How to Draw Peter Griffin: Easy Step-by-Step Cartoon Guide
Bring the iconic patriarch of Family Guy to life with this straightforward, 10-step drawing tutorial. Designed for artists of all ages, this guide uses basic shapes to help you master Peter's unique cartoon proportions. Grab a pencil, an eraser, and a piece of paper to get started on your own Quahog-inspired masterpiece.
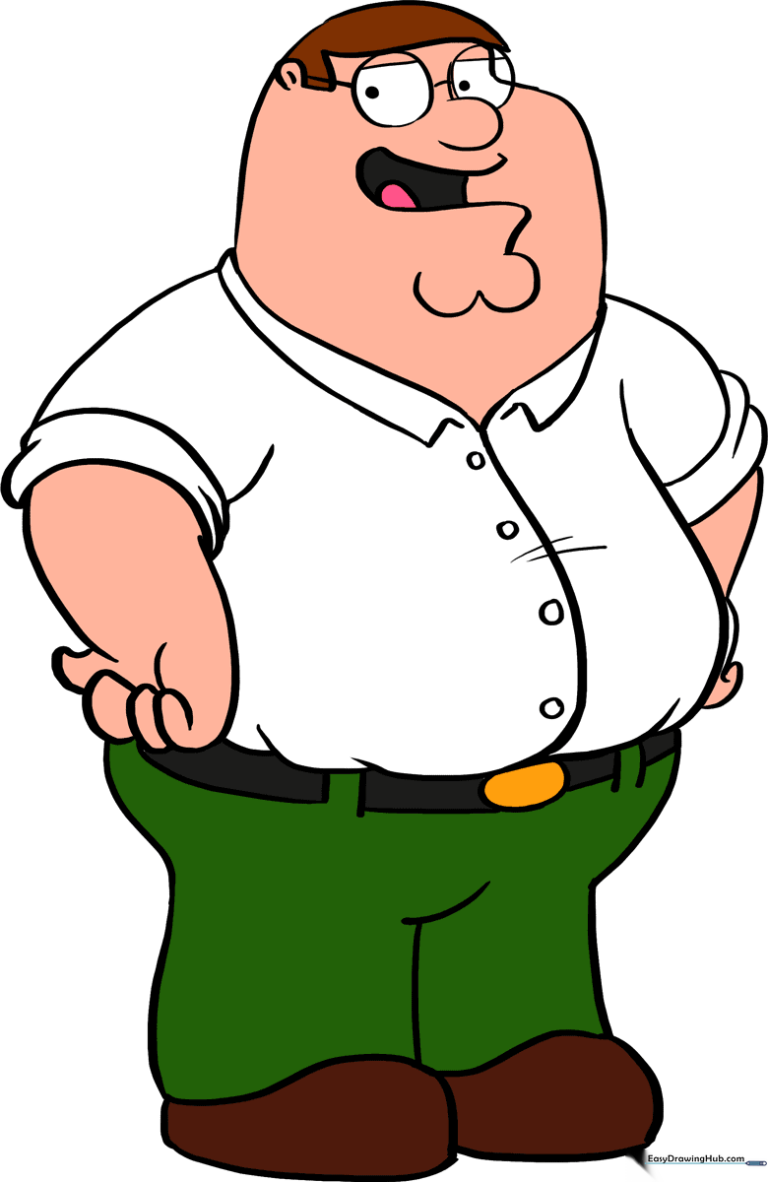
🎯 Final Result
Step-by-Step Instructions
Sketching the Head Shape

Draw a curved line to outline the top of Peter's head, his signature overhanging hair, and his rounded cheek. Teacher's Tip: Keep your pencil pressure light here; this is just the foundation for his iconic profile.
Adding the Ear and Collar
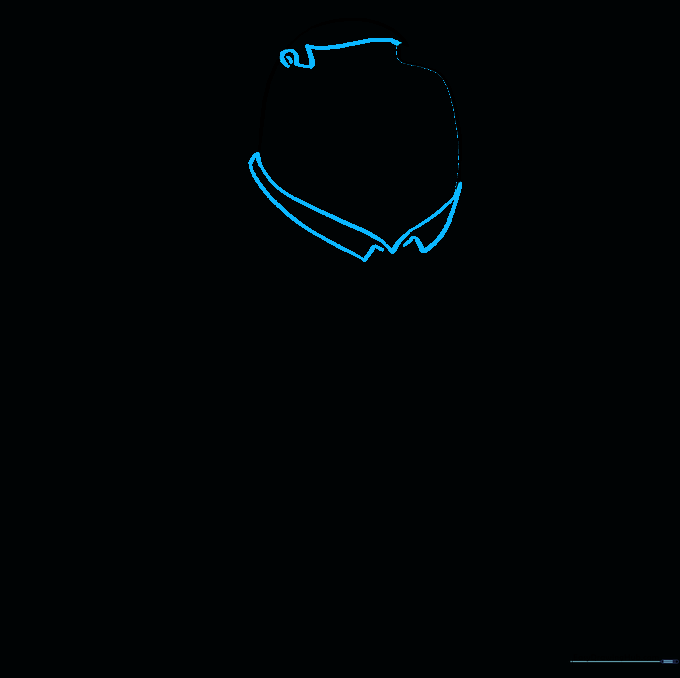
Add a small 'C' shape for the ear with a tiny inner detail line. Then, draw a 'V' shape at the bottom for the neck and two triangles for the shirt collar. Teacher's Tip: Ensure the collar points are symmetrical to give him that classic crisp shirt look.
Drawing the Glasses and Face

Draw two large circles for the glasses, connecting them with a bridge. Add pupils inside and straight lines for eyelids. Use a 'C' shape for the nose. Teacher's Tip: Draw the glasses circles first—they act as a guide for where the eyes should sit.
Sketching the Arm and Hand
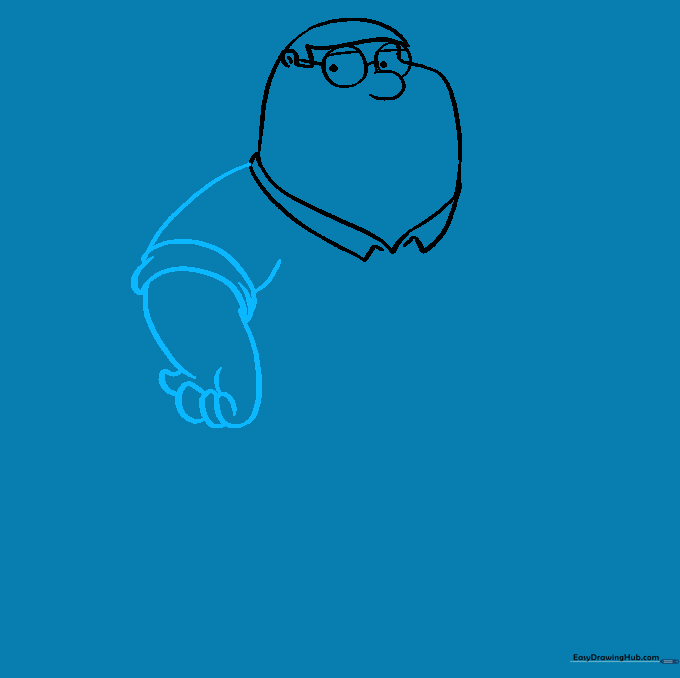
Use curved lines to sketch the arm, adding a rounded shape at the elbow for the sleeve. Finish with overlapping 'U' shapes for the hand. Teacher's Tip: Keep the hand shapes simple; don't worry about individual fingers yet.
Defining the Torso
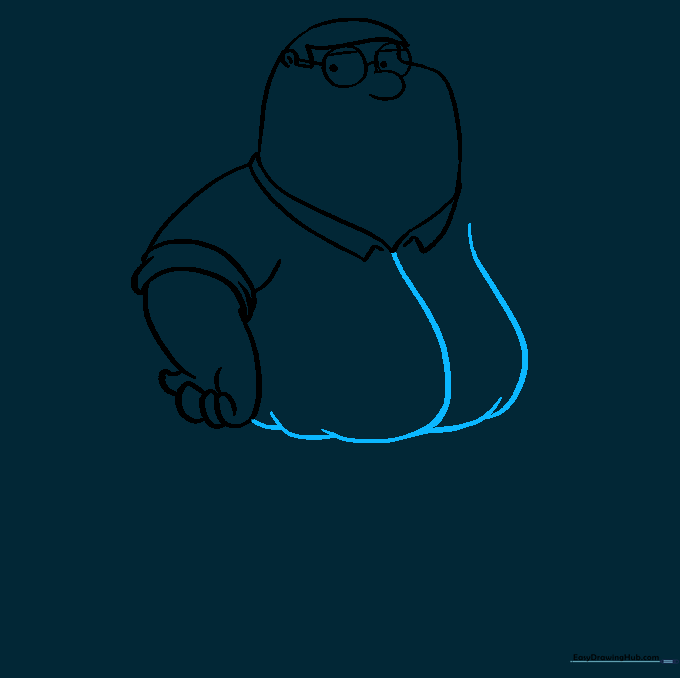
Draw long, curved lines downward from the collar to create the torso. Connect these to the arm with shorter lines. Teacher's Tip: This is where you define his shape, so make the lines flow naturally to show his build.
Adding the Second Arm

Outline the remaining sleeve with a curved shape at the end, then draw the lower arm and hand. Teacher's Tip: Check that the second arm matches the length of the first to keep the character balanced.
Detailing the Mouth

Use curved lines to outline the open mouth, tongue, and chin. Teacher's Tip: A slight curve for the mouth gives him that classic, expressive look.
Adding Buttons and Belt
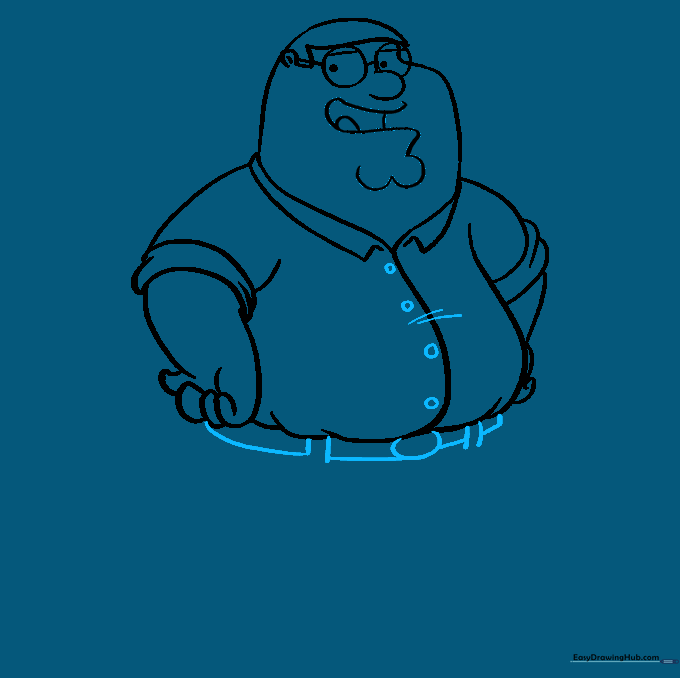
Draw small circles for buttons and an oval for the belt buckle with rectangles on the sides. Teacher's Tip: Keep the buttons centered to maintain his proportions.
Drawing the Legs and Feet
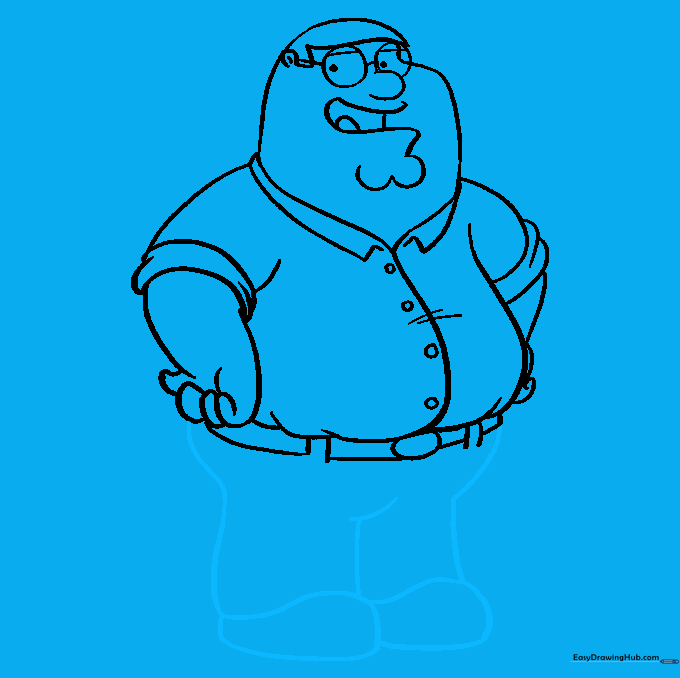
Use curved lines to outline the legs and feet, adding a line to separate the shoes from the pants. Teacher's Tip: Make the shoes slightly wider to ground the character on the page.
Coloring Your Drawing

Bring your drawing to life with color! Use white for the shirt and a classic green for his pants. Teacher's Tip: Use a light brown or tan for skin tones to keep the cartoon aesthetic authentic.
More Tutorials


