How to Draw a Horse: Anatomy Guide for Kids
Perfect for ages 6+, this lesson helps young artists master horse anatomy through a fun, guided drawing activity. You will need a pencil, eraser, and paper to create a detailed diagram that builds both fine motor skills and observational accuracy. Follow along to turn a simple sketch into a professional-looking educational chart.
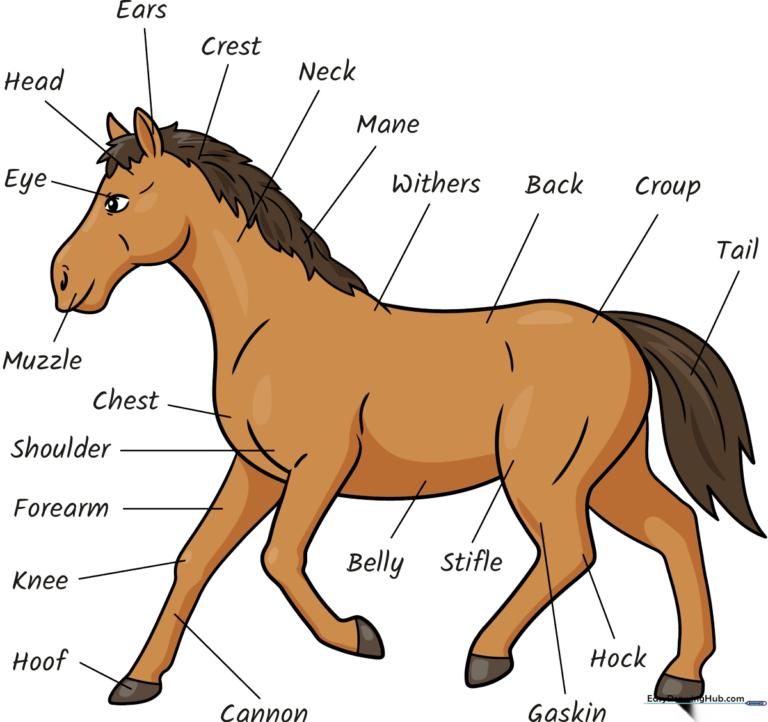
🎯 Final Result
Step-by-Step Instructions
Step 1: Sketching the Head and Muzzle

Draw the horse's head using soft, overlapping curved lines to define the jaw and snout. Add an almond shape for the eye and a small circle for the nostril. Teacher's Tip: Keep the eye shape simple; it’s the anchor for the rest of the face's proportions.
Step 2: Adding Ears and Mane
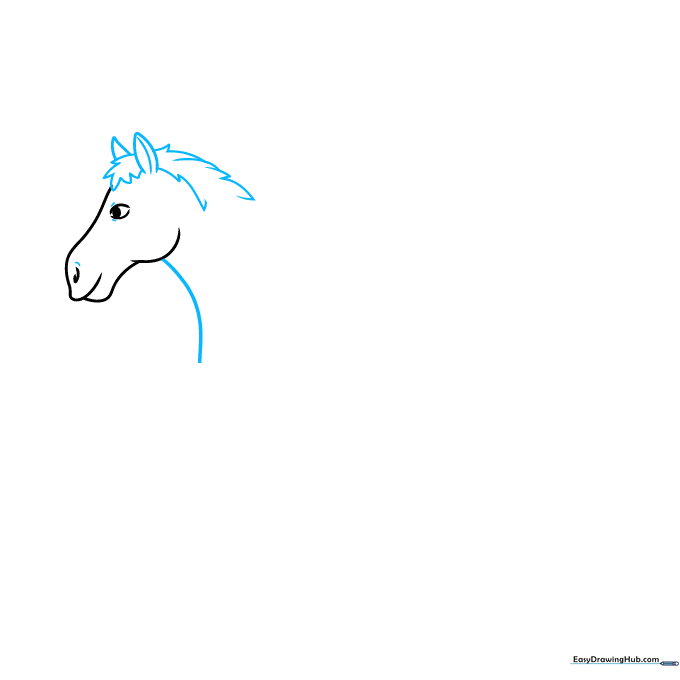
Use jagged, triangular lines to create the ears and the flowing mane. Connect these to a long, graceful curve for the neck. Teacher's Tip: Don't worry about making the mane perfectly smooth; hair has texture, so short, overlapping strokes look more natural.
Step 3: Defining the Chest and Neck
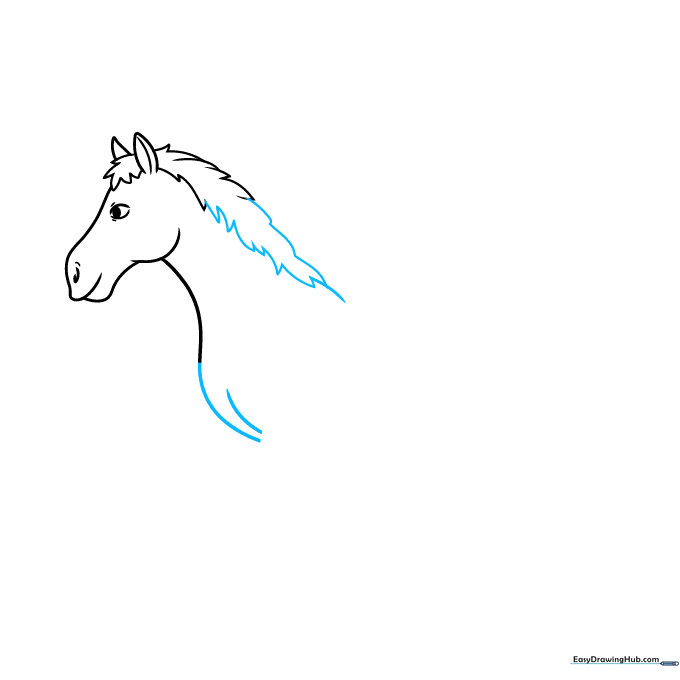
Continue the mane line down and curve outward to form the horse's chest. Teacher's Tip: Imagine the chest as a large, rounded muscle—keep your line bold and confident here.
Step 4: Sketching the Front Leg
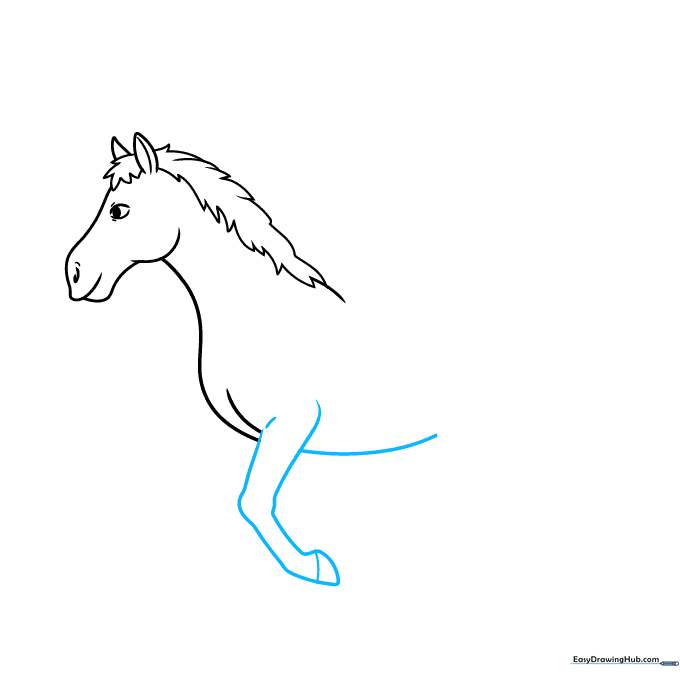
Draw the front leg using long, slightly curved lines. Add a small horizontal band at the bottom for the hoof. Teacher's Tip: Notice the slight bulge at the 'knee' joint; adding this detail makes your drawing look much more realistic.
Step 5: Adding the Second Foreleg
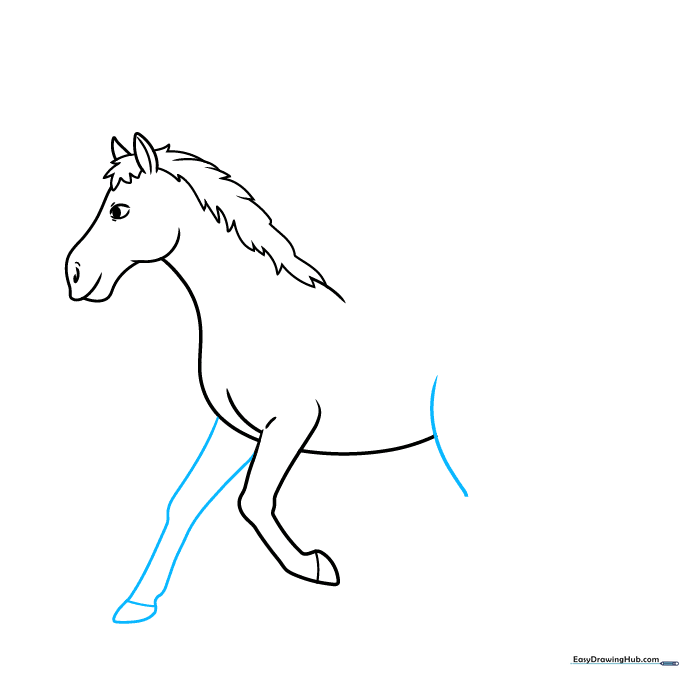
Draw the second foreleg slightly behind the first to show depth. Start sketching the rear leg as well. Teacher's Tip: By drawing the second leg slightly higher up, you create the illusion of the horse standing on solid ground.
Step 6: The Back and Rear Legs
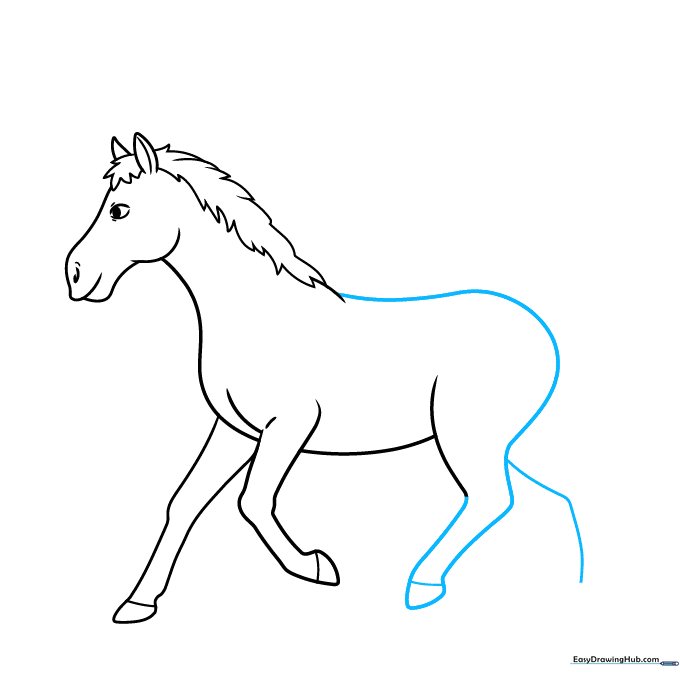
Extend a long, smooth line from the mane to form the back and rump. Complete the rear legs with the same hoof-band technique. Teacher's Tip: The back should be a gentle slope, not a flat line, to capture the horse's natural posture.
Step 7: Drawing the Tail
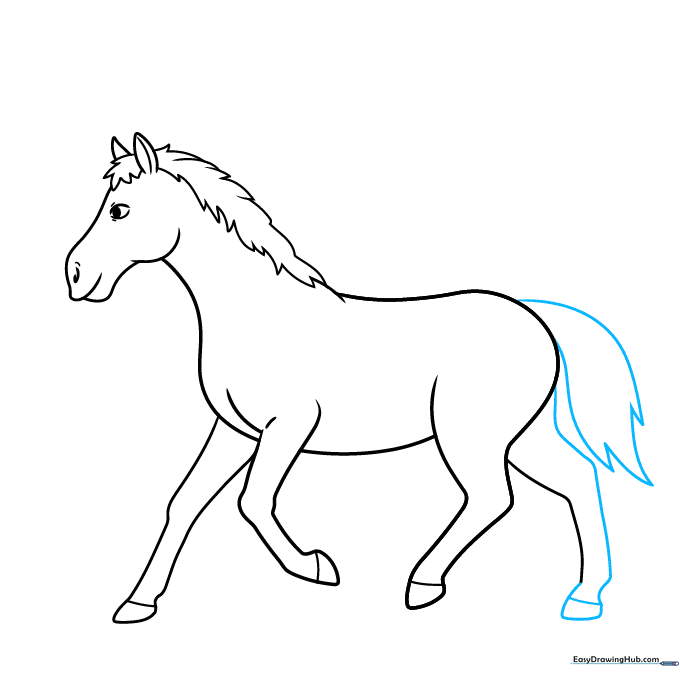
Finish the rear leg and add a flowing tail using jagged, pointed lines. Teacher's Tip: Make the tail look like it's swaying by drawing the lines in a slight 'S' curve.
Step 8: Beginning the Anatomy Labels
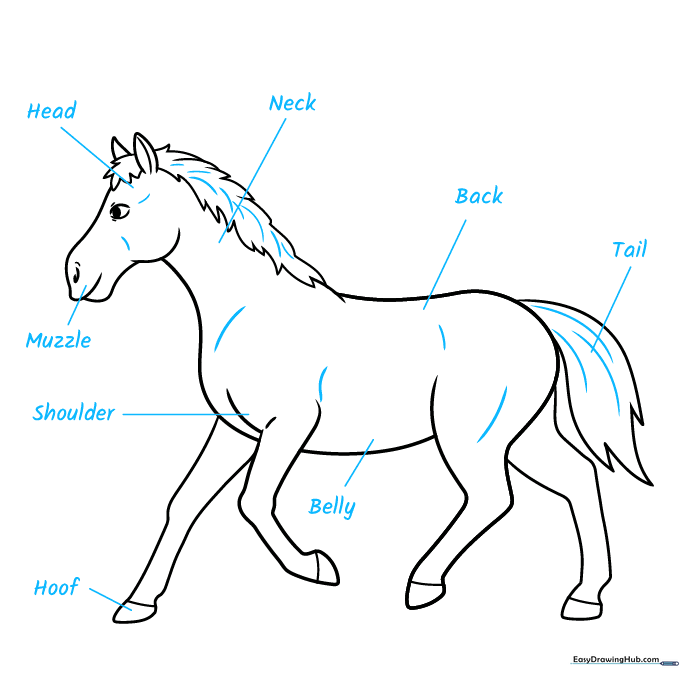
Add texture to the mane and tail with light, quick strokes. Now, draw straight lines pointing to the neck, back, tail, belly, and muzzle, and write the names clearly. Teacher's Tip: Use a ruler to ensure your label lines are straight and don't cross over each other.
Step 9: Completing the Anatomy Diagram
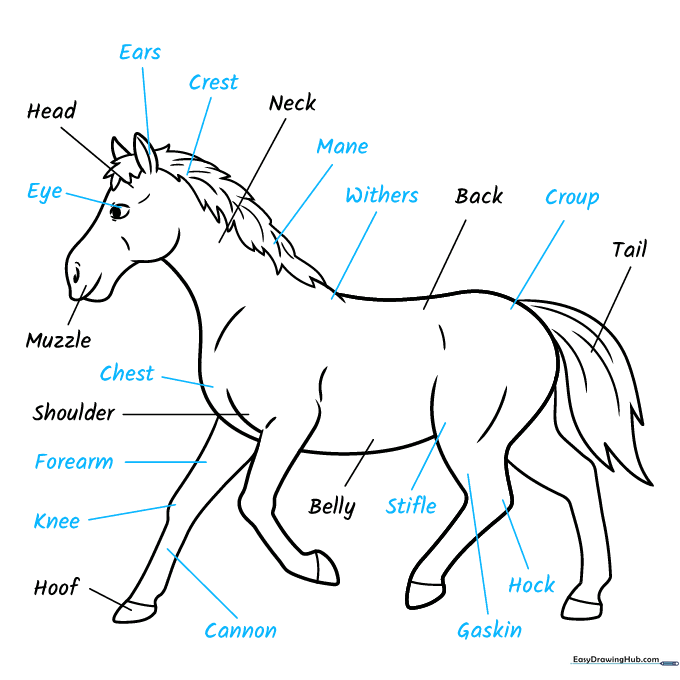
Finish your diagram by labeling the more specific parts like the withers, hock, and gaskin. Teacher's Tip: This is a great time to talk about what each part does—for example, explain that the hock acts like our heel!
Step 10: Adding Color
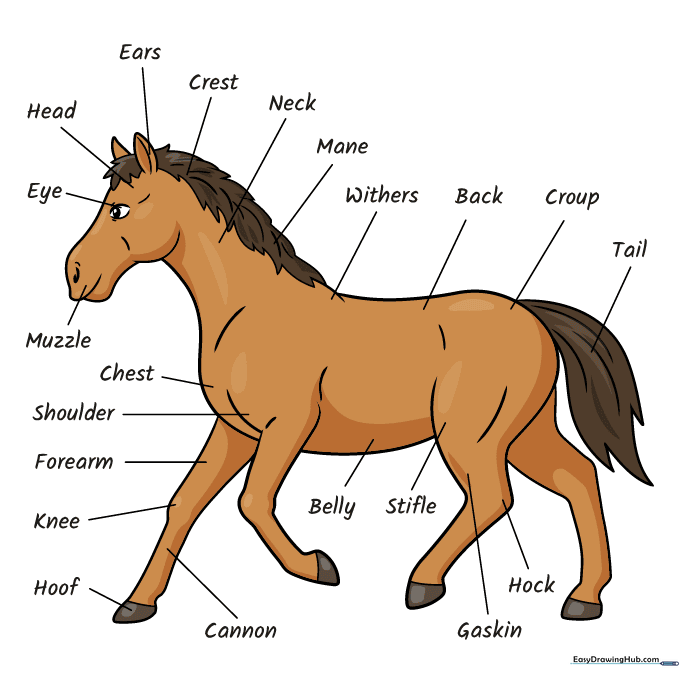
Bring your horse to life! Use browns, tans, or greys. Add spots or patches if you like. Teacher's Tip: Use light pressure with your colored pencils to create a soft, realistic coat, and press harder for the mane and tail to make them stand out.
More Tutorials


