How to Draw Natsu Dragneel: Easy 10-Step Anime Guide
Bring the Fire Dragon Slayer to life with this step-by-step guide designed for anime fans ages 8 and up. You will only need a pencil, an eraser, and a sheet of paper to capture Natsu’s iconic spiky hair and determined expression. Follow along to develop your manga-style character drawing skills.
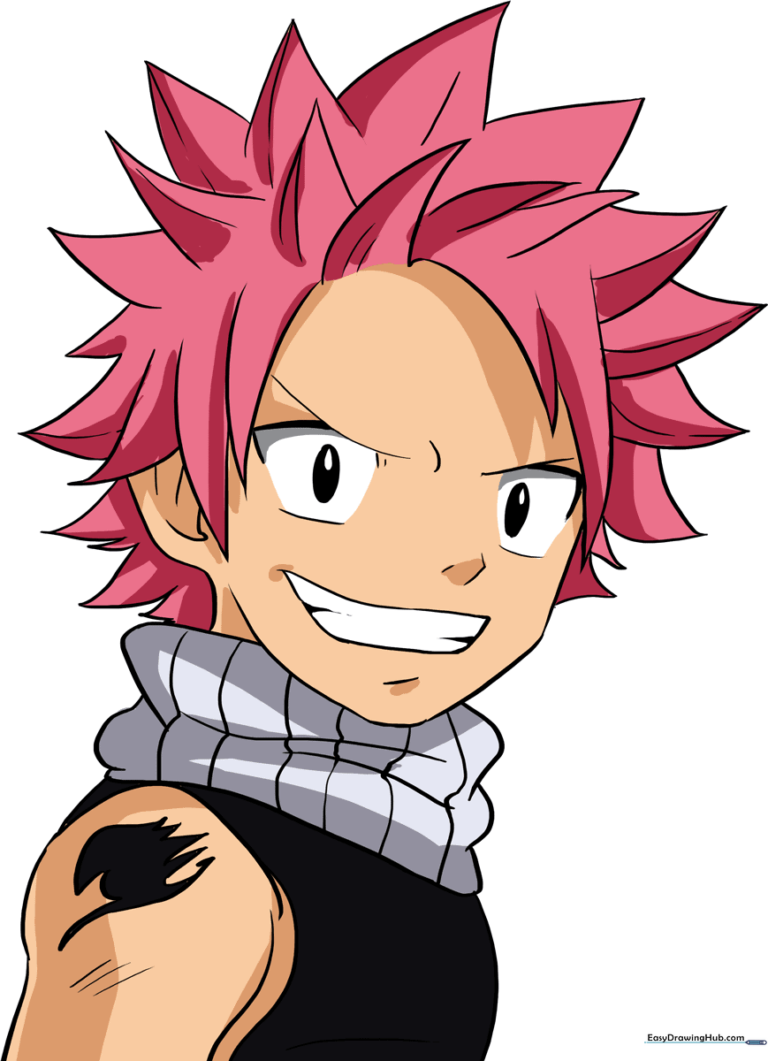
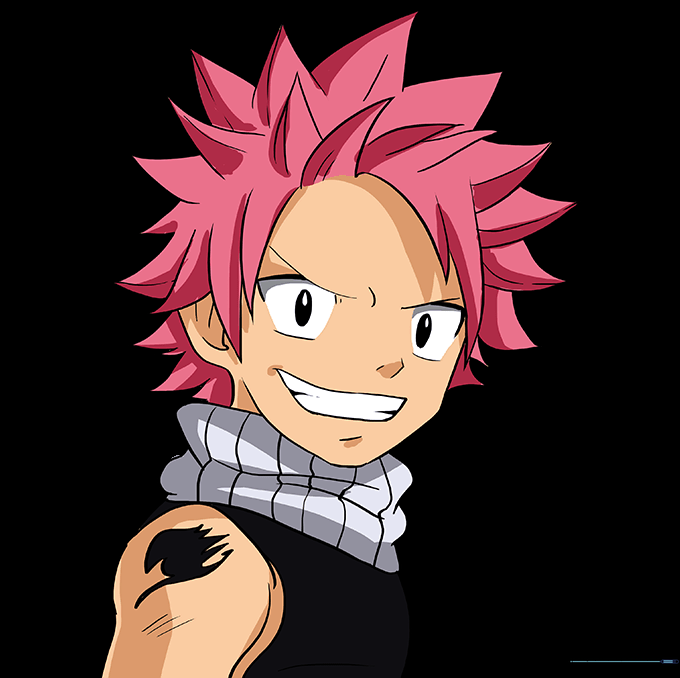
🎯 Final Result
Step-by-Step Instructions
Step 1: Sketching the Face Shape
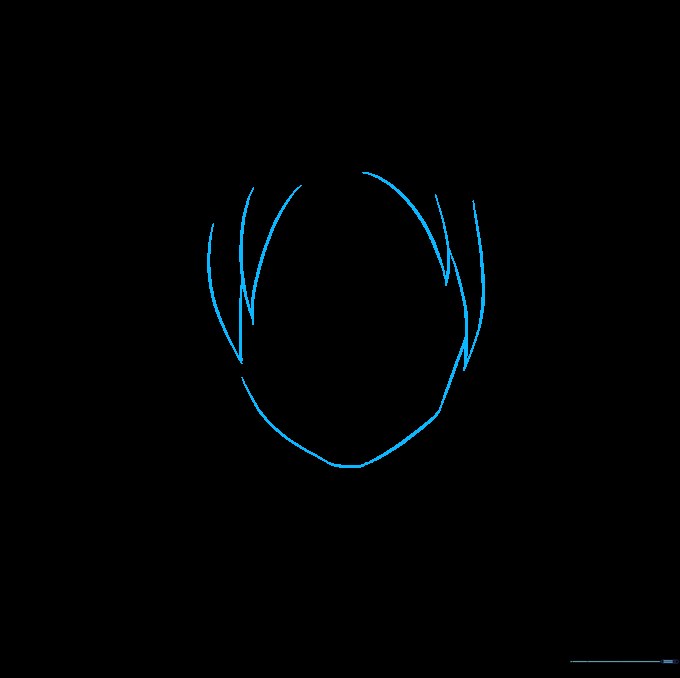
Lightly sketch the chin using a long, curved line with a soft point at the center. Add the initial locks of hair on the sides of the face. Teacher's Tip: Keep your pencil pressure very light here so you can easily erase the guidelines later.
Step 2: Adding the Ear and Hair Spikes
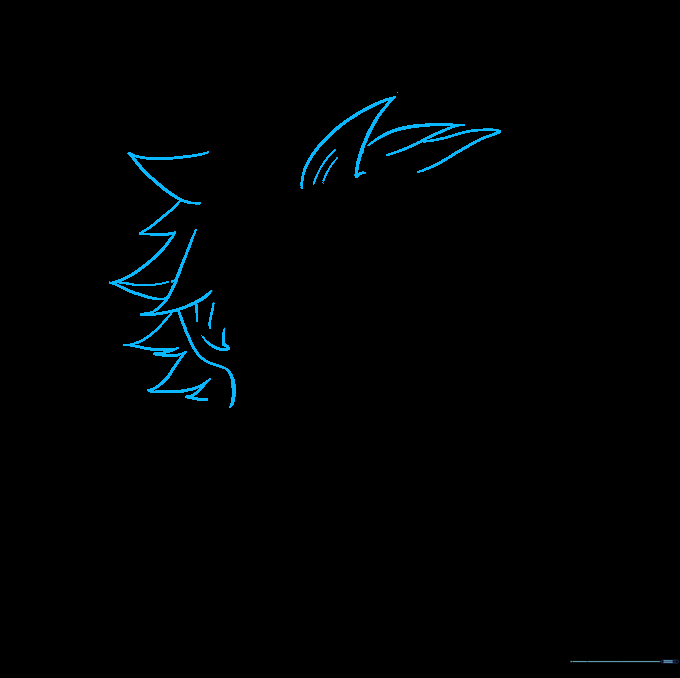
Draw the ear outline on the side of the head with small internal details. Build the hair by adding spiky, curved lines of varying lengths. Teacher's Tip: Natsu’s hair is famously messy, so don't worry about making the spikes perfectly symmetrical!
Step 3: Detailing the Hair Texture
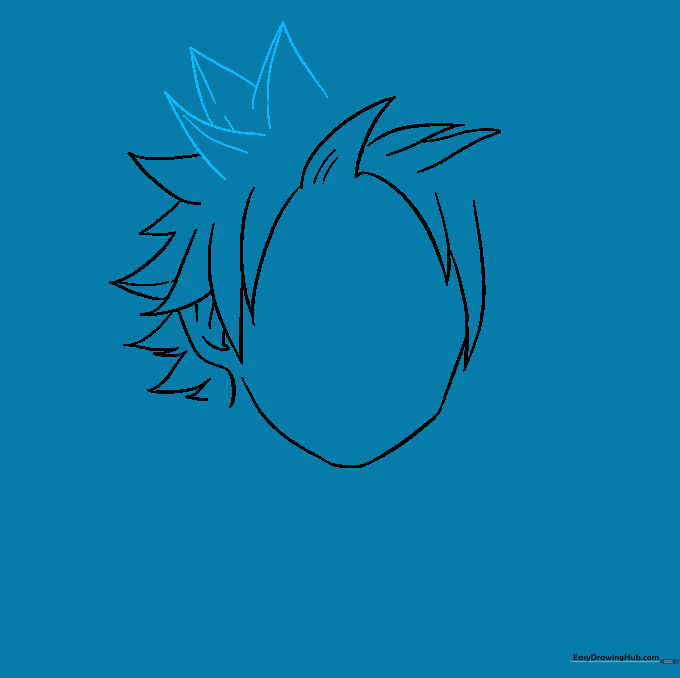
Continue adding triangular spikes to the top of the hair. Add a small line inside each spike to give the hair depth and volume. Teacher's Tip: Use quick, flicking motions with your pencil to get that sharp, anime-style point.
Step 4: Completing the Hairline
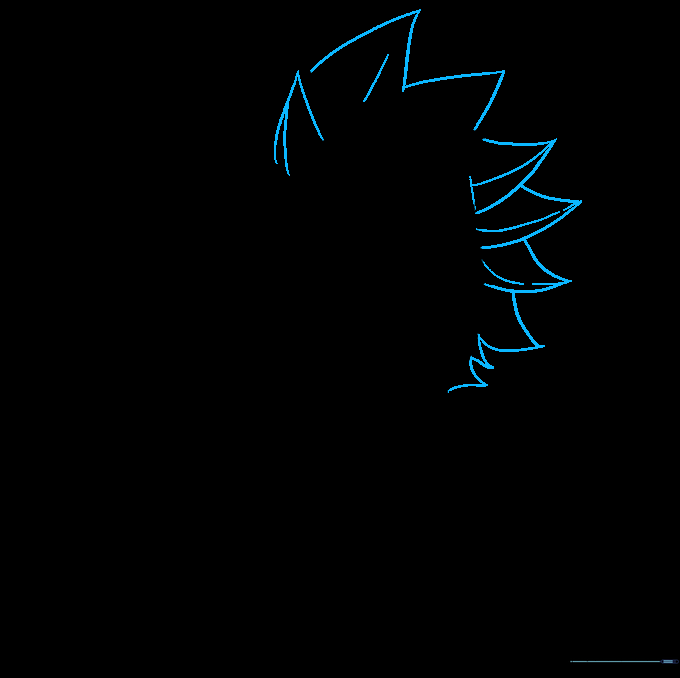
Fill in the remaining hair spikes until they form a full, circular shape around the head. Add extra detail lines to any thin-looking areas. Teacher's Tip: Check your proportions—ensure the hair looks balanced around the face shape you drew in Step 1.
Step 5: Drawing the Scarf
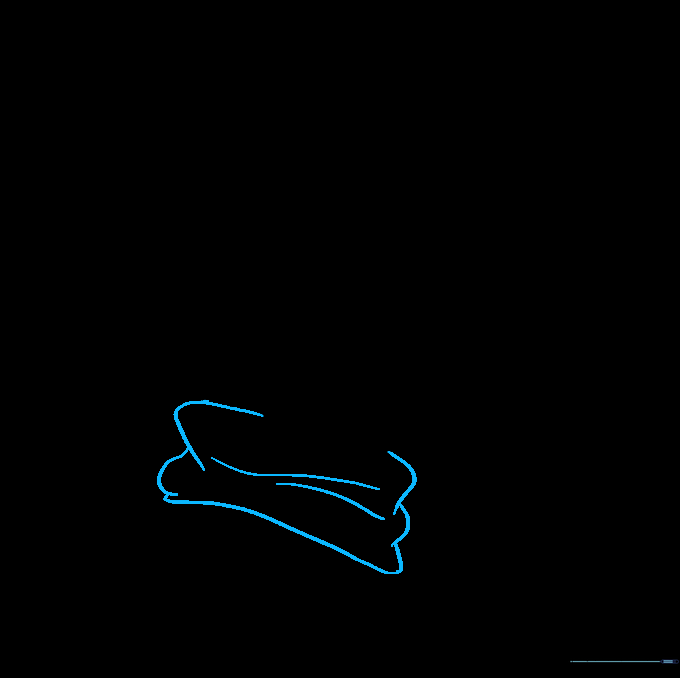
Sketch the iconic scarf using curved lines around the neck. Add a few vertical lines to represent the folds in the fabric. Teacher's Tip: The folds make the scarf look soft and realistic, so keep your lines slightly rounded.
Step 6: Sketching the Torso
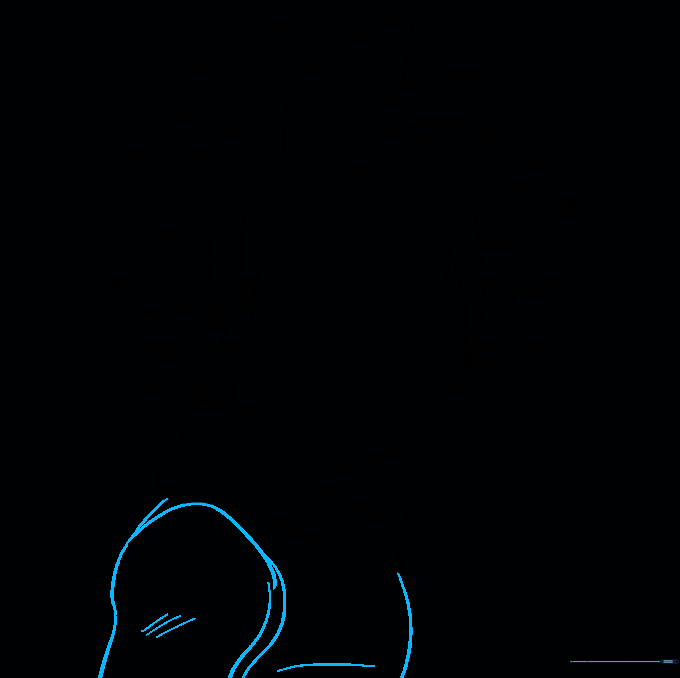
Outline the shoulder and upper arm with curved lines. Add short lines to define the chest and arm muscles. Teacher's Tip: Keep these lines simple; you are just establishing the basic anatomy of the character.
Step 7: Adding Scarf Details and Guild Mark
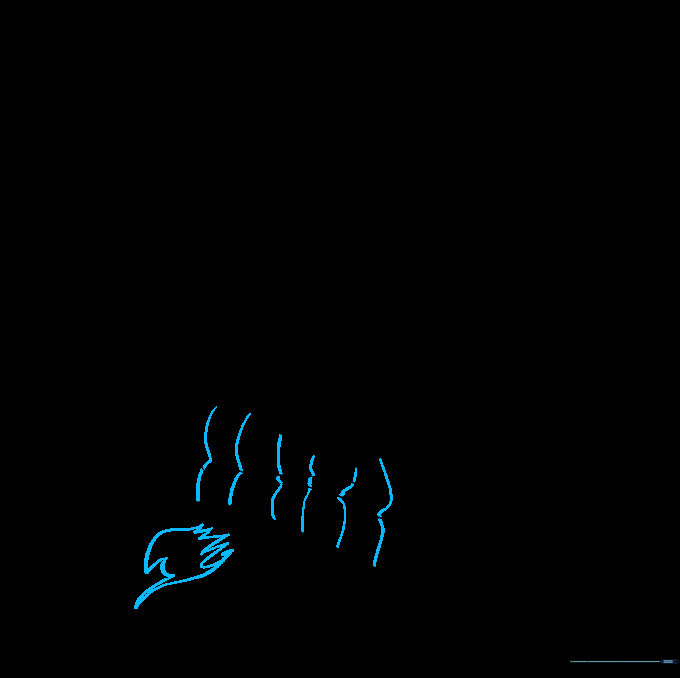
Add wavy lines to the scarf to show texture. Sketch the guild mark tattoo on his shoulder using curved lines. Teacher's Tip: Take your time with the guild mark—it's a small detail that makes the character instantly recognizable.
Step 8: Drawing the Anime Eyes
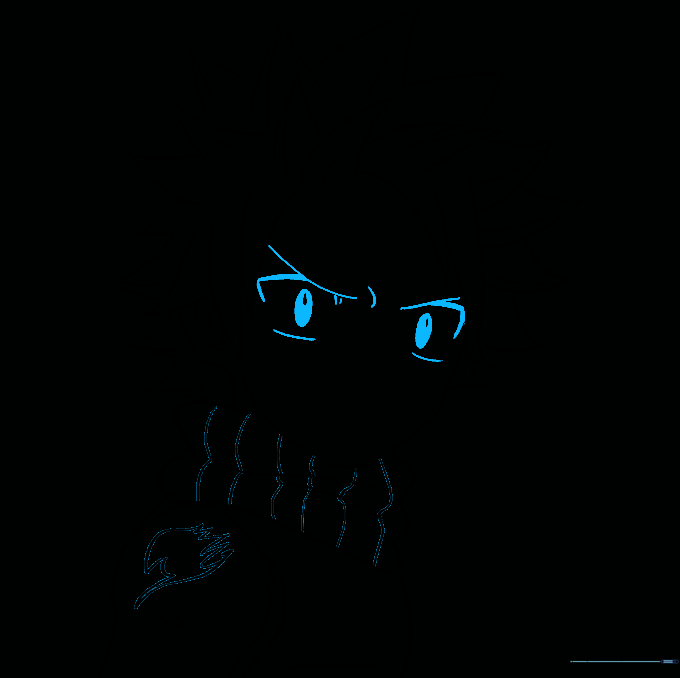
Draw the sharp, 'L' shaped upper eyelids. Add the pupils by drawing an oval within an oval and shading the space between them. Teacher's Tip: Anime eyes convey emotion; make sure they look focused and intense to match Natsu's personality.
Step 9: Finalizing the Facial Features
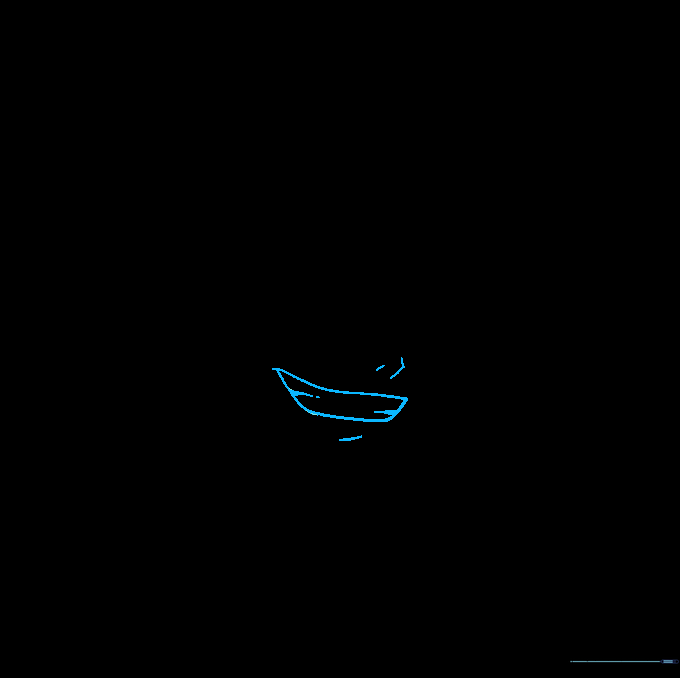
Use curved lines to draw his signature smirk. Add small lines for the nose and chin to complete the face. Teacher's Tip: A smirk is all about the angle—keep the line slightly tilted to show his confident attitude.
Step 10: Adding Color
Bring Natsu to life with color! Use pink for his spiky hair and white for his scarf. Teacher's Tip: If you are using markers, use light, even strokes to avoid streaks, and don't forget to leave a small white highlight in the eyes for a 'sparkle' effect.
More Tutorials


