How to Draw My Melody: Easy 10-Step Sanrio Tutorial
Bring Sanrio’s sweetest bunny to life with this beginner-friendly drawing guide! Designed for artists ages 5 and up, this tutorial requires only a pencil, paper, and an eraser. Follow along to build your character-drawing confidence and create your own adorable My Melody masterpiece.
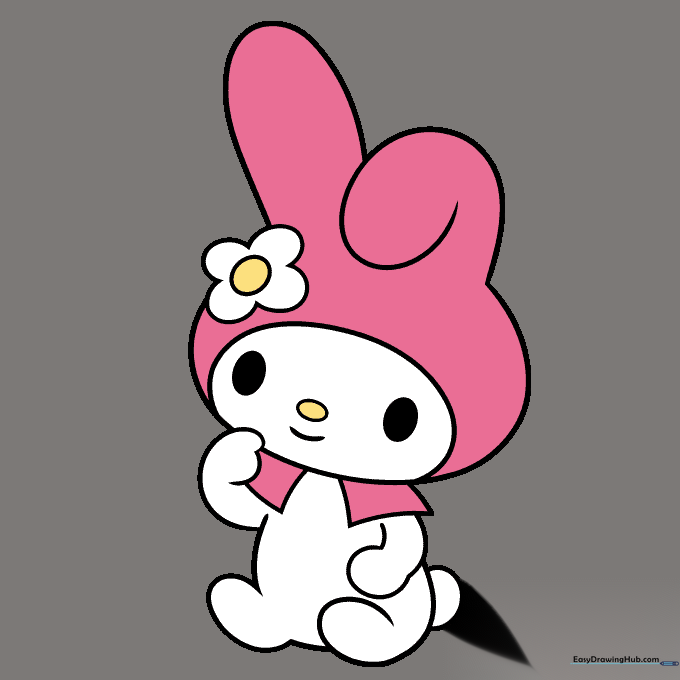
🎯 Final Result

Step-by-Step Instructions
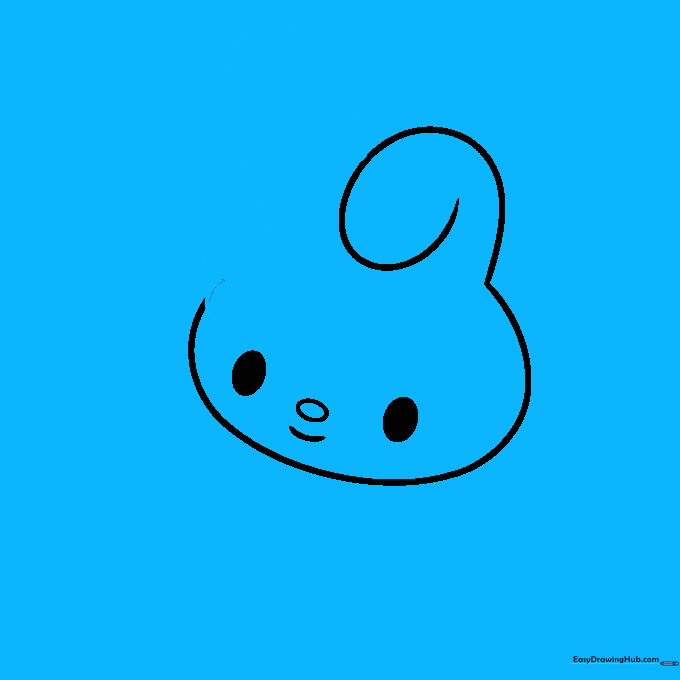
Step 1: Sketching the Face

Draw a small oval for the nose and a gentle curved line beneath it for her happy smile. Add two larger, darkened ovals for her eyes. Teacher's Tip: Keep your pencil pressure light so you can easily adjust the placement of her features if needed.
Step 2: Shaping the Hood

Outline the face with a long, sweeping curved line. Extend a line upward and loop it back to create her signature floppy bunny ear. Teacher's Tip: Think of the ear as a long, soft bean shape to get that perfect 'floppy' look.
Step 3: Adding the Flower Detail
Draw three 'U' shaped lines at the base of the ear to form the petals of her flower. Enclose the top of the ear with a curved line that doubles back. Teacher's Tip: Make the petals slightly different sizes to give the flower a more natural, organic feel.
Step 4: Completing the Head Shape
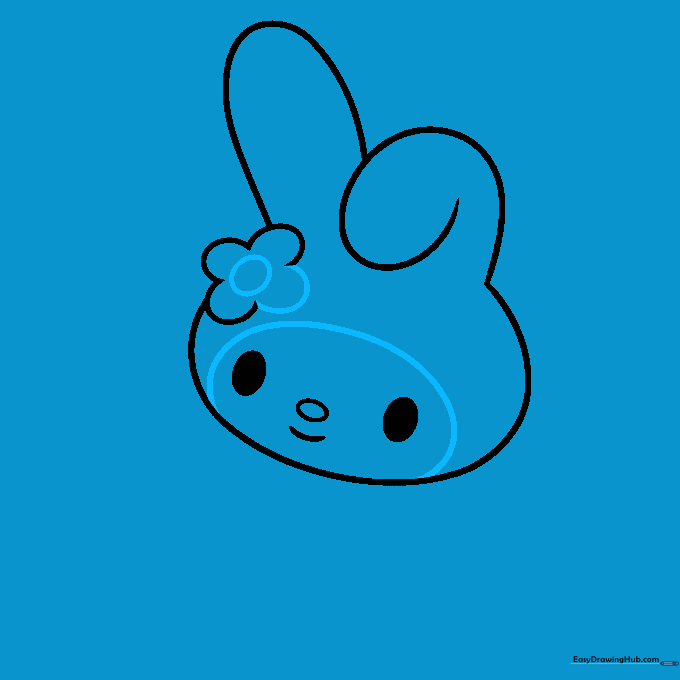
Add one final petal and a small center oval to finish the flower. Then, draw a long, smooth curved line to enclose the rest of her face. Teacher's Tip: Use a fluid motion for the face outline to keep the shape nice and round.
Step 5: Drawing the Hood Collar

Sketch the rectangular edges of her hood collar using soft, curved lines. Teacher's Tip: Keep these lines parallel to the face to ensure the hood looks like it’s resting comfortably on her shoulders.
Step 6: Sketching the First Arm
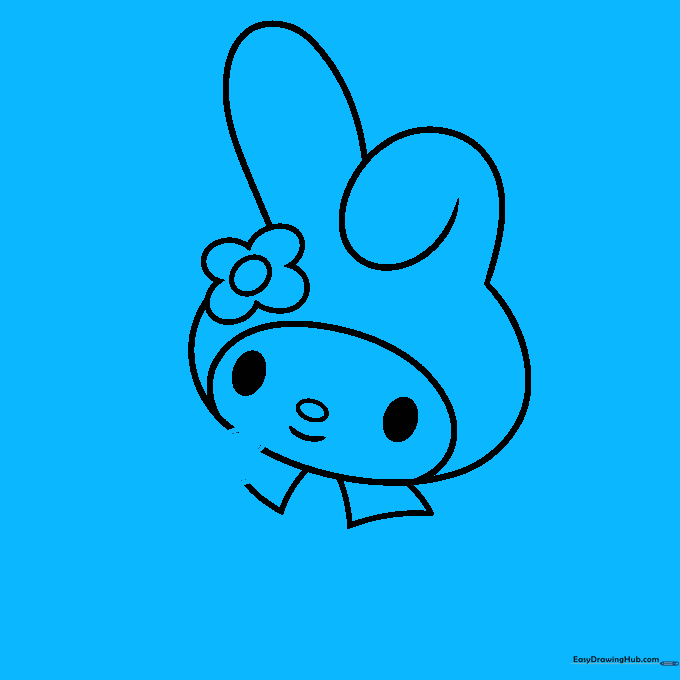
Draw her arm using a curved line that doubles back, creating a small bulge for the fingers. Add a curved line for the side of her torso. Teacher's Tip: Don't worry about perfect fingers; a simple rounded shape works perfectly for this cartoon style.
Step 7: Adding the Second Arm

Draw the second arm using parallel curved lines and a circular hand. Teacher's Tip: Try to match the thickness of the first arm to keep your character looking balanced.
Step 8: Drawing the Feet and Body
Extend a line from the arm to form the foot, doubling it back on itself. Add another line to define the bottom of her body. Teacher's Tip: Keep the feet small and rounded to maintain her 'cute' aesthetic.
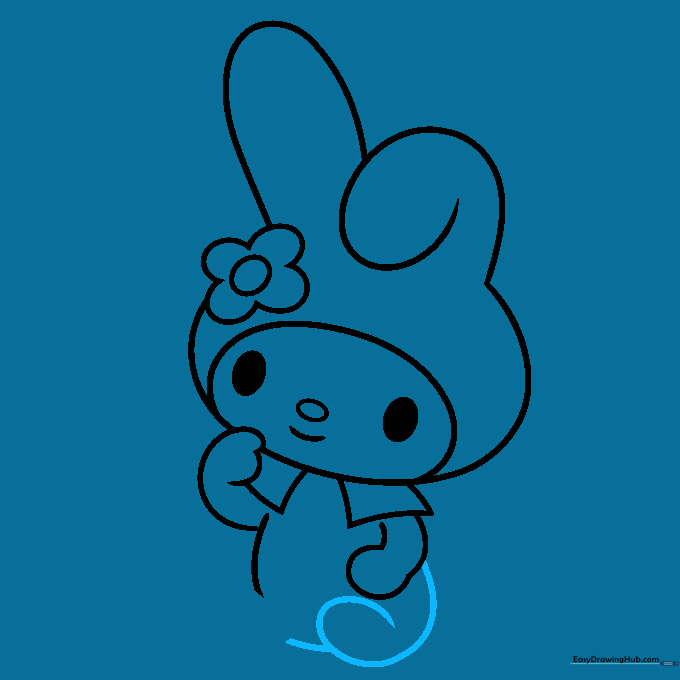
Step 9: Final Touches

Use a 'C' shaped line to finish the second foot and add another 'C' shape for her fluffy, round tail. Teacher's Tip: A quick, light sketch for the tail makes it look soft and bouncy!
Step 10: Color Your Masterpiece
Your outline is complete! Now, bring her to life with color. We kept her fur white and colored her hood a soft, signature pink. Teacher's Tip: Use light, circular coloring motions to keep the colors smooth and even.
More Tutorials


