How to Draw Monkie Kid: Easy 10-Step Guide for Kids
Ready to bring the legendary Monkie Kid to life? This tutorial is designed for young artists and fans of the series, requiring only a pencil, paper, and an eraser. Follow these steps to build your character from the ground up, focusing on proportions and iconic details.
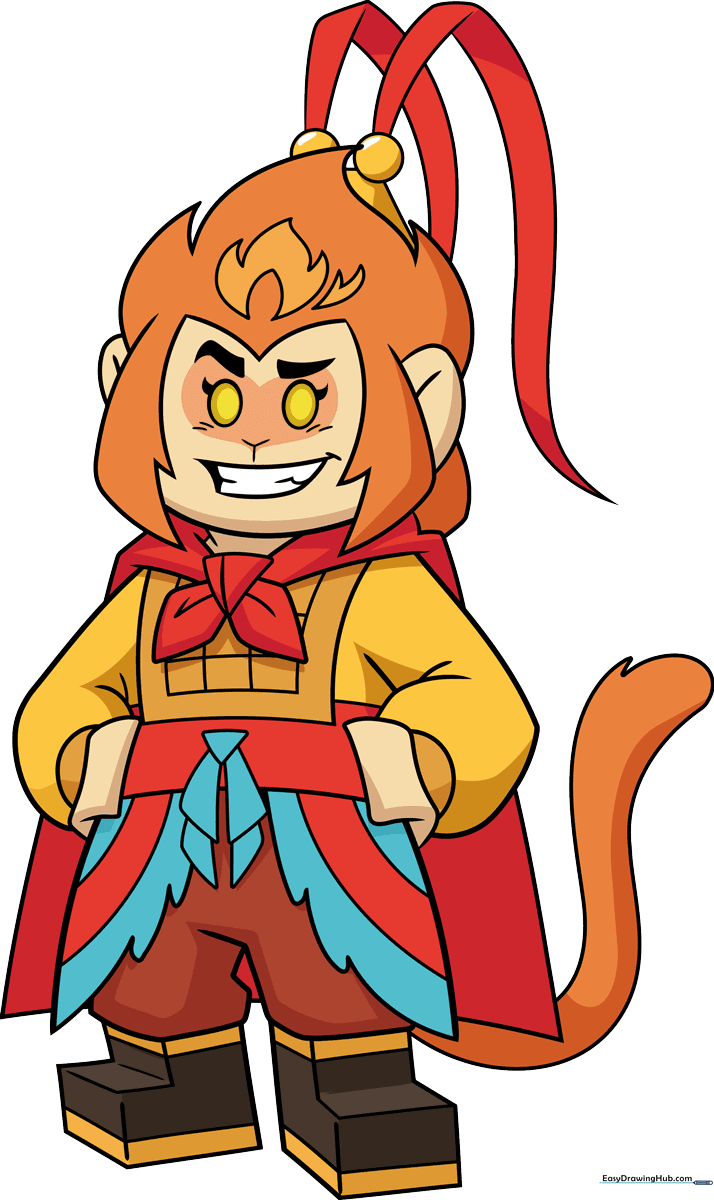
🎯 Final Result
Step-by-Step Instructions
Step 1: Sketching the Facial Features
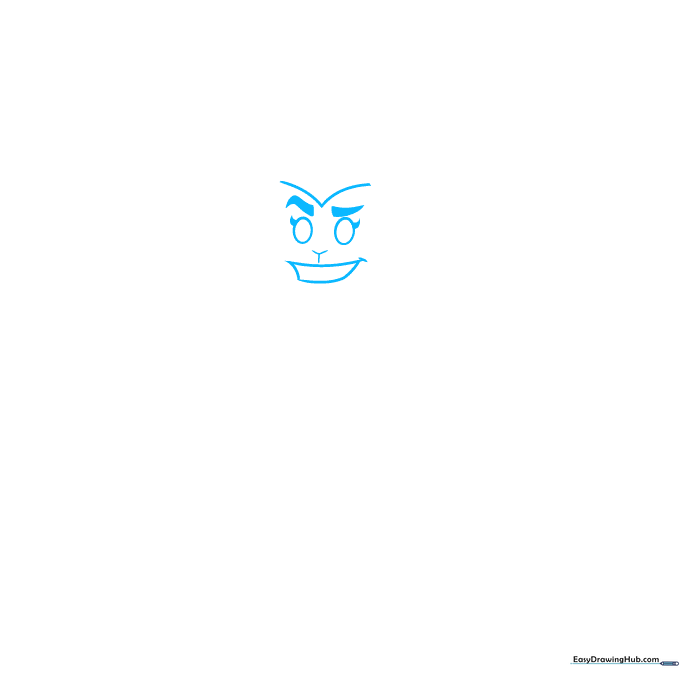
Start by drawing two ovals for the eyes, adding a small curved triangle at the outer corner of each for depth. Sketch the thick, expressive eyebrows above—one slightly raised to give him personality. Draw a 'Y' shape for the nose and a simple rectangular curve for his smile. Teacher's Tip: Keep your pencil lines light so you can easily adjust the expression later.
Step 2: Defining the Face and Hair

Add small lines inside the mouth to represent teeth. Now, frame the face using curved lines that meet at jagged points to mimic his signature hairstyle. Add the ears on either side of the head. Teacher's Tip: Use short, quick strokes for the hair to give it a spiky, energetic look.
Step 3: Adding the Cape and Arms
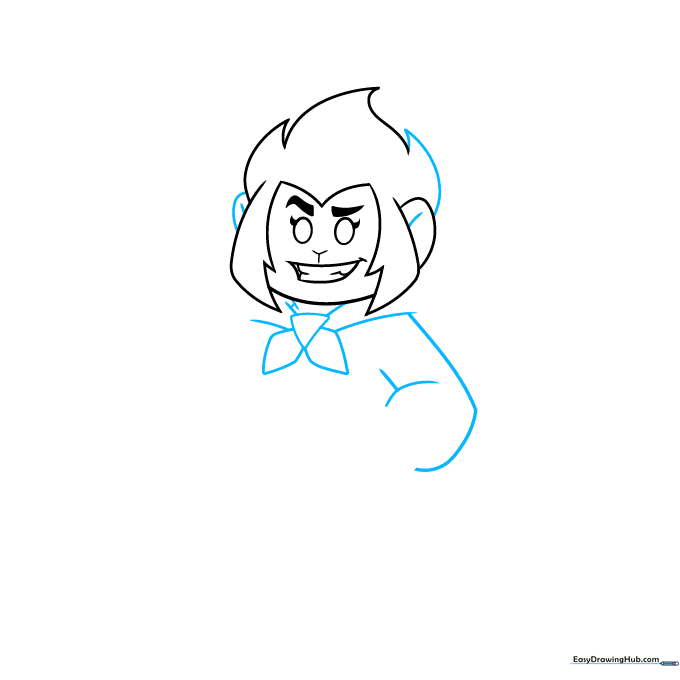
Complete the hair with sharp, flamelike points. Below the chin, draw a triangle and two pentagons to form the knot of his cape. Sketch the cape flowing outward and define the muscular arm. Teacher's Tip: Ensure the cape lines curve slightly to show movement and flow.
Step 4: Drawing the Torso and Hands
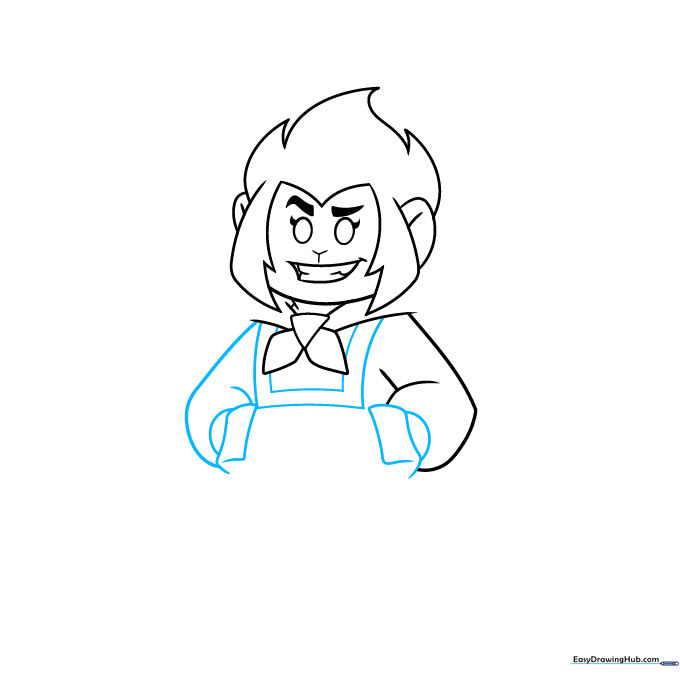
Continue the garment lines down to the torso. Add a rectangular pattern on the chest to represent his tunic details, and draw the rectangular hands. Teacher's Tip: Keep the hands blocky to match the iconic minifigure style.
Step 5: Adding the Belt and Tunic
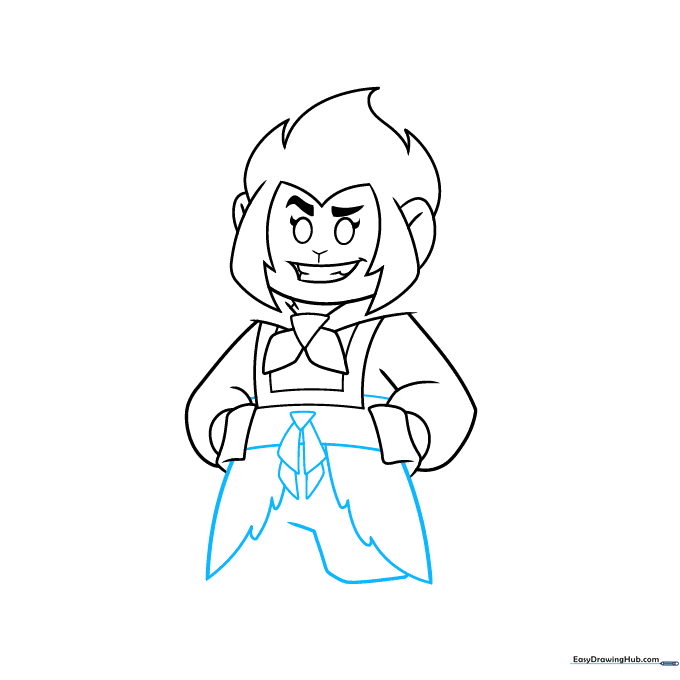
Draw the belt with its central triangular knot and hanging tassels. Add scalloped edges to the bottom of the tunic to give it a layered look, then sketch the top of the pants. Teacher's Tip: The scalloped lines should be uniform to keep the drawing looking neat.
Step 6: Sketching the Legs
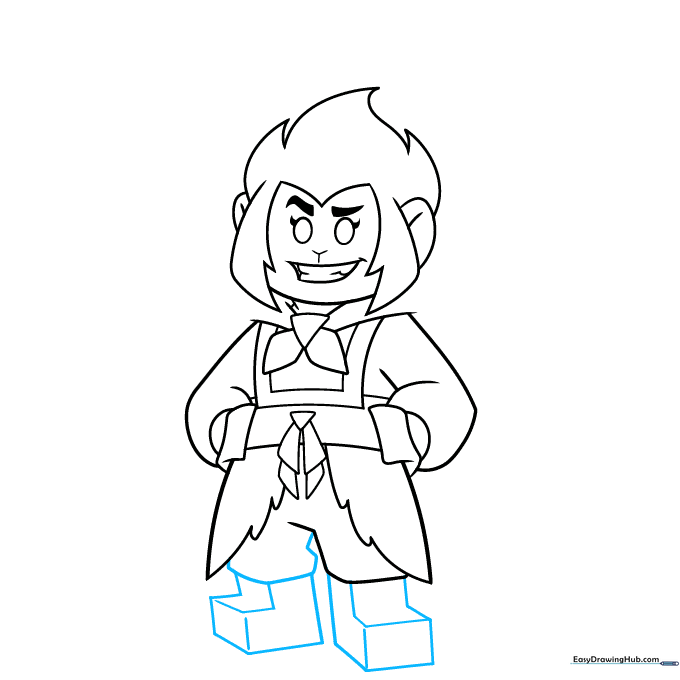
Complete the pants and draw the 'L' shaped legs. Use straight lines to define the blocky, three-dimensional look of the minifigure legs. Teacher's Tip: Use a ruler if you find it hard to keep your straight lines steady!
Step 7: Finalizing the Cape and Tail

Add bands to the legs and feet for detail. Finish the cape with flowing lines and add a curved monkey tail behind him. Teacher's Tip: The tail should have a gentle 'S' curve to make it look natural.
Step 8: Adding Hair Details
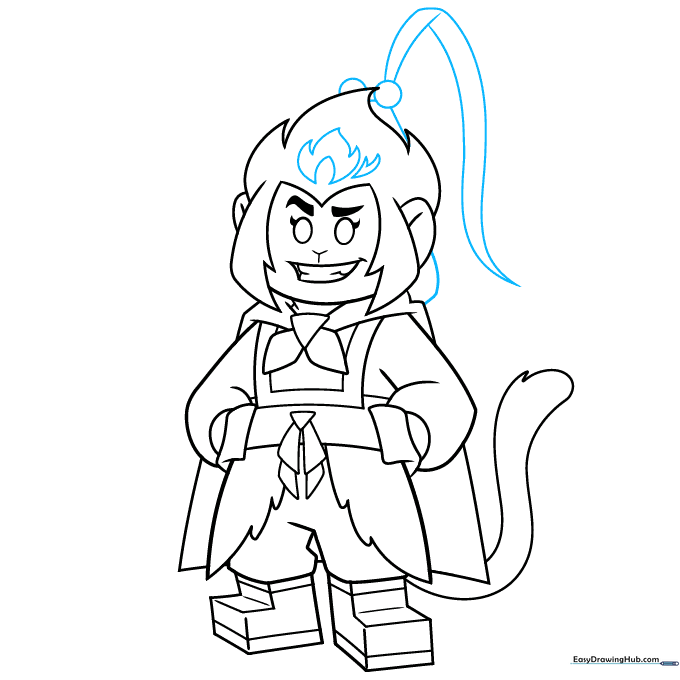
Add a flamelike shape to the front of the hair using jagged lines. Draw a circle on top of the head and extend two long, sharp curved lines upward. Teacher's Tip: These lines represent the top of his hair—keep them symmetrical for a balanced look.
Step 9: Final Touches
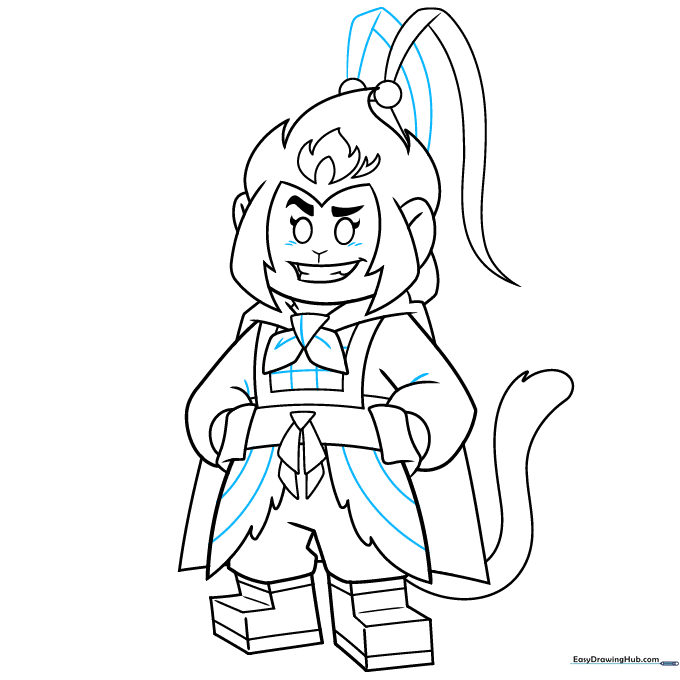
Add a final plume of lines on top of the head. Use short lines to contour the face and add decorative straight lines to the chest rectangle. Embellish the tunic and knot with extra curved lines. Teacher's Tip: These small details make your drawing look professional and finished.
Step 10: Bring Him to Life with Color

Your outline is complete! Now, grab your markers or colored pencils. Use vibrant orange for his hair, and bold red, yellow, and blue for his clothing to match his classic look. Teacher's Tip: Use a black fine-liner to trace your pencil lines before coloring for a clean, cartoon-style finish.
More Tutorials


