How to Draw Mirabel from Encanto: Easy 10-Step Guide
Bring the magic of the Madrigal family to your sketchbook! This tutorial is perfect for young artists ages 7+ who want to capture Mirabel’s cheerful spirit. Grab your favorite graphite pencil, an eraser, and some colored pencils to get started on this screen-free creative adventure.
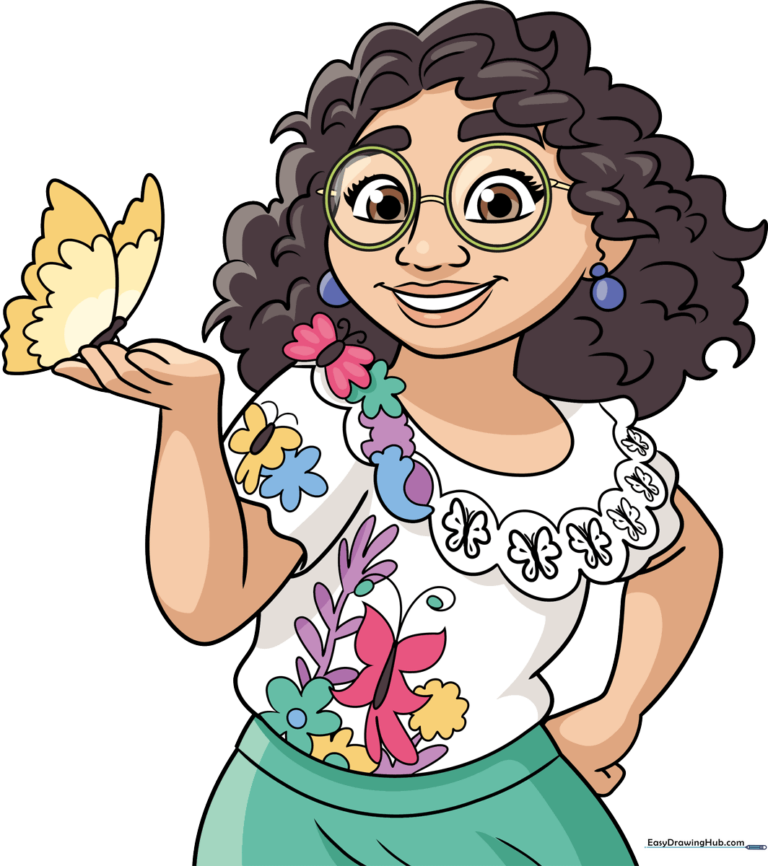
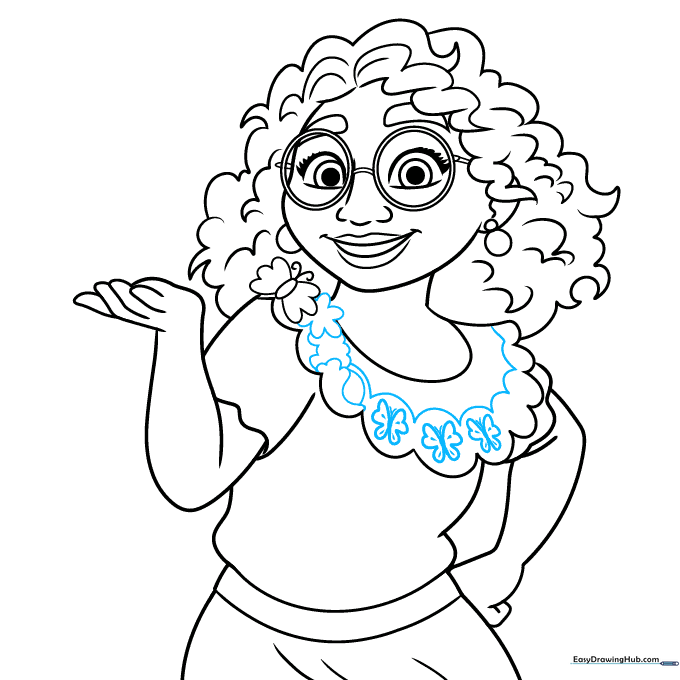
🎯 Final Result
Step-by-Step Instructions
Step 1: Sketching the Face and Eyes
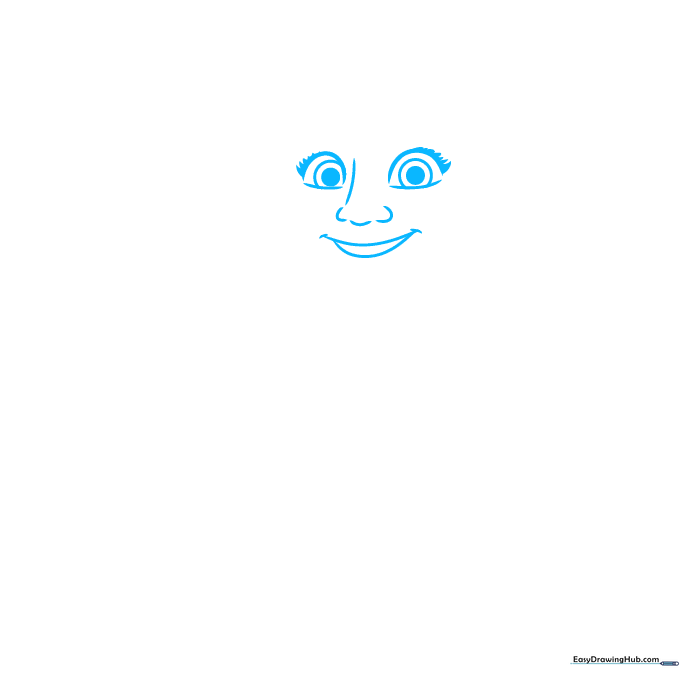
Start by drawing the face shape with a gentle chin point. Add the eyes as curved shapes, including the pupils and lashes. Teacher's Tip: Keep the eyes symmetrical by drawing a light horizontal guideline across the face first.
Step 2: Adding Hair and Expression

Outline the face and add her signature curly hair using 'U' shaped strokes. Add the eyebrows and lips. Teacher's Tip: Use short, flicking motions with your pencil to make the hair look natural and textured.
Step 3: Glasses and Earrings
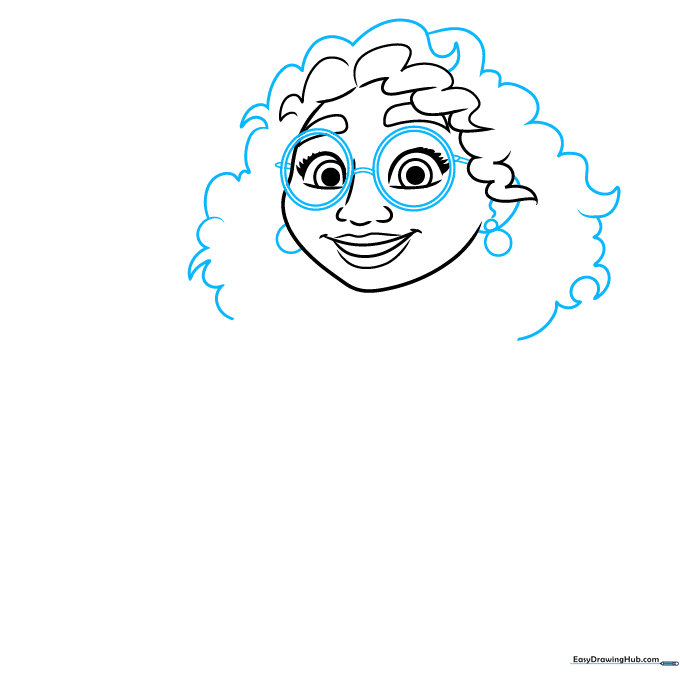
Draw her iconic round glasses and add the earrings. Teacher's Tip: Draw the glasses frames as two perfect circles; if they look lopsided, use a circular object like a coin as a stencil.
Step 4: Neck and Blouse Details

Sketch the neck and the top of her blouse, including the butterfly detail. Teacher's Tip: Keep the butterfly small; focus on the wing shapes to give it a delicate look.
Step 5: Drawing the First Arm
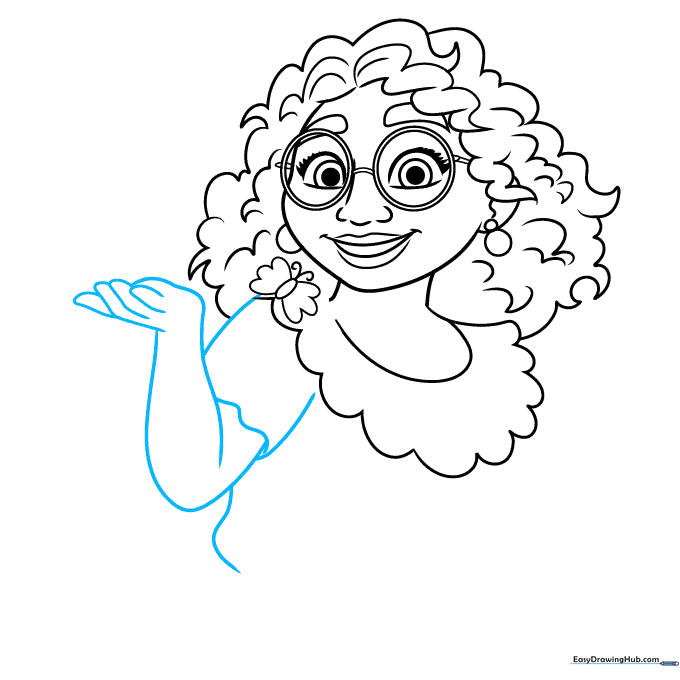
Draw the arm and sleeve using overlapping curved lines. Teacher's Tip: Ensure the sleeve looks 'puffy' by using rounded lines rather than straight ones.
Step 6: Torso and Second Arm

Complete the torso and the second arm. Teacher's Tip: Use the first arm as a guide to ensure the second arm is proportional in length.
Step 7: Adding Collar Embroidery
Add the scalloped pattern to the collar. Teacher's Tip: Take your time with the embroidery details; small, consistent curves make the blouse look authentic.
Step 8: Detailed Butterflies
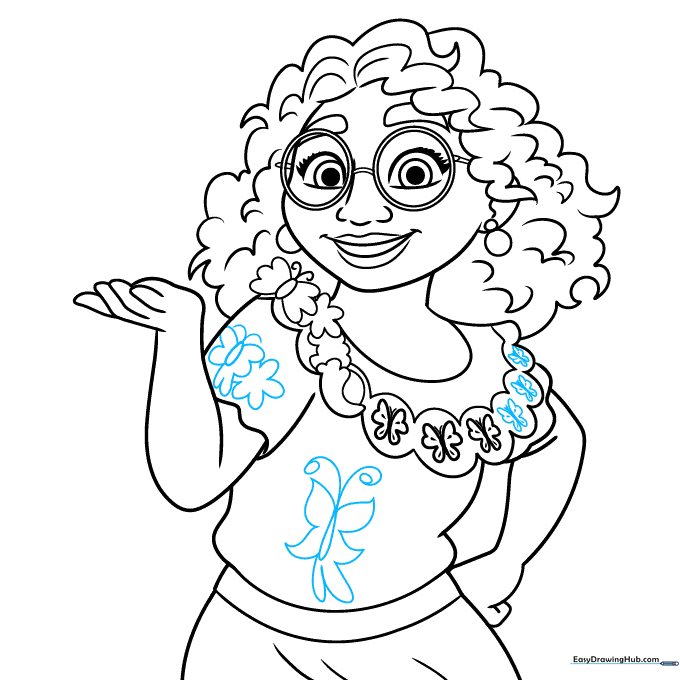
Draw more butterflies on her sleeve and torso. Teacher's Tip: Use a sharp pencil point to ensure the butterfly antennae are thin and delicate.
Step 9: Final Flourishes

Add final flowers and a butterfly on her hand. Teacher's Tip: This is the time to clean up any messy lines with your eraser before you start coloring.
Step 10: Coloring Mirabel
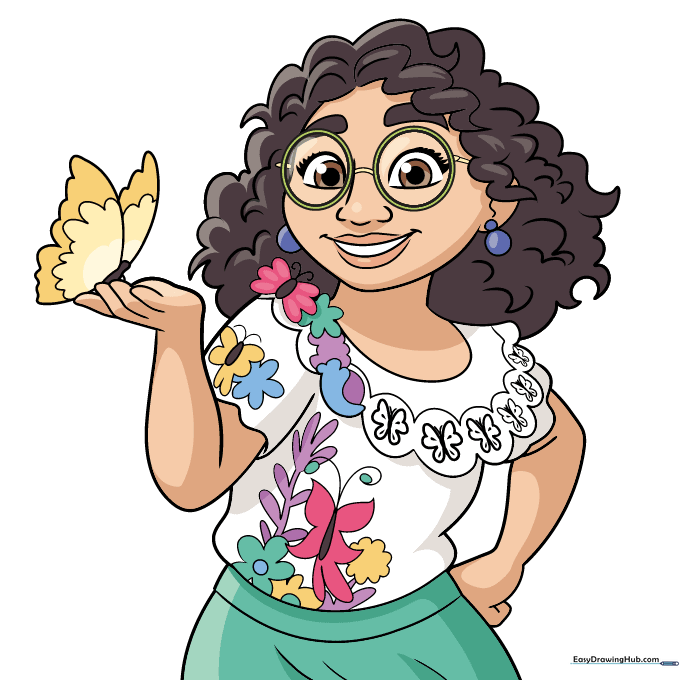
Bring Mirabel to life with color! Use dark tones for her hair, bright green for her glasses, and vibrant colors for her embroidered blouse. Teacher's Tip: Use light pressure with your colored pencils to layer colors for a richer, more professional look.
More Tutorials


