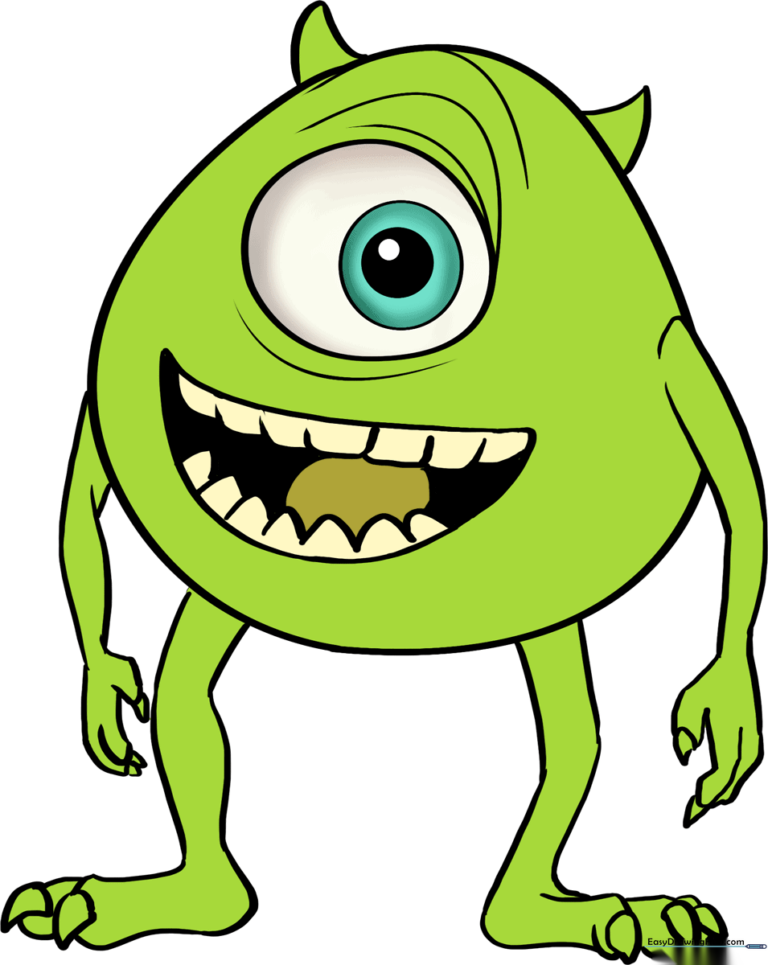
How to Draw Mike Wazowski: Easy 9-Step Guide
Ready to bring everyone's favorite one-eyed monster to life? This tutorial is perfect for young artists ages 5 and up. Grab a pencil, an eraser, and a piece of paper to practice your shapes and proportions while creating a fun, recognizable character.
🎯 Final Result
Step-by-Step Instructions
Sketching the Base Shape

Start by drawing a light, curved line to map out the top of Mike’s round body. Teacher's Tip: Keep your pencil pressure very light here so you can easily adjust the shape later if needed.
Defining the Body

Continue that curved line to close the shape into a squat, egg-like oval. Tip: Don't worry about making it a perfect circle; Mike is naturally a bit lumpy and organic!
Placing the Eye

Draw a large oval in the top center of the body for his eye, then add a curved line underneath for the lower lid. Tip: Centering the eye helps give him that classic, expressive look.
Adding the Eyelid

Add a series of soft, curved lines above the eye to create the upper eyelid. Tip: This adds depth and character, making his eye look like it's resting on his face.
Drawing the Iris and Pupil
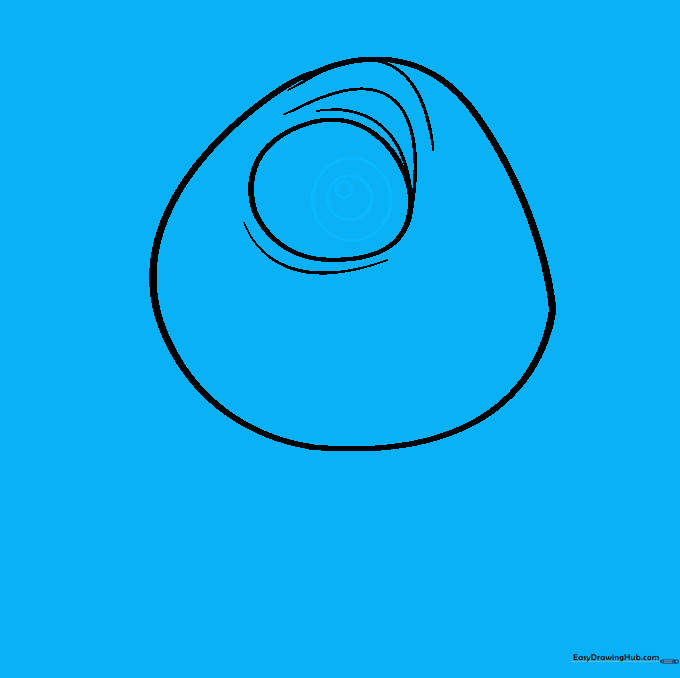
Inside the eye, draw three circles, each one smaller than the last. Tip: The smallest circle is the pupil—color this in dark to make his eye really pop!
Adding the Horns

Draw two small, curved triangles at the very top of his head. Tip: Keep them small and pointy to match Mike's signature look.
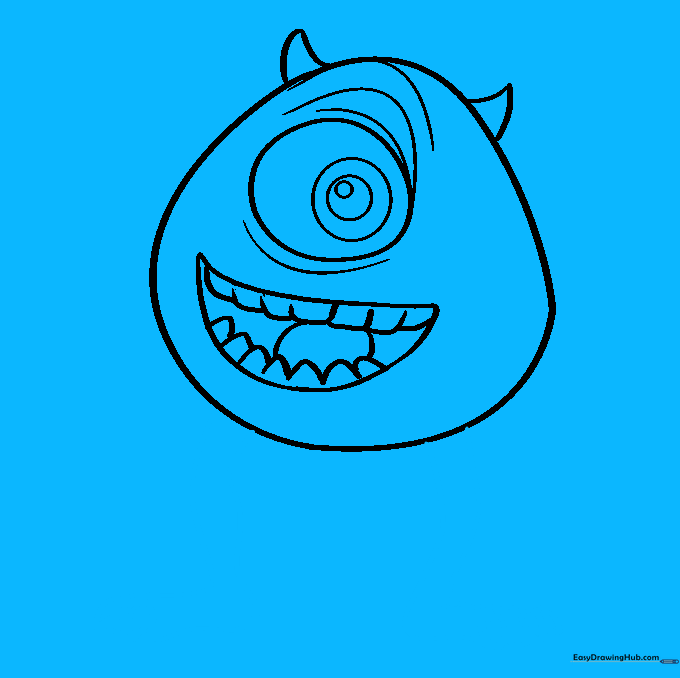
Creating the Mouth
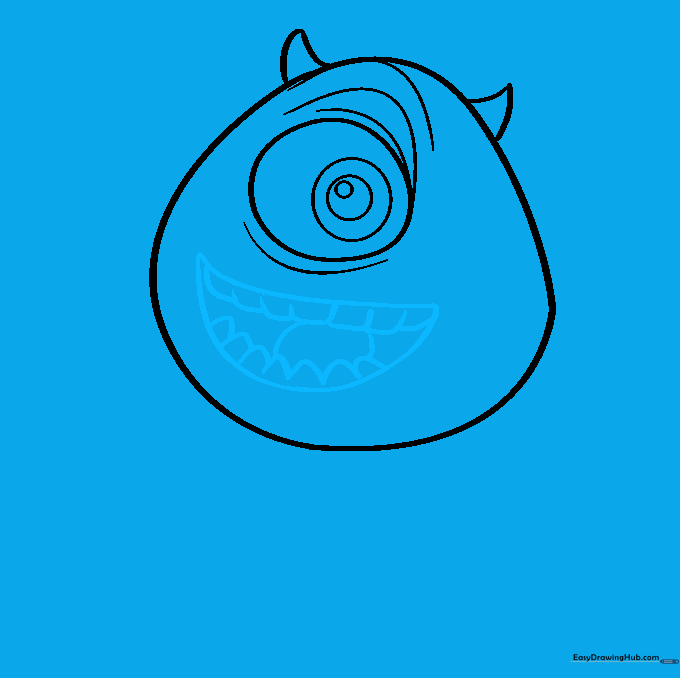
Draw a wide, crescent-shaped mouth. Add teeth with small, overlapping curves and a tongue inside. Tip: Use short, quick strokes for the teeth to keep them looking uniform.
Drawing the Legs
Extend two pairs of curved lines from the bottom for his legs, adding small triangles at the ends for claws. Tip: Notice how the lines curve to show his knees—this makes him look like he's standing in a pose.
Adding Arms and Claws
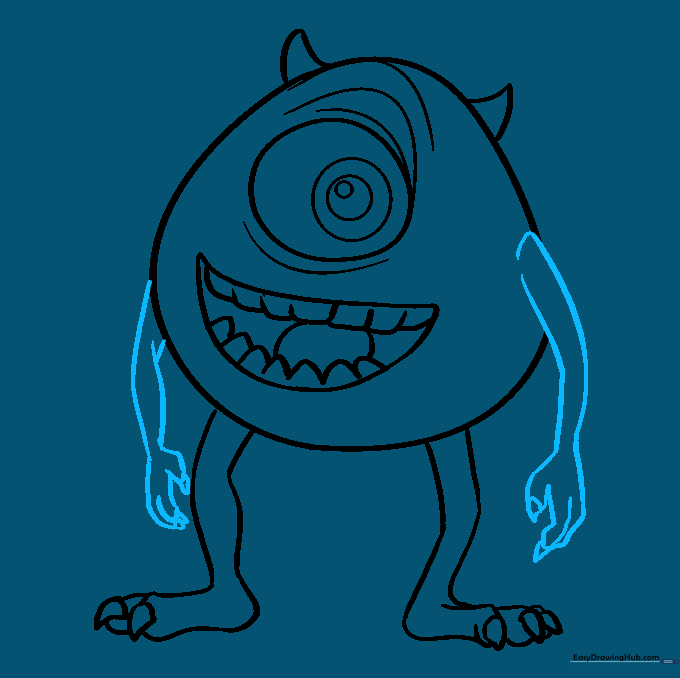
Draw the arms extending from the sides, finishing with fingers and small claw triangles. Tip: Erase any overlapping lines from the body to make the arms look like they are in front.
Coloring Your Monster
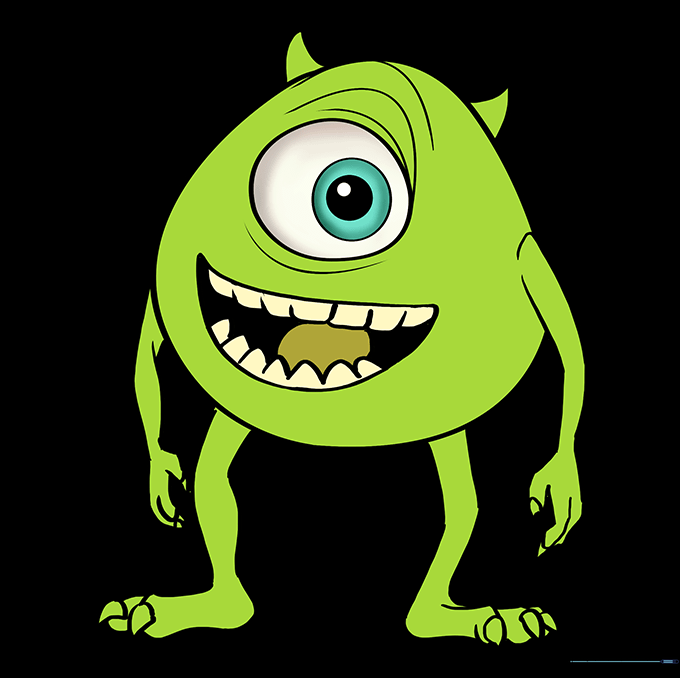
Time to bring him to life! Use a bright lime green for his body. Tip: Try using a slightly darker green for shading under his eye or near his legs to give him a 3D look.
More Tutorials


