How to Draw Lilo: Easy Step-by-Step Disney Tutorial
Bring the spirit of Ohana to your sketchbook! This tutorial is designed for young artists and beginners to capture Lilo’s iconic look using basic shapes. Grab your pencil, eraser, and paper, and let’s start building this beloved character from the ground up.
🎯 Final Result

Step-by-Step Instructions
Step 1: Sketching the Face Shape

Lightly sketch Lilo's face using curved lines for her cheeks and chin. Add sharp, angled lines at the forehead to suggest her hair. Teacher's Tip: Keep your pencil pressure soft here; these are just guide shapes!
Step 2: Adding Hair and Neck

Draw a long, sweeping curved line for the top of her hair. Add a small 'U' shape below the chin to form her neck and the collar of her dress. Tip: Make sure the neck is centered so she looks balanced.
Step 3: Outlining the Dress
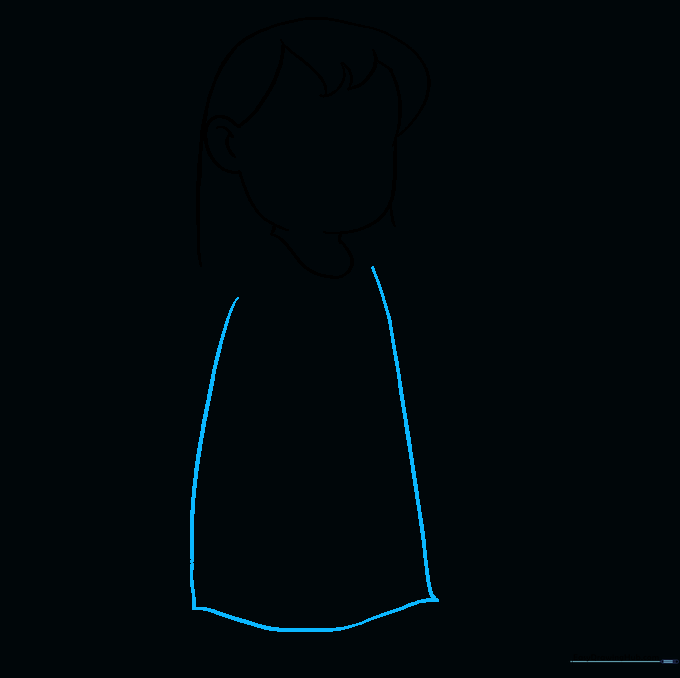
Extend two long, slightly curved lines downward from the collar to create the body of her dress. Close the bottom with a gentle curve. Tip: Keep these lines fluid to give the dress a natural, flowy appearance.
Step 4: Drawing the First Sleeve

Connect the collar to the side of the dress with a curved line to form the sleeve. Tip: Imagine the sleeve is a small cap sitting on her shoulder.
Step 5: Adding the Second Sleeve and Arm
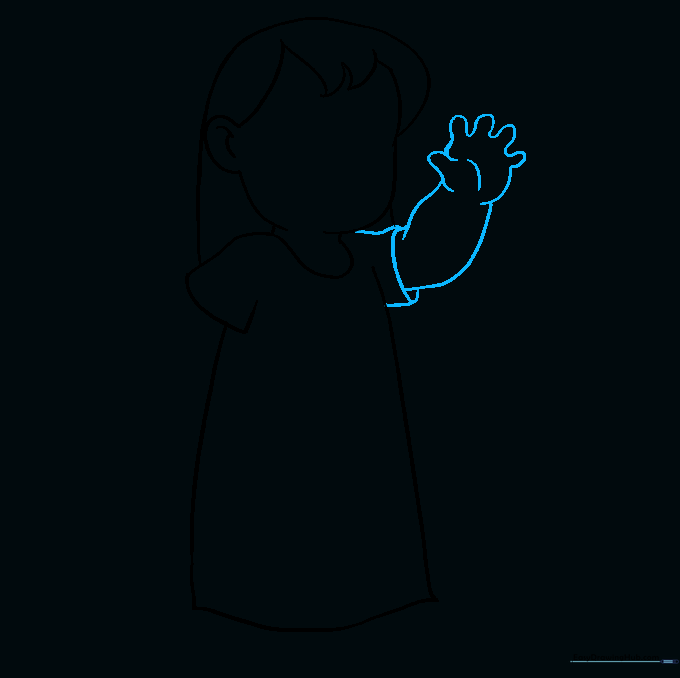
Add the second sleeve, then draw her arm reaching down. Use small 'U' shapes for the fingers. Tip: Keep the fingers small and close together to make them easier to draw.
Step 6: Drawing the Other Arm

Sketch the remaining arm and a closed fist. Erase any overlapping guide lines inside the arm area. Tip: Use a light touch so you don't smudge your paper.
Step 7: Adding the Leaf Pattern

Decorate the dress with Lilo's signature leaf pattern. Draw the leaf shapes with sharp points and a center vein. Tip: Don't worry about making them perfect; leaves in nature are all unique!
Step 8: Drawing Feet and Sandals

Draw the feet using small 'C' shapes for toes, then add sandals underneath. Tip: Keep the sandals simple—just a strap and a sole.
Step 9: Adding Facial Features
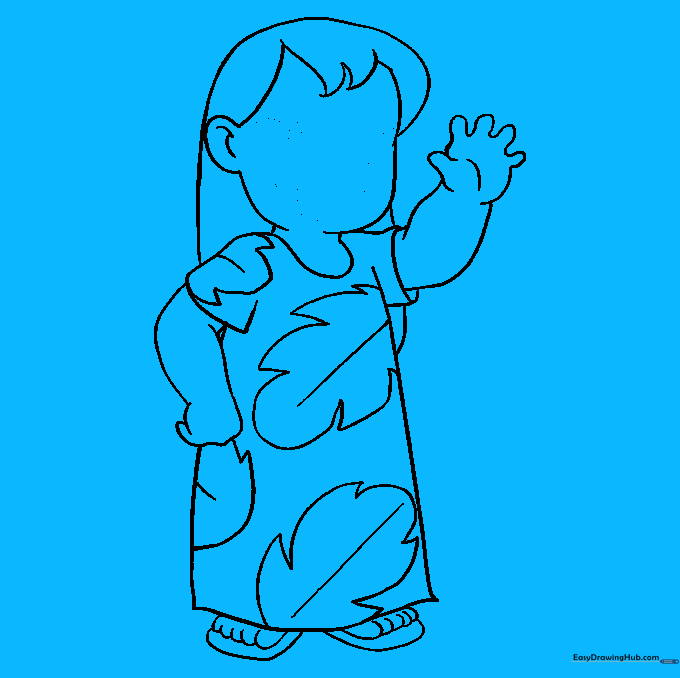
Draw the mouth, almond-shaped eyes, and eyebrows. For the eyes, draw three circles inside each other and shade the middle one. Tip: Take your time with the eyes; they give Lilo her expressive look!
Step 10: Adding Color

Time to bring her to life! Use black for her hair, tan for her skin, and a bright red for her dress. Tip: Use light, circular motions with your colored pencils for an even finish.
More Tutorials


