How to Draw Labubu: Easy 9-Step Guide for Kids
Bring your favorite mischievous monster to life with this easy, guided drawing tutorial. Designed for artists ages 5 and up, this lesson requires only a pencil, paper, and an eraser. Follow along to master Labubu’s signature furry texture and iconic grin while building your confidence as an illustrator.
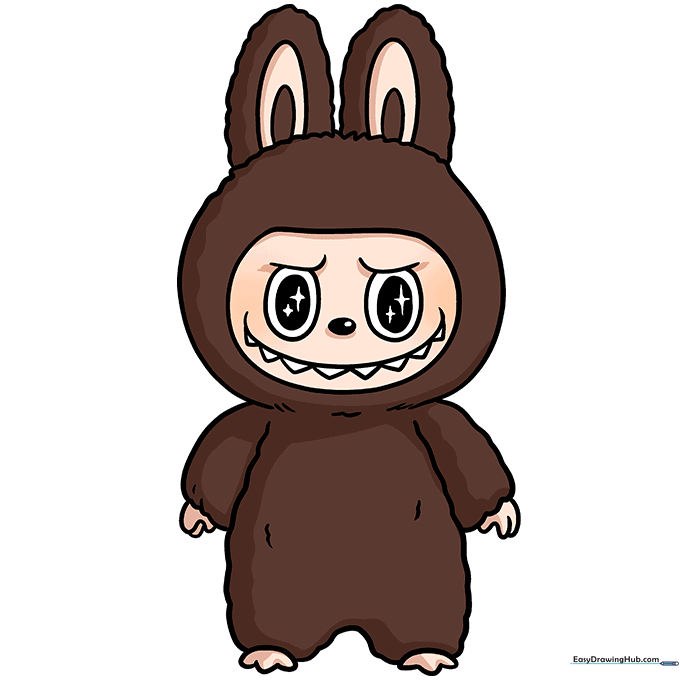
🎯 Final Result

Step-by-Step Instructions
Step 1: Sketching the Expressive Eyes
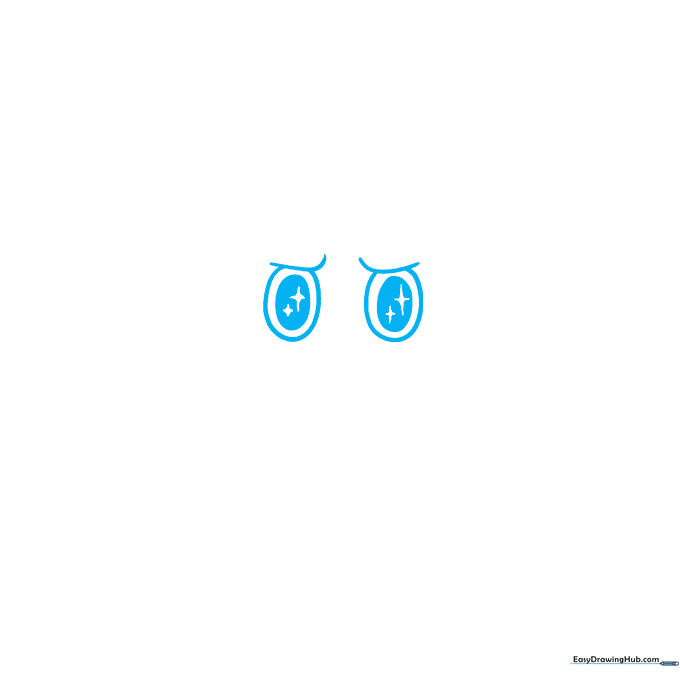
Start by drawing two curved lines for the brows, then add large ovals beneath them for the eyes. Inside each eye, sketch a smaller oval and two four-pointed stars to create that signature sparkle. Tip: Keep your pencil pressure light so you can easily adjust the symmetry.
Step 2: Adding the Iconic Grin
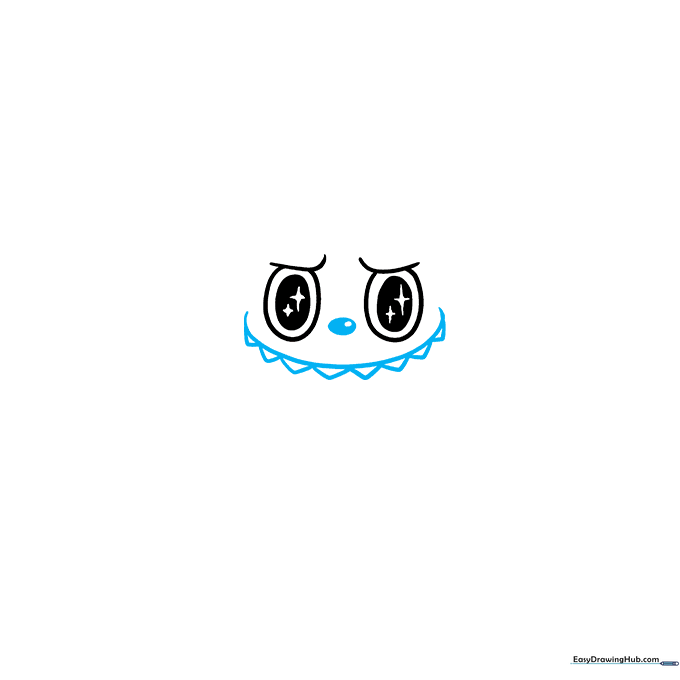
Draw a small oval between the eyes for the nose, then sketch a wide 'C' shape for the mouth. Add sharp, 'V' shaped teeth along the bottom. Tip: Make the teeth slightly uneven to give Labubu that cheeky, mischievous personality.
Step 3: Shaping the Head
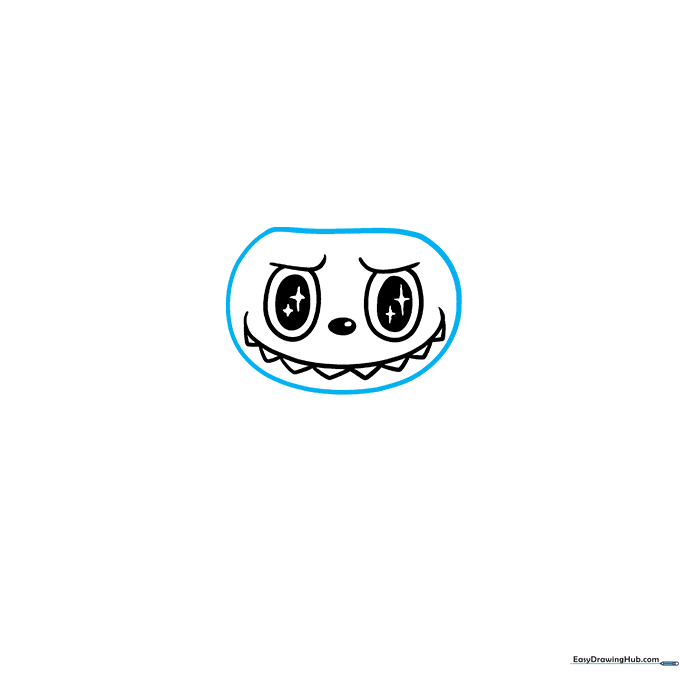
Use a long, smooth curved line to enclose the head, keeping the top slightly flattened. Tip: Think of this as drawing a soft, rounded square rather than a perfect circle.
Step 4: Creating Furry Texture
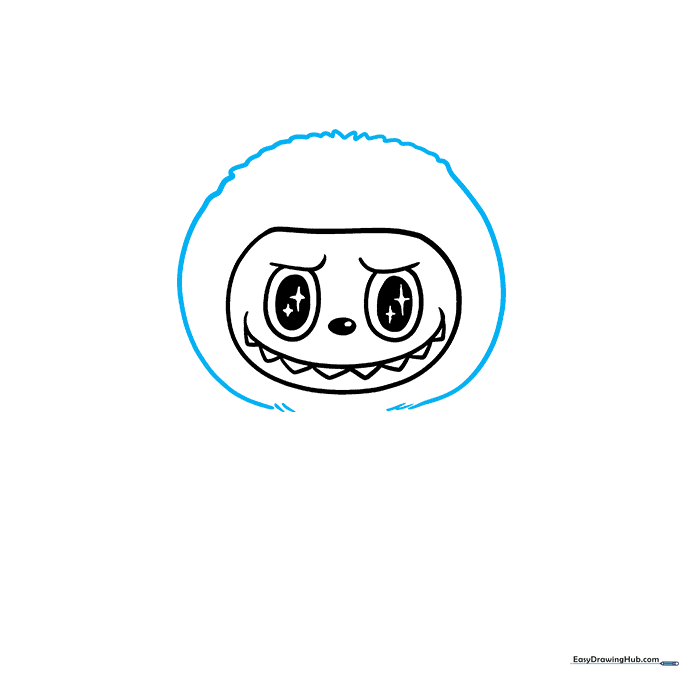
Go over your head outline using short, jagged strokes to create a furry appearance. Tip: Vary the length of your lines to make the fur look natural and wild.
Step 5: Drawing the Rabbit Ears
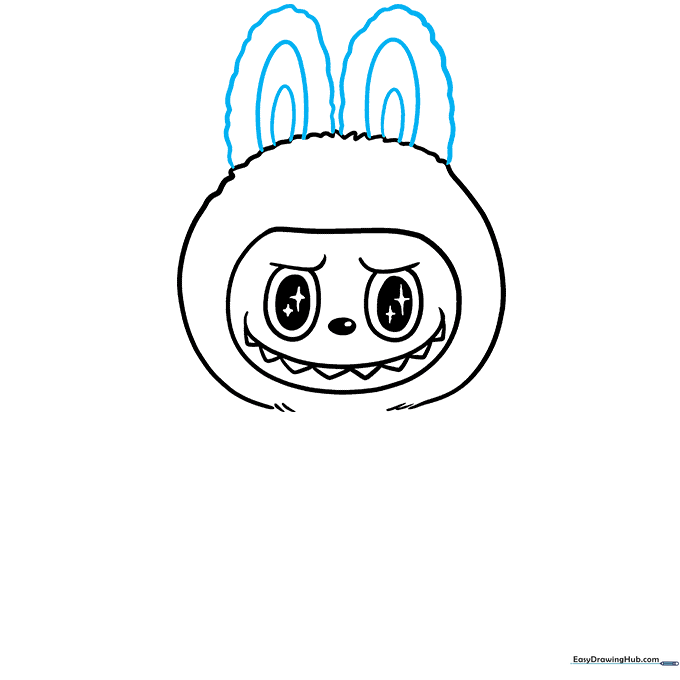
Sketch two long, wavy 'U' shapes for the outer ears. Add a smaller inner contour inside each to give them depth. Tip: Don't worry if they aren't perfectly identical; Labubu's ears are meant to look floppy and fun!
Step 6: Sketching the Arms

Use wavy lines to draw the fuzzy arms extending from the body. Add short, quick strokes at the ends to suggest fingers. Tip: Keep the arms loose and relaxed to match the character's pose.
Step 7: Adding the First Leg
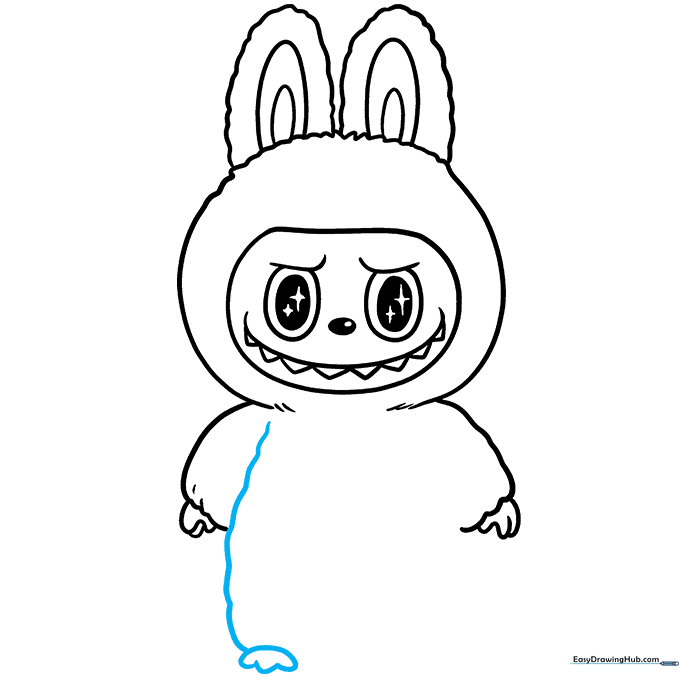
Draw a wavy line down from the torso to form the side of the leg. At the bottom, enclose a foot with three distinct toes. Tip: Ensure the foot is large enough to balance the character's head.
Step 8: Completing the Lower Body
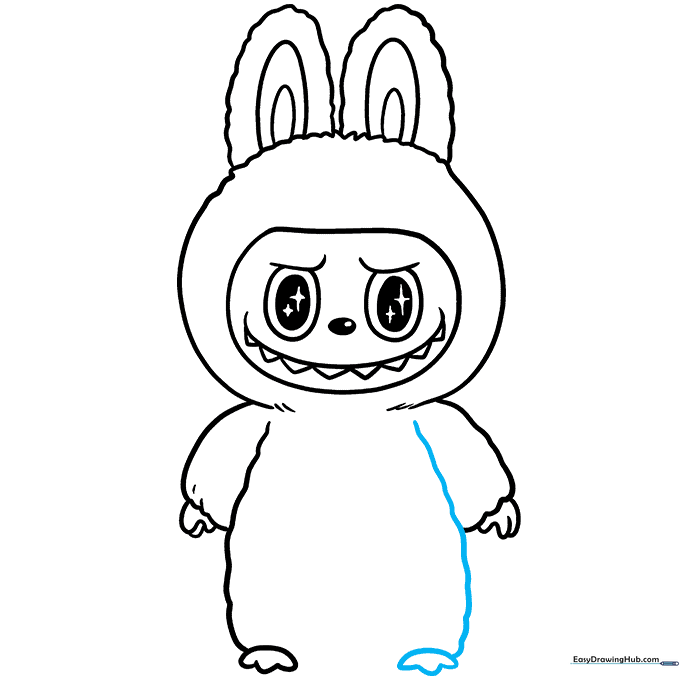
Repeat the process on the opposite side to draw the second leg and foot. Tip: Try to mirror the curve of the first leg to keep the character balanced.
Step 9: Finalizing the Outline
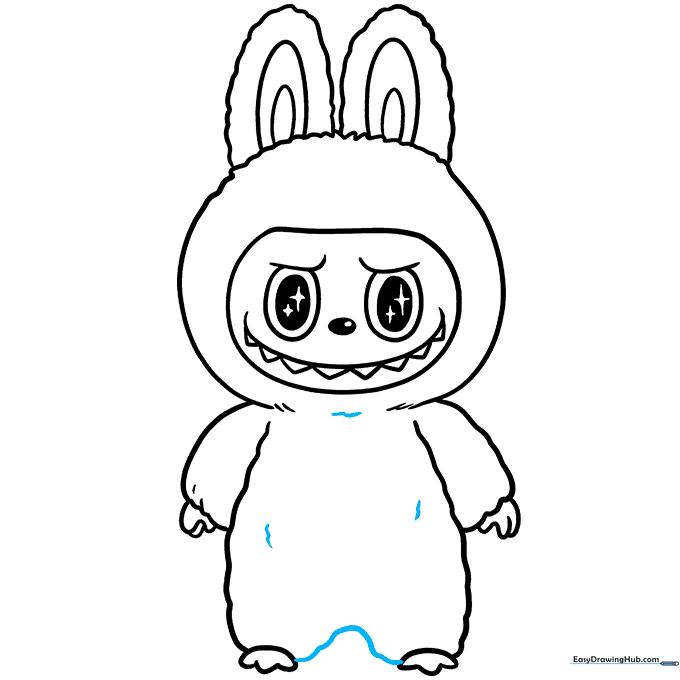
Connect the feet with a final wavy line to close the figure. Add a few extra short, wavy lines across the body to emphasize the fur. Tip: Go over your final lines with a darker pencil or pen to make the drawing pop!
Step 10: Bringing Labubu to Life with Color
Now for the fun part! Use your favorite colors to fill in Labubu. Since Labubu can be any color, feel free to get creative. Tip: Use light pressure for a soft look, or press harder for vibrant, bold colors.
More Tutorials


