How to Draw Keroppi: Easy Step-by-Step Guide for Kids
Bring Sanrio’s favorite frog to life with this beginner-friendly drawing tutorial, perfect for ages 5 and up. You’ll only need a pencil, an eraser, and your favorite markers to complete this cheerful character. Follow along to build confidence in your sketching skills while creating a fun, hand-drawn masterpiece.
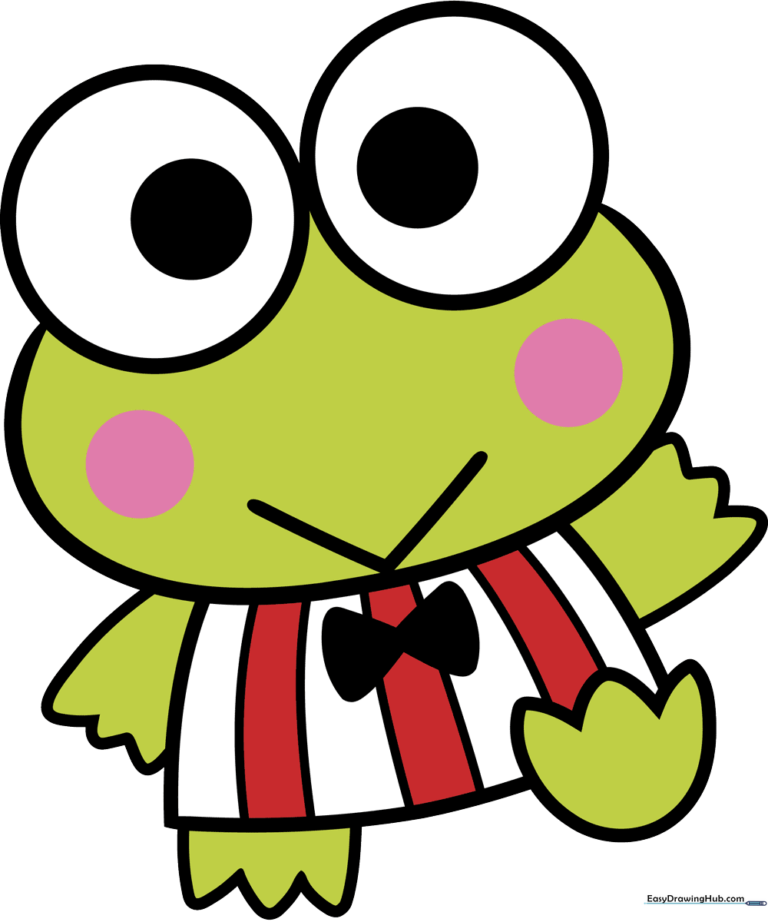
🎯 Final Result
Step-by-Step Instructions
Step 1: Sketching the Iconic Eyes

Start by drawing two large, side-by-side circles for Keroppi’s eyes. Add a smaller, shaded circle inside each to give him his signature look. Teacher's Tip: Keep your pencil pressure light so you can easily adjust the spacing if needed.
Step 2: Defining the Face

Draw a long, smooth curved line beneath the eyes to form the top of his head. Add a small 'V' shape at the bottom for his happy smile. Teacher's Tip: A gentle 'V' makes him look friendly, so don't make the angle too sharp!
Step 3: Adding Cheeks and Torso

Add a small circle on each side of the face for his rosy cheeks. Then, draw a curved line extending downward to start the torso. Teacher's Tip: Keep the cheek circles symmetrical to maintain his cute, balanced appearance.
Step 4: Shaping the Body

Use two curved lines to close the rectangular shape of the torso. Extend another curved line from the head to begin the first arm. Teacher's Tip: Think of his body as a soft, rounded rectangle rather than a sharp box.
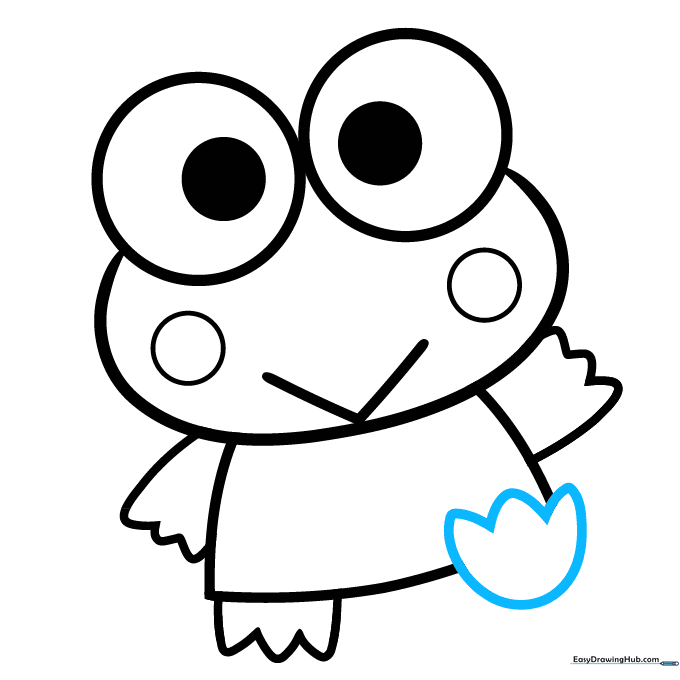
Step 5: Drawing the Arms

Use a wavy line to connect the arm to the torso, creating his fingers. Repeat this on the opposite side for the second arm. Teacher's Tip: Wavy lines are great for making hands look soft and cartoonish!
Step 6: Adding the Feet
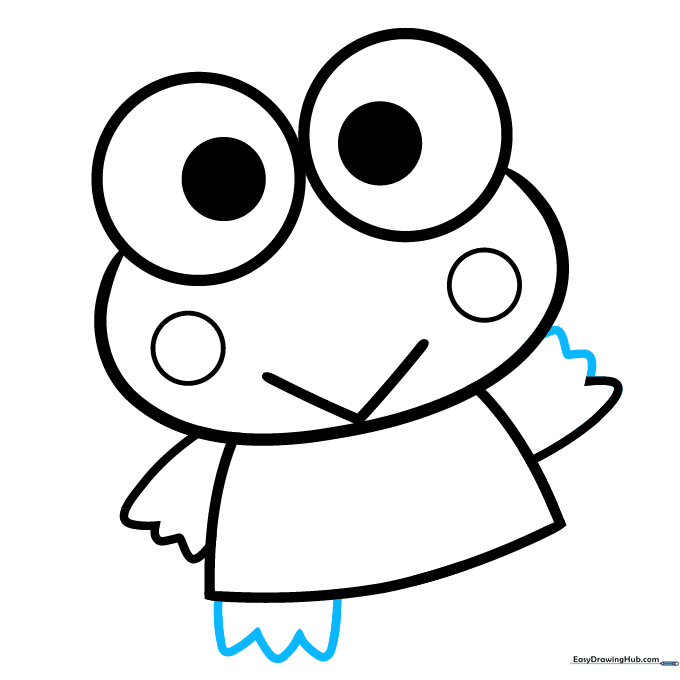
Draw a zigzag line below the torso to form the first foot. Teacher's Tip: Zigzags give a nice 'webbed' look to a frog's feet without needing complex detail.
Step 7: Finishing the Feet
Draw the second foot using the same zigzag technique. Erase any overlapping lines from the torso to keep the drawing clean. Teacher's Tip: Always double-check your eraser work so the lines look seamless.
Step 8: The Signature Bow Tie
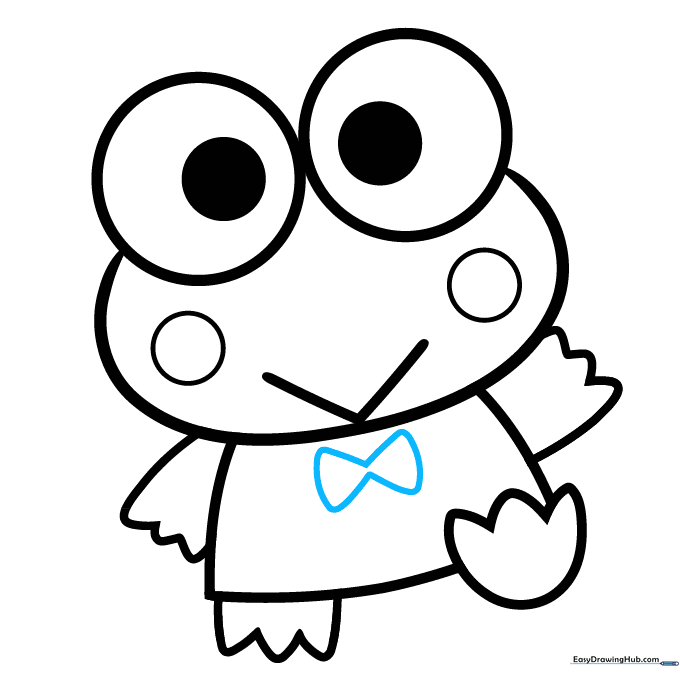
Use curved lines to draw an hourglass shape for his bow tie right on his chest. Teacher's Tip: This is the perfect spot to add a pop of color later!
Step 9: Final Details
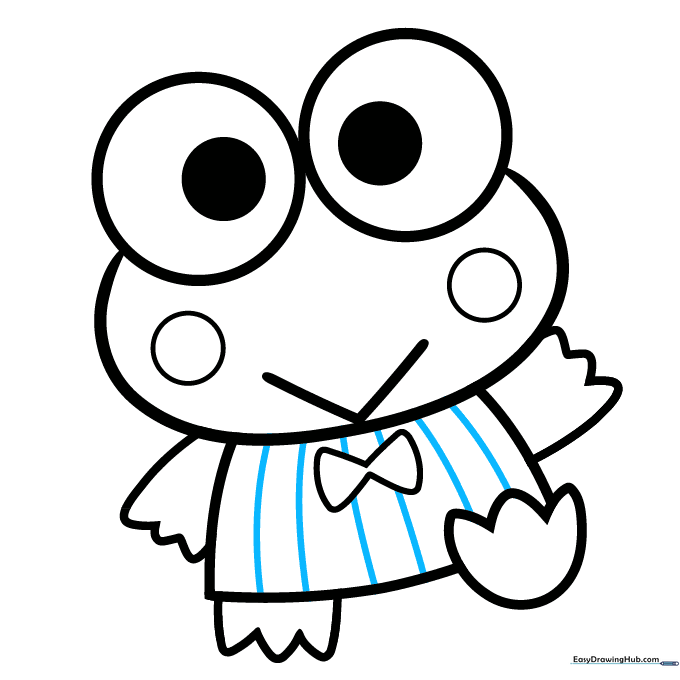
Add vertical curved lines across his shirt to show the stripes. Your outline is now ready for color! Teacher's Tip: Use a fine-liner pen to trace your pencil lines before coloring to make them pop.
Step 10: Bringing Keroppi to Life with Color
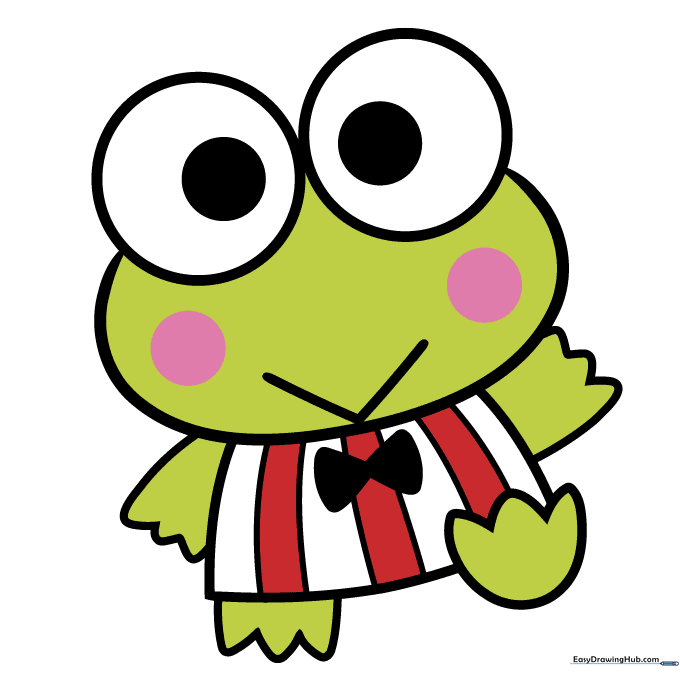
Time to color! Use bright green for his skin and a soft pink for his cheeks. His shirt looks great in red and white stripes, but feel free to get creative with your own color palette.
More Tutorials


