How to Draw Kai from Ninjago: Easy Step-by-Step Guide
Ready to master the Fire Ninja? This guide is perfect for young fans ages 7+ looking to level up their character drawing skills. You'll just need a pencil, an eraser, and some paper to bring Kai to life.
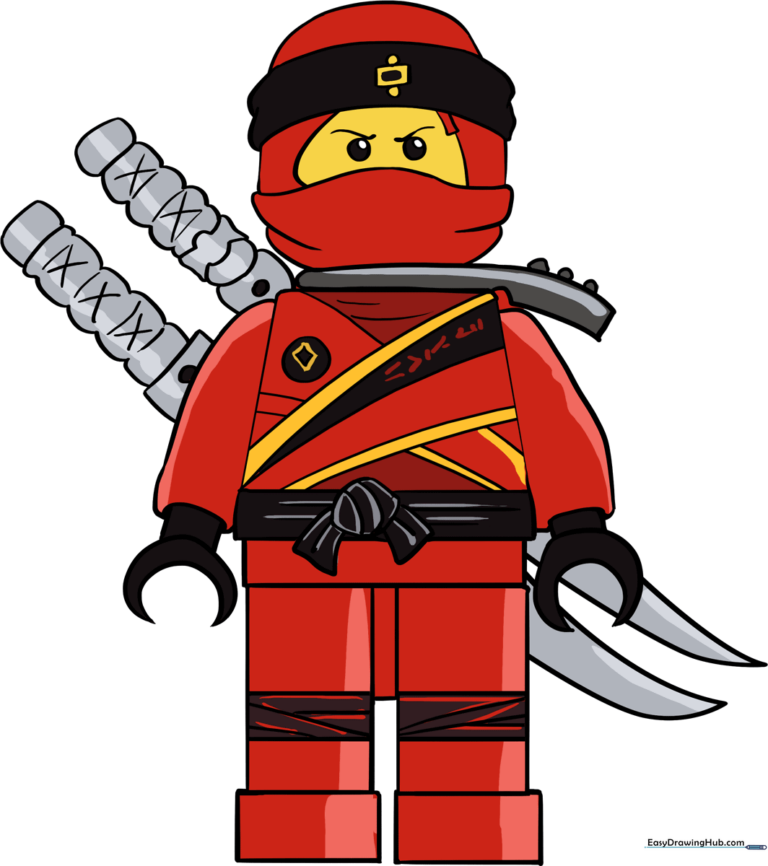
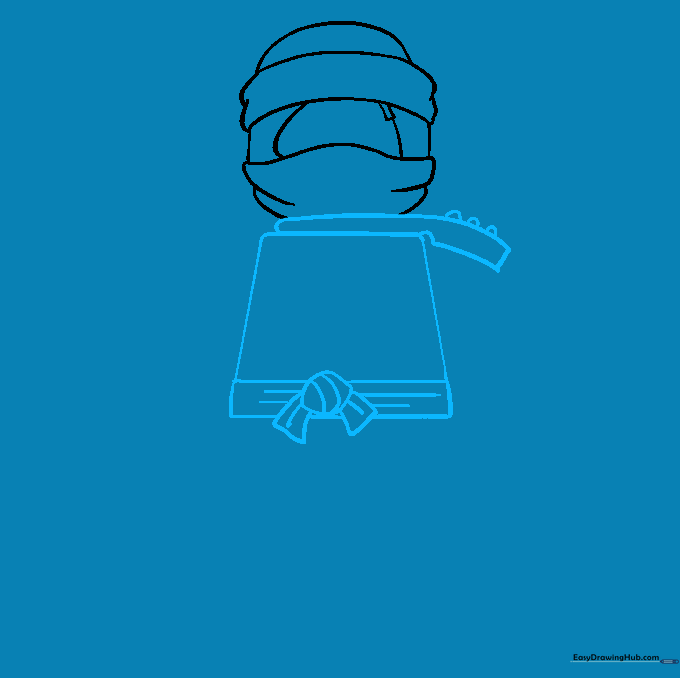
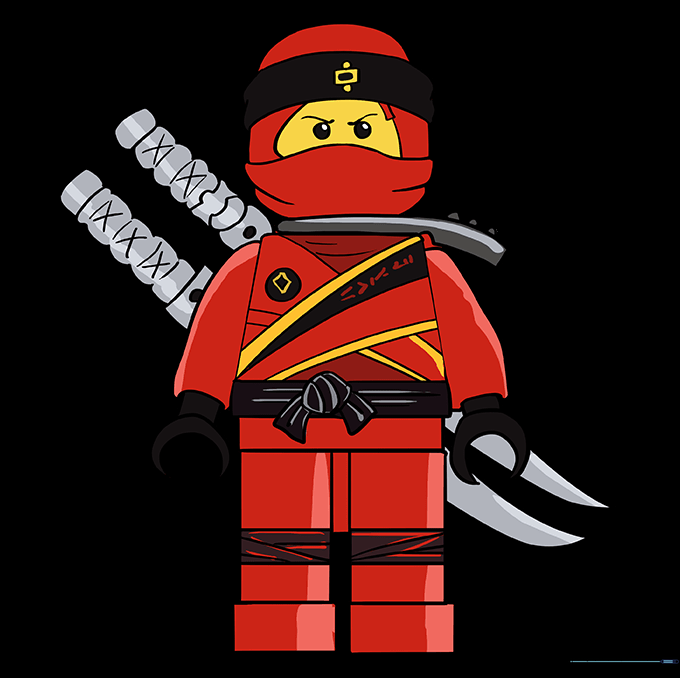
🎯 Final Result
Step-by-Step Instructions
Step 1: Sketching the Ninja Mask
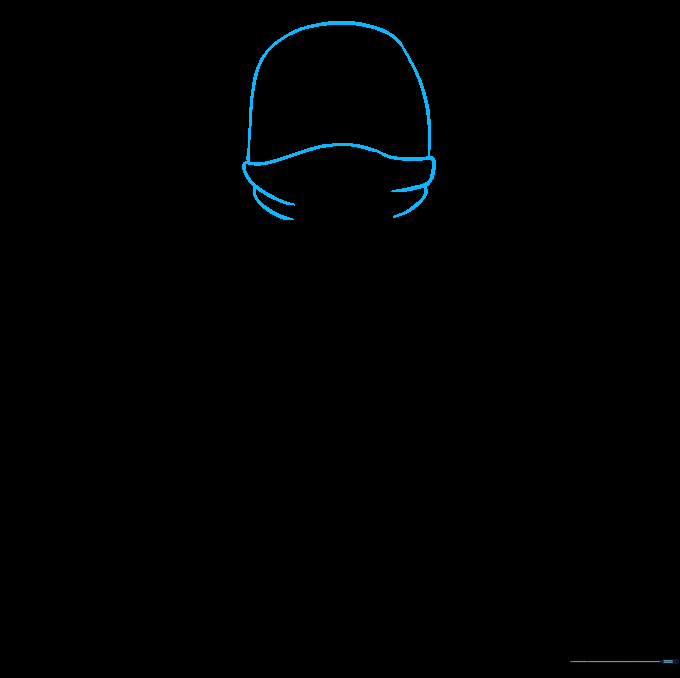
Draw an inverted 'U' shape for the top of the head, then connect the ends with a curved line. Add short, overlapping curves at the sides to create the fabric folds of his mask. Teacher's Tip: Keep your pencil pressure light here so the mask looks soft, not stiff.
Step 2: Adding the Headband
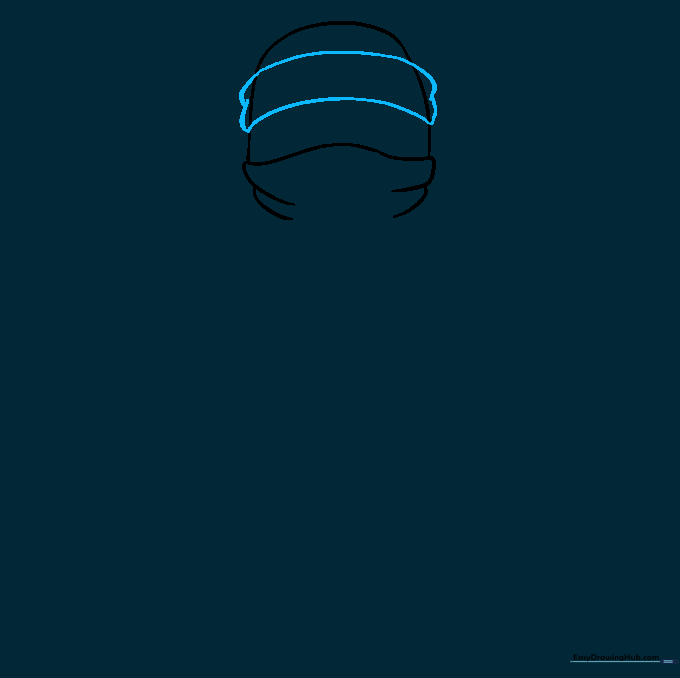
Draw two parallel curved lines across the forehead area, connecting them with small wavy lines at the edges. This creates the band of his headwrap. Tip: Make sure the curves follow the shape of the head to give it a 3D look.
Step 3: Defining the Face
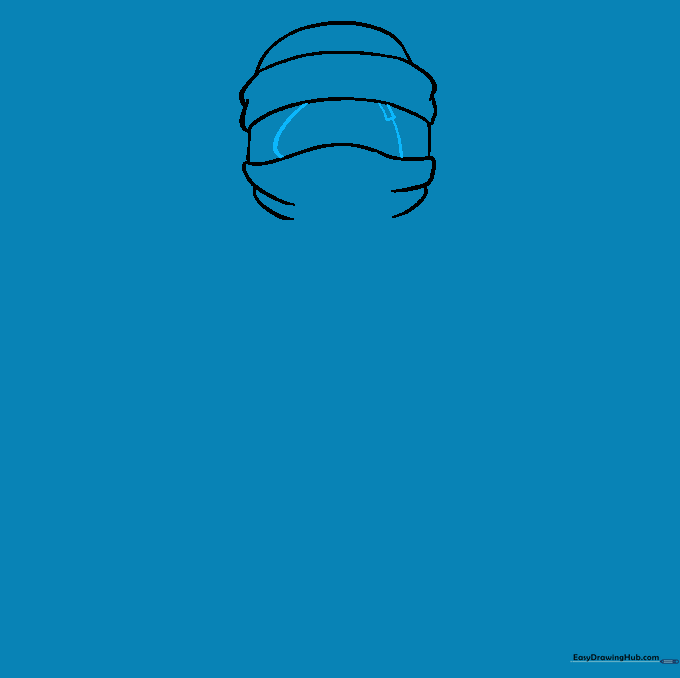
Carefully erase the lines hidden behind the headband. Add two curved lines connecting the headband to the mask to frame his eyes. Draw a small rectangle below the headband for the mask detail. Tip: Use a clean eraser to keep your lines crisp.
Step 4: Drawing the Torso and Belt
Draw a trapezoid shape for the torso and a rectangle for the belt. Add a circle in the center of the belt for the knot. Tip: Draw the belt knot slightly larger to make it look like it's tied tightly.
Step 5: Adding Uniform Details
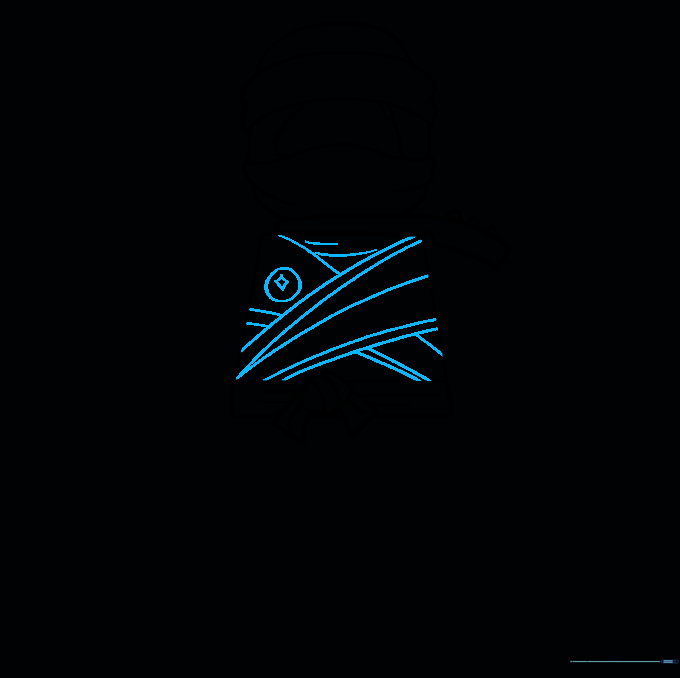
Add diagonal lines across the chest to show the gi's wrap. Draw a small circle with a diamond inside on the chest. Tip: Keep your lines straight and parallel to make the fabric look structured.
Step 6: Sketching the Legs
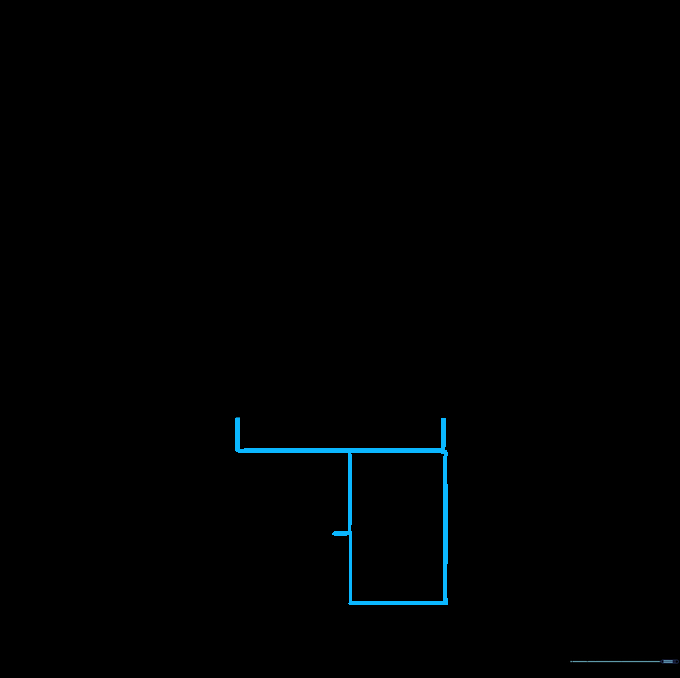
Draw two vertical rectangles beneath the torso for the legs. Add a small line on the side for the pant detail. Tip: Use a ruler if you struggle with straight lines, but freehand is great for practice!
Step 7: Completing the Lower Body

Add the second leg rectangle to complete the base of the body. Tip: Ensure both legs are roughly the same width to keep the character balanced.
Step 8: Adding Arms and Feet
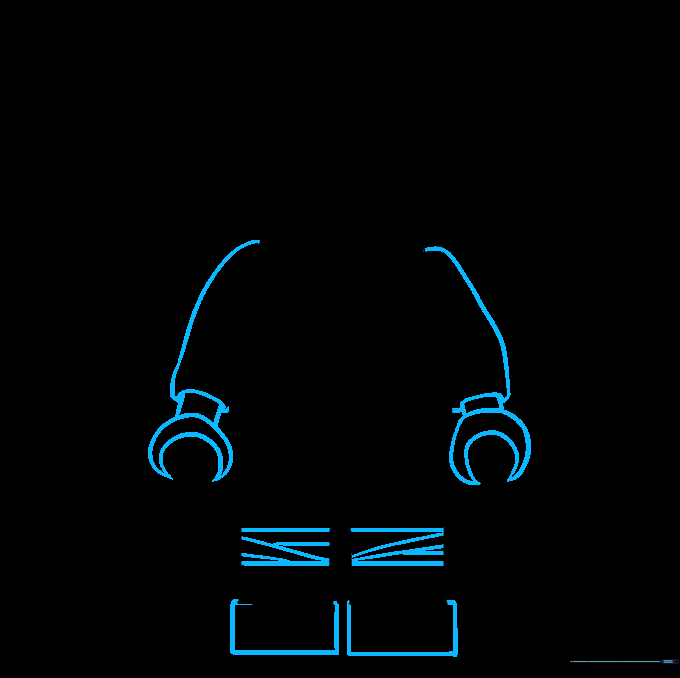
Draw curved shapes for the arms and crescent moons for the hands. Add rectangular feet at the bottom of the legs. Tip: The crescent moon shape is a quick way to draw a 'ninja fist' without needing to draw individual fingers.
Step 9: Final Details and Weapons
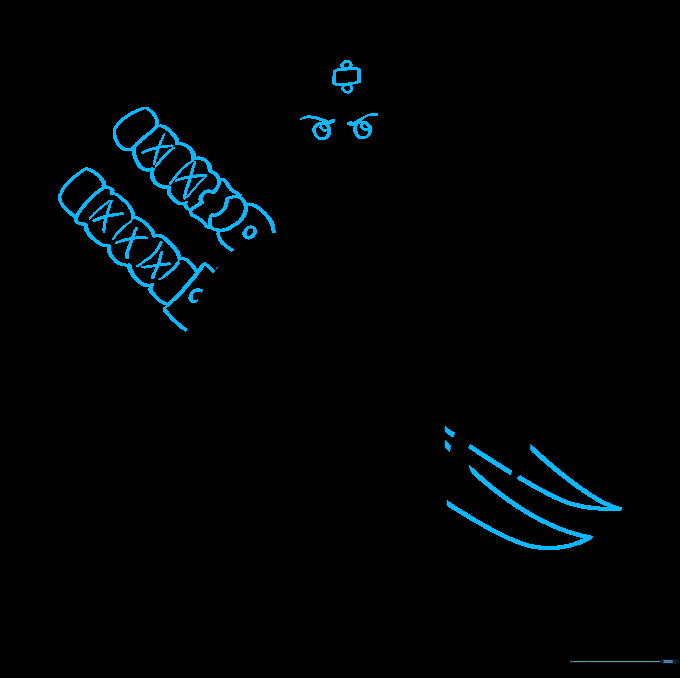
Draw the eyes and eyebrows inside the mask. Add the swords by drawing wavy rectangles with 'X' patterns for the handles. Tip: Use sharp points for the blades to make them look like real ninja swords.
Step 10: Bringing Kai to Life with Color
Color your drawing! Use deep reds for the gi, black for the mask and belt, and gold for the sword handles. Tip: Use a black fine-liner to outline your pencil work before coloring for a professional comic-book look.
More Tutorials


