How to Draw Jane Goodall: Easy Step-by-Step Portrait Guide
Celebrate the legendary primatologist Jane Goodall by creating your own portrait! This tutorial is designed for young artists and beginners, requiring only a pencil, paper, and an eraser. Follow these steps to build confidence in drawing facial features and capturing a likeness.
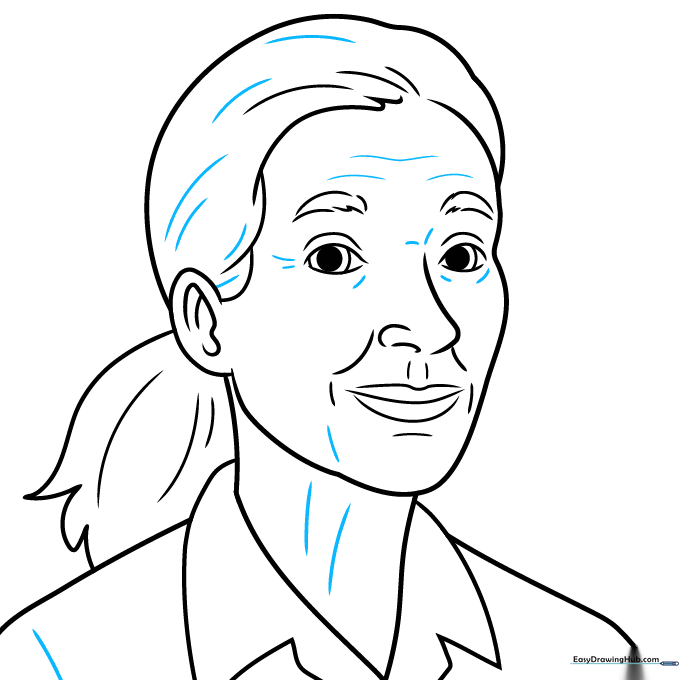
🎯 Final Result

Step-by-Step Instructions
Step 1: Sketching the Eyes

Draw two almond-shaped outlines for the eyes. Add circles inside for the pupils and shade them in. Teacher's Tip: Keep your pencil pressure light here so you can easily adjust the symmetry if one eye looks a bit different than the other.
Step 2: Adding Brows and Nose

Sketch the eyebrows using gentle, arched lines above the eyes. Use a small 'L' and 'C' shape to form the nose. Teacher's Tip: The nose is often the trickiest part; keep these lines minimal to avoid making the nose look too heavy.
Step 3: Defining the Face and Mouth
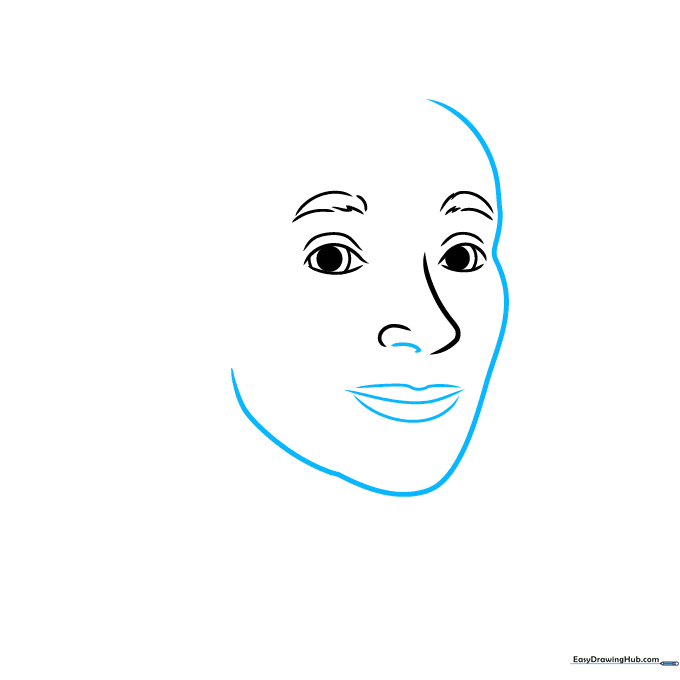
Draw the curve of the jawline and add three lines to define the lips. Teacher's Tip: Use a very light touch for the mouth lines—a smile or neutral expression is created by the subtle curve of the center line.
Step 4: Drawing the Ear and Hairline
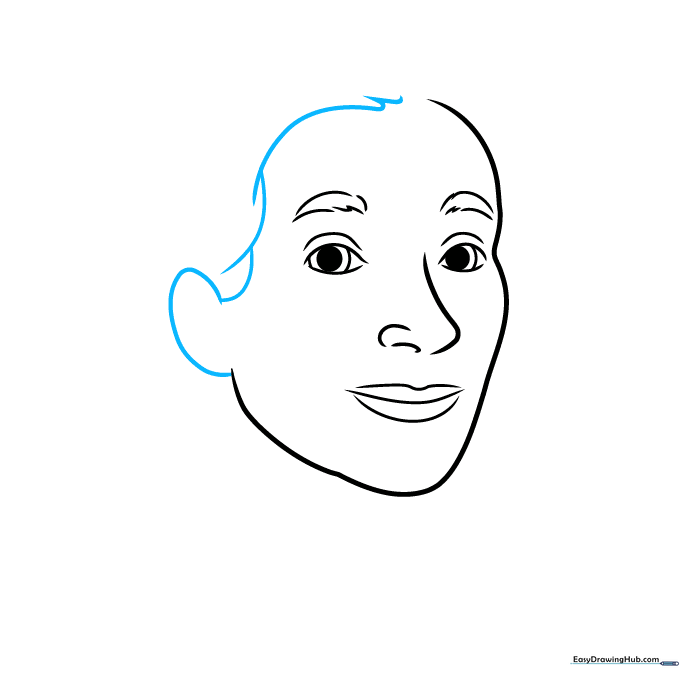
Use overlapping curved lines to sketch the ear and the hair framing the side of the face. Teacher's Tip: Think of the ear as a 'C' shape that sits between the eye and nose level.
Step 5: Completing the Head Shape
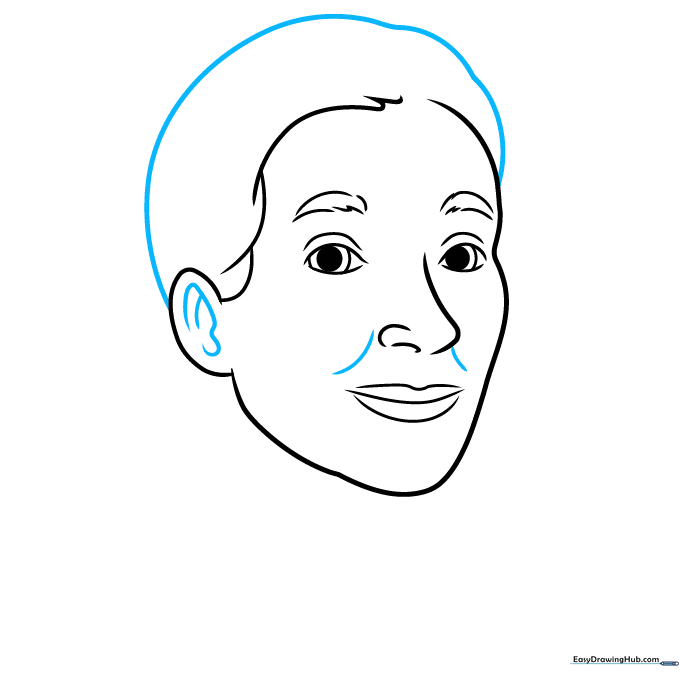
Draw a long, sweeping curve to enclose the top of the head. Add extra detail to the ear. Teacher's Tip: Don't worry if the hair line isn't perfect; hair is naturally messy and organic!
Step 6: Adding the Neck
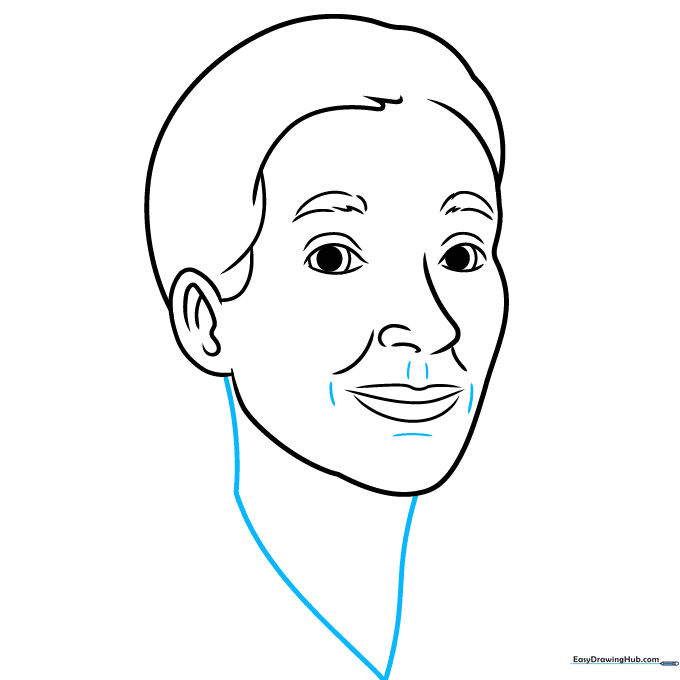
Add contour lines around the mouth and draw two vertical lines down from the chin to form the neck. Teacher's Tip: Keep the neck lines parallel to give the portrait a natural, upright posture.
Step 7: Sketching the Shirt Collar

Draw the triangular shapes of the collar and the start of the shoulders. Teacher's Tip: Use sharp, clean lines for the collar to contrast with the softer, curved lines of the face.
Step 8: Adding the Ponytail

Draw the second shoulder and the ponytail using jagged, overlapping lines to suggest hair texture. Teacher's Tip: Use quick, flicking motions with your pencil to make the hair look more realistic.
Step 9: Final Details
Add subtle lines for facial wrinkles and texture the hair further. Teacher's Tip: Wrinkles tell a story! Keep them light to show character without making the portrait look aged too heavily.
Step 10: Coloring Your Portrait

Time to bring your drawing to life! Use soft grays for the hair and natural skin tones. Teacher's Tip: When coloring hair, use light, directional strokes to follow the flow of the ponytail.
More Tutorials


