How to Draw Iron Man: Easy 10-Step Guide for Kids
Ready to bring Tony Stark’s iconic armor to life? This tutorial is designed for young Marvel fans and budding artists to practice geometric shapes and symmetry. You will need a pencil, an eraser, and a steady hand to master the Mark 6 suit.
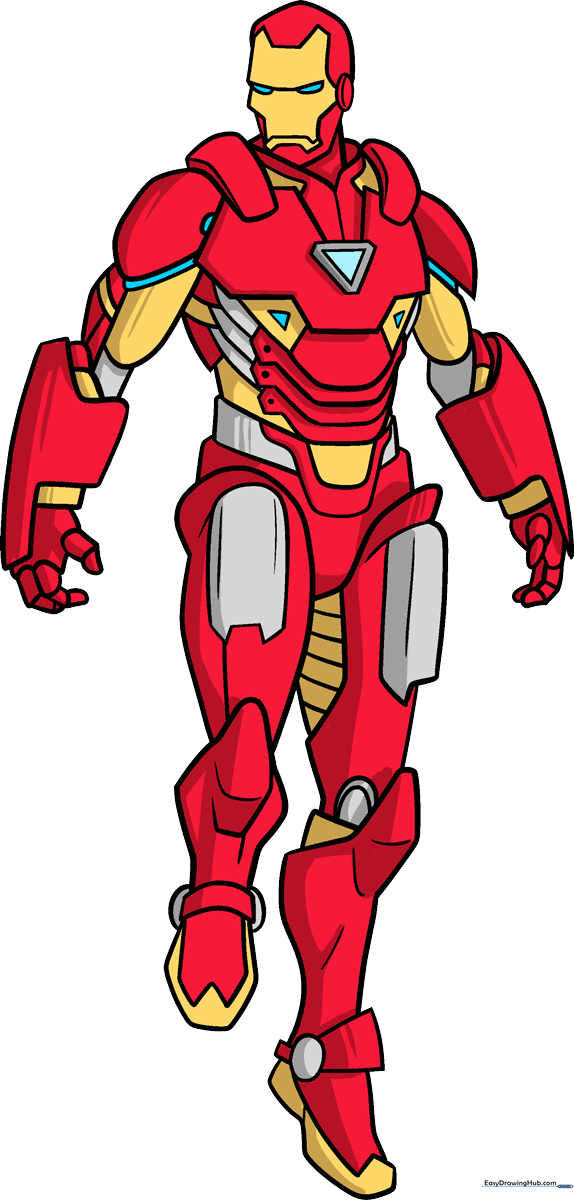
🎯 Final Result
Step-by-Step Instructions
Step 1: Sketching the Helmet and Shoulders

Start by lightly sketching the helmet shape and shoulder pads. Teacher's Tip: Keep your pencil lines very faint so you can easily erase the construction lines later. Focus on the symmetry of the face and the triangular chest plate.
Step 2: Defining the Torso
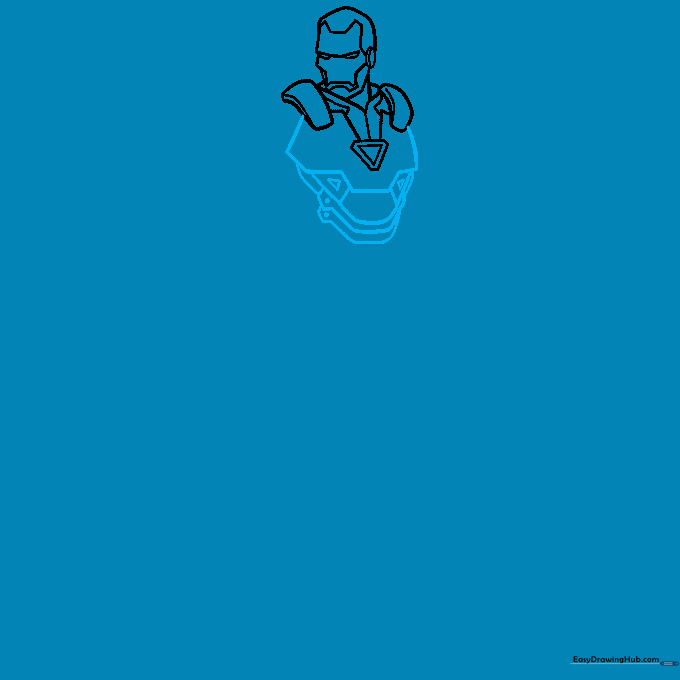
Draw the main torso using straight, clean lines for the armor plating. Teacher's Tip: Add small circles at the joints to represent the bolts holding the suit together; this gives your drawing a mechanical, authentic look.
Step 3: Sketching the First Arm
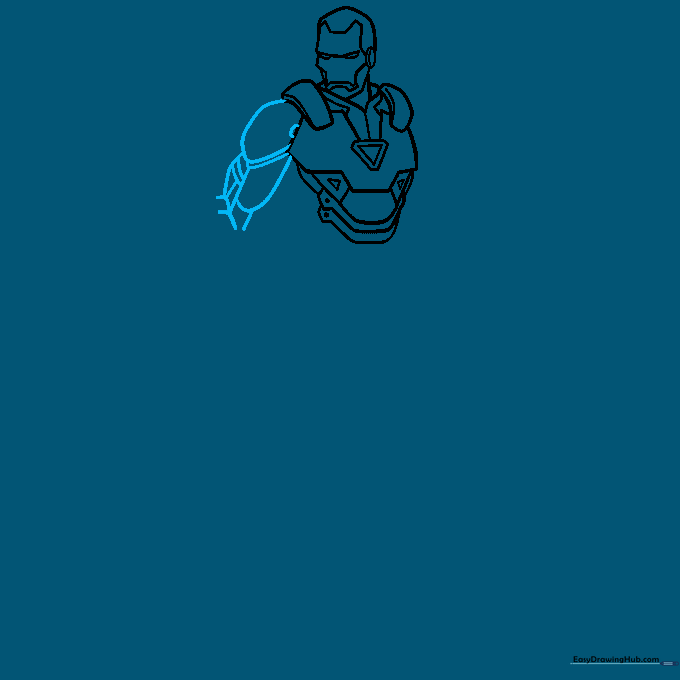
Outline the first arm using overlapping curved lines to suggest the muscular shape of the suit. Teacher's Tip: Think of the armor as separate plates layered over each other to create depth.
Step 4: Adding the Second Arm
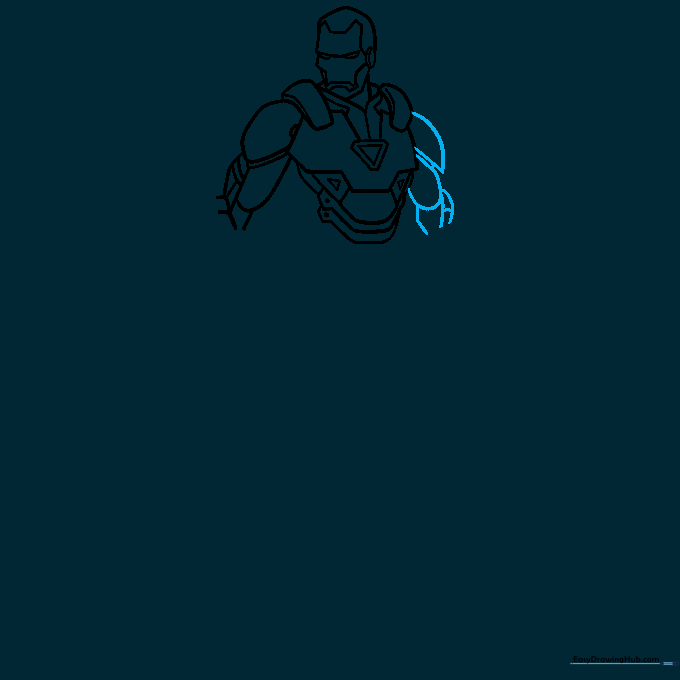
Mirror the process for the second arm. Teacher's Tip: Use your first arm as a guide to ensure the proportions match, keeping the width consistent on both sides.
Step 5: Drawing Gauntlets and Hands
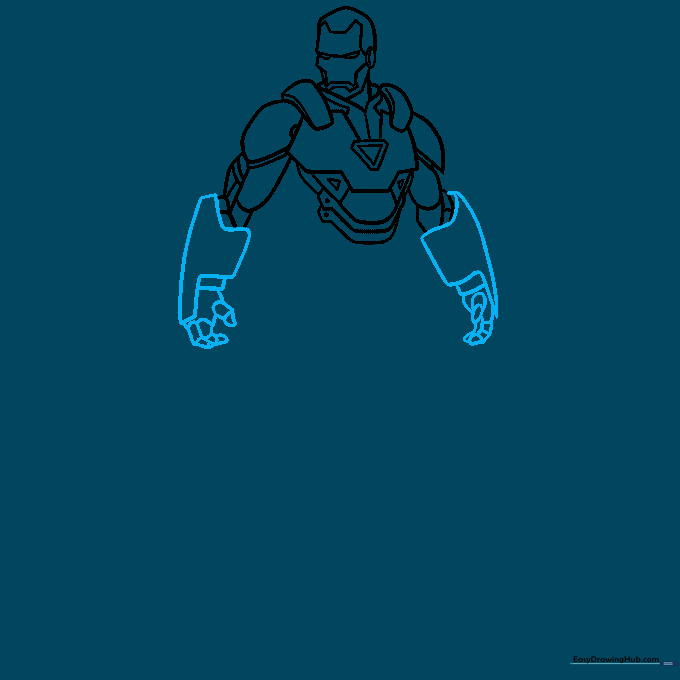
Enclose the hands and gauntlets with firm, curved lines. Teacher's Tip: Keep the shapes slightly irregular to mimic the high-tech, segmented look of the superhero suit.
Step 6: Completing the Torso Armor
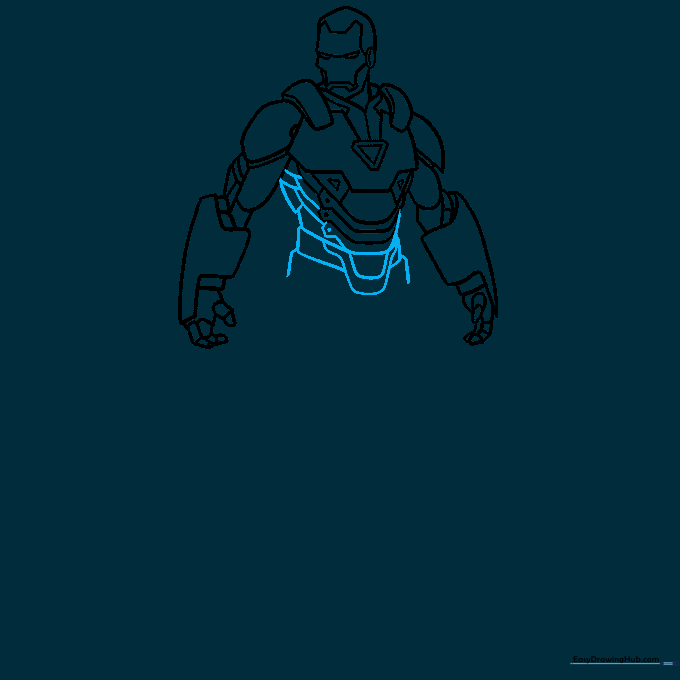
Add the final details to the torso, including the rounded rectangles along the sides. Teacher's Tip: These details help define the 'waist' of the armor, making the character look more dynamic.
Step 7: Sketching the First Leg
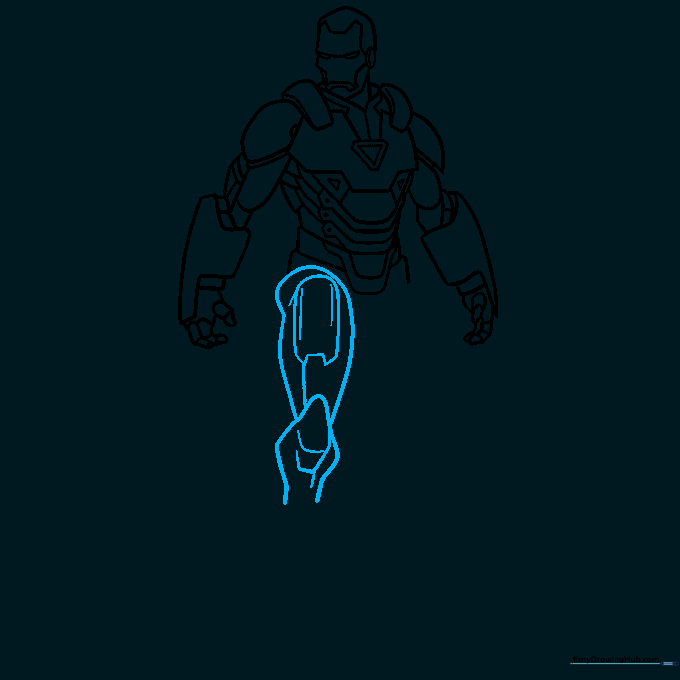
Draw the upper and lower leg using long, sweeping curved lines. Teacher's Tip: Overlap the lines at the knee joint to show where the armor plates connect.
Step 8: Sketching the Second Leg
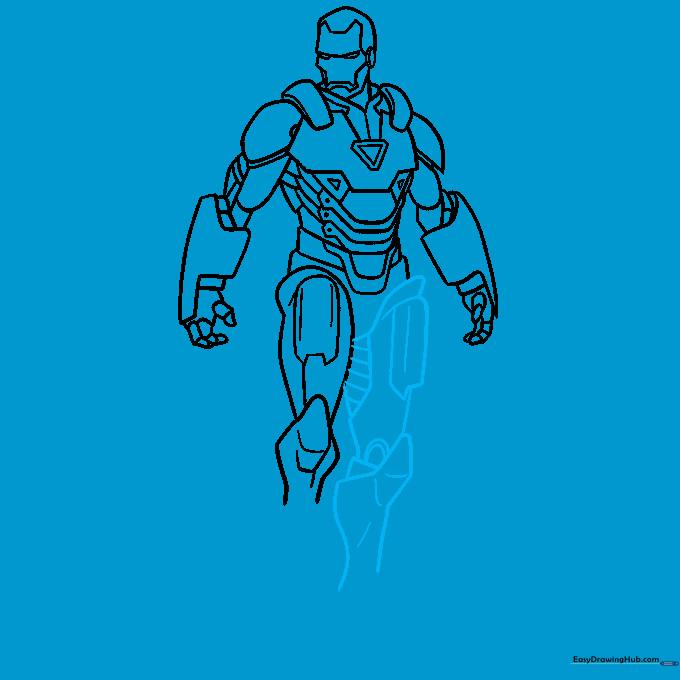
Repeat the leg drawing process for the other side. Teacher's Tip: Ensure the legs look balanced so your Iron Man looks ready for action, not falling over!
Step 9: Drawing the Boots
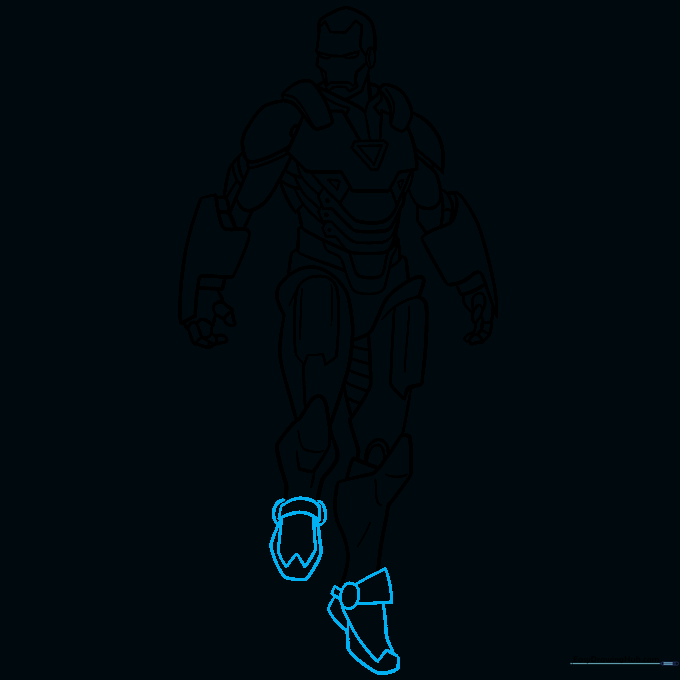
Finish the outline by drawing the boots, poised as if in flight. Teacher's Tip: Use sharp, angular lines for the feet to emphasize the metallic, heavy nature of the boots.
Step 10: Bringing Iron Man to Life with Color
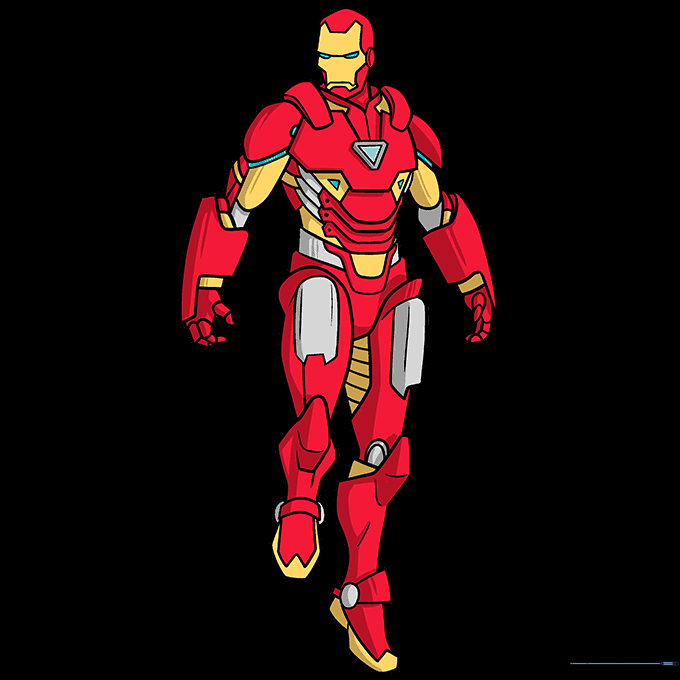
Time to color! Use classic Iron Man red for the main armor, yellow for the accents, and silver for the joints. Teacher's Tip: Use a light touch with your markers or pencils to keep the colors vibrant and smooth.
More Tutorials


