How to Draw Holiday Hello Kitty: Easy 10-Step Guide
Bring some festive cheer to your sketchbook with this adorable Holiday Hello Kitty drawing. Designed for young artists and beginners, this activity requires only a pencil, eraser, and paper to master. Follow these simple steps to build confidence in your character drawing skills while creating a perfect holiday keepsake.
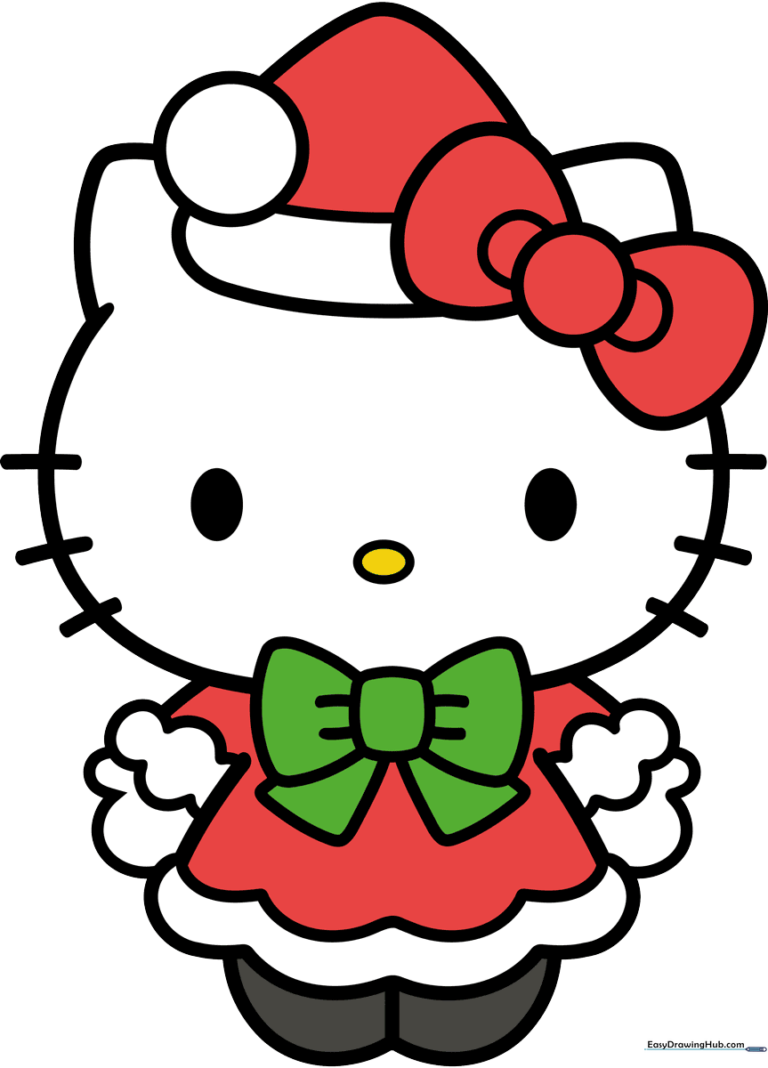
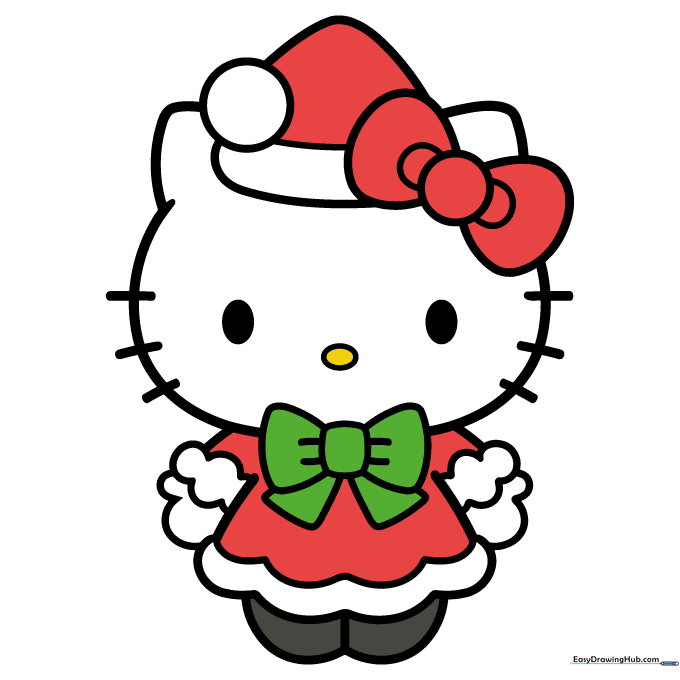
🎯 Final Result
Step-by-Step Instructions
Step 1: Sketching the Face

Start by drawing a soft, rounded shape for Hello Kitty's face. Add two small, shaded ovals for her eyes and a tiny oval for her nose. Teacher's Tip: Keep your pencil pressure light here so you can easily adjust the proportions if needed.
Step 2: Adding the Iconic Bow
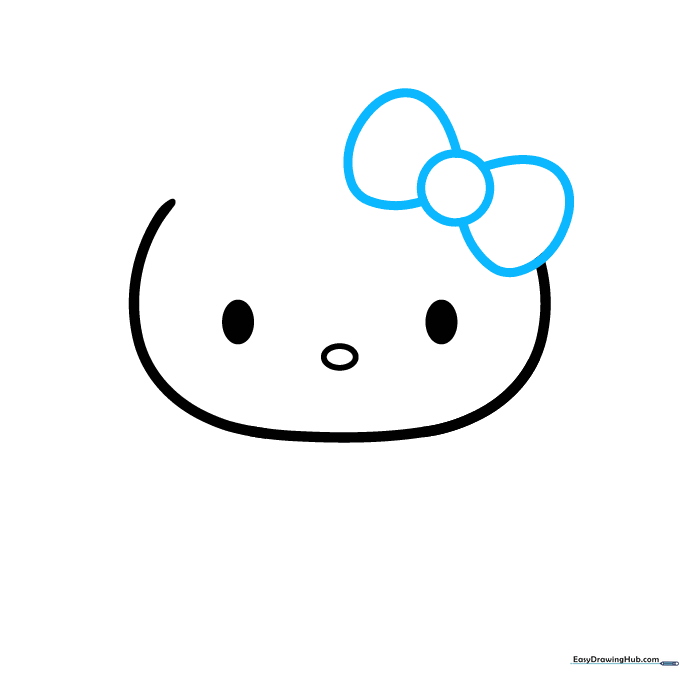
Draw a central circle, then outline a soft, rounded shape on each side to form the bow. Teacher's Tip: Make sure the bow is centered above the eyes to keep her face looking balanced.
Step 3: Detailing the Bow and Hat
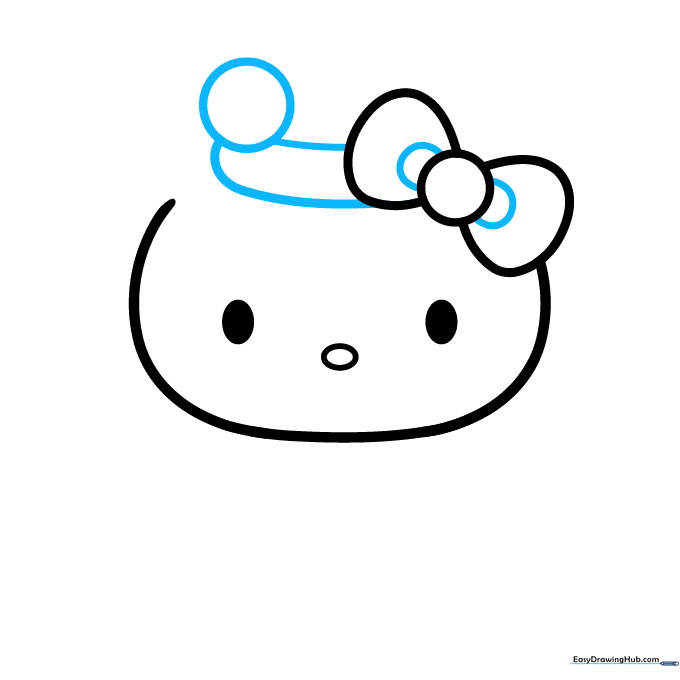
Add a 'U' shaped line on each side of the bow for texture. Then, use curved lines and a small circle to start the base of her Santa hat. Teacher's Tip: Use smooth, fluid motions for the hat brim to make it look soft and fuzzy.
Step 4: Ears and Whiskers
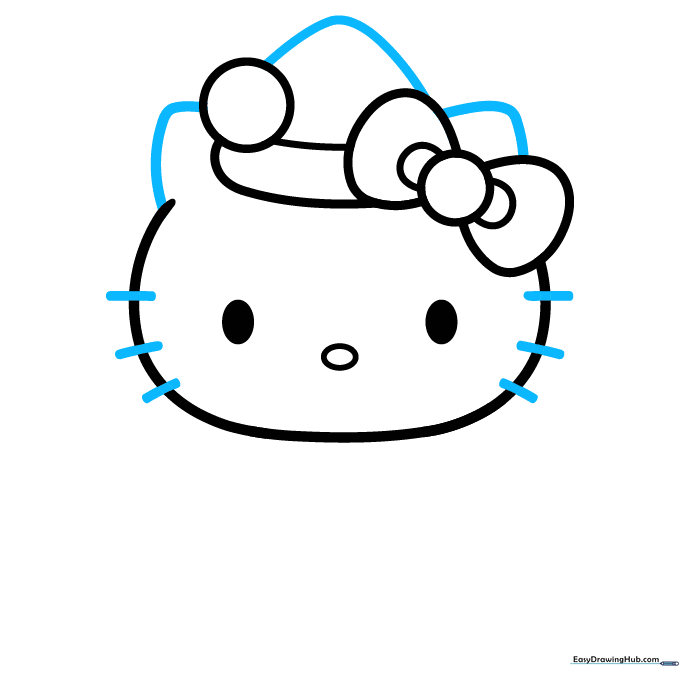
Use curved lines to define the ears and the top of the hat. Add three short, straight lines on each side of the face for her whiskers. Teacher's Tip: Keep the whiskers short and sharp to maintain her cute aesthetic.
Step 5: Drawing the Torso Bow

Draw a second bow beneath her face. Erase any overlapping lines from the body to keep the drawing clean. Teacher's Tip: Use your eraser to gently lift graphite before drawing the final clean lines.
Step 6: Adding Ribbons and Torso
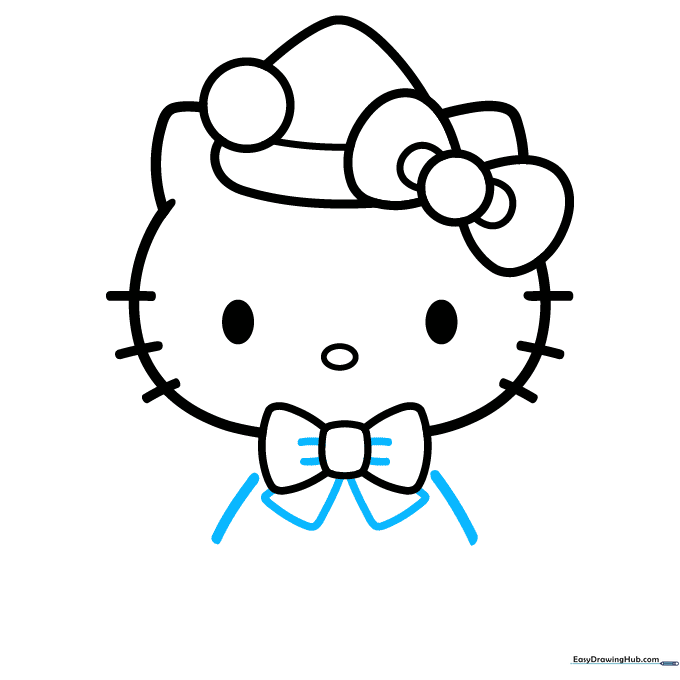
Add two short lines on the sides of the bow, then enclose the ribbons beneath it. Use diagonal lines to create the sides of her torso. Teacher's Tip: Keep the torso lines slightly curved to give her a natural, friendly shape.
Step 7: The Scalloped Dress
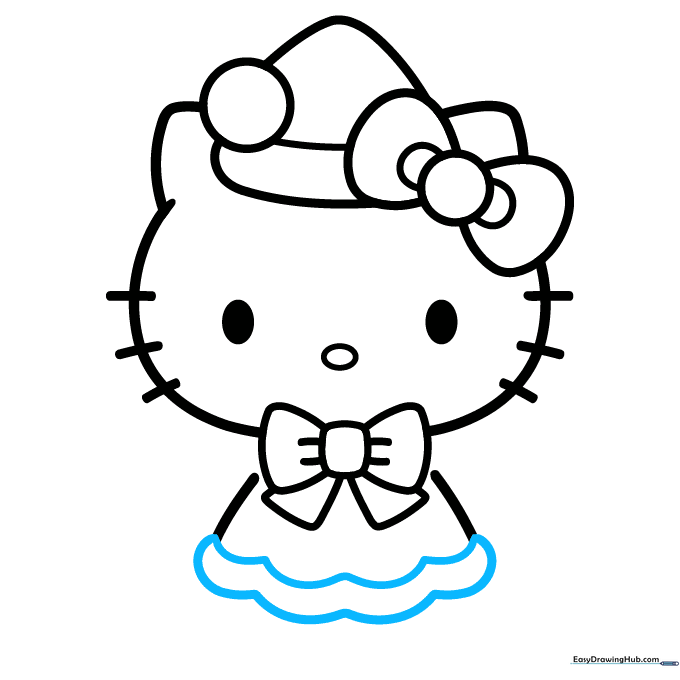
Use a series of curved lines to create a scalloped pattern at the bottom of her dress. Connect them with another series of lines to finish the hem. Teacher's Tip: Think of these as little 'U' shapes connected in a row.
Step 8: Adding Sleeves
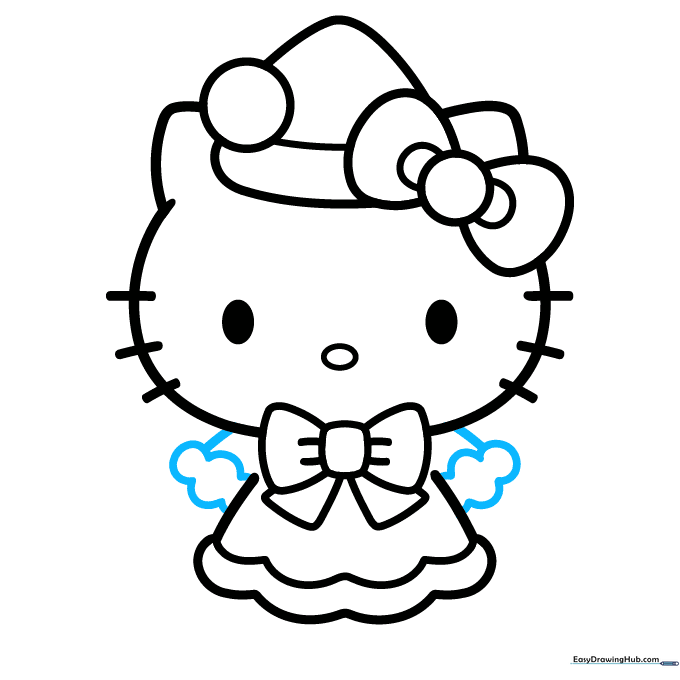
Enclose a cloudlike, scalloped pattern on each side to form the sleeves. Use short lines to connect them to the head area. Teacher's Tip: Keep the sleeves puffy to make her outfit look cozy.
Step 9: Finishing Hands and Feet
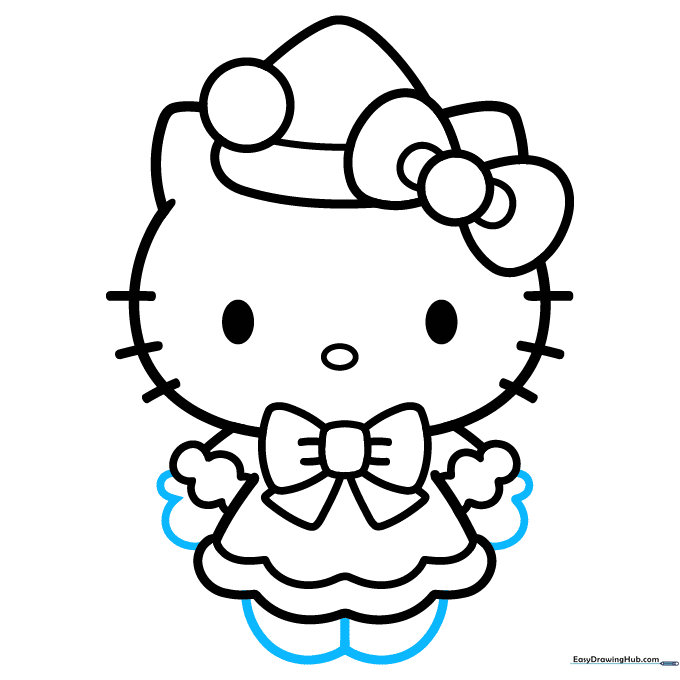
Use simple curved lines to enclose the hands and feet. Teacher's Tip: Keep these shapes rounded and simple—Hello Kitty's charm is in her minimalist design.
Step 10: Adding Color
Your outline is complete! Now, bring her to life with color. Use white for her fur, and vibrant red and green for her holiday outfit. Teacher's Tip: Use light, circular strokes when coloring to keep the pigment smooth and even.
More Tutorials


