How to Draw Crossed Hockey Sticks: Easy 10-Step Guide
Ready to hit the ice? This tutorial is perfect for young sports fans ages 6+ looking to master a classic hockey scene. You only need a pencil, an eraser, and a piece of paper to get started. Follow these steps to build confidence in your line work and create a dynamic sports illustration.
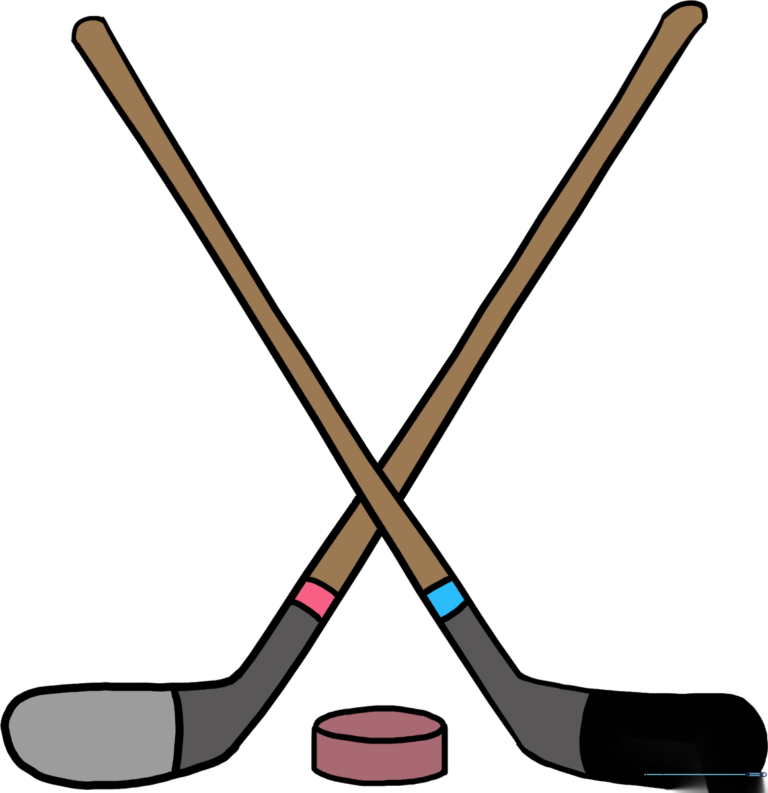
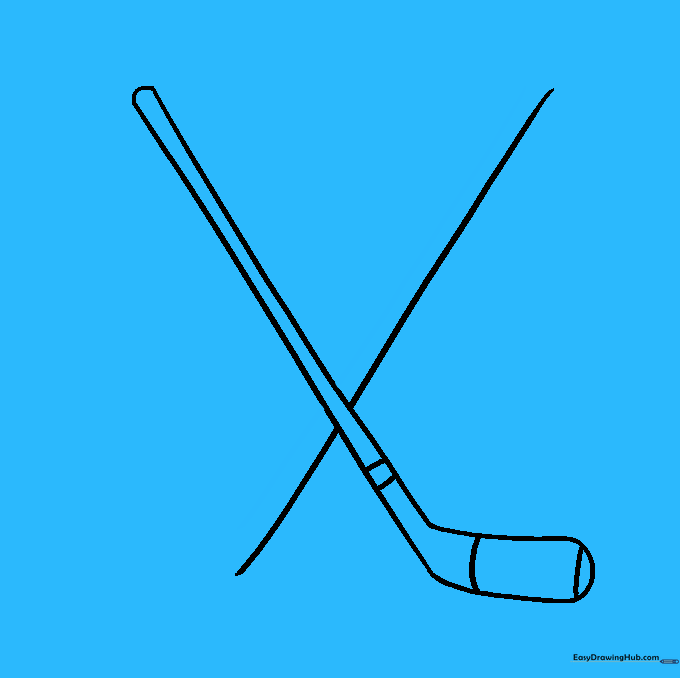
🎯 Final Result
Step-by-Step Instructions
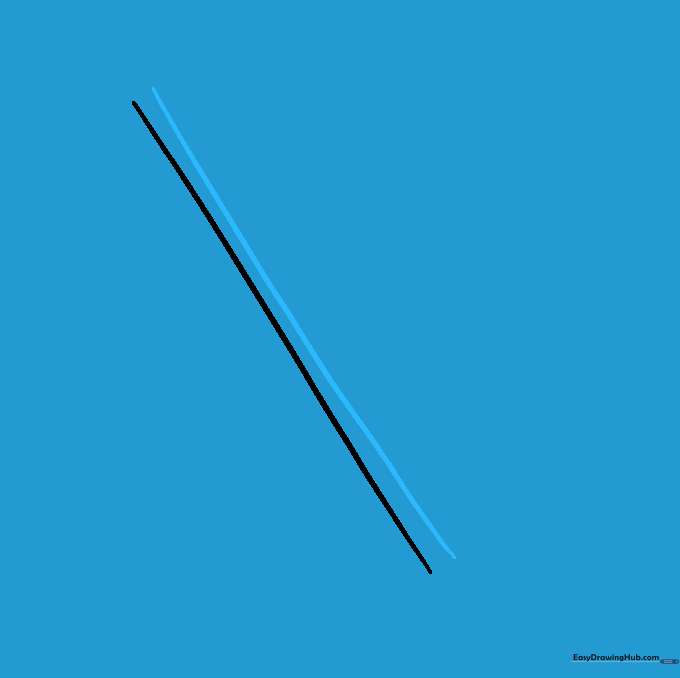
Sketching the First Shaft

Start by drawing a long, straight diagonal line. Teacher's Tip: Use a light touch with your pencil so you can easily adjust the angle if it feels too steep.
Defining the Stick's Width
Draw a second diagonal line parallel to the first. Keep the gap consistent to ensure your stick looks sturdy. Tip: Imagine you are drawing a long, thin rectangle.
Adding the Butt and Blade
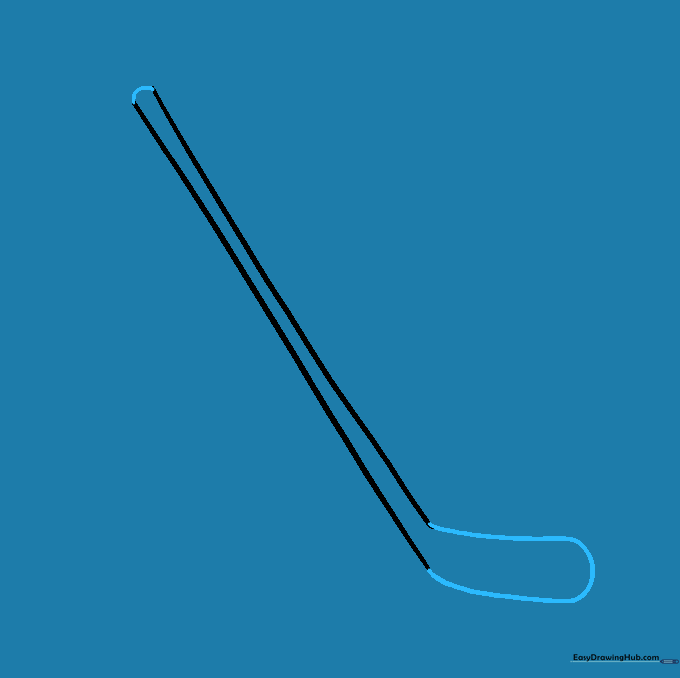
Close the top with a short curved line and add a larger, rounded curve at the bottom to form the blade. Tip: Make the blade curve look like a gentle 'J' shape.
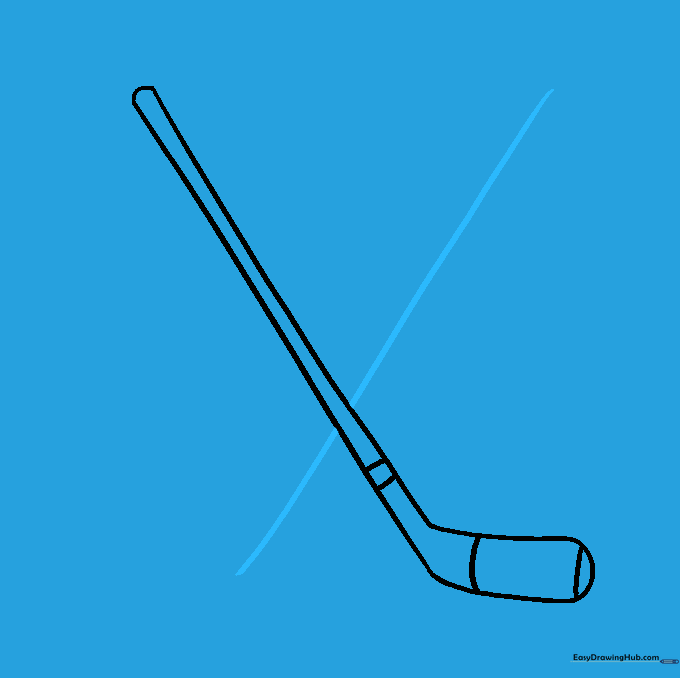
Adding Grip Tape Details

Draw curved lines across the shaft near the heel and the toe to represent grip tape. Tip: Keep these lines slightly rounded to give the stick a 3D appearance.
Positioning the Second Stick
Draw a new diagonal line crossing the first one. Tip: By drawing this line 'behind' the first stick, you create a sense of depth and perspective.
Completing the Second Shaft
Draw a parallel line for the second stick. Ensure the lines don't overlap the first stick to keep the 'crossed' effect clean. Tip: Use your eraser to clean up any lines that cross over the first stick.
Finishing the Second Blade

Add the top cap and the curved blade to the second stick. Tip: Make sure the blade points in the opposite direction of the first one to balance the composition.
Adding Tape to the Second Stick

Add the same tape details to the second stick. Tip: Vary the tape placement slightly to make the drawing look more natural and less like a mirror image.
Drawing the Hockey Puck
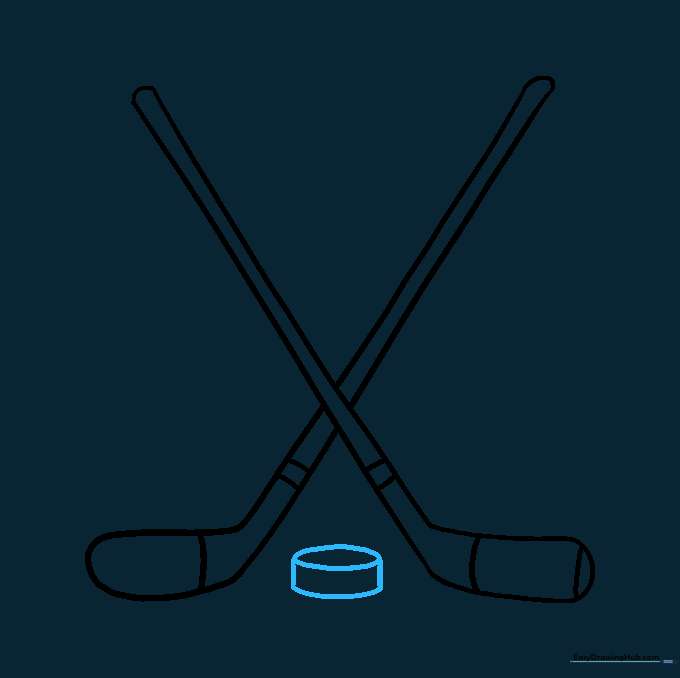
Draw a small, flattened oval between the two blades. Add short lines on the sides to give it thickness. Tip: A puck is just a cylinder seen from the side!
Adding Color
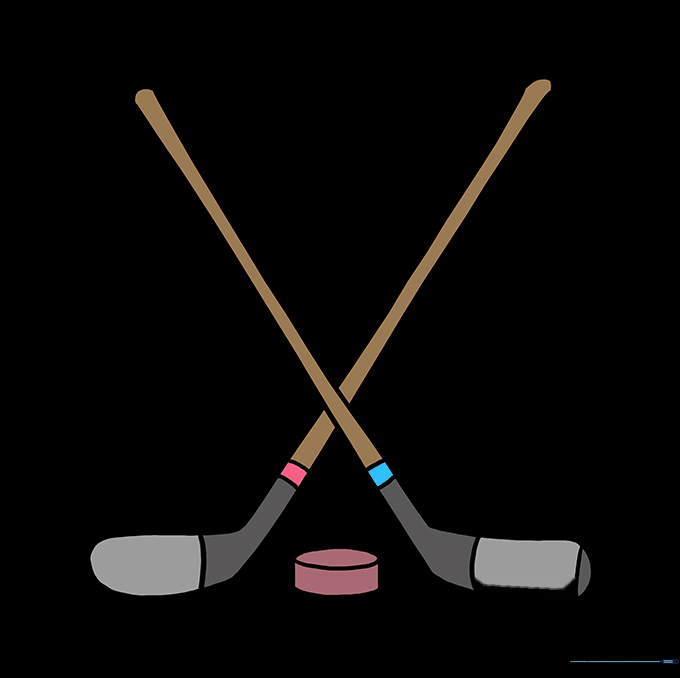
Bring your drawing to life with color! Use your favorite team's colors or classic wood tones for the sticks. Tip: Use a black marker to outline your work for a professional, bold finish.
More Tutorials


