How to Draw High Heels: Easy 9-Step Fashion Sketch Guide
Ready to design your own footwear? This tutorial is perfect for young artists ages 6+ looking to add flair to their fashion sketches. You will only need a pencil, an eraser, and a piece of paper to bring these elegant heels to life.
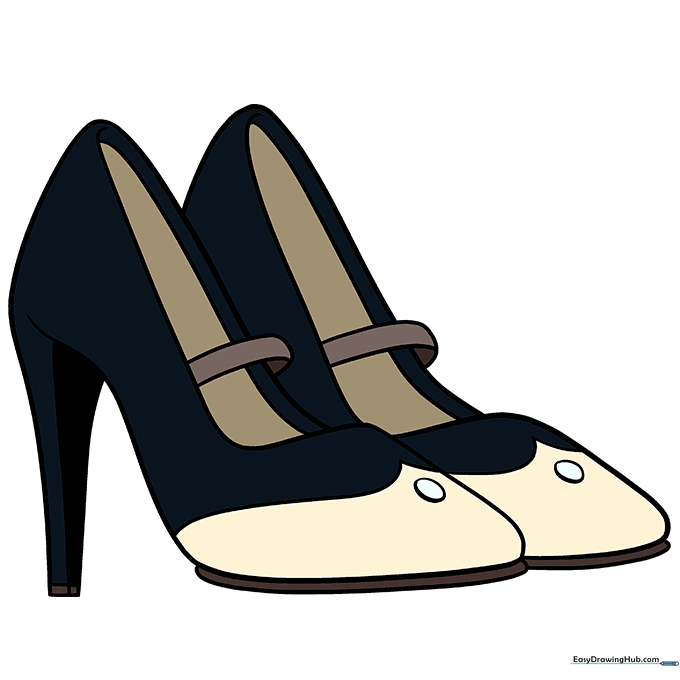
🎯 Final Result

Step-by-Step Instructions
Step 1: Sketching the Toe Box
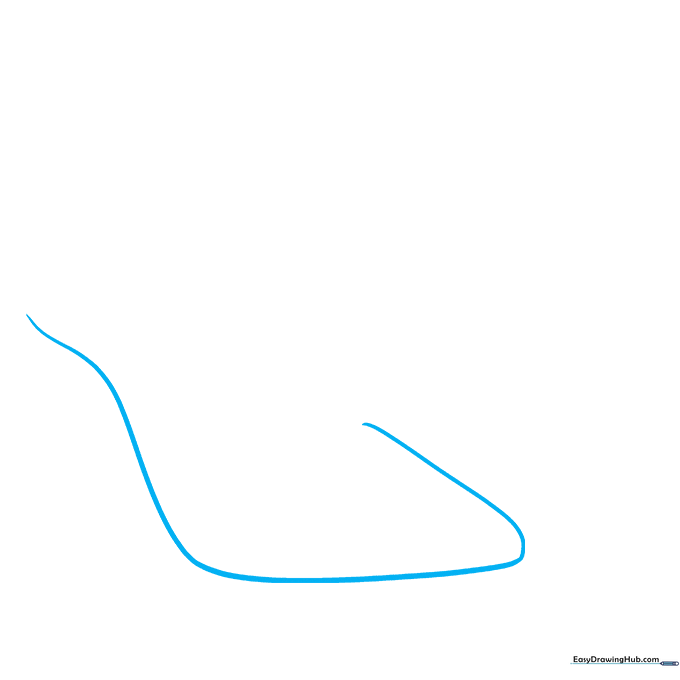
Start by drawing a long, gentle curve that loops back on itself to form the pointed toe box. Teacher's Tip: Keep the curve smooth and rounded to give the shoe a realistic, elegant shape.
Step 2: Defining the Upper
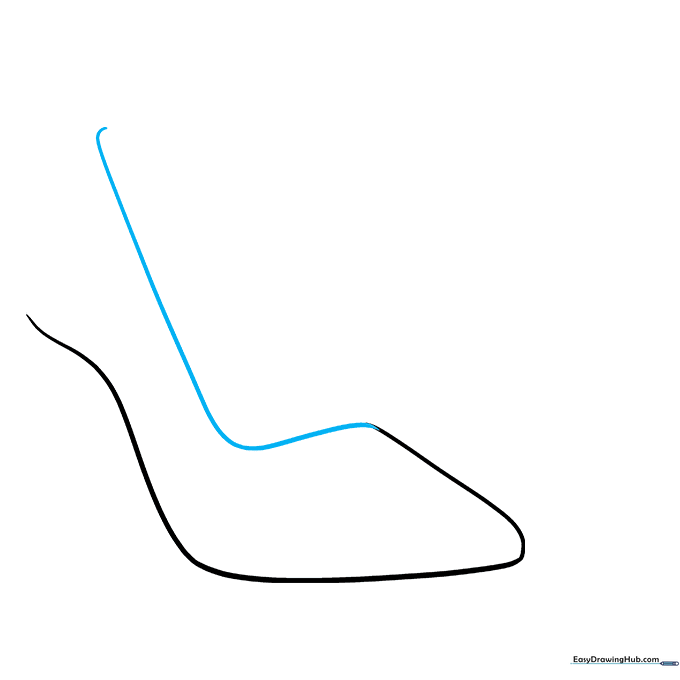
Extend the top line backward to create the opening of the shoe. Tip: Imagine the shape of a foot inside; the line should slope downward slightly toward the heel area.
Step 3: Forming the Stiletto Heel
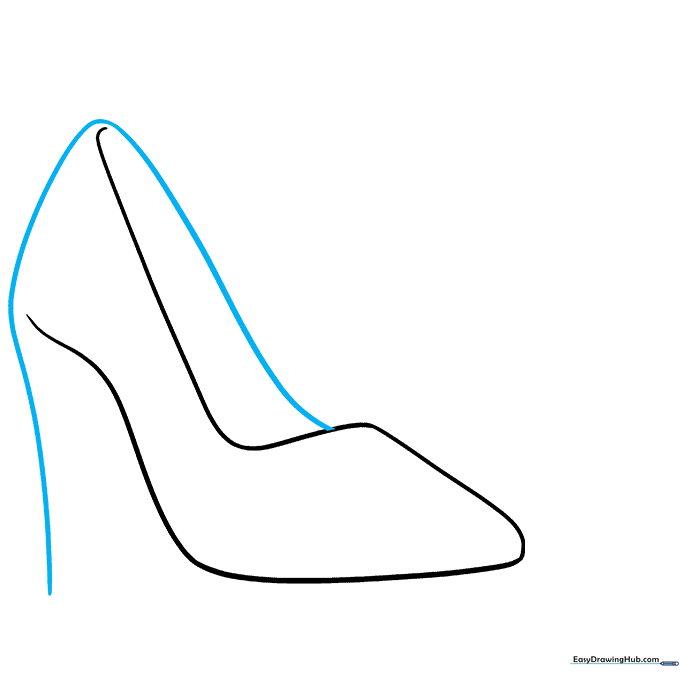
Draw a long, elegant curve from the top of the shoe down to the ground to form the back of the heel. Tip: Make sure the heel is narrow to give it that classic 'stiletto' look.
Step 4: Adding the Heel Cap
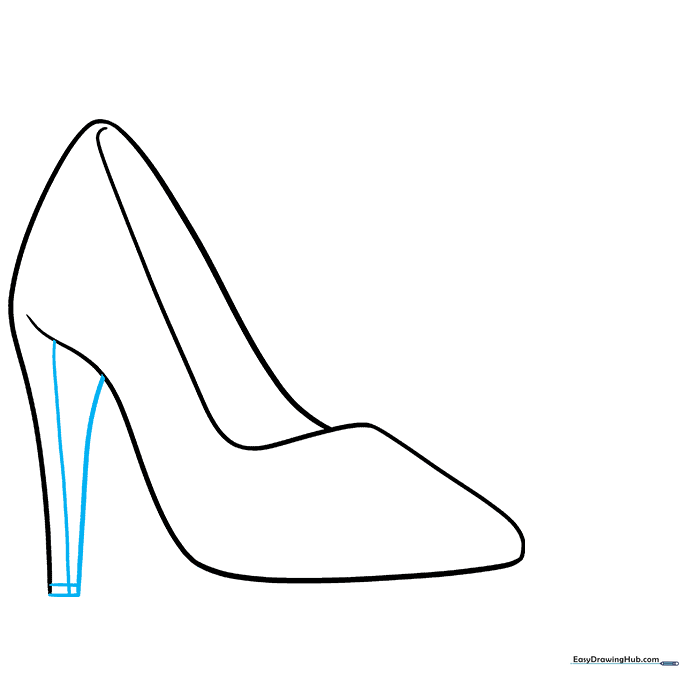
Draw a small rectangle at the very bottom of the heel. Connect it to the shoe with two short, angled lines. This represents the rubber cap that helps with balance!
Step 5: Defining the Sole
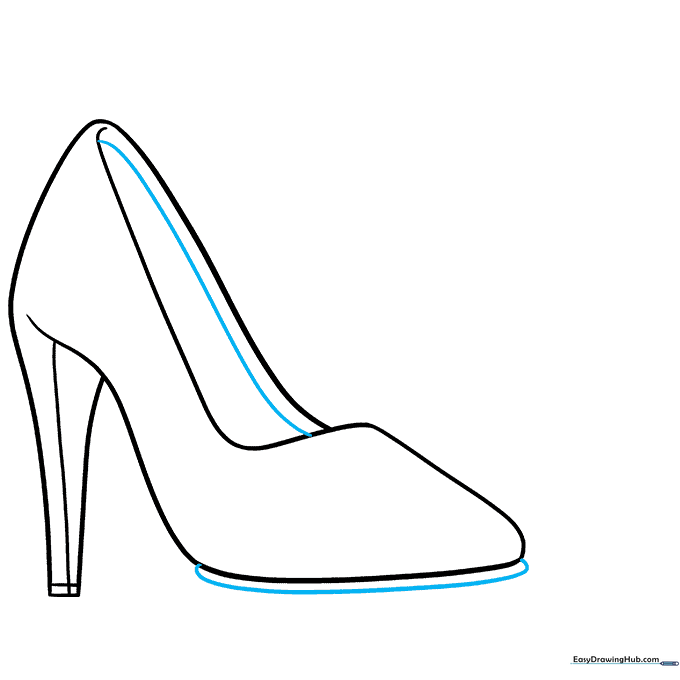
Add a curved line inside the shoe opening and another along the bottom of the toe box to create the sole. Tip: This adds depth and makes the shoe look three-dimensional.
Step 6: Adding Straps and Details
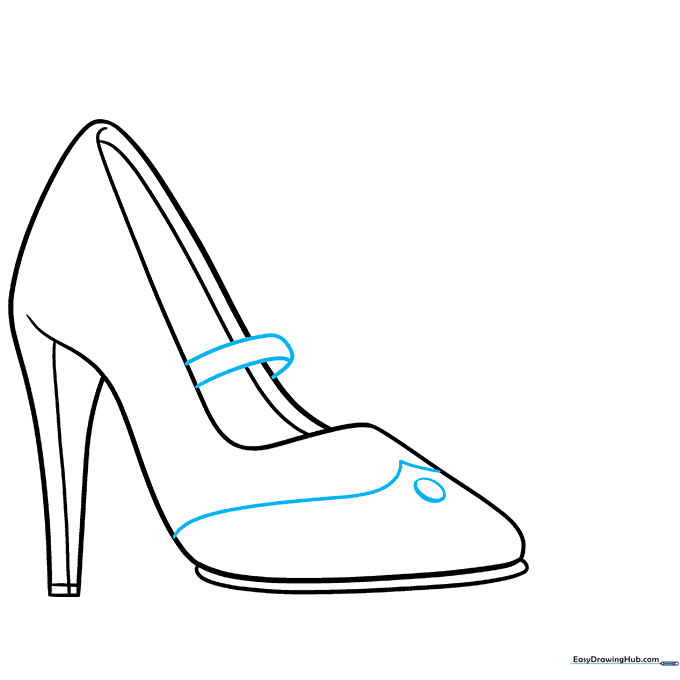
Draw two intersecting curved lines across the opening to create a stylish strap. Add a small oval and two lines on the toe box for a decorative touch. Tip: Keep these lines light so they look delicate.
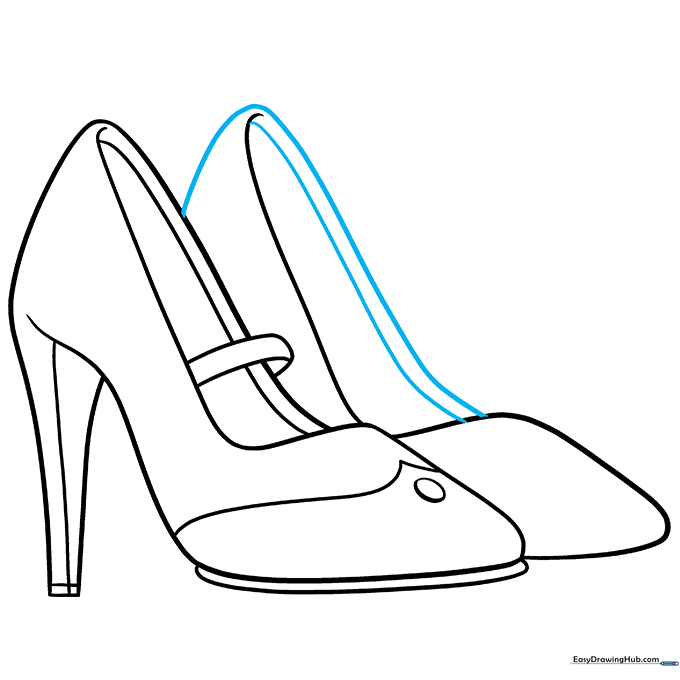
Step 7: Starting the Second Shoe

Repeat the process from Step 1 to outline the second shoe. Tip: Try to place it slightly behind the first one to create a sense of perspective.
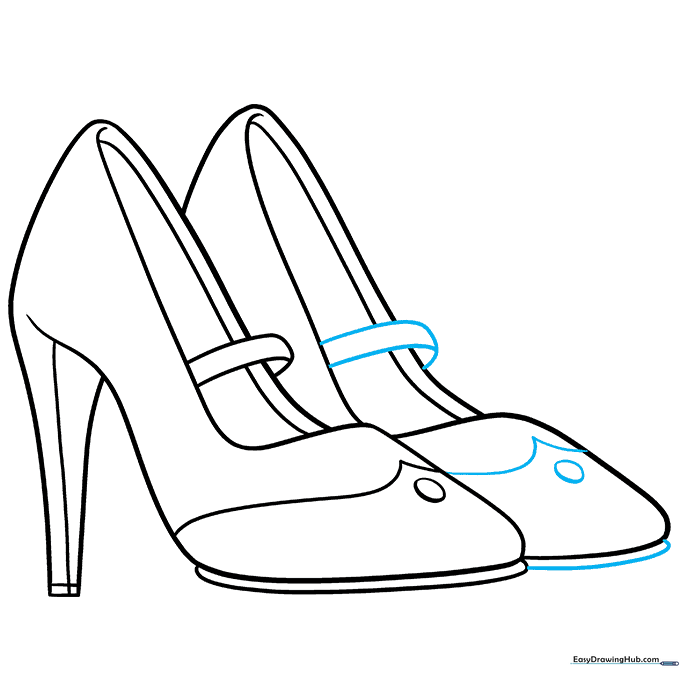
Step 8: Completing the Second Shoe
Connect the lines of the second shoe to match the style of the first. Ensure the top opening and sides align with your first shoe's proportions.
Step 9: Final Touches
Add the final straps and sole details to the second shoe to match the first. Now your pair of high heels is complete and ready for color!
Step 10: Bring Your Design to Life
Time to color! Use bright, bold colors or soft pastels to match your favorite outfit. Tip: Use a darker shade on the inside of the heel to create a shadow effect.
More Tutorials


