How to Draw Hercules: Easy 10-Step Guide for Kids
Bring the legendary hero to life with this fun, step-by-step drawing guide designed for young artists ages 6 and up. You will only need a pencil, an eraser, and some paper to master Hercules' heroic proportions. Follow along to build confidence in your character sketching skills while creating your own mythological masterpiece.
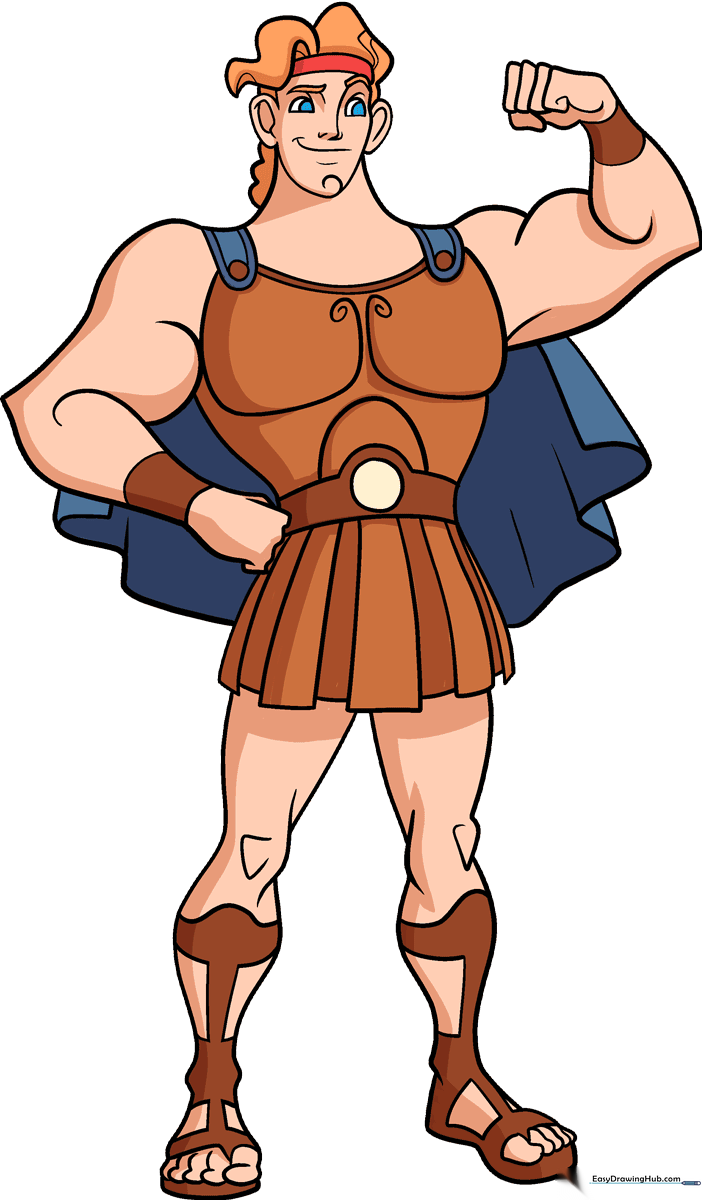
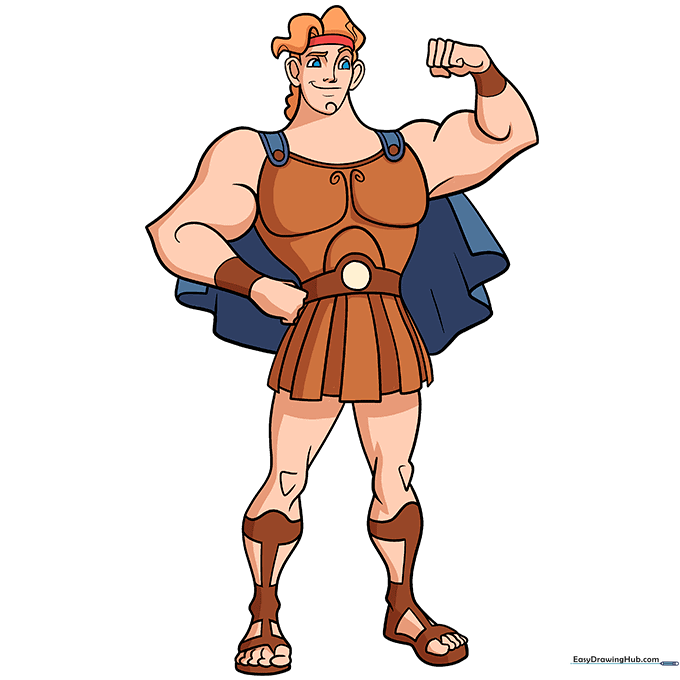
🎯 Final Result
Step-by-Step Instructions
Step 1: Sketching the Facial Features

Near the top of your page, sketch two semi-ovals for the eyes. Add a vertical line near the right eye and short curves for the nose and mouth. Teacher's Tip: Keep your pencil pressure light here; these are just guidelines for your hero's face shape.
Step 2: Defining the Neck and Hairline

Draw two curves for the neck and add semi-ovals for the shoulders. Sketch the hair using swooping curves and rounded triangles. Teacher's Tip: Think of the hair as big, soft shapes rather than individual strands to keep the cartoon look clean.
Step 3: Sketching the Left Arm
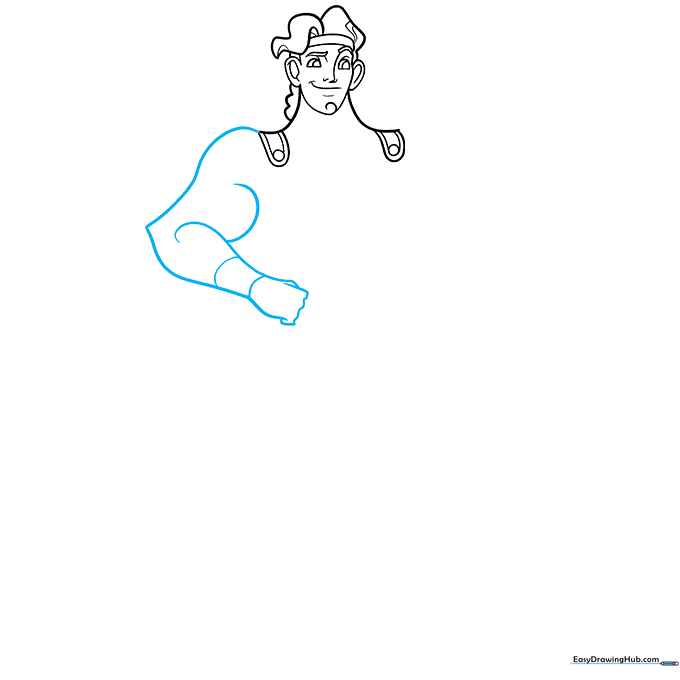
Sketch two curved lines for the left arm, connecting them at a point. Outline the wristband with two lines and add the thumb and pinky. Teacher's Tip: Use a 'C' shape for the wrist to give it a sense of volume.
Step 4: Drawing the Right Arm
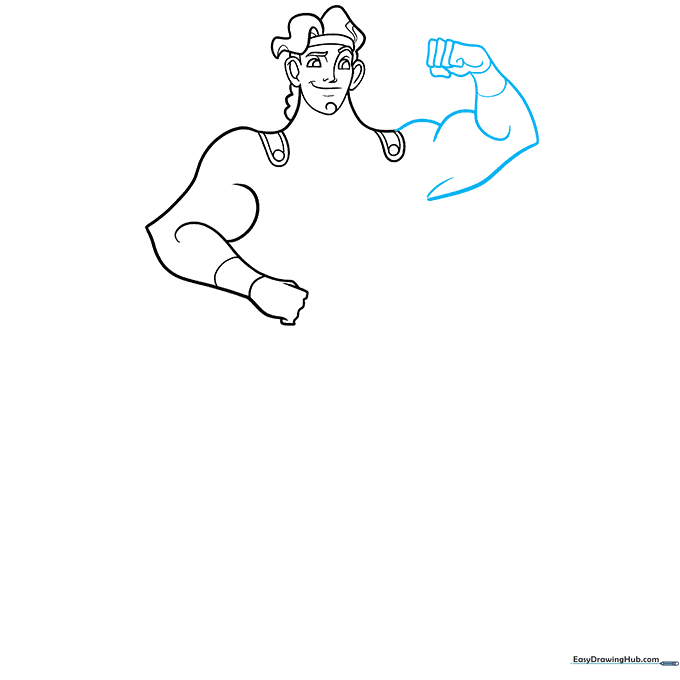
Draw the right forearm using a C-shape and add the wristband. Sketch the fingers as loose, rounded rectangles. Teacher's Tip: Keep the fingers slightly rounded to make the hand look natural rather than stiff.
Step 5: Adding Armor Details
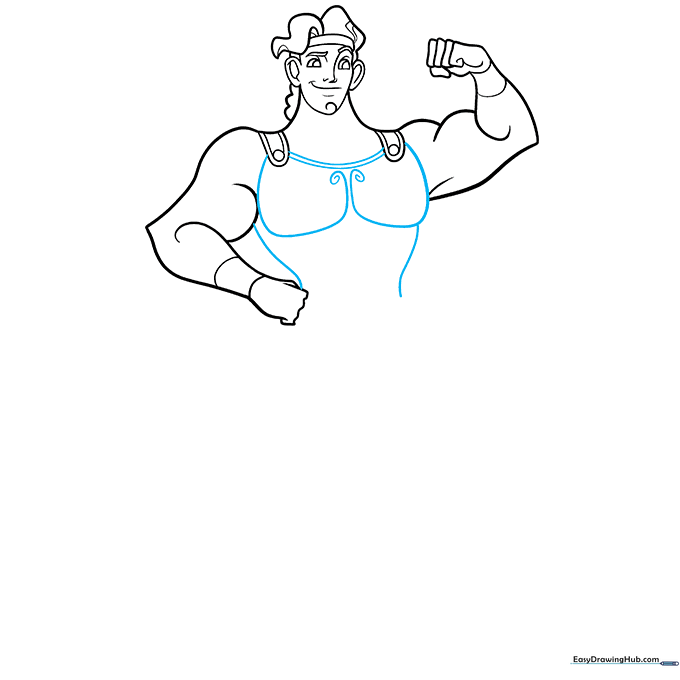
Connect the shoulder straps with two curves and draw two rounded squares that end in spirals. Teacher's Tip: Spirals can be tricky—try drawing them slowly in one continuous motion.
Step 6: Starting the Lower Body
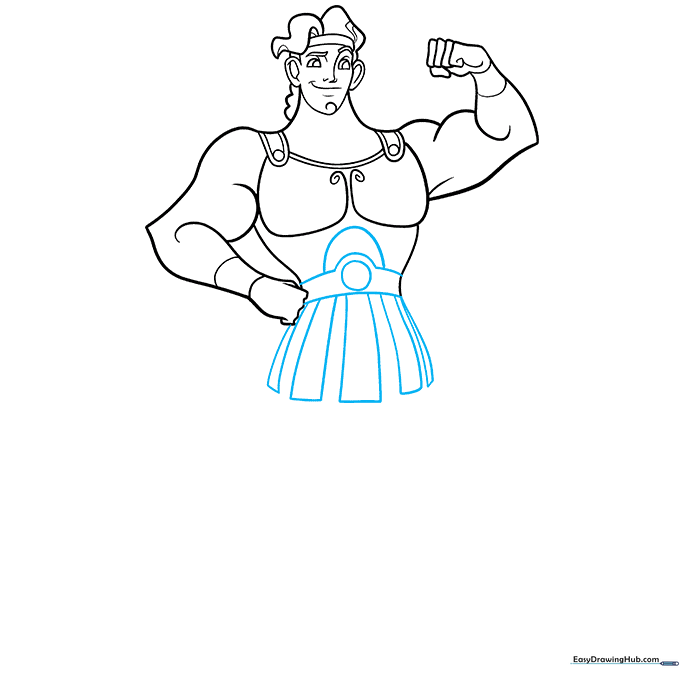
Draw a circle for the waist, surrounding it with a hill shape and vertical curves. Add five curved rectangles underneath for the tunic. Teacher's Tip: Keep these shapes symmetrical to help the character look balanced.
Step 7: Drawing the Left Leg
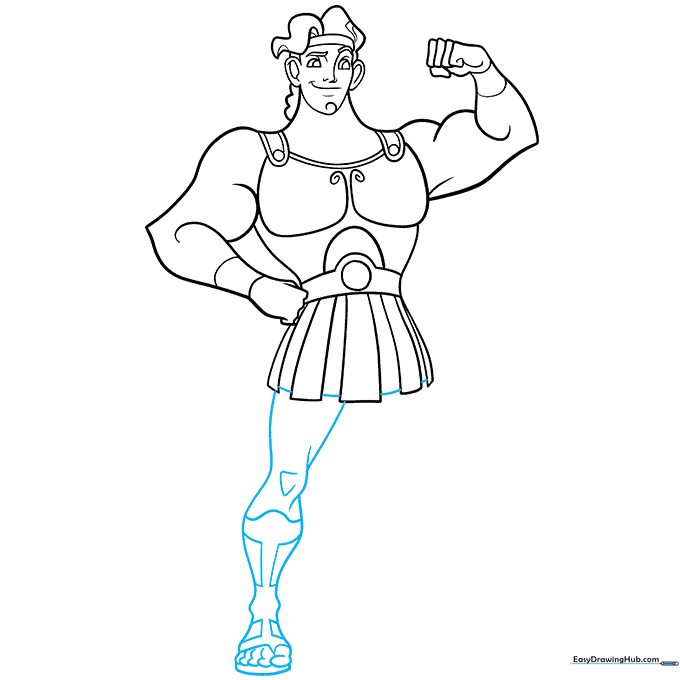
Outline the leg with two diagonal lines, adding a bump for the knee and ankle. Use ovals for the toes. Teacher's Tip: The knee bump is essential for making the leg look like it's bending correctly.
Step 8: Drawing the Right Leg
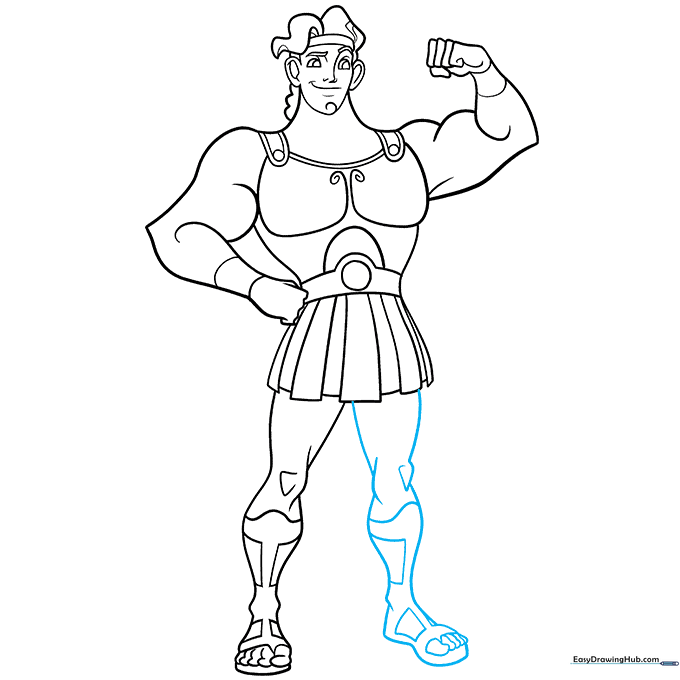
Repeat the previous step for the right leg, angling it slightly to the right to create a dynamic stance. Teacher's Tip: Compare the two legs to ensure they are roughly the same length.
Step 9: Finalizing the Outline
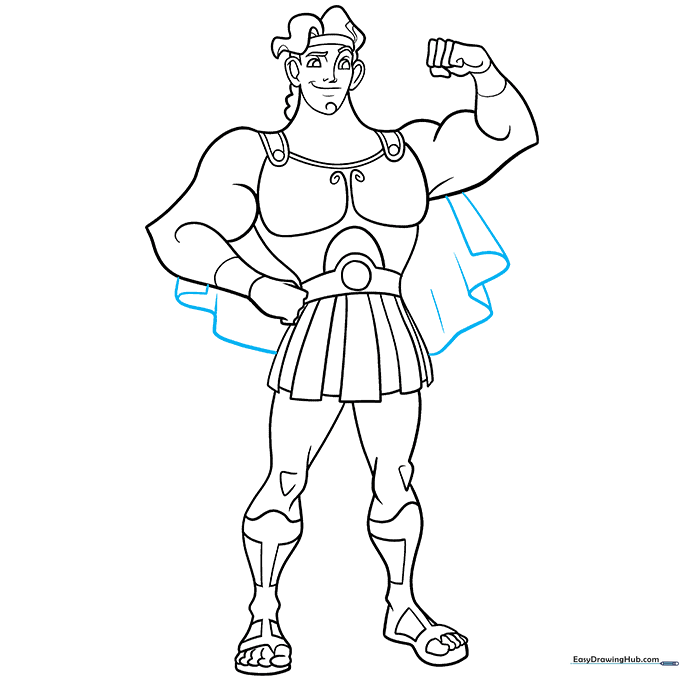
Sketch two wavy lines behind the body for the cape. Once you are happy with your shapes, go over your lines with a black pen or dark pencil. Teacher's Tip: Use smooth, confident strokes when outlining to make your drawing look professional.
Step 10: Bringing Hercules to Life with Color
Color your hero with tan skin, blue eyes, and vibrant orange hair. Use red for the headband, bronze for the armor, and blue for the cape. Teacher's Tip: Try coloring in one direction to keep your work looking neat and even.
More Tutorials


