How to Draw Harley Quinn: Easy 10-Step Guide for Kids
Bring the iconic Harley Quinn to life with this fun, beginner-friendly drawing tutorial. Designed for ages 6 and up, this guide uses basic shapes to help you master her classic jester look. Grab your pencil and eraser—let’s get started on your masterpiece!
🎯 Final Result

Step-by-Step Instructions
Step 1: Sketching the Face Shape

Start by sketching Harley's face outline. Use light, curved lines for the forehead, cheeks, and chin. Teacher's Tip: Keep your pencil pressure very light here so you can easily adjust the shape if it looks a bit lopsided.
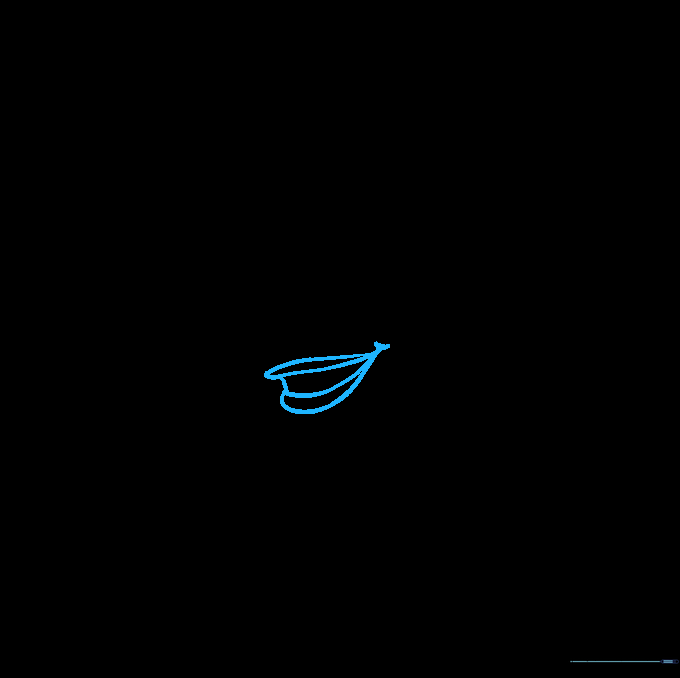
Step 2: Starting the Jester Hat

Extend curved lines from the forehead to create the base of her jester cap. Leave a small gap at the top, then draw a triangular sleeve shape with a circle at the end for the bell. Tip: Think of the bell as a small bead hanging from a string.
Step 3: Adding the Second Hat Flap
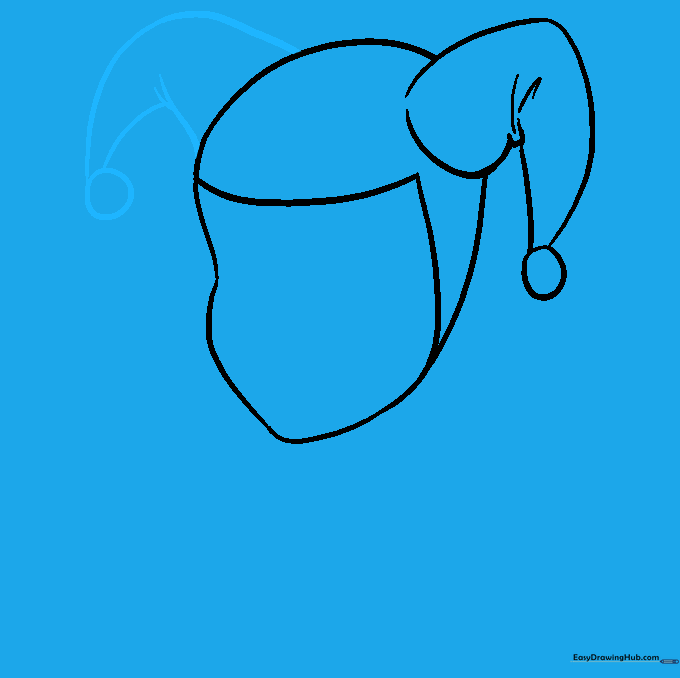
Repeat the process for the other side of the hat. Add small, jagged lines near the bend to represent fabric folds. Tip: Adding these tiny details makes your drawing look much more professional and realistic.
Step 4: Defining the Mask
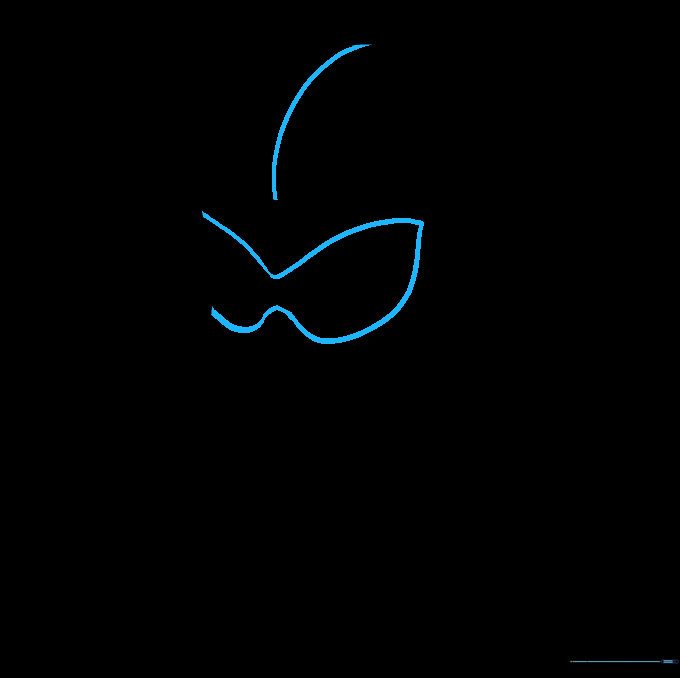
Draw a curved line across the cap to show where the colors will change. Then, sketch the butterfly-shaped mask over her eyes. Tip: Use a light touch; if the mask looks uneven, use your eraser to gently soften the curves.
Step 5: Drawing the Eyes and Nose
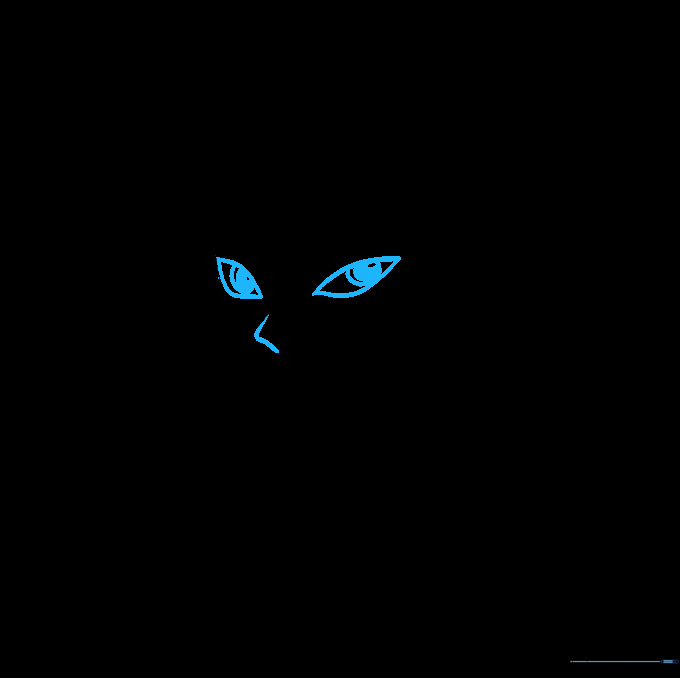
Add a small 'V' shape for the nose. For the eyes, draw two almond shapes with three circles inside each for the pupils. Tip: Shading the pupil dark helps bring the character to life!
Step 6: Adding the Mouth
Draw the lips with a slight curve to show a smile. Include a small line for the teeth and a dimple at the corner. Tip: Keep the lines connecting the lips smooth to give her a friendly, mischievous expression.
Step 7: Sketching the Neck and Collar

Draw two vertical lines for the neck, then connect them with a curved line that doubles back to form the collar. Tip: Make sure the collar looks wide to match her classic jester costume.
Step 8: Completing the Collar
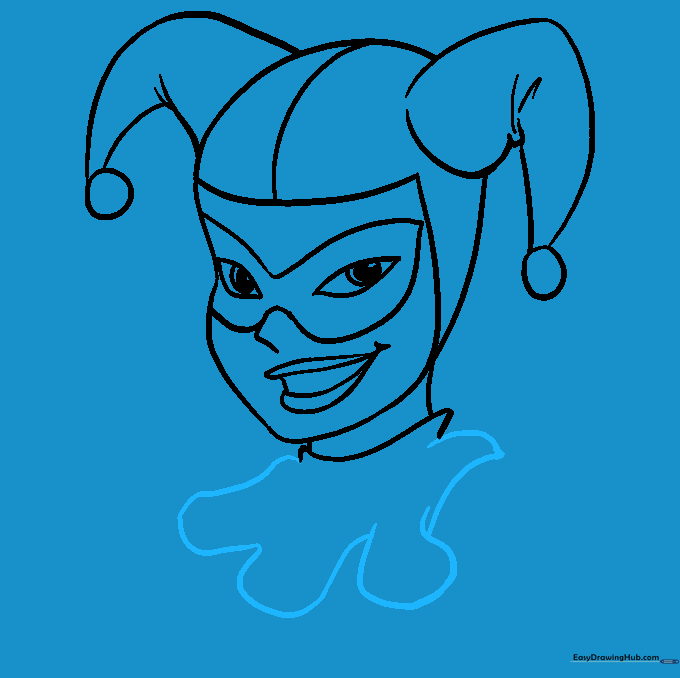
Extend a curved, scalloped line from the collar to create the full jester shape. Tip: Use a fluid motion with your wrist to get those nice, rounded scallops.
Step 9: Adding Final Details
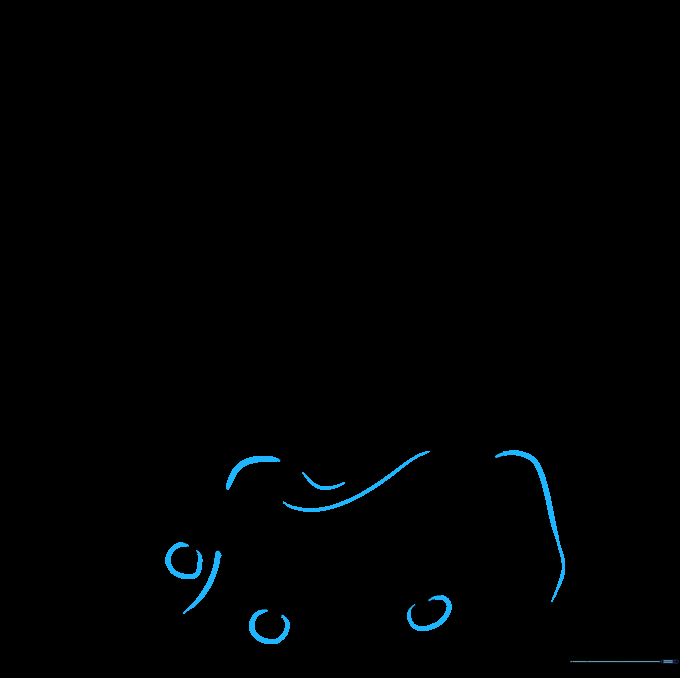
Draw the shoulders and add small circles at the tips of the collar for the bells. Tip: Double-check your lines—if you want to ink your drawing, now is the time to go over your pencil lines with a fine-tip marker.
Step 10: Coloring Your Drawing
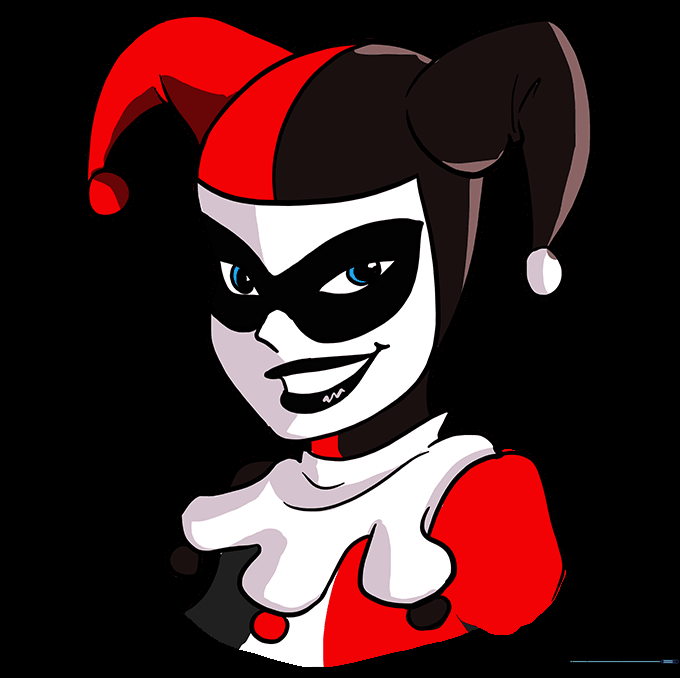
Time to color! Use Harley's signature red and black palette. Tip: Use light, even strokes with your colored pencils to keep the colors vibrant and smooth.
More Tutorials


