How to Draw Grandpa: Easy 10-Step Guide for Kids
Celebrate family with this fun, step-by-step drawing lesson perfect for artists ages 6 and up. All you need is a pencil, an eraser, and a piece of paper to bring this friendly character to life. Follow along to practice facial proportions and character design in a simple, stress-free way.
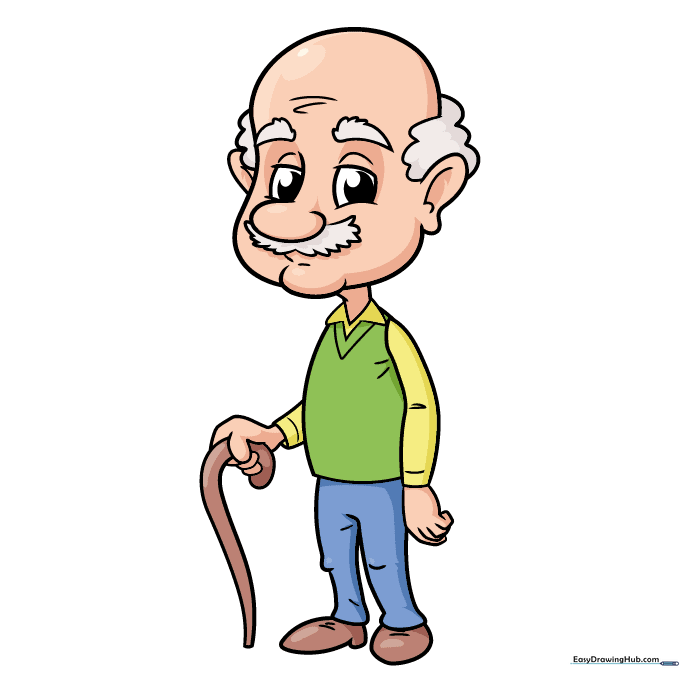
🎯 Final Result

Step-by-Step Instructions
Step 1: Sketching the Nose and Eye
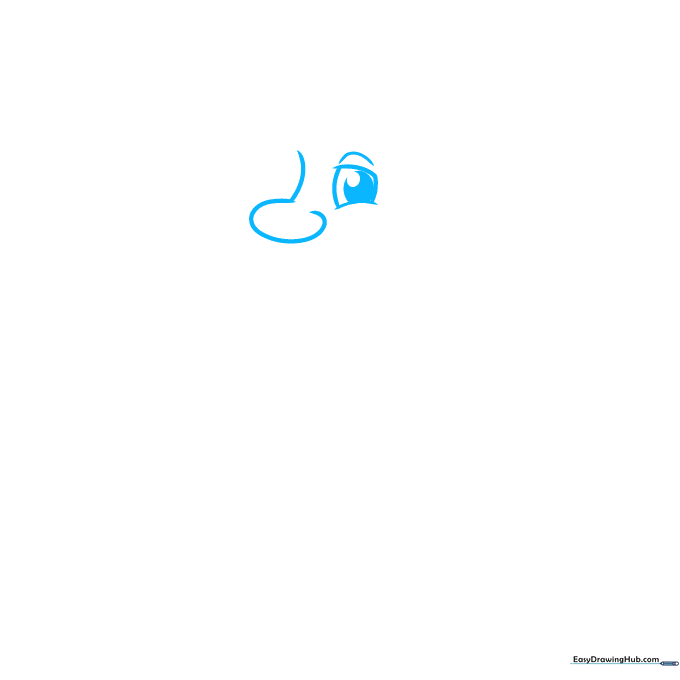
Start by drawing the nose using soft, overlapping curved lines. Then, place a curved line above it for the cheek and draw a rectangular eye. Tip: Keep the eye shape simple; draw a small circle inside for the pupil and shade it in to give your character personality.
Step 2: Adding the Mustache and Second Eye
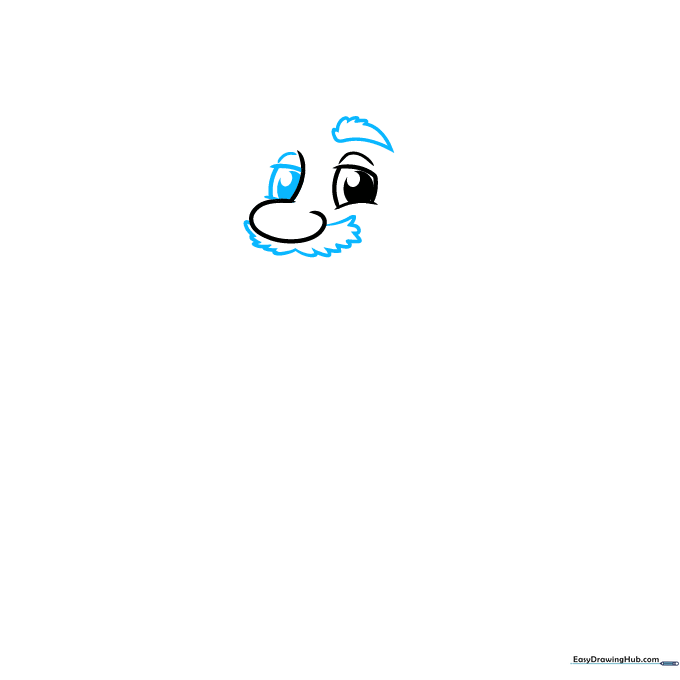
Mirror the first eye on the other side of the nose. Now, add a bushy mustache using short, connected 'U' shaped lines. Tip: Use quick, flicking motions with your pencil to make the mustache look textured and full.
Step 3: Defining the Face Shape
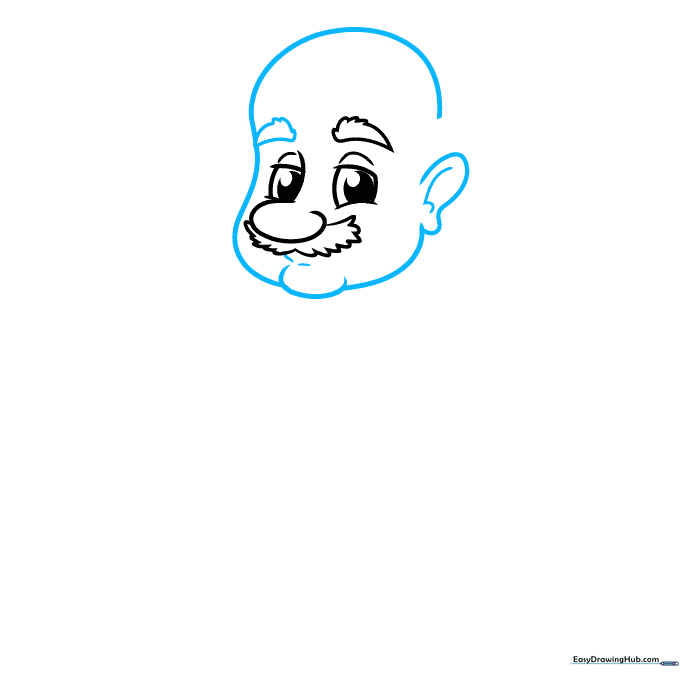
Draw the second eyebrow, then outline the head, chin, and ear using long, smooth curves. Add a few small lines inside the ear for detail. Tip: If the chin looks too sharp, gently round it off with your eraser.
Step 4: Hair, Wrinkles, and Collar
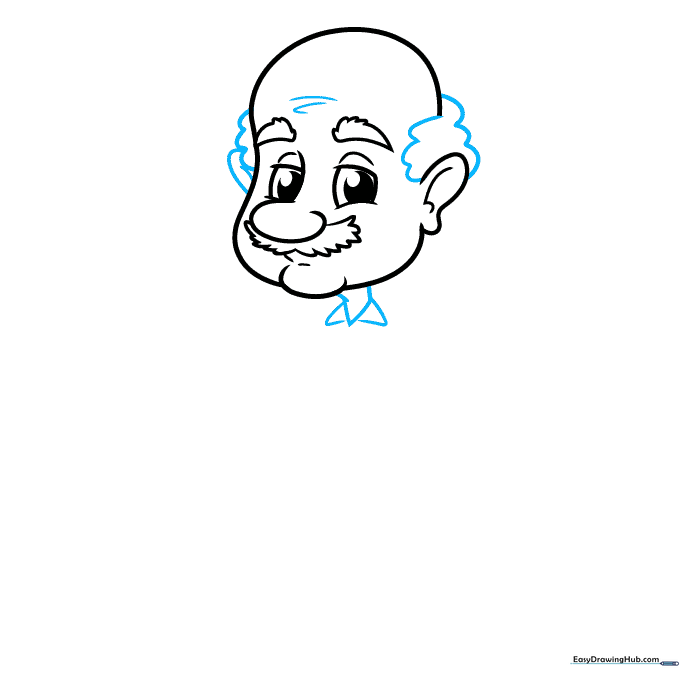
Add wavy lines for hair above the ears and small lines between the eyebrows to show character. Draw a 'V' shape for the neck and collar. Tip: Wrinkles are just small, curved lines—don't worry about making them perfect!
Step 5: Drawing the Arms
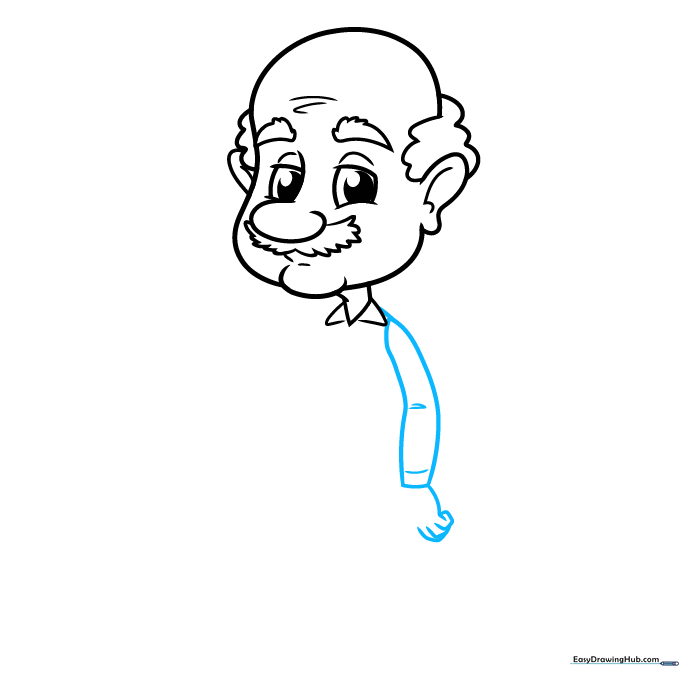
Sketch the sleeves using long, curved lines that taper toward the wrists. Add simple shapes for the hands. Tip: Keep the arms slightly bent to make the pose look more natural and relaxed.
Step 6: Adding the Vest
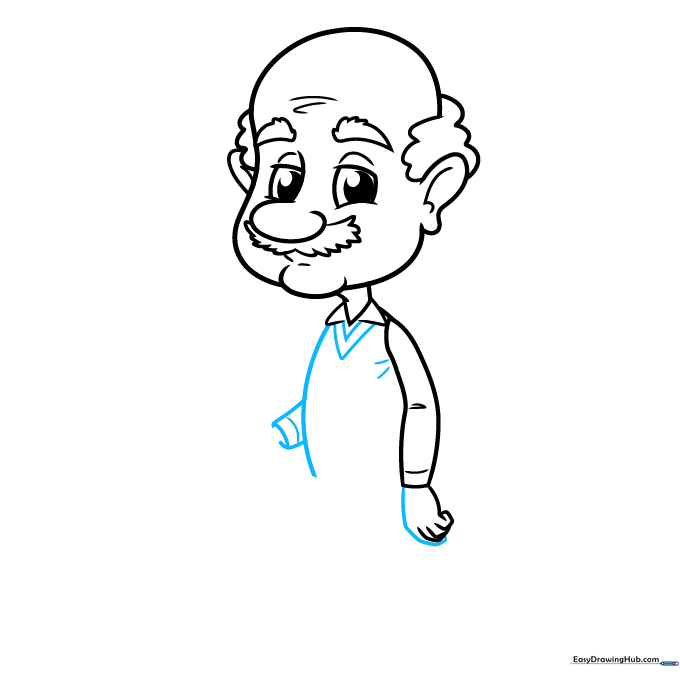
Draw the vest opening with 'V' lines and connect the torso. Add small details like buttons or fabric folds. Tip: Use light pressure to draw the vest so it doesn't overpower the face.
Step 7: The Walking Cane
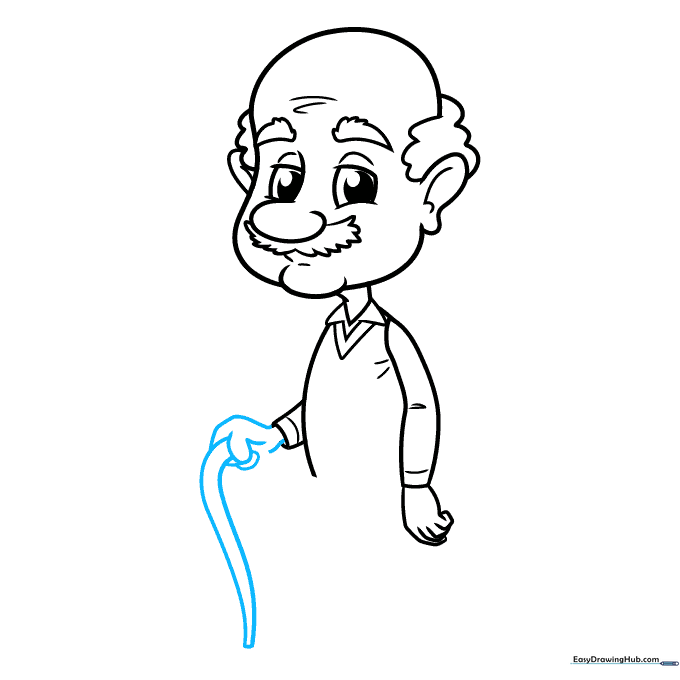
Draw the hand holding a long, sturdy line that reaches the ground. This is the cane. Tip: Make sure the cane is straight to help ground the character in the drawing.
Step 8: Finishing the Cane and Legs

Complete the handle of the cane by doubling the line back. Start drawing the pants legs below the vest. Tip: Use simple, vertical lines for the pants to keep the focus on the upper body.
Step 9: Adding Shoes
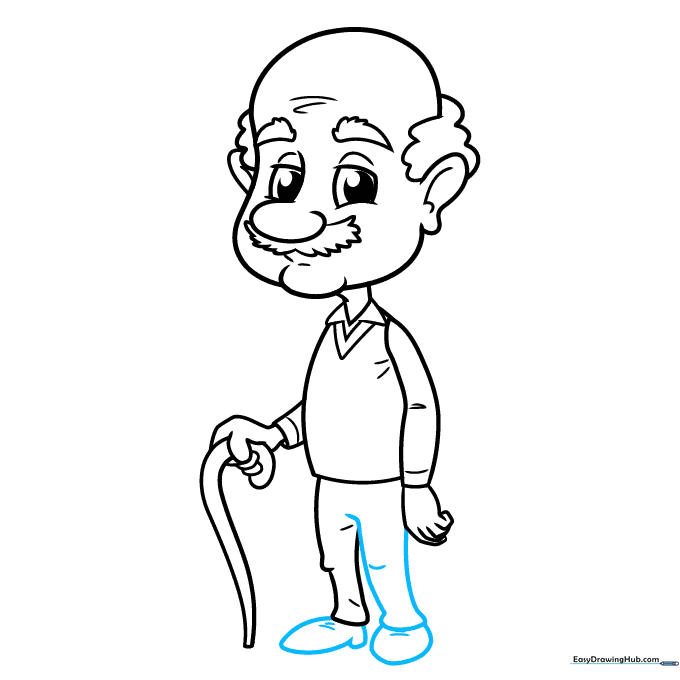
Draw the feet at the bottom of the pants legs. Keep them rounded and simple. Tip: Shoes are just oval shapes—don't overcomplicate the laces unless you want to add extra detail!
Step 10: Color Your Masterpiece
Your outline is finished! Now, use your favorite colors to bring your grandpa to life. Tip: Use soft grays for the hair and warm tones for the vest to give him a cozy, friendly look.
More Tutorials


