How to Draw Gotham City: Easy Step-by-Step Guide
Ready to bring the dark, moody skyline of Gotham City to life? This project is perfect for young artists ages 7+ who want to practice perspective and geometric shapes. Grab a pencil, an eraser, and a piece of paper to create your own heroic cityscape.
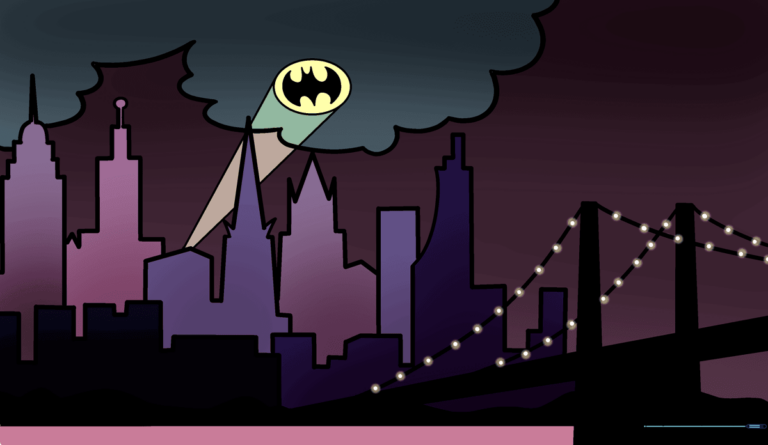
🎯 Final Result
Step-by-Step Instructions
Step 1: Sketching the Bridge Base
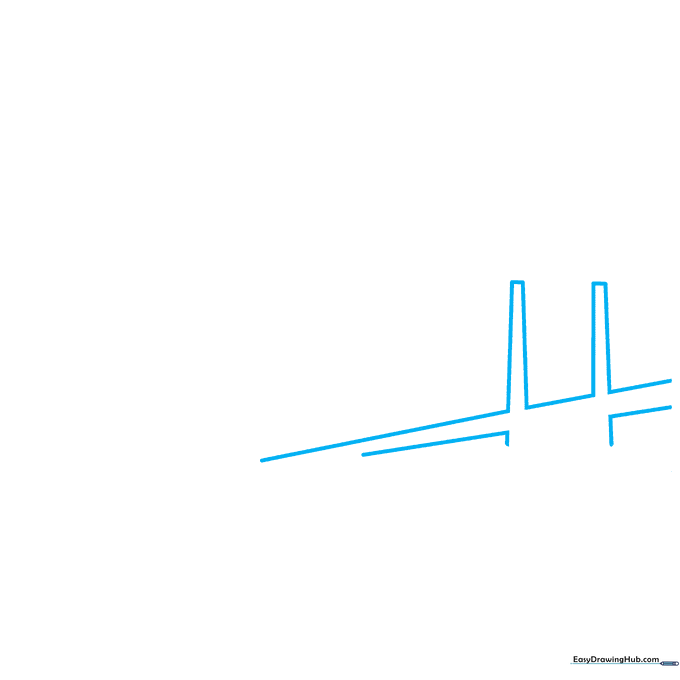
Start by drawing the bridge structure using long, curved lines that form a hashtag-like shape. Teacher's Tip: Keep your pencil pressure light here; these lines act as a guide for the bridge cables later.
Step 2: Defining the Shoreline
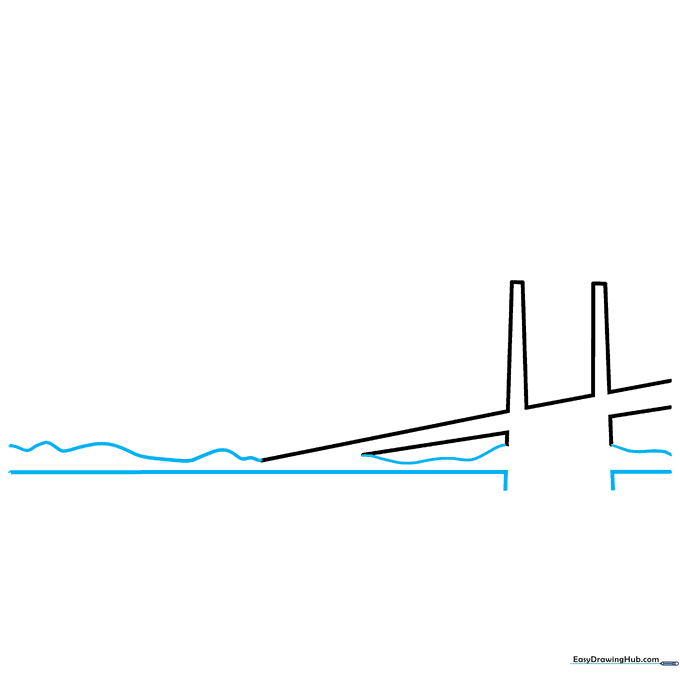
Draw long 'L' shaped lines at the bottom to ground your city, then add wavy, organic lines above them to represent the distant shore. Teacher's Tip: Use a slightly darker stroke for the shoreline to separate the water from the land.
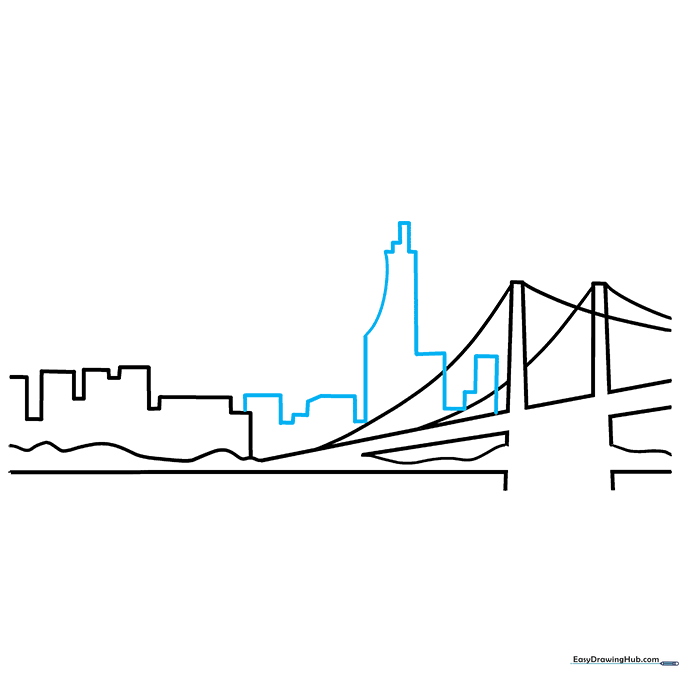
Step 3: Building the Skyline
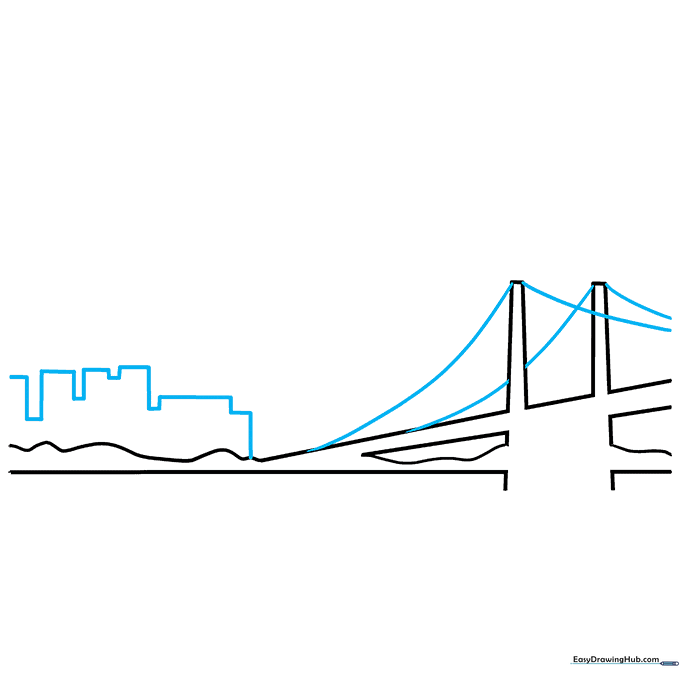
Use a mix of long and short vertical lines to create your first cluster of skyscrapers. Then, draw curved lines from the bridge top to the surface for the suspension cables. Teacher's Tip: Varying the heights of your buildings makes the city look more realistic and dynamic.
Step 4: Expanding the Cityscape
Continue the skyline by adding more vertical lines and one prominent curved line to suggest a dome or unique architecture. Teacher's Tip: Keep your lines straight by using the edge of a ruler or a steady hand.
Step 5: Adding Architectural Detail
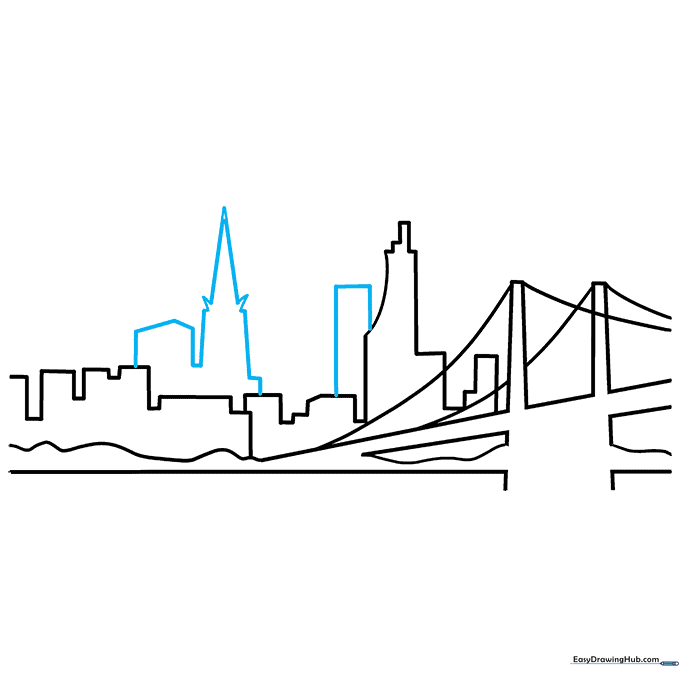
Enclose a rectangular building behind the others to create depth, then add a building with a sharp, pointy spire. Teacher's Tip: Overlapping shapes is a great way to teach children about foreground and background in art.
Step 6: Iconic Building Shapes
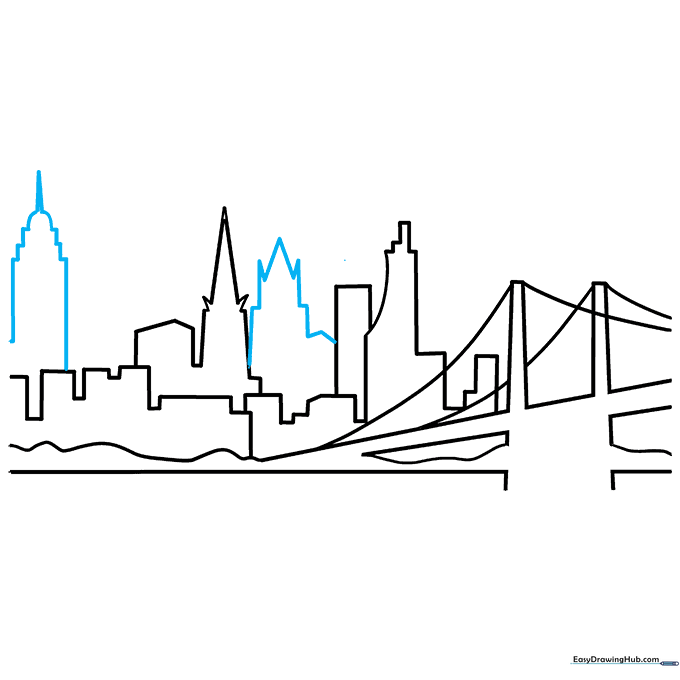
Draw a building inspired by the Empire State Building using tiered straight lines, and add another pointy structure nearby. Teacher's Tip: Use short horizontal lines to represent windows or ledges on these buildings.
Step 7: The Bat Signal
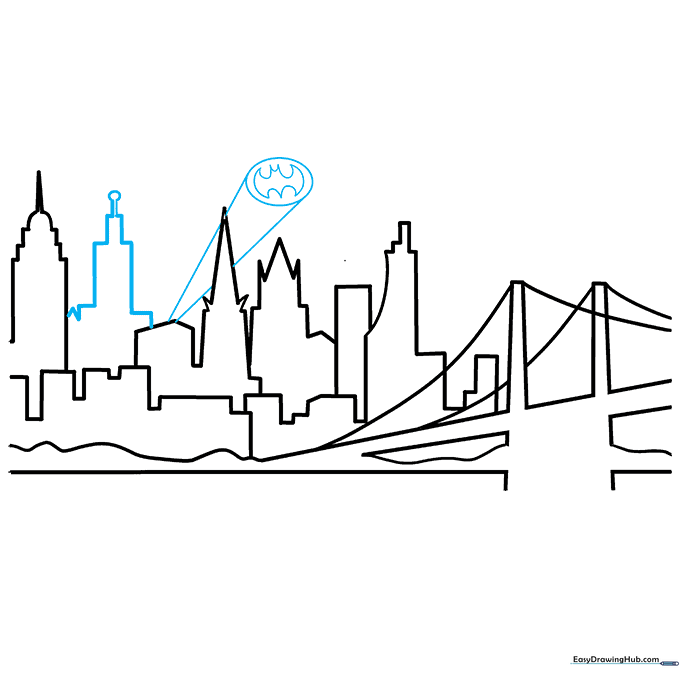
Draw one final building with a circular antenna. Below it, draw an oval and sketch the iconic Batman logo inside. Teacher's Tip: Focus on the symmetry of the bat wings to make the signal look professional.
Step 8: Sketching the Clouds
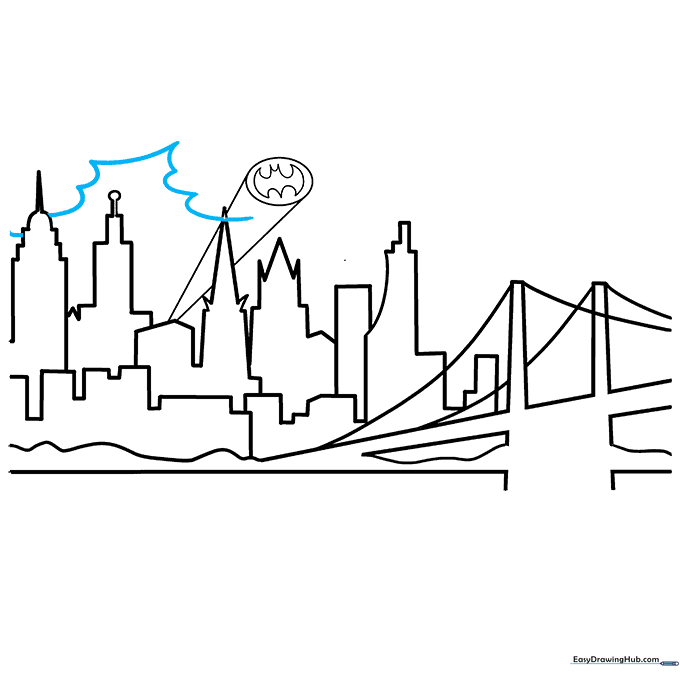
Use connected, soft curved lines to sketch clouds drifting behind the city. Teacher's Tip: Clouds should be irregular and fluffy—don't worry about making them perfect circles!
Step 9: Finalizing the Sky
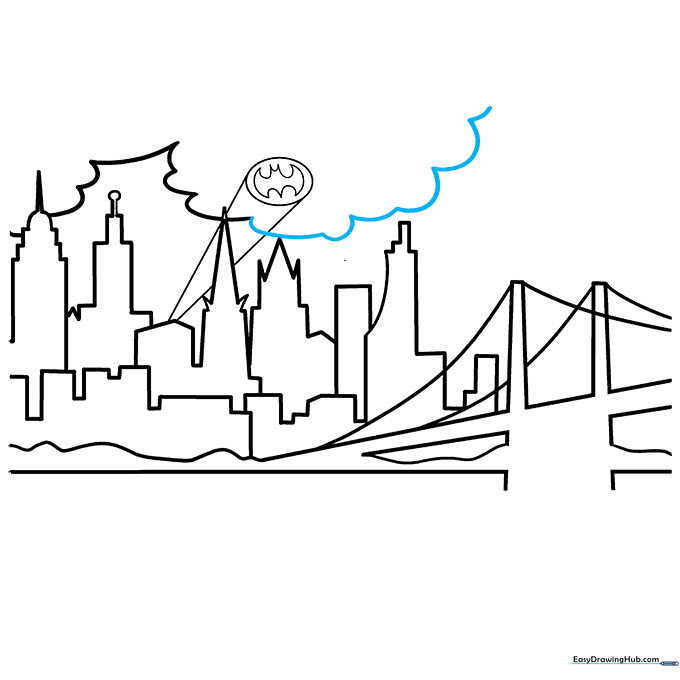
Continue adding more cloud clusters to fill the empty space in the sky. Teacher's Tip: Vary the size of your clouds to create a sense of distance.
Step 10: Adding Color and Drama
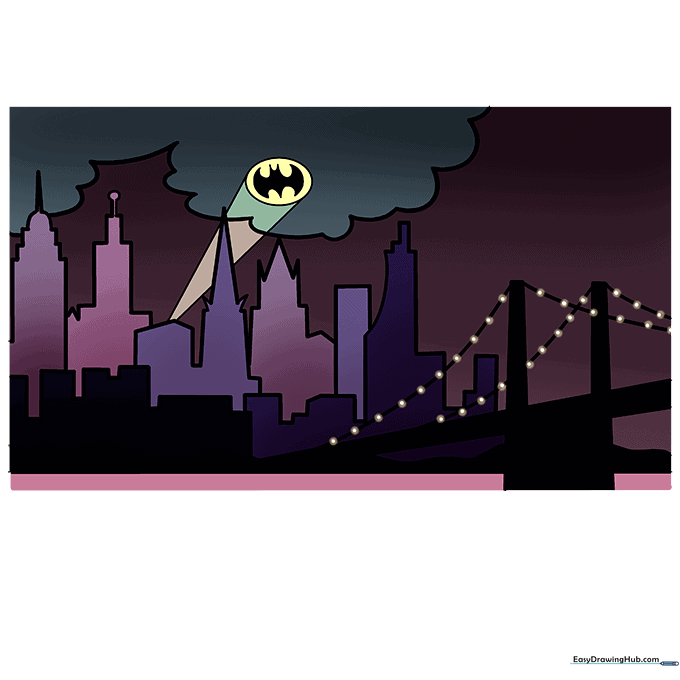
Bring your Gotham City to life with dark blues, greys, and blacks. Make the Bat Signal pop with a bright yellow glow. Teacher's Tip: Use a yellow marker for the signal and leave the bat silhouette black for high contrast.
More Tutorials


