How to Draw Genji: Easy Step-by-Step Overwatch Guide
Bring the legendary cyborg ninja to life with this beginner-friendly drawing guide. Designed for fans of Overwatch ages 7 and up, this activity requires only a pencil, an eraser, and a sheet of paper. Follow along to master the geometric shapes that form Genji’s iconic armor.
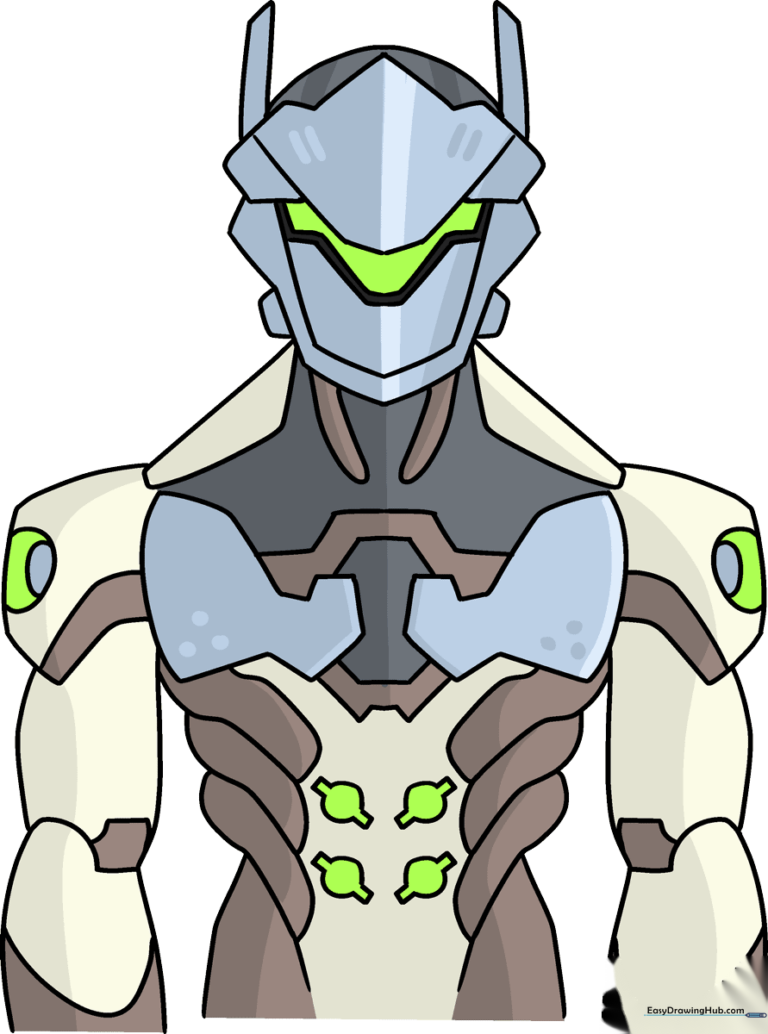
🎯 Final Result
Step-by-Step Instructions
Step 1: Sketching the Face Shape

Start by sketching a ten-sided decagon for the head. Add a central triangular peak at the top and smaller peaks on the sides. Teacher's Tip: Keep your pencil lines light and loose so you can easily adjust the symmetry before committing to the final outline.
Step 2: Defining the Mask Details

Use parallel lines to enclose the eye and nose area, then add a pentagon shape below for the mouth guard. Outline the lower face to create the chin. Teacher's Tip: Focus on keeping the lines straight to capture that sharp, robotic aesthetic Genji is known for.
Step 3: Building the Torso
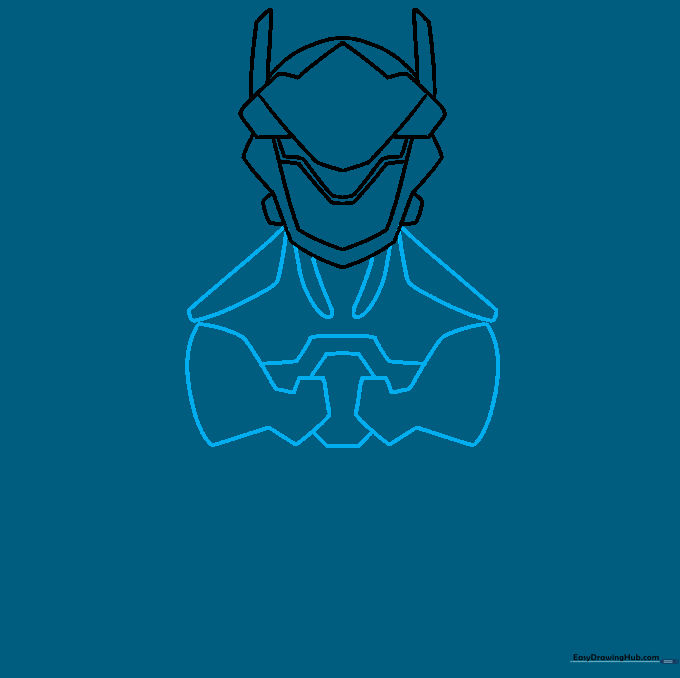
Draw two curved lines below the head to form the neck, then sketch the shoulder armor and chest plate. Teacher's Tip: Think of the chest plate as a puzzle; draw the irregular shapes one by one to ensure they fit together correctly.
Step 4: Refining the Shoulders
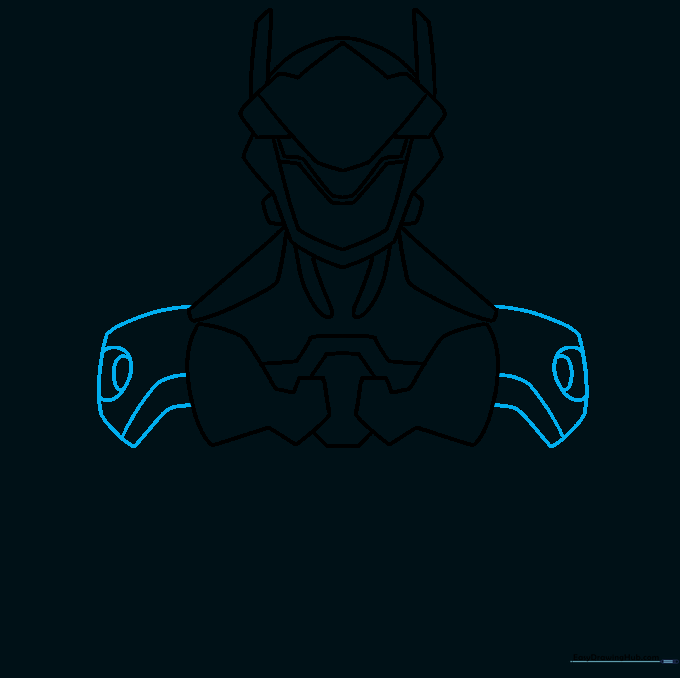
Expand the shoulder armor with curved lines and add oval details on the sides. Teacher's Tip: Use a steady hand for the ovals—if they look a bit wobbly, just erase and try again; practice makes perfect!
Step 5: Upper Arm Armor
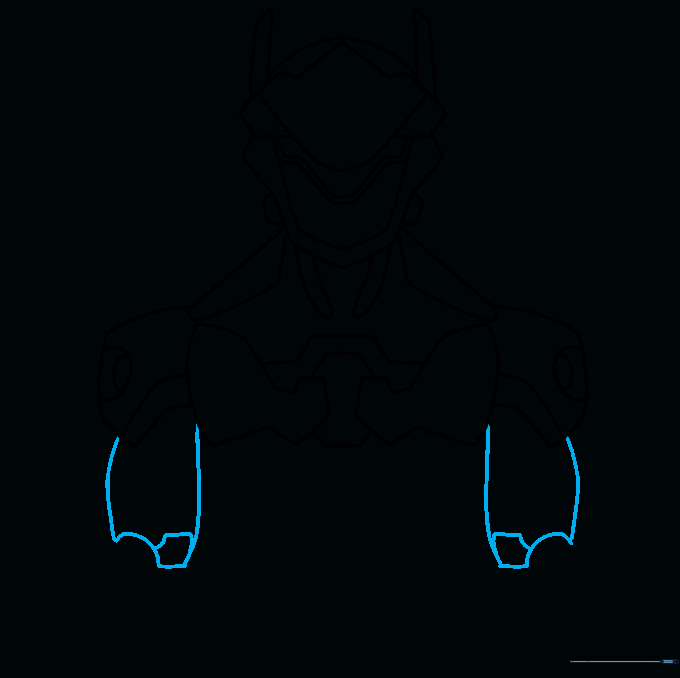
Enclose the armor at the top of the arms using curved lines, adding smaller shapes inside for detail. Teacher's Tip: These smaller shapes represent the mechanical joints—keep them precise to make the drawing look more realistic.
Step 6: Lower Arm Details
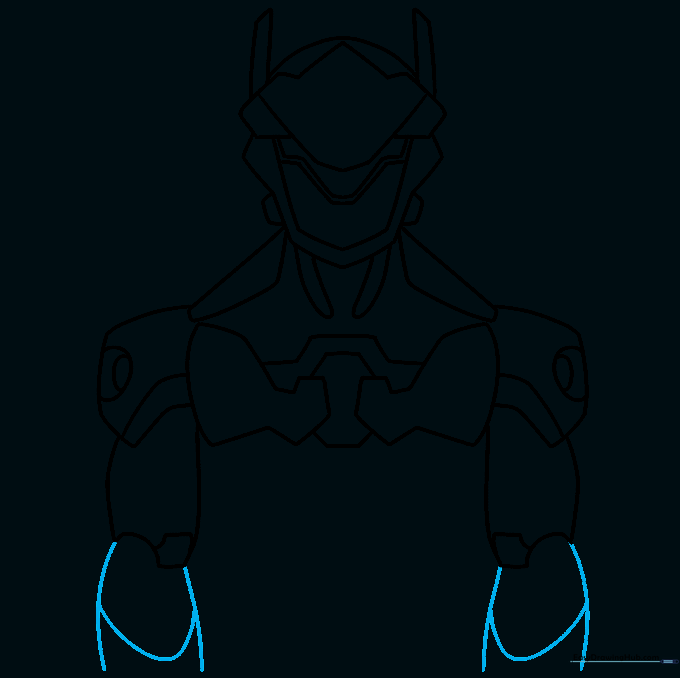
Outline the lower arms with curved lines and add a 'U' shaped band to each. Teacher's Tip: These bands act as the 'cuffs' of his armor, so make sure they are centered on the arm segments.
Step 7: Chest Plate Structure
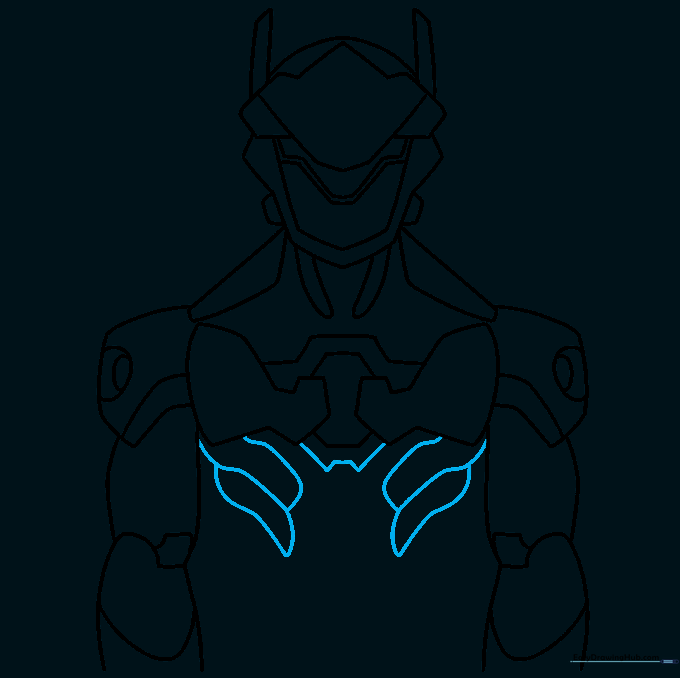
Define the bottom of the chest plate with straight lines and add rib-like armor using pairs of curved lines. Teacher's Tip: Keep the spacing between the ribs consistent to give the armor a clean, manufactured look.
Step 8: Adding Armor Layers
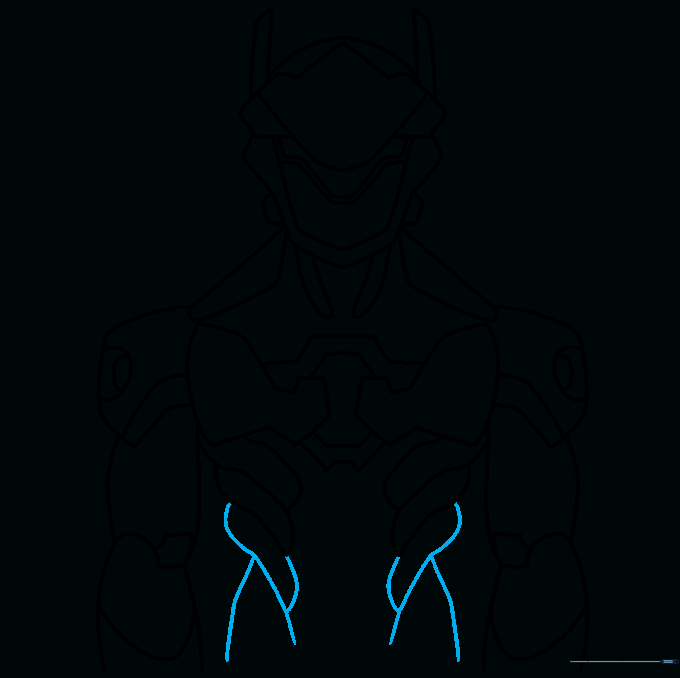
Extend the rib-like armor and add pentagon-shaped details. Teacher's Tip: If you find the pentagons tricky, draw a small triangle first and then add a flat base to turn it into a five-sided shape.
Step 9: Finalizing the Outline
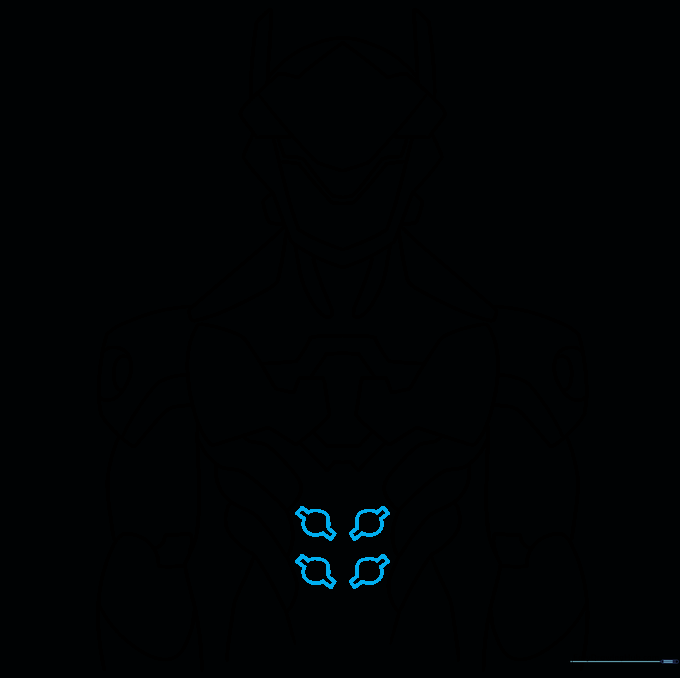
Draw partial circles on the torso and connect them with straight lines. Teacher's Tip: This is the final structural step! Take a moment to darken your main lines and erase any stray guide marks.
Step 10: Bringing Genji to Life with Color

Time to color! Use silver, cream, brown, and green to match Genji's classic look. Teacher's Tip: Use light pressure with your colored pencils to create a metallic sheen on the silver armor parts.
More Tutorials


