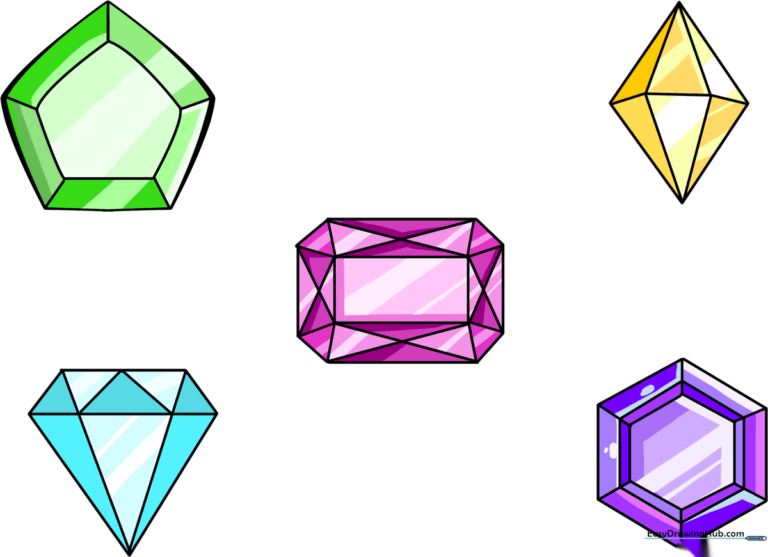
How to Draw Gems: Easy 10-Step Guide for Beginners
Ready to add some sparkle to your sketchbook? This tutorial is perfect for artists ages 6+ looking to practice geometric shapes and symmetry. You will only need a pencil, an eraser, and a steady hand to create these brilliant, multi-faceted gems.
🎯 Final Result
Step-by-Step Instructions
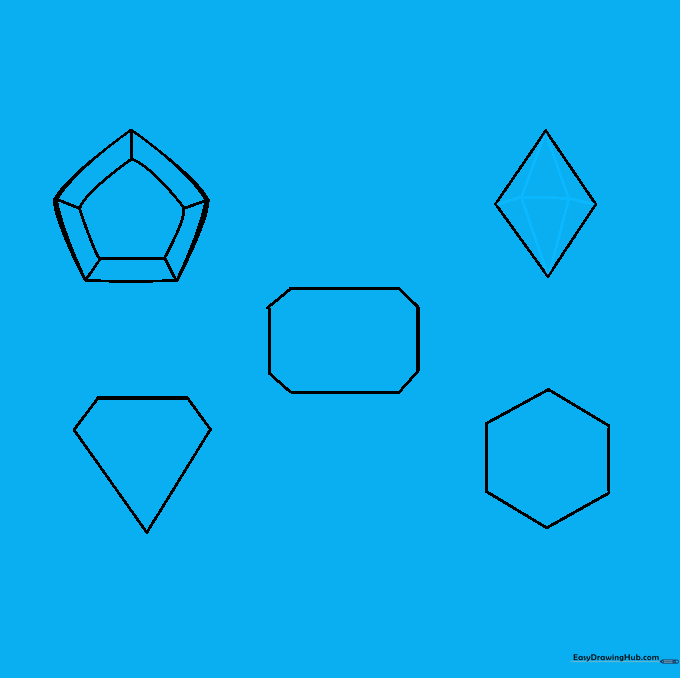
Step 1: Establishing the Base Shapes

Start by sketching a five-sided pentagon with soft, rounded corners for your first gem, and a sharp diamond shape for the second. Tip: Use a light touch; these are just your guidelines.
Step 2: Adding Geometric Variety
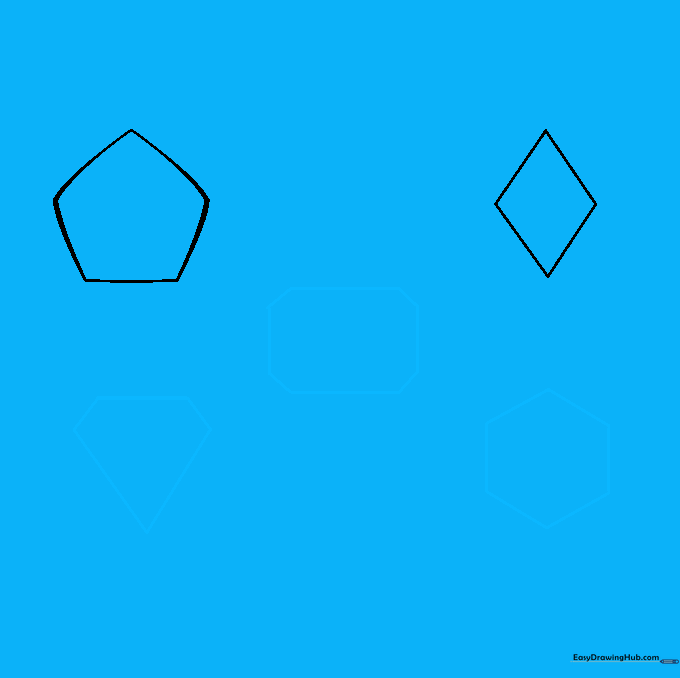
Draw a hexagon for your third gem. Inside, sketch a rectangle, but leave the corners open, connecting them with short, angled lines instead. For the final gem, create an open-ended triangle shape.
Step 3: Creating Depth in the Pentagon
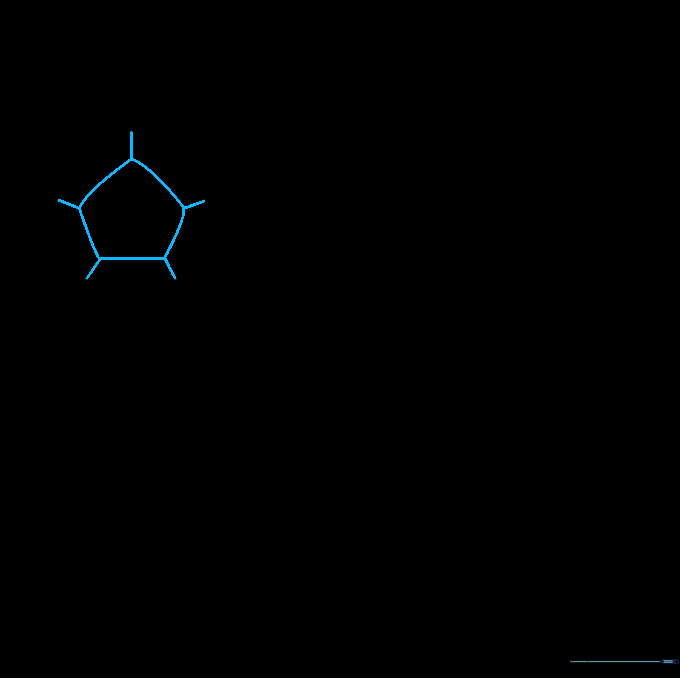
Draw short lines inward from each corner of your pentagon, then connect them with slight curves. Tip: These curves create the illusion of a rounded, 3D surface.
Step 4: Faceting the Diamond
Draw a horizontal line across the middle of your diamond. Connect the top and bottom corners to this center line to create two triangles. This simple division instantly makes the gem look 'cut'.
Step 5: Detailing the Central Gem
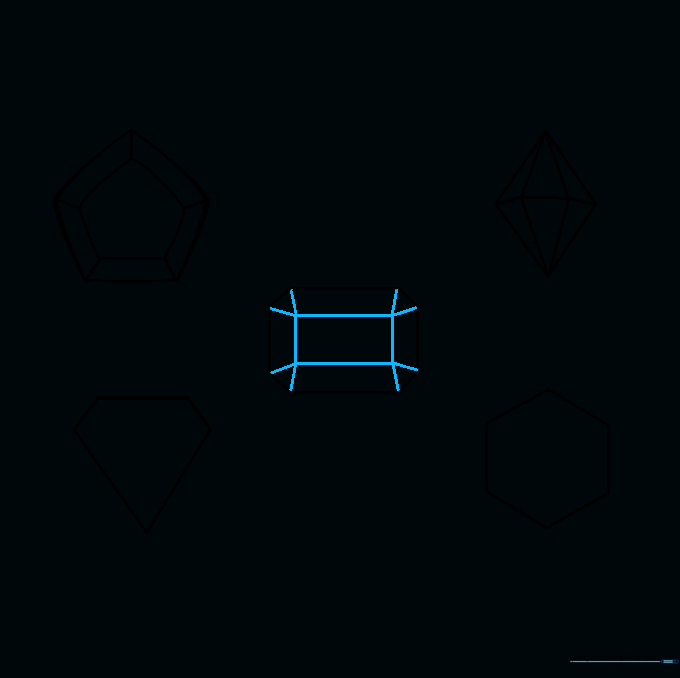
Add vertical curves between the upper and lower corners of the central gem. Connect the remaining corners to these curves with short, straight lines to define the facets.
Step 6: Adding 'X' Accents
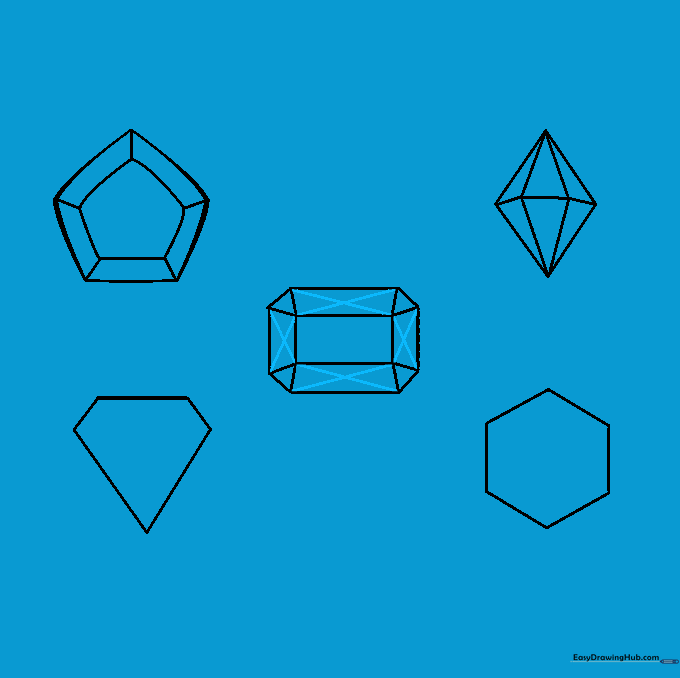
Draw an 'X' shape in the top, bottom, and side sections of your central gem. This detail mimics the way light reflects off the sharp edges of a real gemstone.
Step 7: Defining the Final Gem
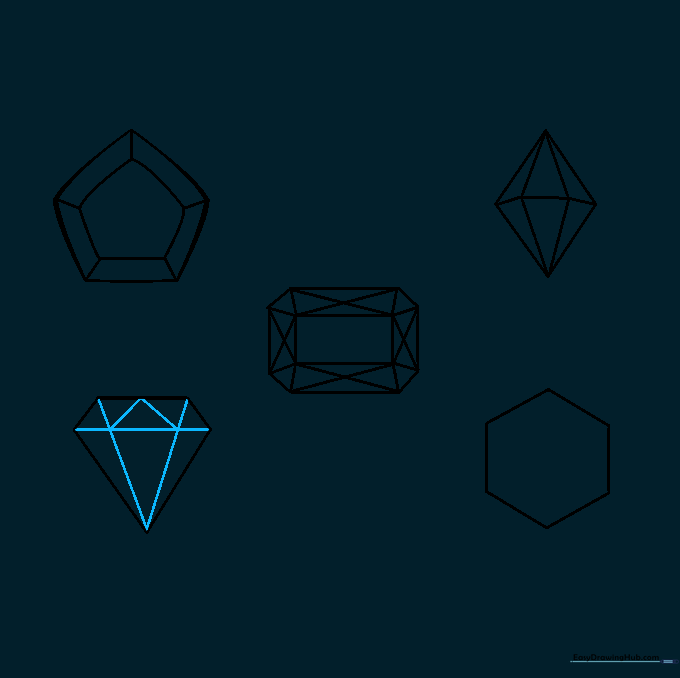
Connect the upper corners to the bottom point to form a triangle. Add a horizontal line between the side corners and a small triangle at the top to complete the structure.
Step 8: Adding Inner Detail
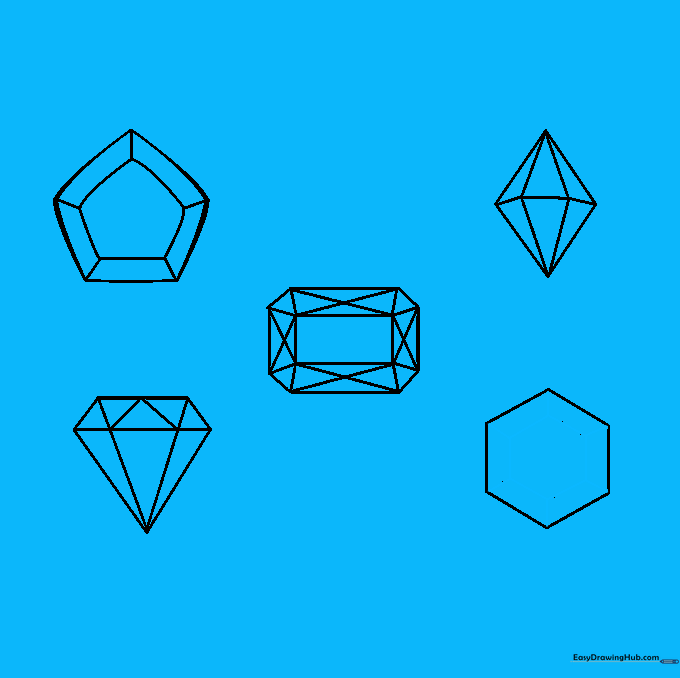
Draw a smaller hexagon inside your existing one. Connect the corners of the inner and outer shapes with short lines. Tip: Keep these lines parallel to ensure the gem looks symmetrical.
Step 9: Refining the Outline
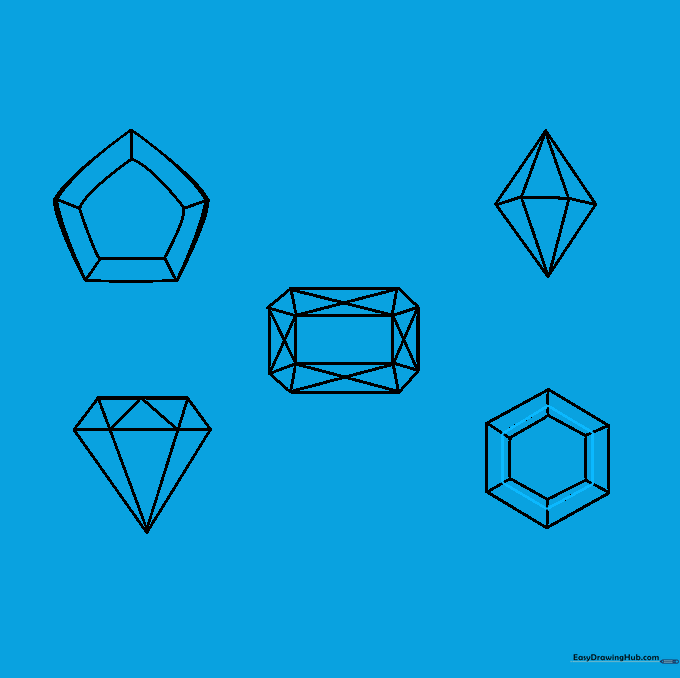
Add an extra line between your existing short lines. This final touch sharpens the edges and makes the gemstone look professionally cut.
Step 10: Bringing Gems to Life with Color
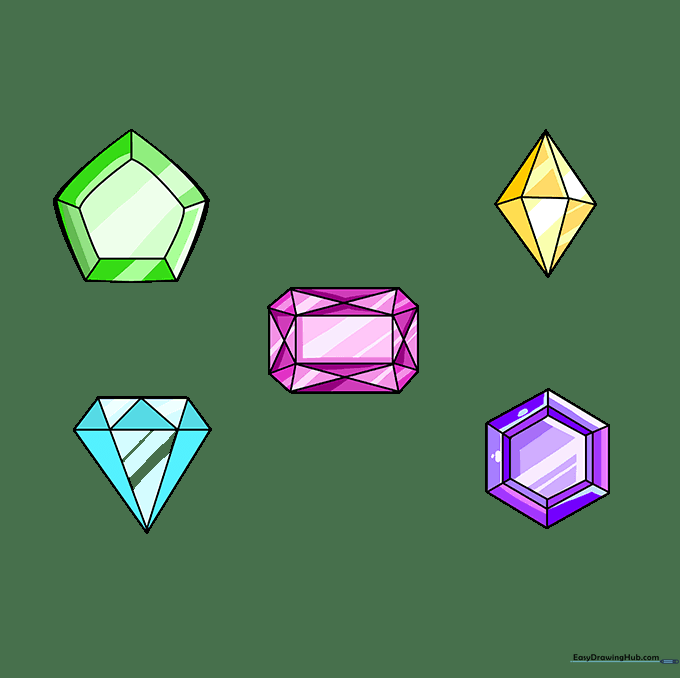
Time to color! Use vibrant hues like emerald green, ruby red, or amethyst purple. Tip: Leave a small white space on one side of each facet to represent a 'highlight' where light hits the stone.
More Tutorials


