How to Draw Garfield: Easy 10-Step Guide for Kids
Bring everyone's favorite lasagna-loving cat to life with this fun, guided drawing lesson. Designed for ages 5 and up, this activity requires only a pencil, paper, and an eraser. Follow these steps to master Garfield's iconic expressions and build your character-drawing confidence.
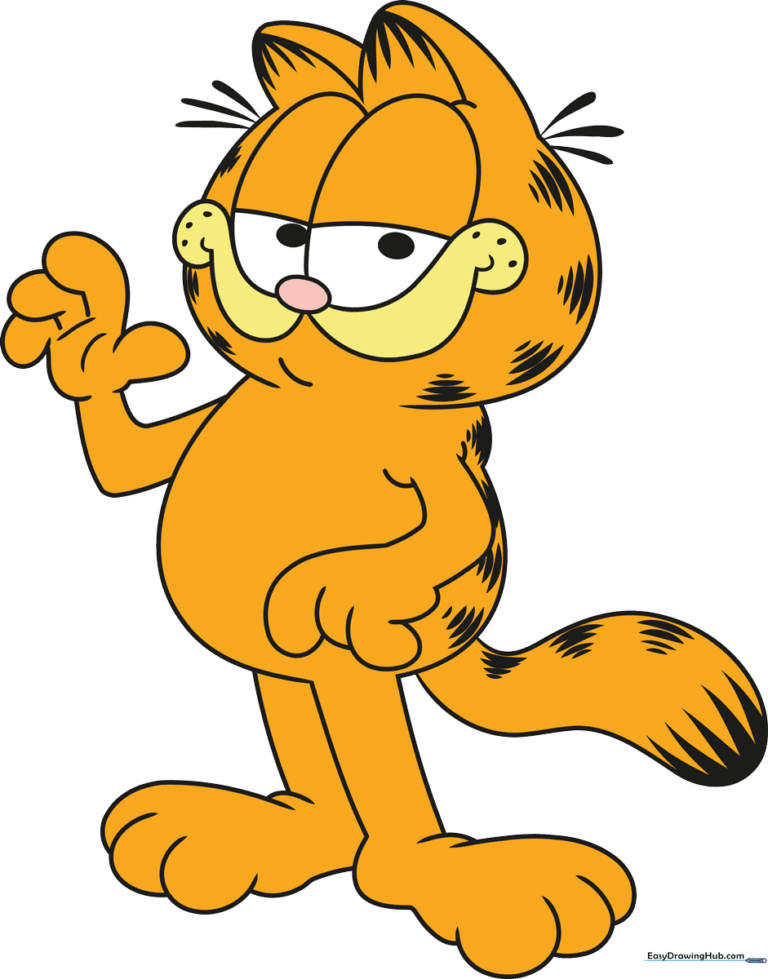
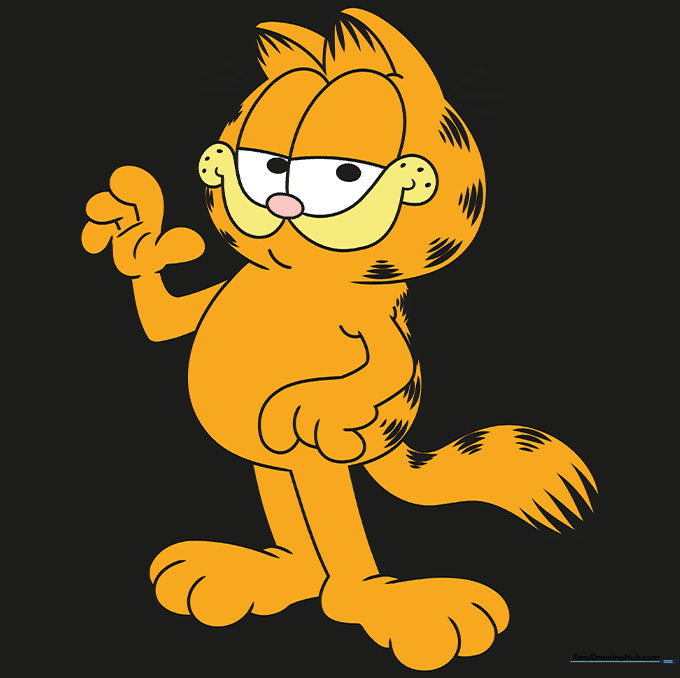
🎯 Final Result
Step-by-Step Instructions
Step 1: Sketching the Nose and Eyes

Start by drawing a small oval for the nose. On each side, draw a curved line that ends in a soft spiral to create his cheeks. Above the nose, draw two large, partial ovals for the eyes. Teacher's Tip: Keep your pencil lines light so you can easily erase any mistakes as you refine the shape.
Step 2: Defining the Mouth and Cheeks

Connect the nose to the cheeks with two curved lines to form the mouth. Add small 'U' shapes at the corners for dimples and dots for whisker spots. Outline the sides of his face with long, smooth curves. Teacher's Tip: Garfield is known for his smirk, so make sure those cheek lines curve upward slightly.
Step 3: Adding Ears and Body Contour

Draw two rounded triangles on top of the head for ears, adding a line inside each for depth. Add small tufts of fur at the base of the ears using short, curved lines. Finally, draw a short line for the chin and a large circle for the body. Teacher's Tip: Don't worry about perfect symmetry; Garfield is a bit round and squishy!
Step 4: Sketching the First Arm
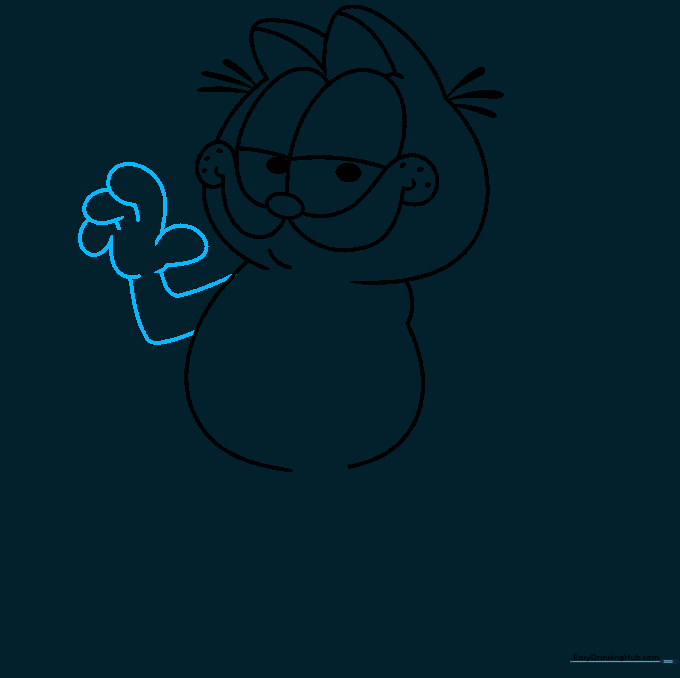
Use 'L' shaped lines to sketch the arm and hand. Ensure the lines overlap to show the palm and fingers clearly. Teacher's Tip: Think of his hand as a mitten shape—keep the lines soft and rounded.
Step 5: Refining the Palm and Second Arm
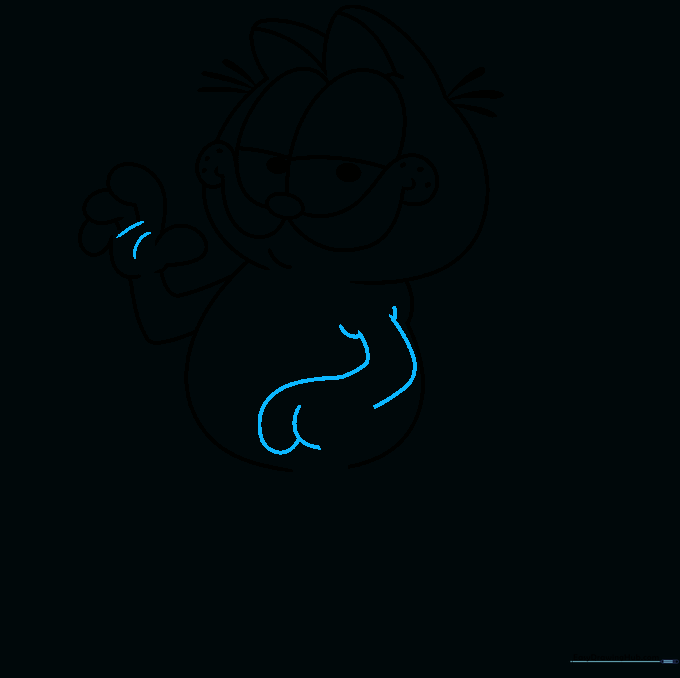
Add two curved lines to define the palm of the hand. Use overlapping strokes to start sketching the second arm. Teacher's Tip: Overlapping lines are the secret to making your drawing look 3D rather than flat.
Step 6: Completing the Hand and First Leg

Finish the hand with a third finger. Extend two parallel lines from the torso to create the first leg, then add a curved foot at the bottom. Teacher's Tip: Use a ruler if you struggle with parallel lines, but freehand is better for practice!
Step 7: Adding Toes and Second Leg
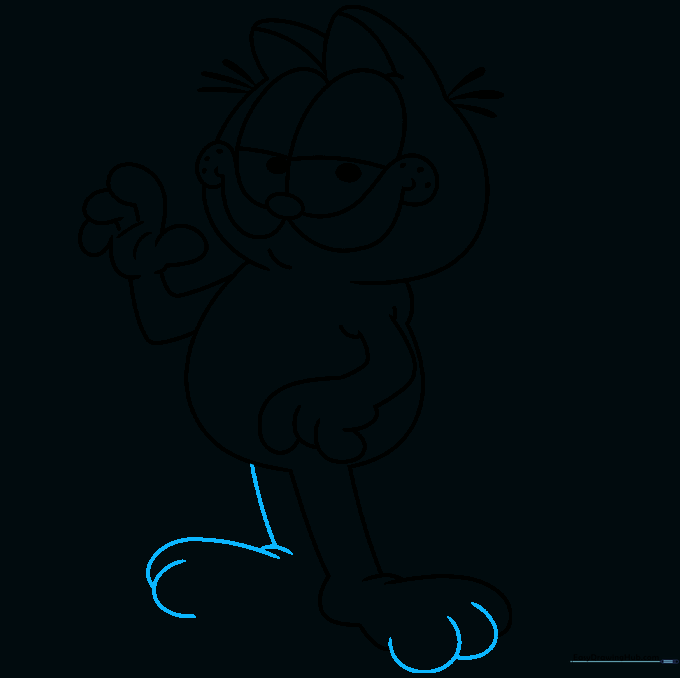
Add toes to the first foot using overlapping curves. Start the second leg with a curved line for the front and overlapping lines for the foot. Teacher's Tip: Garfield's feet are quite large, so don't be afraid to make them nice and chunky.
Step 8: Finalizing Feet and Tail

Complete the second foot with a 'C' shaped toe. Draw a long, curved tail that loops back. Add small triangles inside the ears for detail. Teacher's Tip: The tail should look like a soft, flexible 'S' shape.
Step 9: Adding Signature Stripes
Add Garfield's famous stripes by shading small, successively smaller curved shapes along his face, back, and tail. Teacher's Tip: Vary the size of the stripes to make them look natural and organic.
Step 10: Bringing Garfield to Life with Color
Time to color! Use a vibrant orange for his fur and black for his stripes. Teacher's Tip: Use light, circular motions with your colored pencils to get an even, smooth look without harsh streaks.
More Tutorials


