How to Draw Feet: Simple 10-Step Guide for Beginners
Drawing feet can be tricky, but breaking them down into basic geometric shapes makes it accessible for artists of all ages. You will only need a pencil, an eraser, and a piece of paper to get started. Follow these steps to build confidence in drawing human anatomy, one simple line at a time.
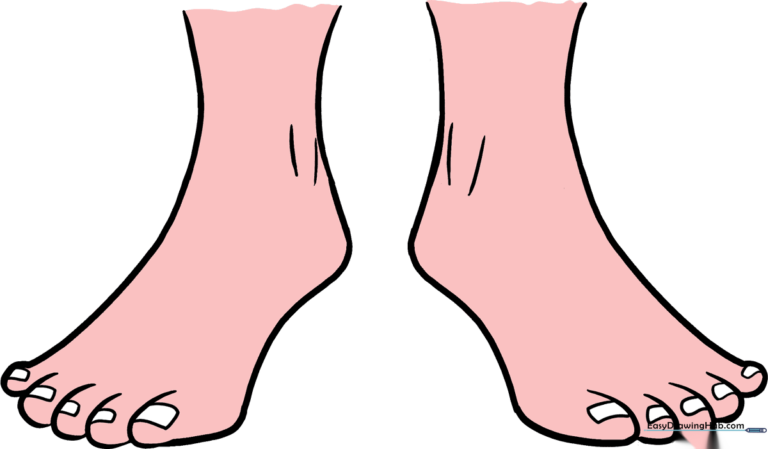
🎯 Final Result
Step-by-Step Instructions
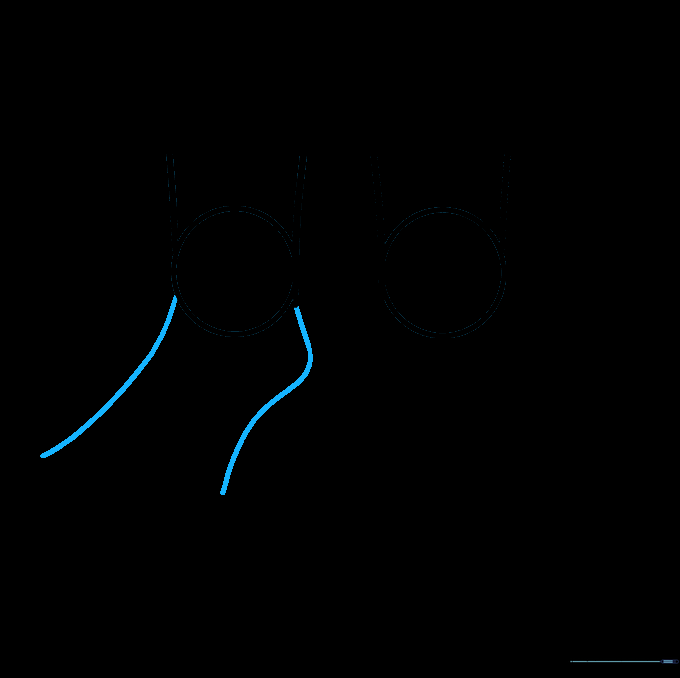
Step 1: Establishing the Ankle Base

Draw two parallel, slightly curved vertical lines. Make one line slightly longer than the other to represent the natural slope of the lower leg. Teacher's Tip: Keep your pencil pressure light so these lines are easy to adjust later.
Step 2: Creating the Second Ankle

Repeat the process by drawing a second set of curved, parallel lines as a mirror image of the first. This establishes the placement for both feet. Tip: Try to keep the spacing between these lines consistent with the first set.
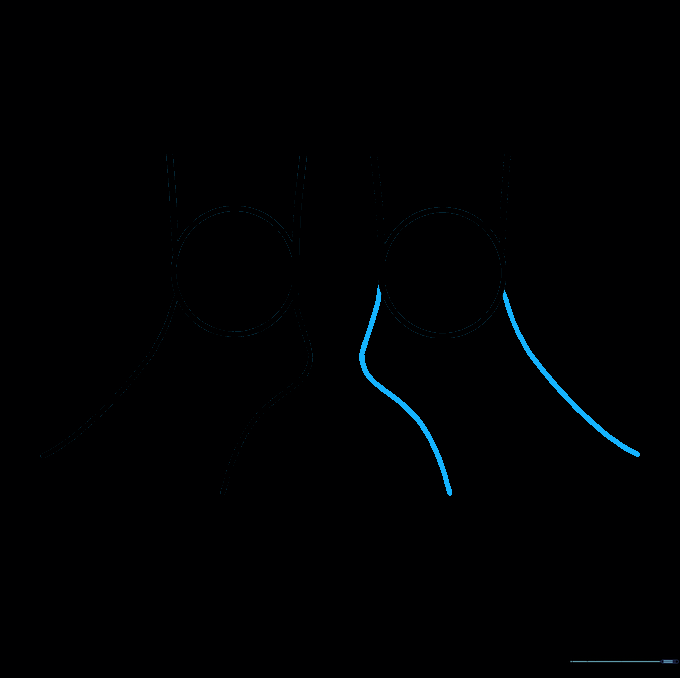
Step 3: Sketching the Ankle Joints

Draw a circle connecting the base of each set of parallel lines. These circles act as the 'joints' for your feet. Tip: Don't worry about perfect circles; focus on creating a smooth connection point.
Step 4: Outlining the First Foot
Extend two curved lines from the circle to form the top and bottom of the foot. Notice the sharp bend on the bottom line—that's your heel! Tip: Think of the foot shape like a slightly flattened triangle.
Step 5: Outlining the Second Foot
Repeat the previous step for the second foot, creating a mirror image. Ensure the heel points in the opposite direction. Tip: Keep your lines fluid; feet have soft curves, not sharp corners.
Step 6: Closing the Foot Shape
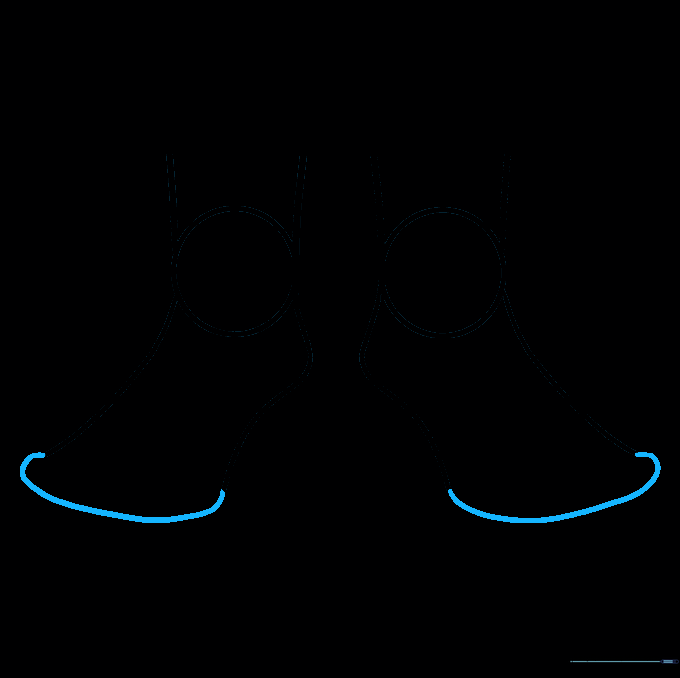
Use a single curved line to enclose the front of each foot. This creates the toe area. Tip: Make this curve gentle, as toes are not perfectly flat.
Step 7: Adding Toes and Leg Detail
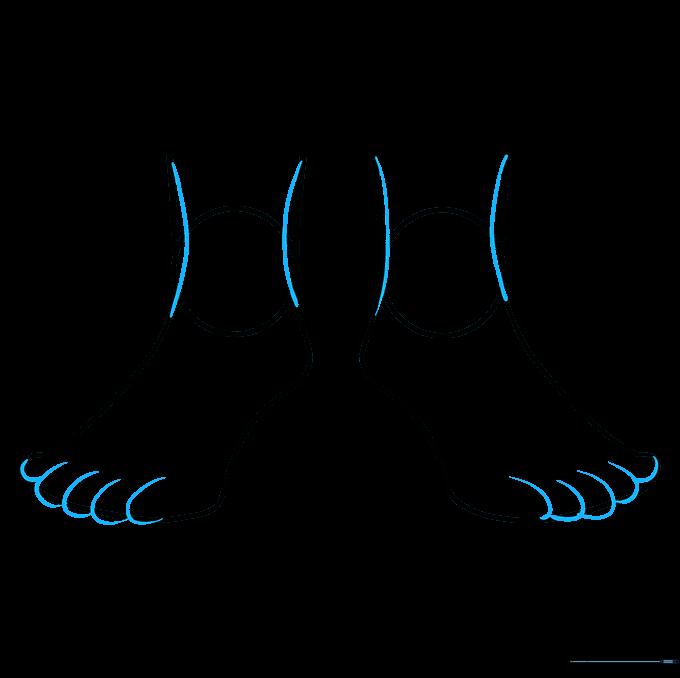
Refine the leg and ankle connection by letting the lines overlap the circles. For the toes, draw small 'U' shaped lines along the front curve. Tip: Overlap your 'U' shapes slightly to make the toes look natural and connected.
Step 8: Cleaning Up Your Sketch

Carefully erase the internal guide lines from the legs, ankles, and toes. You should now see a clean, unified outline of the feet. Tip: Use a kneaded eraser if you have one to lift graphite without damaging the paper.
Step 9: Adding Final Anatomical Details
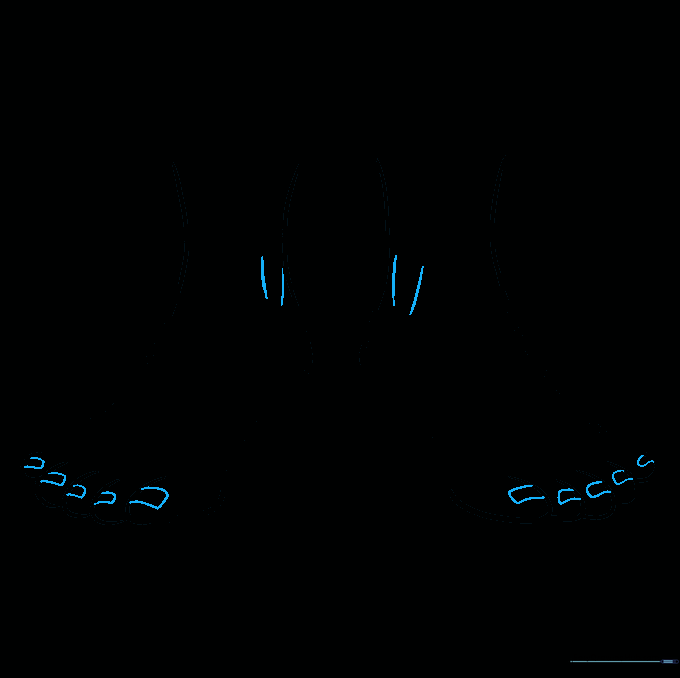
Add short, curved lines near the ankles to suggest the ankle bone. Draw small rounded rectangles on the tips of the toes for toenails. Tip: Keep these lines very thin so they don't overpower the drawing.
Step 10: Bringing Your Drawing to Life
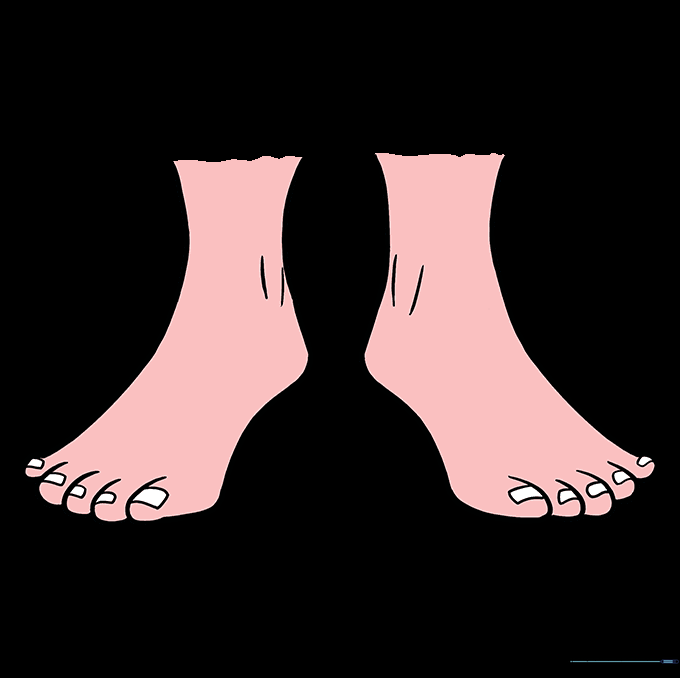
Add color to your feet! You can use skin tones or even get creative with some fun nail polish colors. Tip: Use light shading around the ankle bone to give the drawing a 3D look.
More Tutorials


