How to Draw One-Point Perspective Buildings: Easy Guide
Ready to make your drawings pop off the page? This tutorial is perfect for young artists ages 7+ to learn the magic of one-point perspective. All you need is a pencil, an eraser, and a ruler to create a professional-looking cityscape that builds essential spatial reasoning skills.
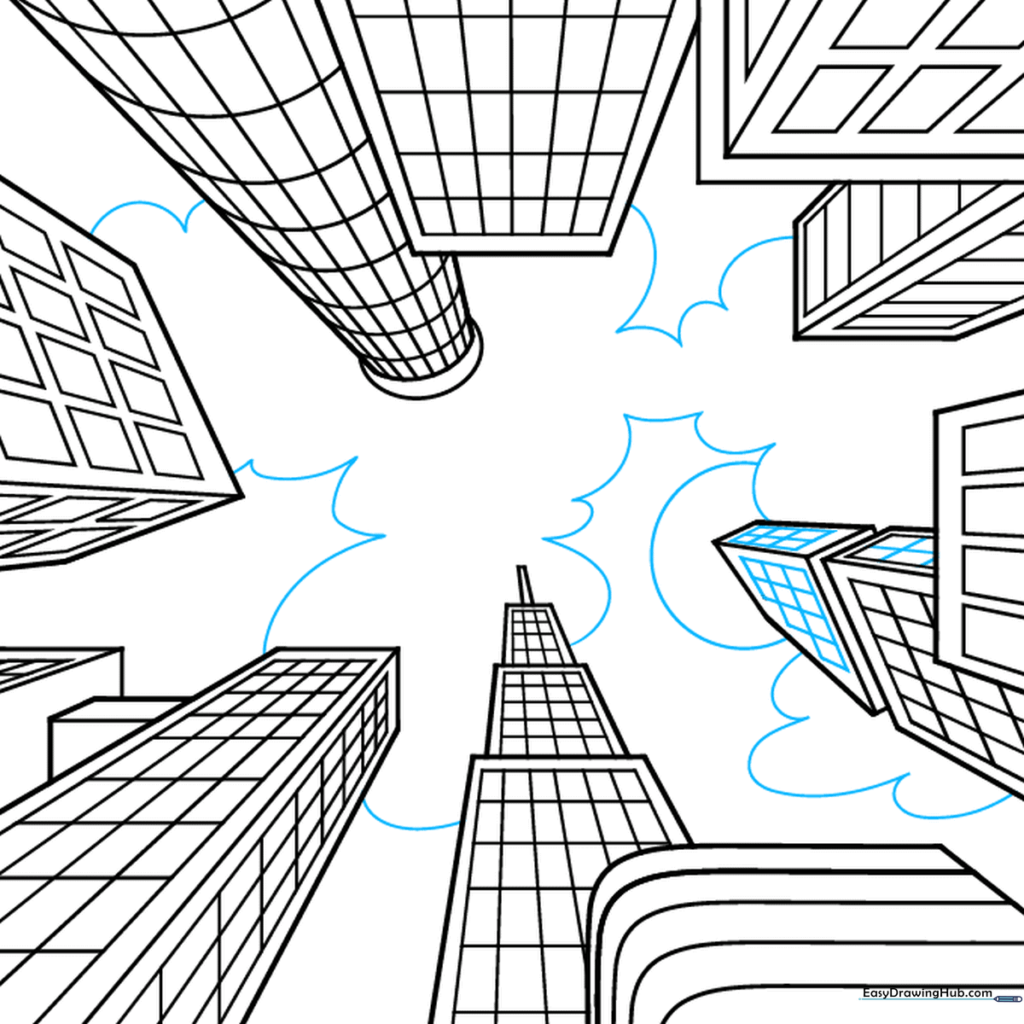
🎯 Final Result

Step-by-Step Instructions
Setting the Vanishing Point
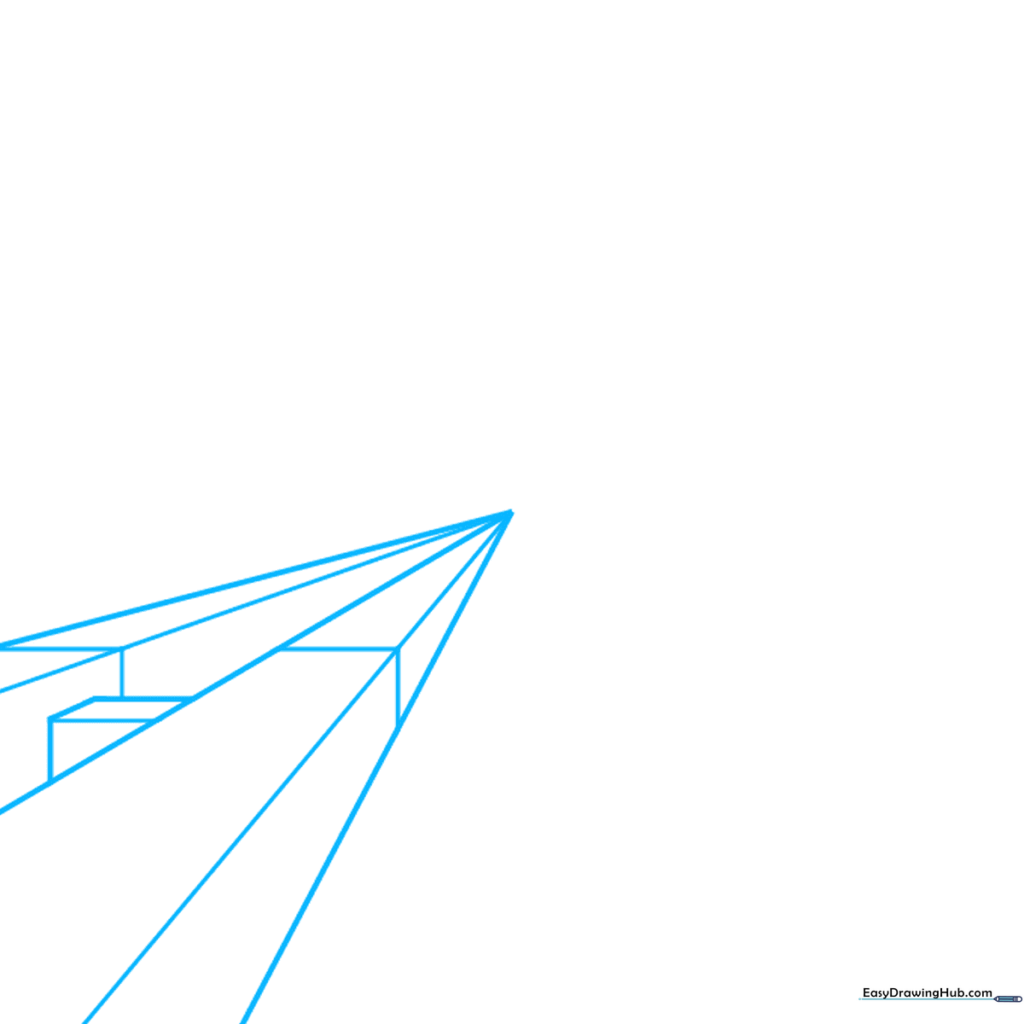
Start by placing a small dot in the center of your paper; this is your 'vanishing point.' Draw five light lines radiating from it toward the bottom left. Tip: Use a ruler to keep these lines perfectly straight, as they act as the 'tracks' for your buildings.
Blocking Out the First Shapes
Connect your guide lines with 'L' shaped segments to form the corners of your buildings. Tip: Think of these as building blocks; keep your pencil pressure light so you can easily erase the extra lines later.
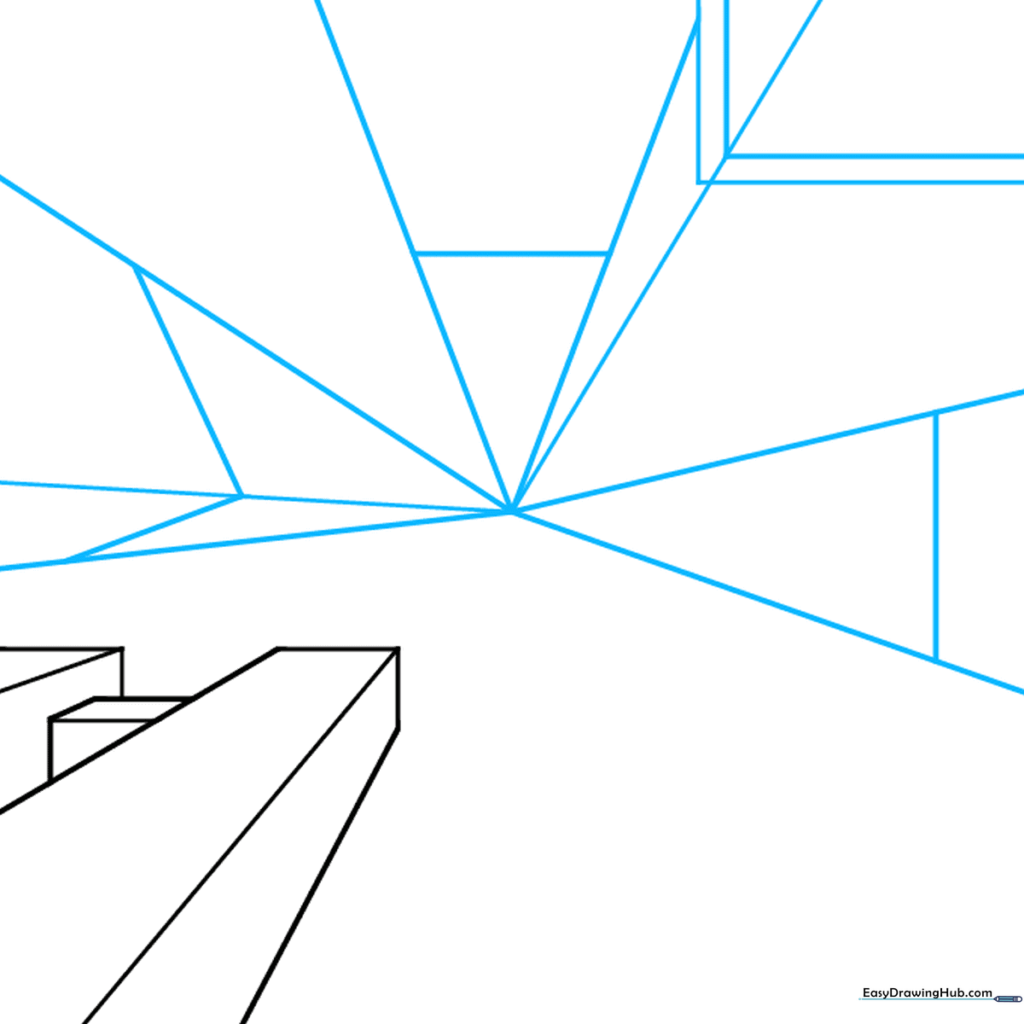
Expanding the Cityscape
Clean up your drawing by erasing the diagonal lines between the buildings. Add more starburst lines from the center to create space for additional structures. Tip: Vary the shapes of your buildings—some tall, some short—to make the city look realistic.
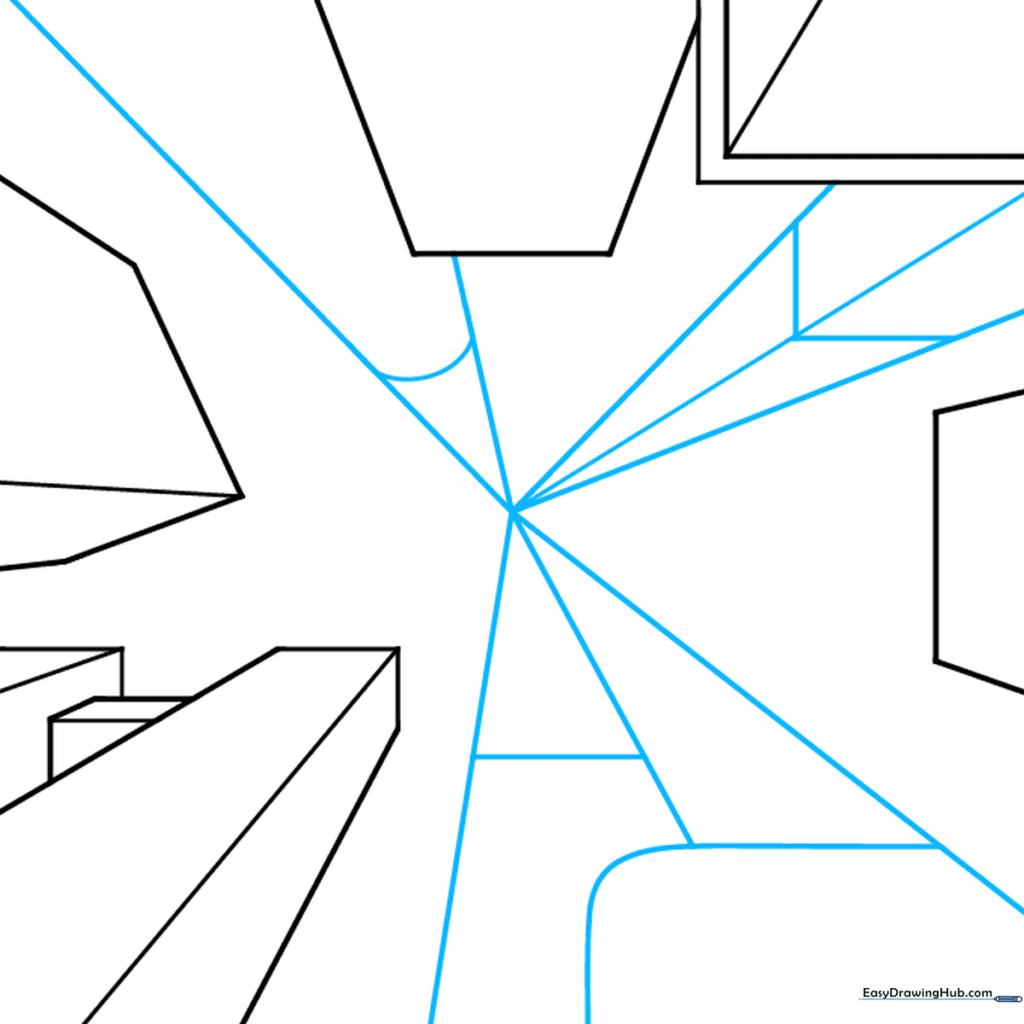
Adding Architectural Details
Now, let's add character! Draw rectangular windows on some buildings and stacked trapezoids on others to create unique rooflines. Tip: Use your ruler for the windows to ensure they align with the perspective lines.
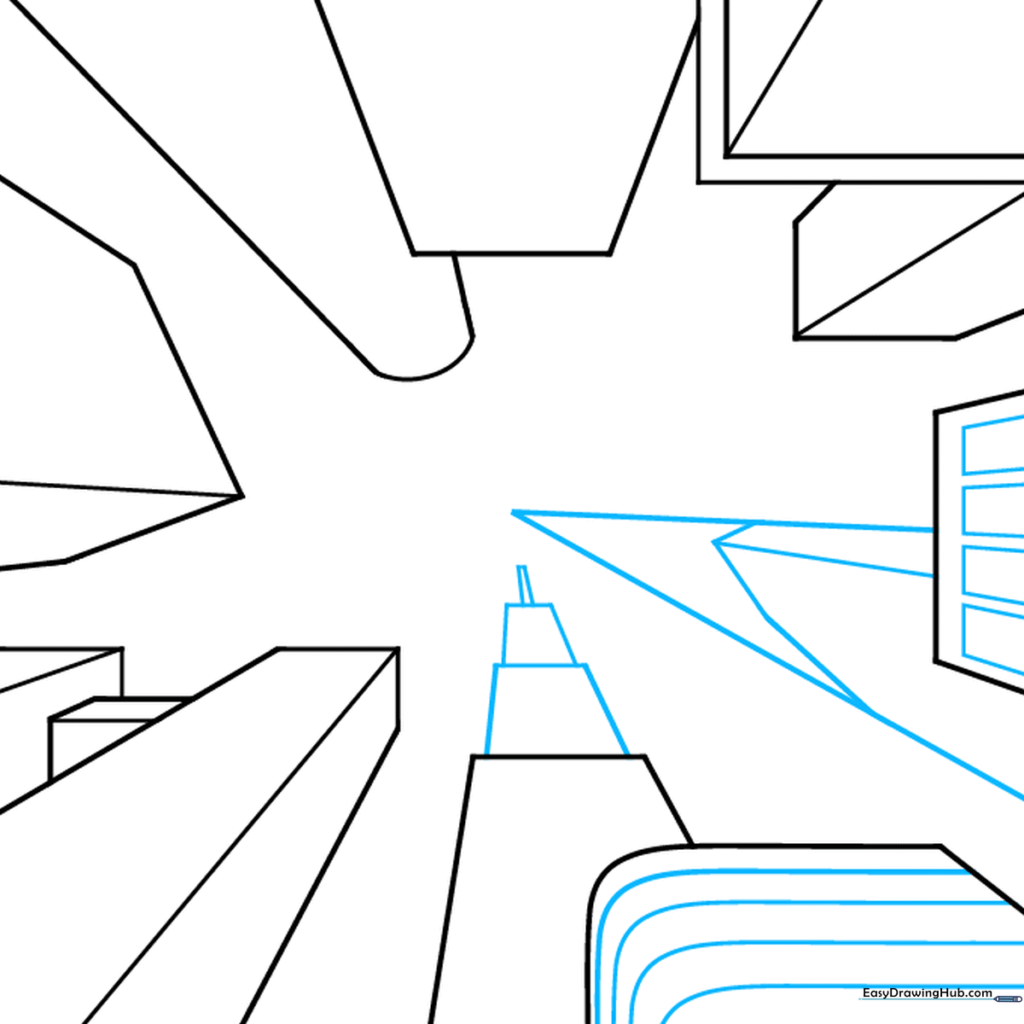
Refining the Forms
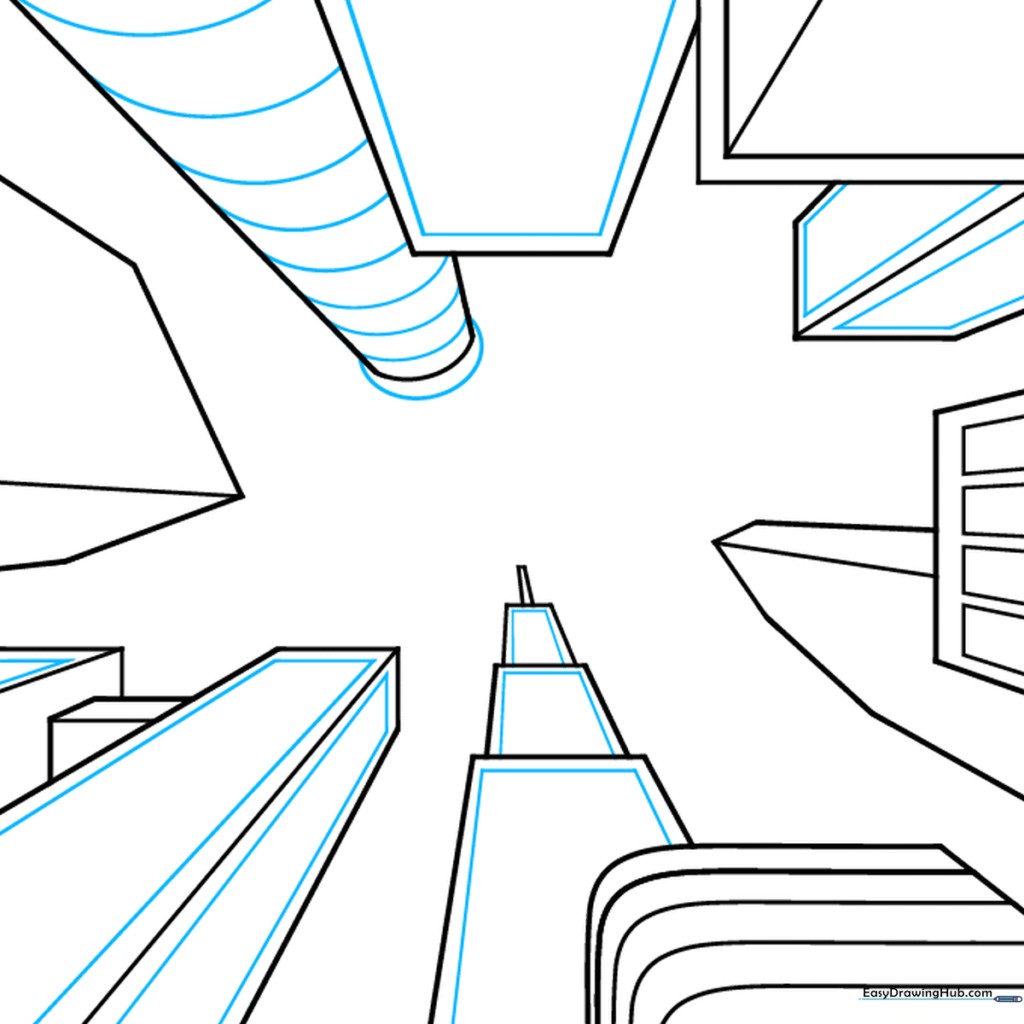
Erase the central vanishing point and the guide lines. Add curved lines to one building to give it a cylindrical, tower-like appearance. Tip: Curved lines are a great way to show that a building is round rather than boxy.
Creating Window Patterns
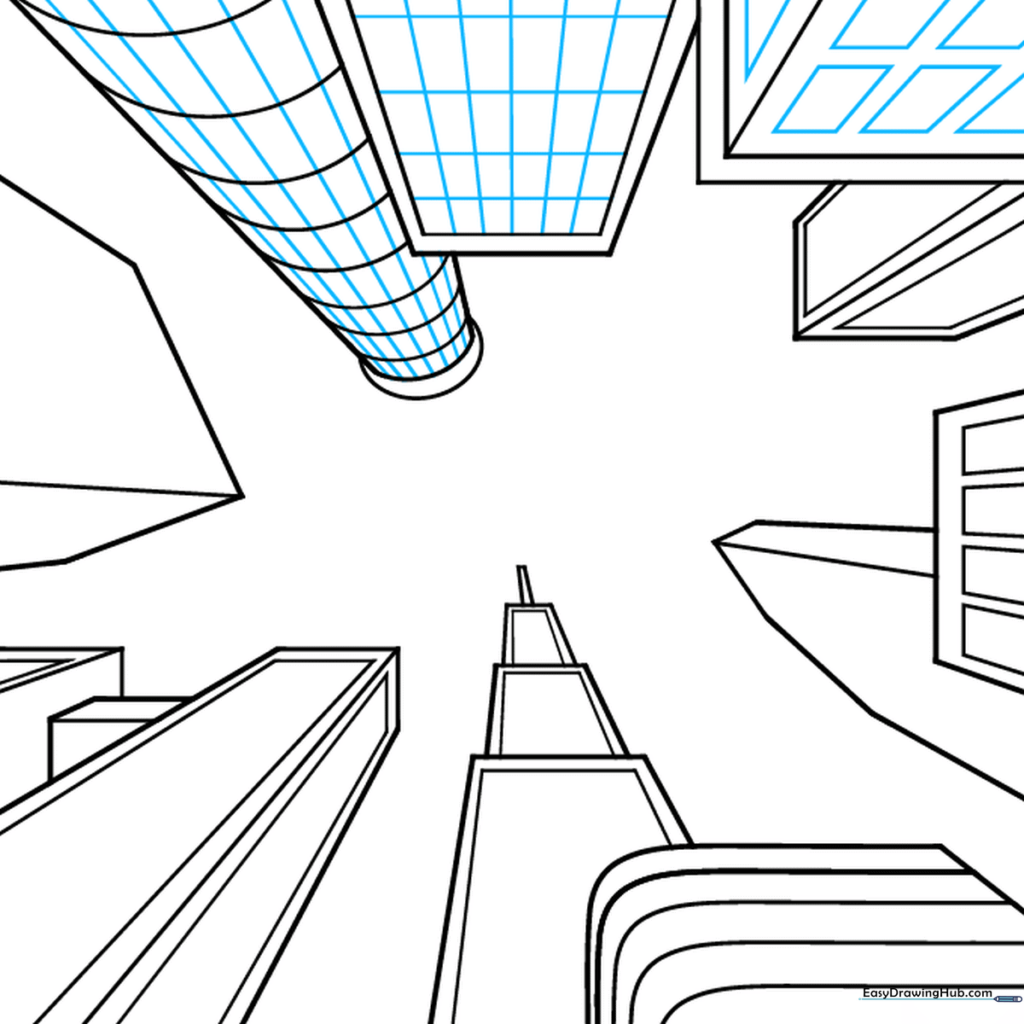
Fill your buildings with life by drawing checkerboard patterns for windows. Tip: Don't worry about making them perfect; a little variation makes the city look more organic and lived-in.
Adding Variety
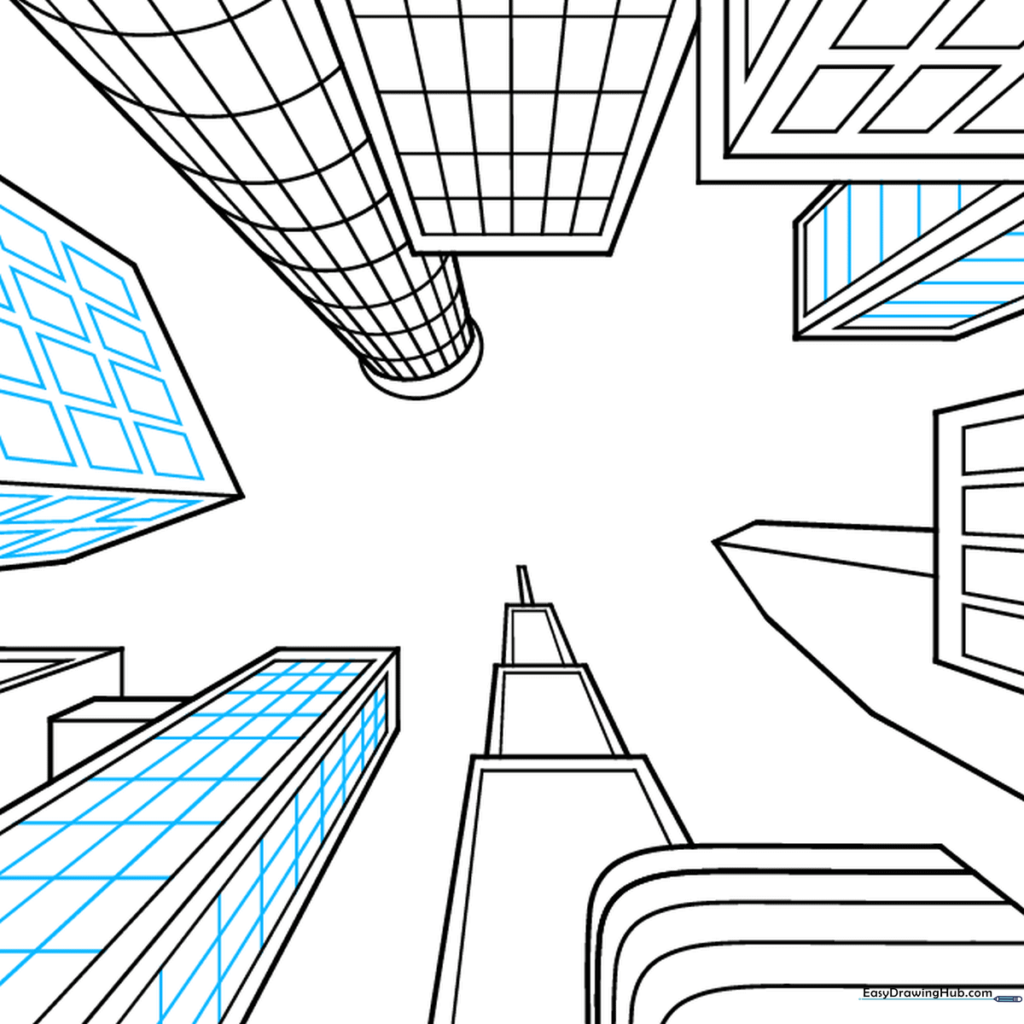
Continue adding windows to the remaining buildings using different styles like parallel lines or long rectangles. Tip: Using different window shapes helps distinguish between office buildings and residential homes.
Adding Depth and Texture
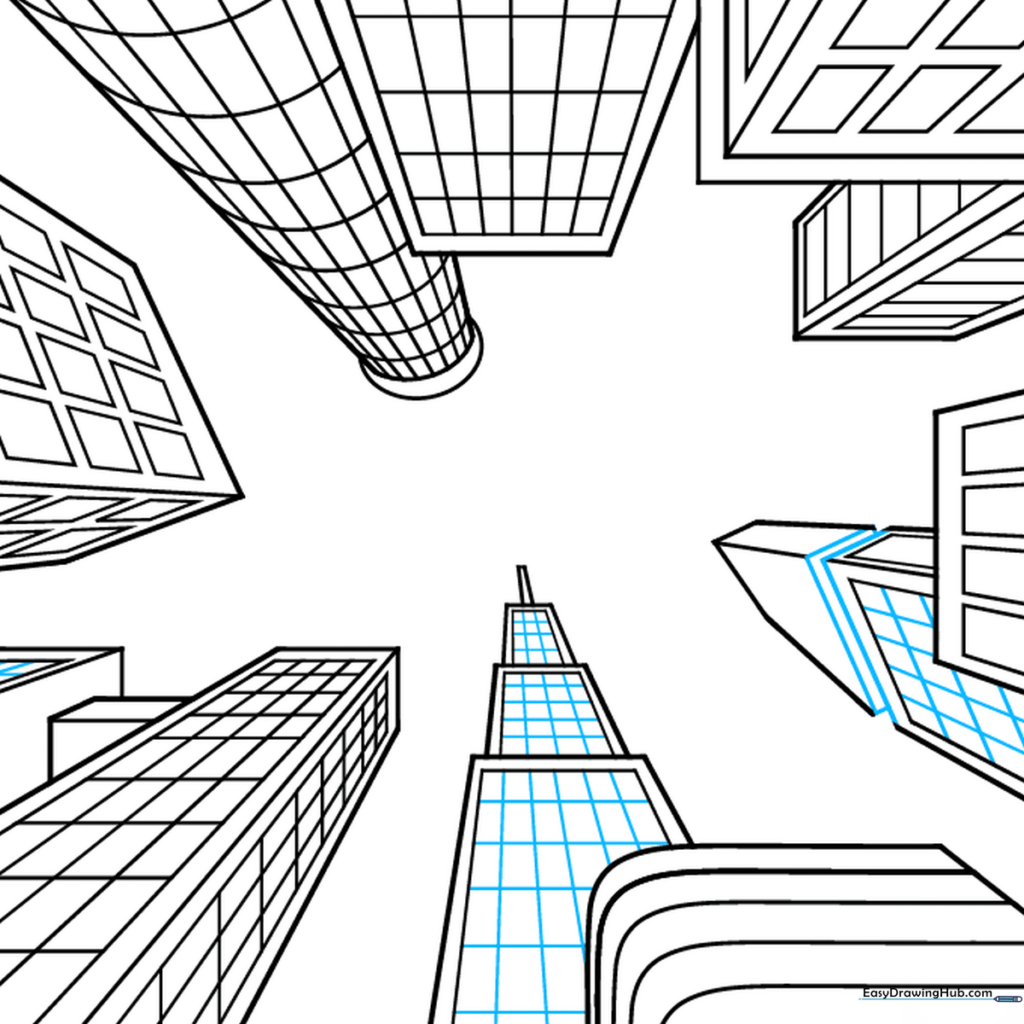
Add a rectangular indentation to one building to create a balcony or doorway effect. This adds a sense of depth to your drawing. Tip: Erase any lines inside the indentation to make it look like a real architectural feature.
Final Touches and Clouds
Finish up the windows and add some fluffy, connected clouds in the sky. Tip: Keep your clouds light and airy to contrast with the sharp, straight lines of your buildings.
Coloring Your City

Bring your city to life with color! Use cool grays for steel, warm browns for brick, or bright blues for the sky. Tip: Use a darker shade for the sides of the buildings facing away from the 'sun' to add even more 3D realism.
More Tutorials


