How to Draw Dragon Wings: Easy 10-Step Guide
Ready to bring your fantasy creatures to life? This tutorial is perfect for young artists ages 6+ who want to master the structure of dragon wings. All you need is a pencil, an eraser, and a piece of paper to get started. Follow these steps to build confidence in your sketching and create a powerful, soaring masterpiece.
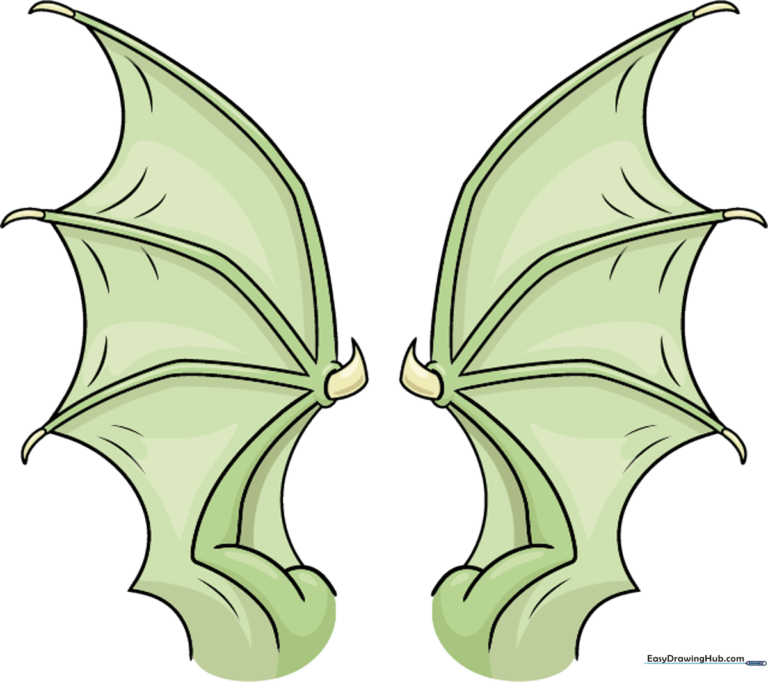
🎯 Final Result
Step-by-Step Instructions
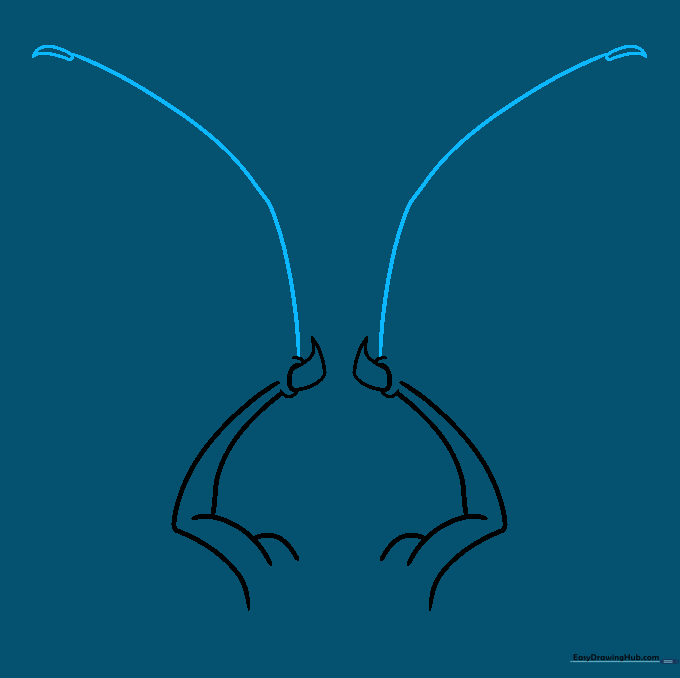
Step 1: Sketching the Base Structure

Start by drawing the base of the wings using two curved 'L' shapes. Add small, rounded bumps for the shoulder blades. Teacher's Tip: Keep your pencil pressure light so you can easily adjust the shape if the wings look uneven.
Step 2: Defining the Wing Edges

Contour the outer edge of each wing using a series of overlapping, scalloped curves. Make the final curve shorter than the others to create a natural taper. Tip: Imagine you are drawing the soft, leathery folds of a bat's wing.
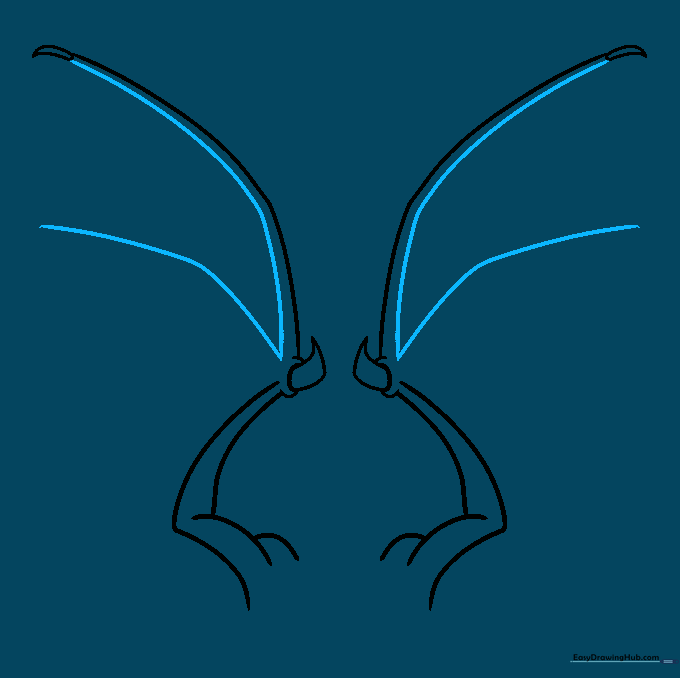
Step 3: Adding the First Claw

Draw a sharp, hooked triangular shape at the top of the wing to represent the claw. Connect it to the wing frame with a short, curved line. Tip: Keep the claw narrow to make it look sharp and dangerous!
Step 4: Extending the Leading Edges
Extend the leading edges of the wings with long, sweeping curves. Add another claw at the tip of each extension. Tip: Use long, fluid motions with your wrist rather than short, choppy strokes to get a smoother line.
Step 5: Outlining the Metacarpals
Draw a long, curved line parallel to the leading edge to create the wing's 'finger' bones. Connect this to the claw and add a second line to form a 'V' shape at the base. Tip: These bones act like the ribs of an umbrella, giving the wing its structure.
Step 6: Adding the Second Metacarpal

Repeat the process to add a second bone structure. Draw a claw at the tip, then create a 'V' shape at the base to support the next section of the wing membrane. Tip: Ensure the bones radiate outward from the shoulder joint.
Step 7: Completing the Wing Frame
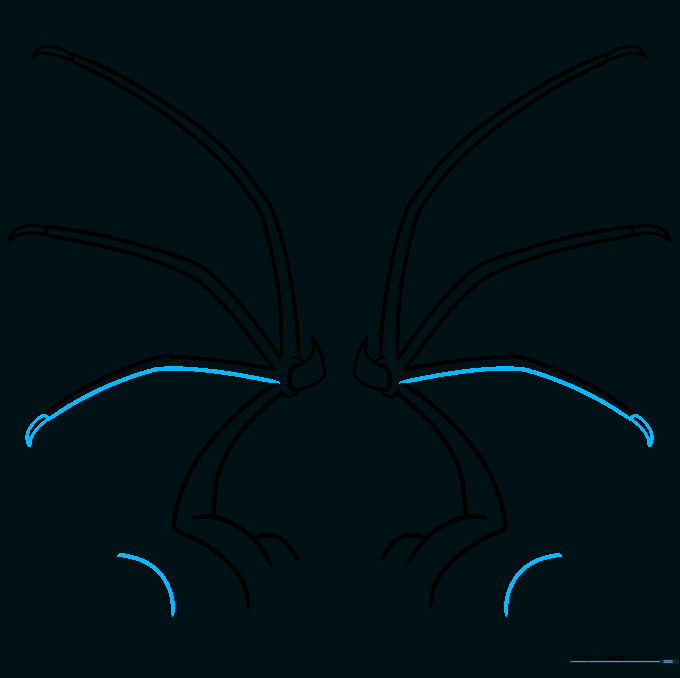
Add the final claw and connect it to the thumb area with a long, graceful curve. Begin sketching the inner sail membrane below the shoulders. Tip: Use light, feathery lines to map out the membrane before committing to a final outline.
Step 8: Connecting the Sails
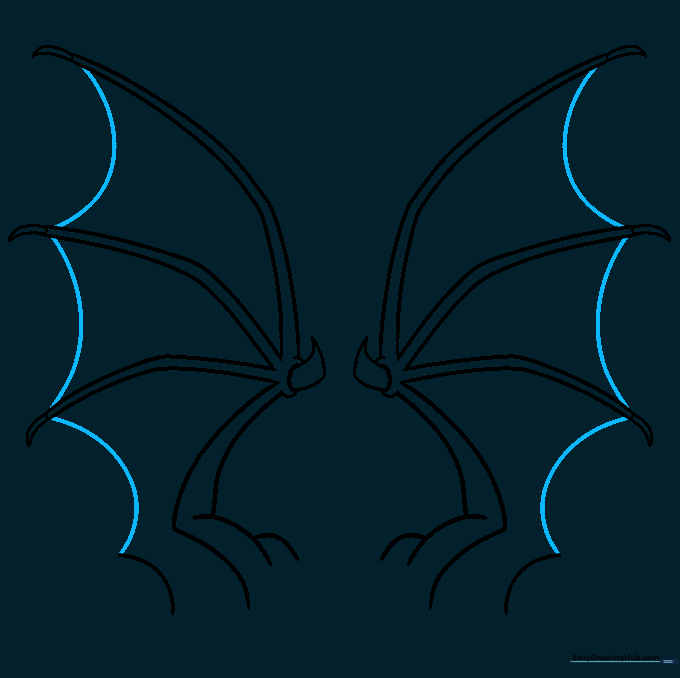
Draw curved lines between the tips of the bones to enclose the wing sails. This creates the 'webbing' that allows the dragon to fly. Tip: Make these lines slightly saggy to show that the skin is stretched between the bones.
Step 9: Adding Final Details
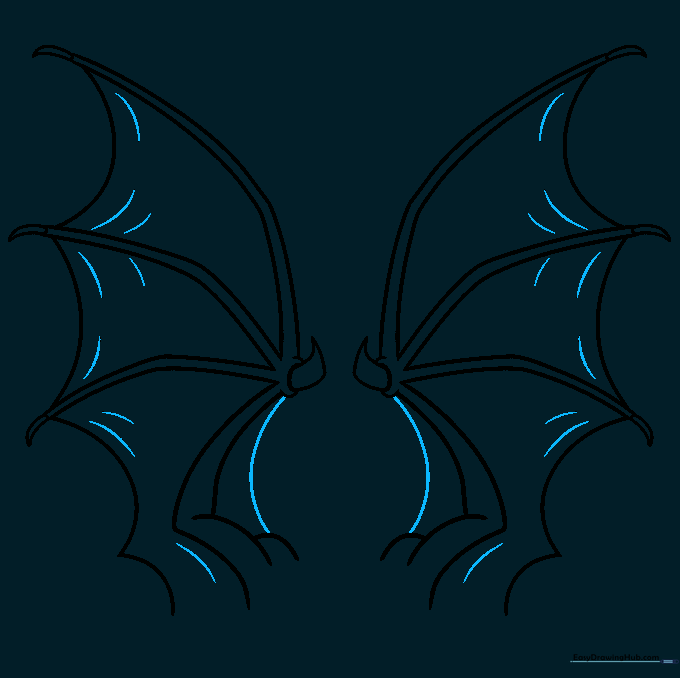
Connect the shoulders to the thumb and add parallel lines along the sails to give them texture and depth. Tip: These small details make your drawing look professional and realistic.
Step 10: Bringing It to Life with Color
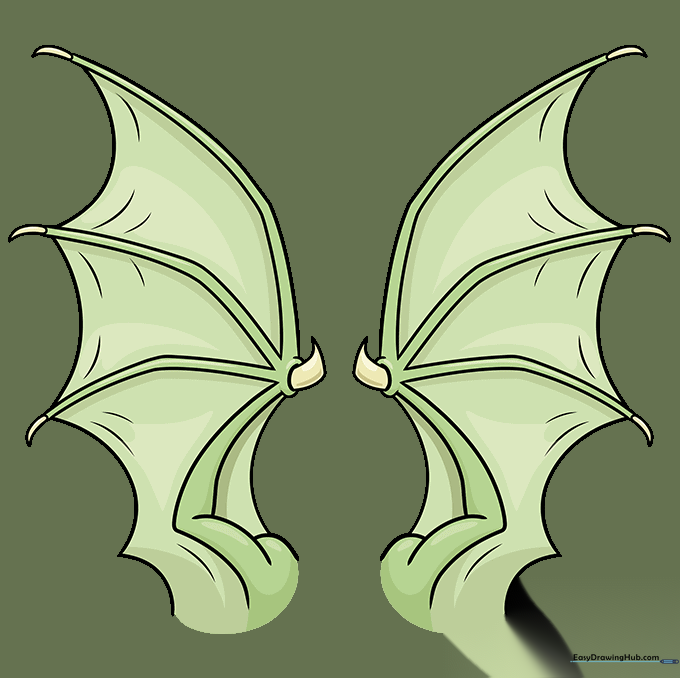
Time to color! We chose a vibrant green, but you can pick any color for your dragon. Tip: Use darker shades near the bones to create a shadow effect, making your wings look three-dimensional.
More Tutorials


