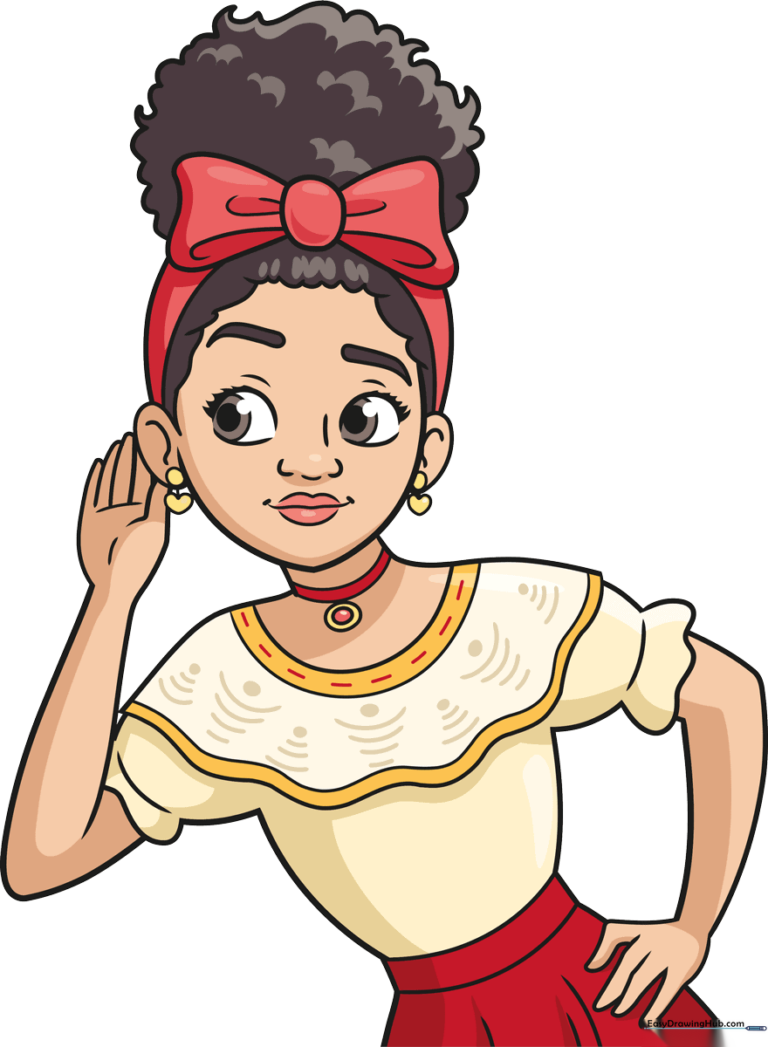
How to Draw Dolores from Encanto: Easy 10-Step Guide
Bring the magic of the Madrigal family to your sketchbook! This tutorial is designed for young artists ages 7+ to practice character proportions and facial expressions. Grab your pencil, eraser, and a set of colored pencils to recreate Dolores’s iconic look in just 10 simple steps.
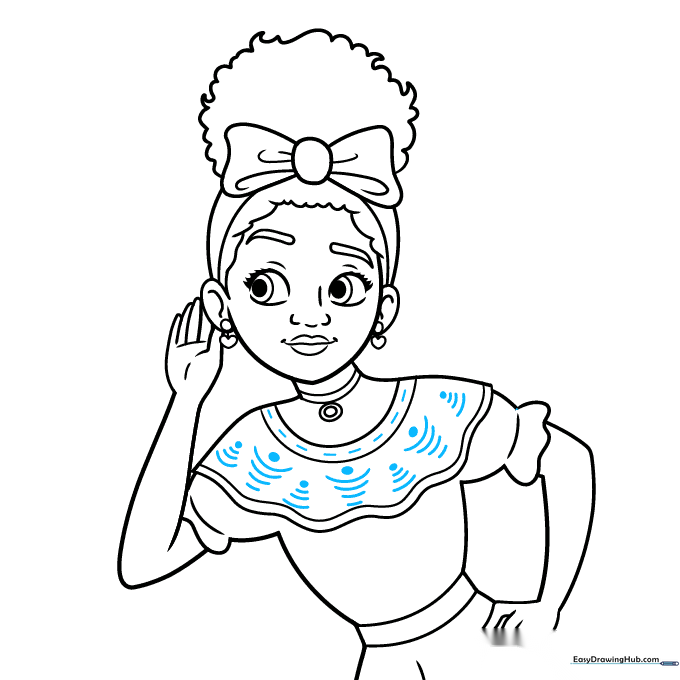
🎯 Final Result
Step-by-Step Instructions
Step 1: Sketching the Expressive Eyes
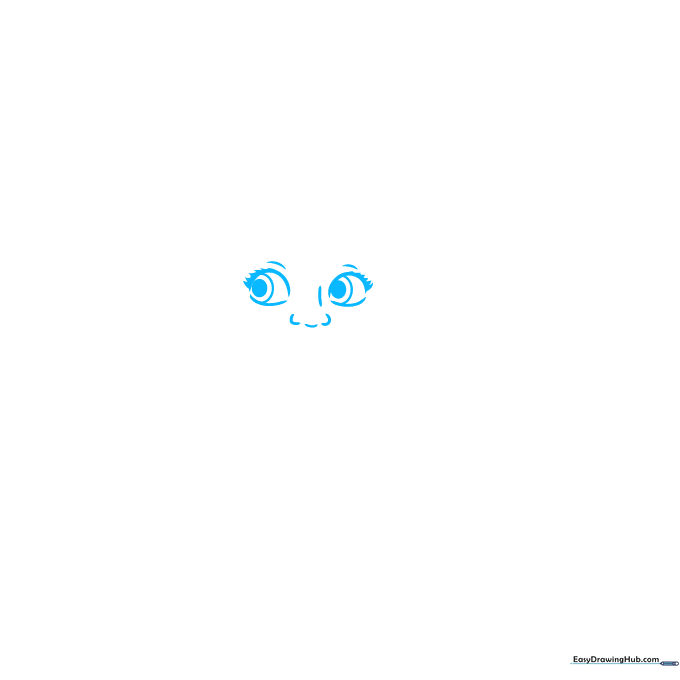
Start by drawing the eyes using soft, curved lines for the lids. Add two partial circles inside for the irises and shade them to create depth. Teacher's Tip: Keep your pencil pressure light here—if you make a mistake, it’s much easier to erase without leaving marks on your paper.
Step 2: Defining the Face and Features

Outline the hairline with short, choppy strokes, then draw a 'C' shape for the ear and a smooth curve for the chin. Add the eyebrows and a gentle mouth. Teacher's Tip: Use a mirror to look at your own face to see how the ears align with the eyes—it helps with placement!
Step 3: Adding the Signature Bow
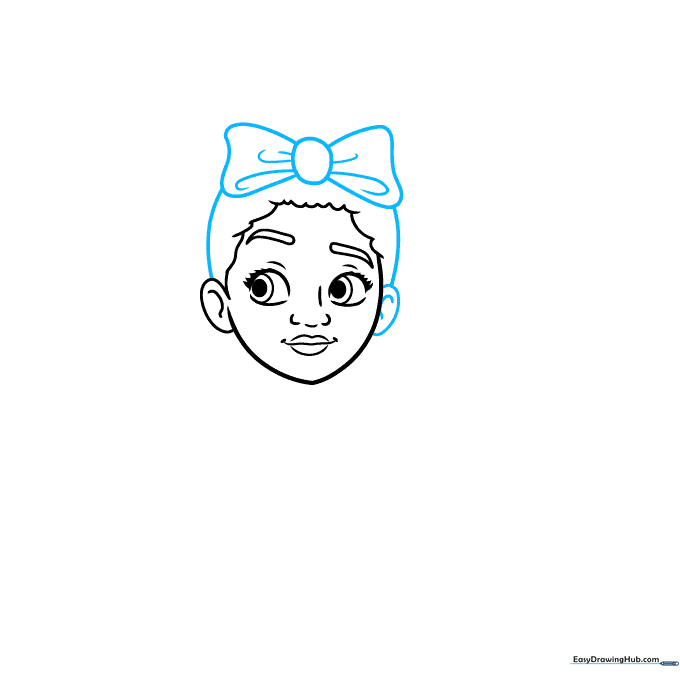
Draw an oval for the center of the bow, then extend curved lines outward to form the loops. Texture the bow with small lines to show fabric folds. Teacher's Tip: Don't worry about making the bow perfectly symmetrical; natural fabric has slight variations.
Step 4: Hairline and Earrings
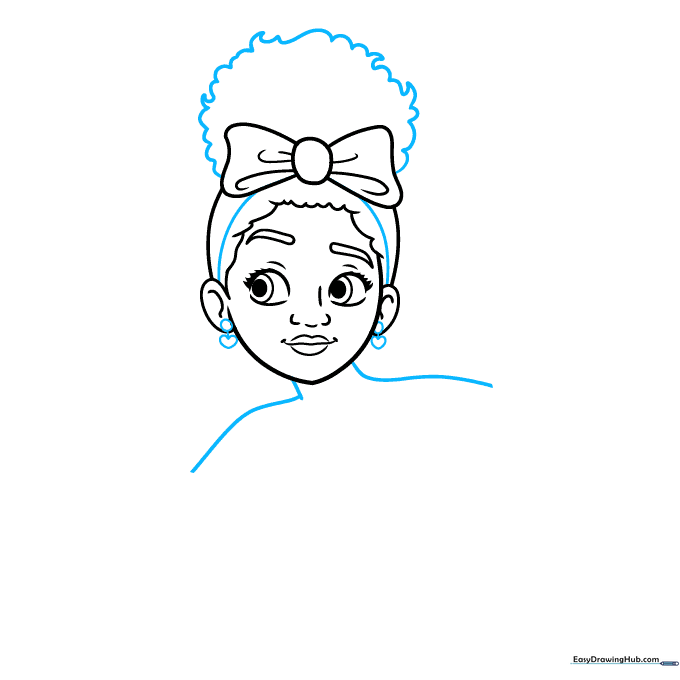
Connect the bow to the ears with smooth curves for the headband. Add her small circular earrings with a tiny heart detail below each. Teacher's Tip: Use a fine-liner pen to trace these small details once you are happy with your pencil sketch.
Step 5: The Frilly Collar
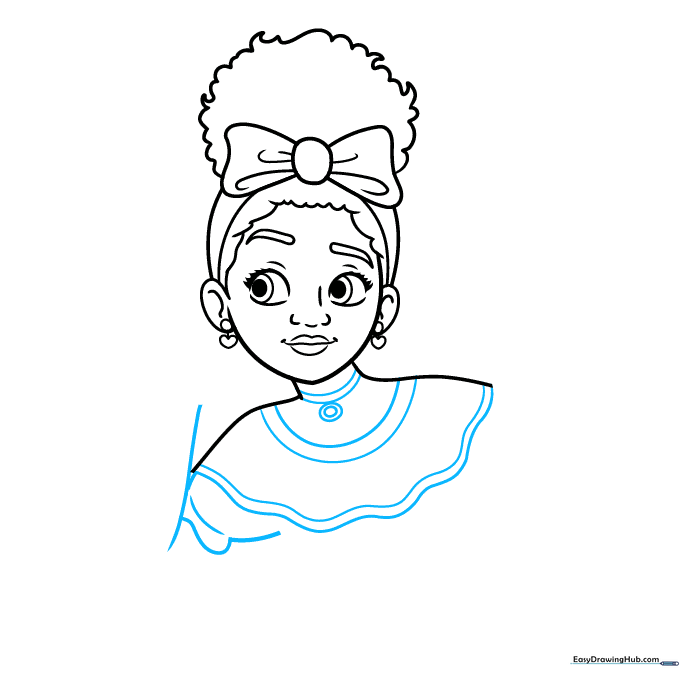
Use wavy 'C' lines to create the frilly collar and necklace. Add an oval detail to the necklace center. Teacher's Tip: Focus on the rhythm of the wavy lines—try to keep them consistent in size to make the collar look uniform.
Step 6: Positioning the Hand
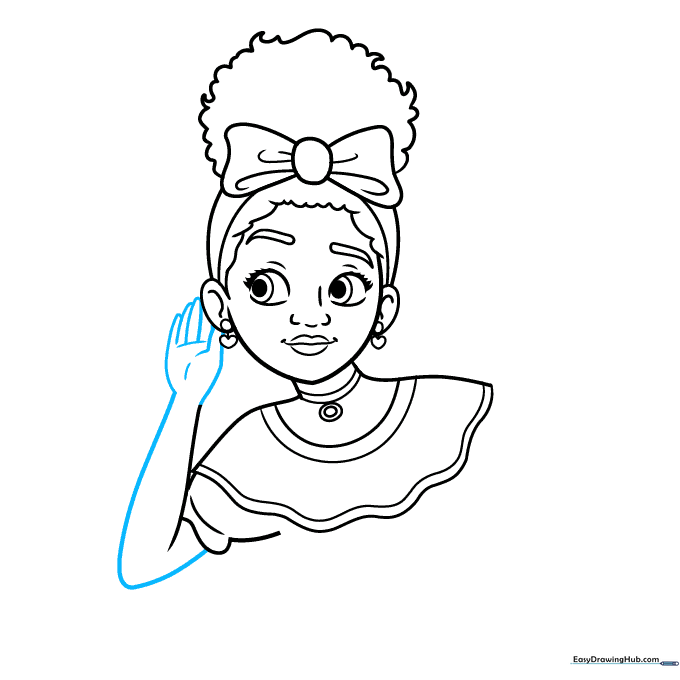
Draw the arm and hand raised toward her ear. Use small, overlapping 'U' shapes for the fingers. Teacher's Tip: If drawing hands feels tricky, try tracing your own hand in that position to understand how the fingers overlap.
Step 7: Shaping the Torso
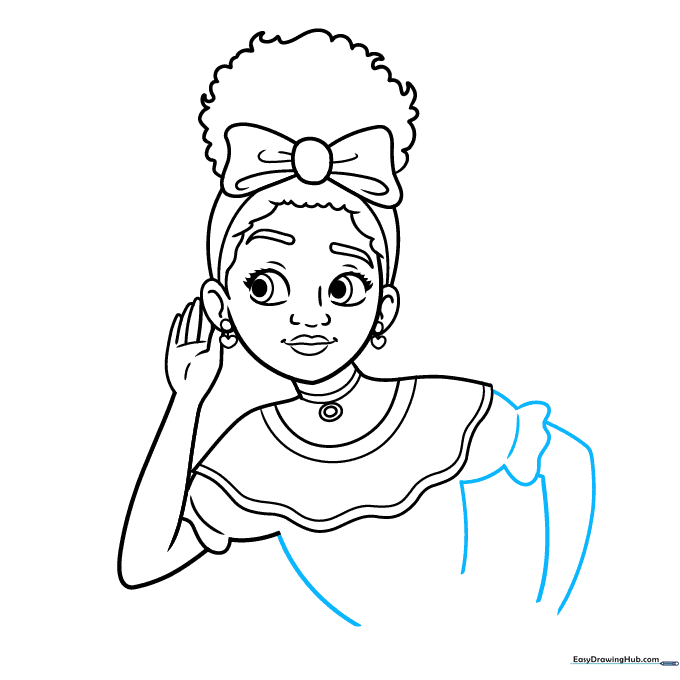
Use long, sweeping curved lines to define the torso and the other sleeve. Keep your lines fluid to suggest the drape of the fabric. Teacher's Tip: Imagine the fabric is soft cotton—let your lines curve with the body shape.
Step 8: Adding Skirt Details
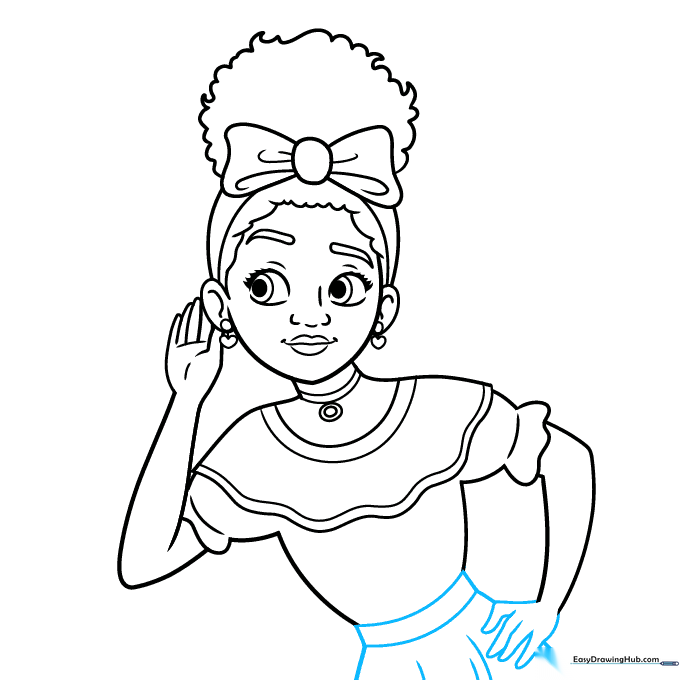
Finish the hand and extend the torso lines to form the skirt. Add horizontal bands at the top of the skirt with vertical texture lines. Teacher's Tip: These vertical lines add 'weight' to the drawing, making the skirt look like it has pleats.
Step 9: Final Touches
Complete the collar with small straight lines and shaded ovals to represent the intricate embroidery. Teacher's Tip: Take your time here; these small details are what make the character look authentic.
Step 10: Bringing Dolores to Life with Color
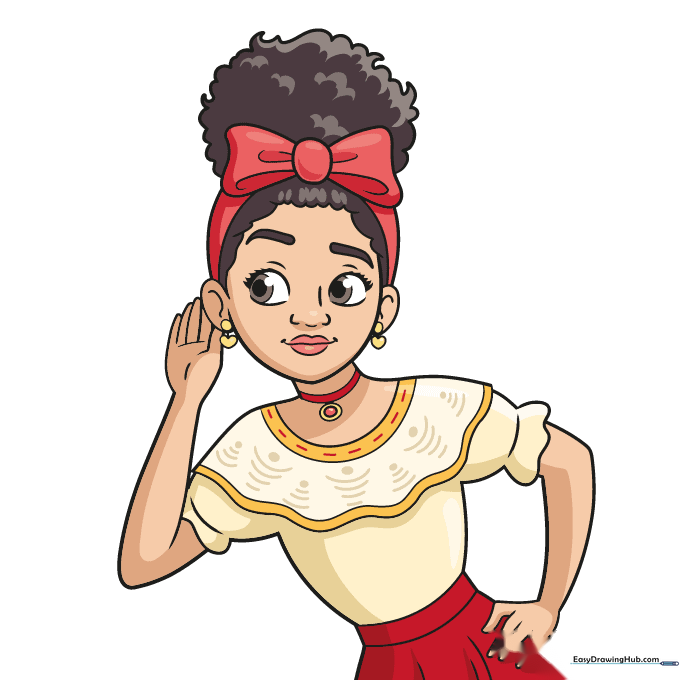
Time to color! Use warm yellows for the blouse, vibrant red for the bow and skirt, and deep browns for her hair and eyes. Teacher's Tip: Use a light touch with your red pencil first, then layer a second coat to make the color pop without smudging.
More Tutorials


