How to Draw Doctor Octopus: Easy 10-Step Guide
Ready to bring a classic Marvel villain to life? This tutorial is perfect for artists ages 8+ who want to practice mechanical details and character proportions. Grab your pencil, eraser, and a fine-liner to follow along as we build Doc Ock from his iconic goggles to his powerful tentacles.
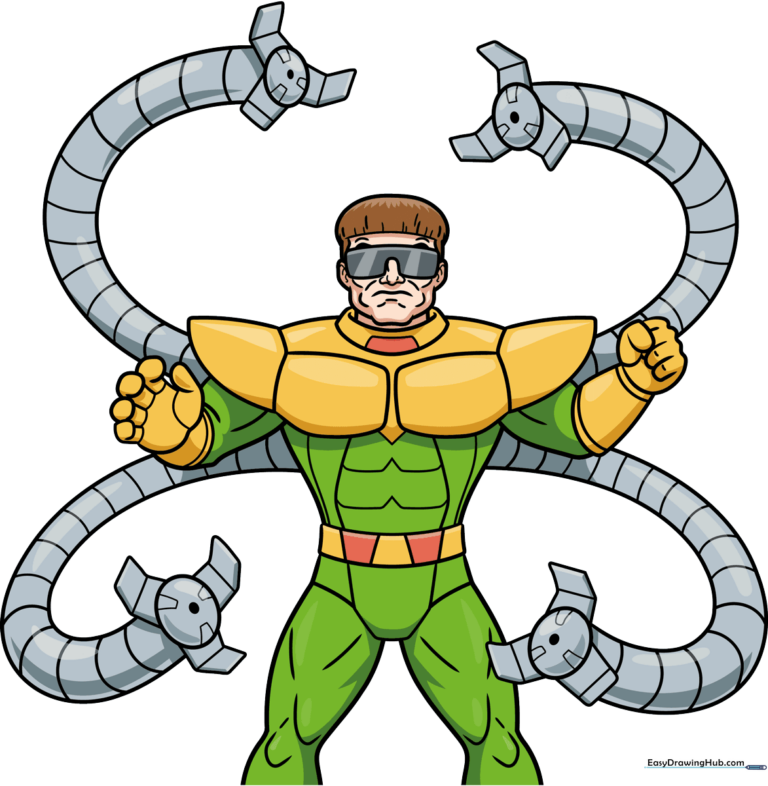
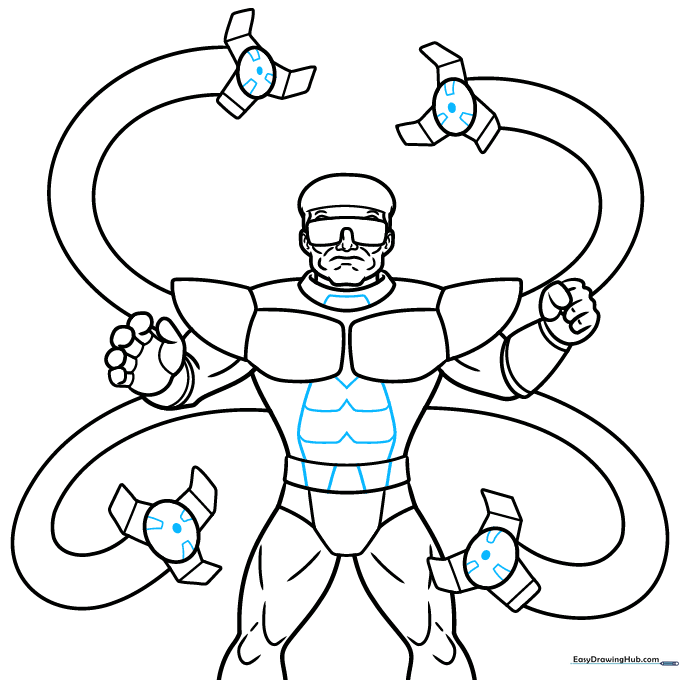
🎯 Final Result
Step-by-Step Instructions
Step 1: Sketching the Head and Goggles
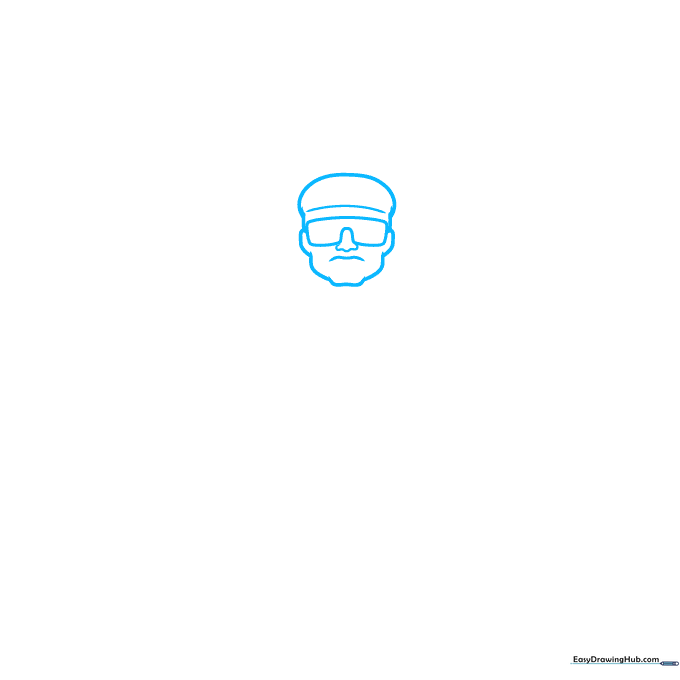
Start by drawing a light circle for the head. Tip: Keep your pencil strokes very faint so you can easily erase the guidelines later. Add the curved shape of his signature sunglasses across the middle.
Step 2: Defining Facial Features and Neck
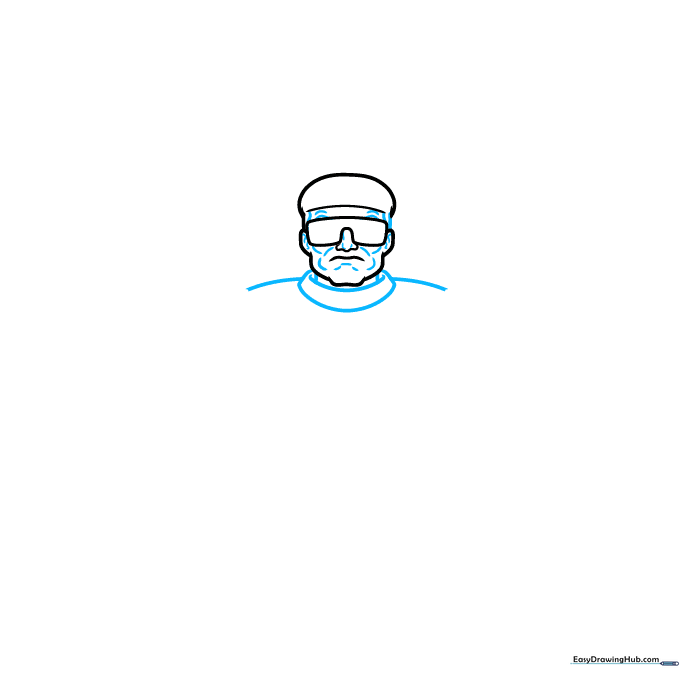
Add short, expressive lines for his eyebrows and wrinkles to give him that classic villainous look. Draw the neck and shoulder lines, keeping them rounded to suggest the bulk of his suit.
Step 3: Building the Chest Armor
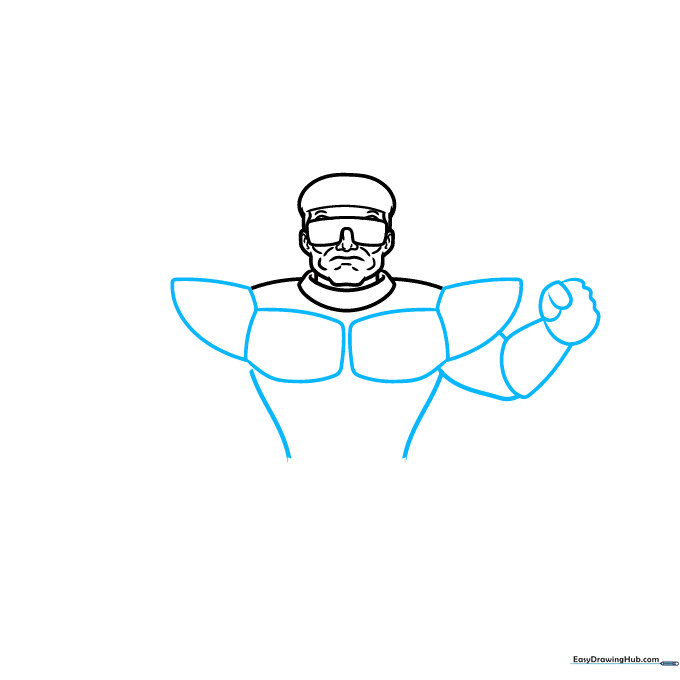
Draw the chest plates using curved, geometric shapes. Tip: Imagine the armor is wrapping around his body like a shell; use curved lines to show depth.
Step 4: Detailing the Arms and Gauntlets
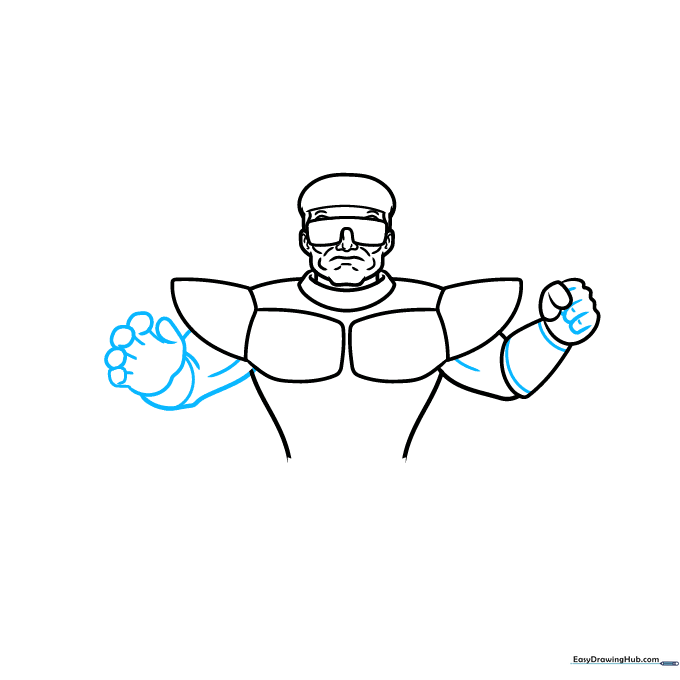
Sketch the arms and hands. Use small, tight curves to show the gauntlet bands. Tip: Keep the fingers slightly bent to make the character look ready for action.
Step 5: Adding the Belt and Lower Body
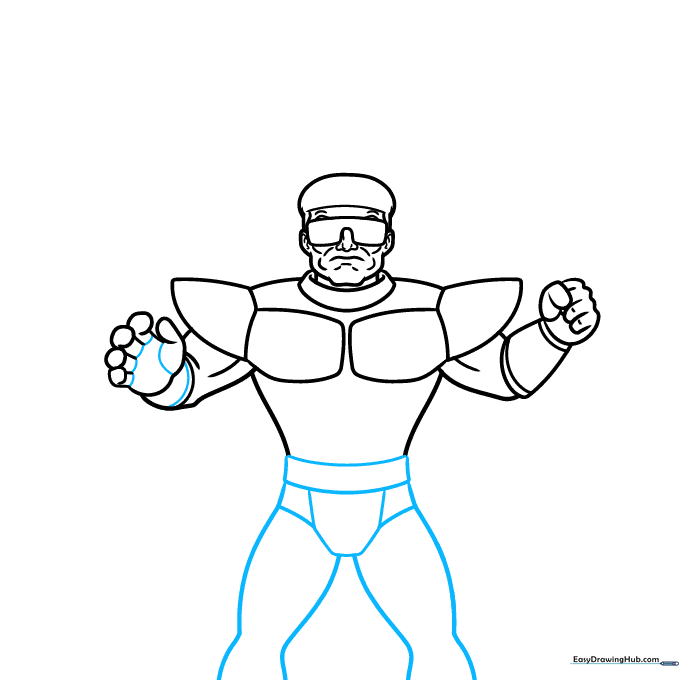
Draw the belt as a wide, curved rectangle at the waist. Add the legs with simple, strong lines to maintain the character's balance.
Step 6: Starting the Mechanical Tentacles
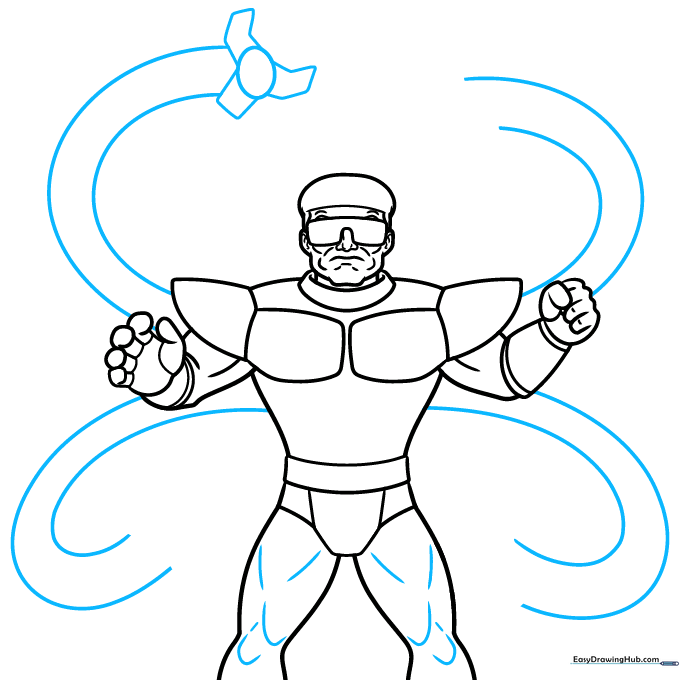
Extend four long, parallel lines from the back and shoulders. These are the base for his tentacles. Tip: Draw them in a 'wavy' motion to make them look flexible and alive.
Step 7: Drawing the Claw Tines
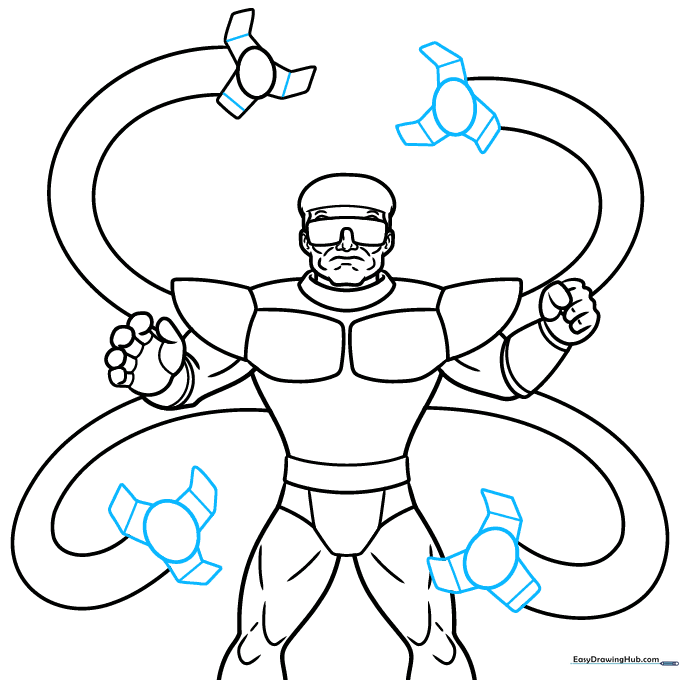
At the end of each tentacle, draw a small circle followed by geometric, rectangular tines. Tip: Use a straight edge if you want the metal claws to look extra sharp and precise.
Step 8: Refining the Armor and Claws
Add small trapezoids to the claws for extra detail. Enhance the chest armor by adding lines that mimic abdominal muscles. This adds a sense of power to the character.
Step 9: Final Texturing
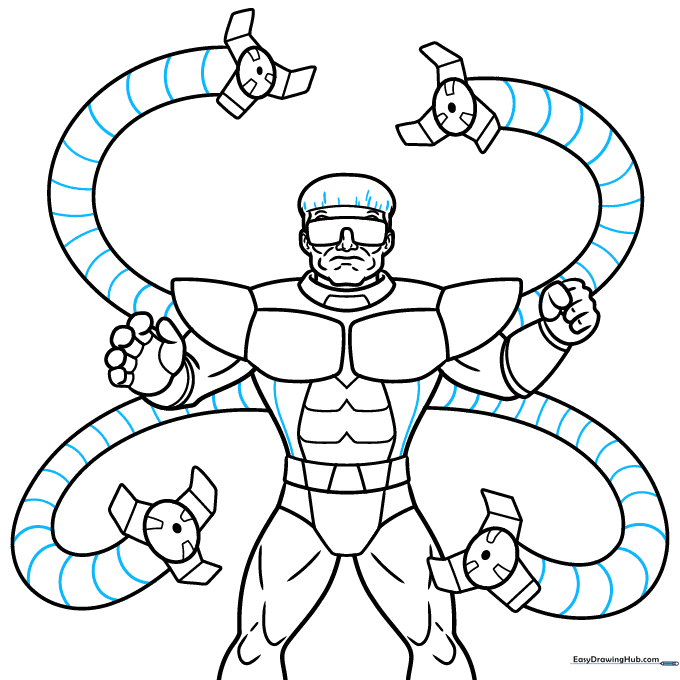
Add short, quick lines to the hair for texture. Add bands along the mechanical arms to show they are made of segments. Tip: Vary the length of your lines to make the hair look natural.
Step 10: Bringing Him to Life with Color
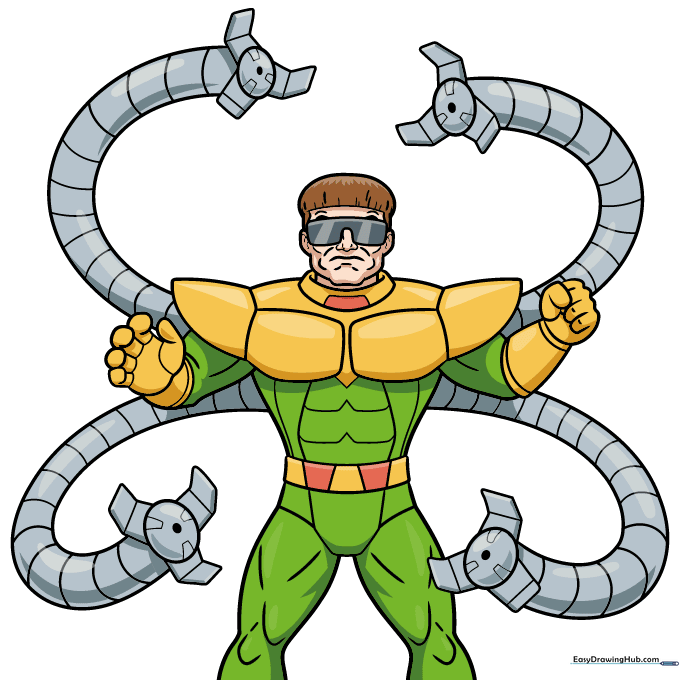
Time to color! Use a classic green and yellow palette for the suit and metallic silver for the arms. Tip: Use a darker grey to shade the underside of the tentacles to make them pop off the page.
More Tutorials


