How to Draw Daisy from Poppy Playtime: Easy 10-Step Guide
Bring the charming Daisy from Poppy Playtime to life with this beginner-friendly drawing guide. Designed for ages 6 and up, this activity requires only a pencil, eraser, and paper to practice character proportions and line work. Follow these steps to master her iconic floral look in minutes.
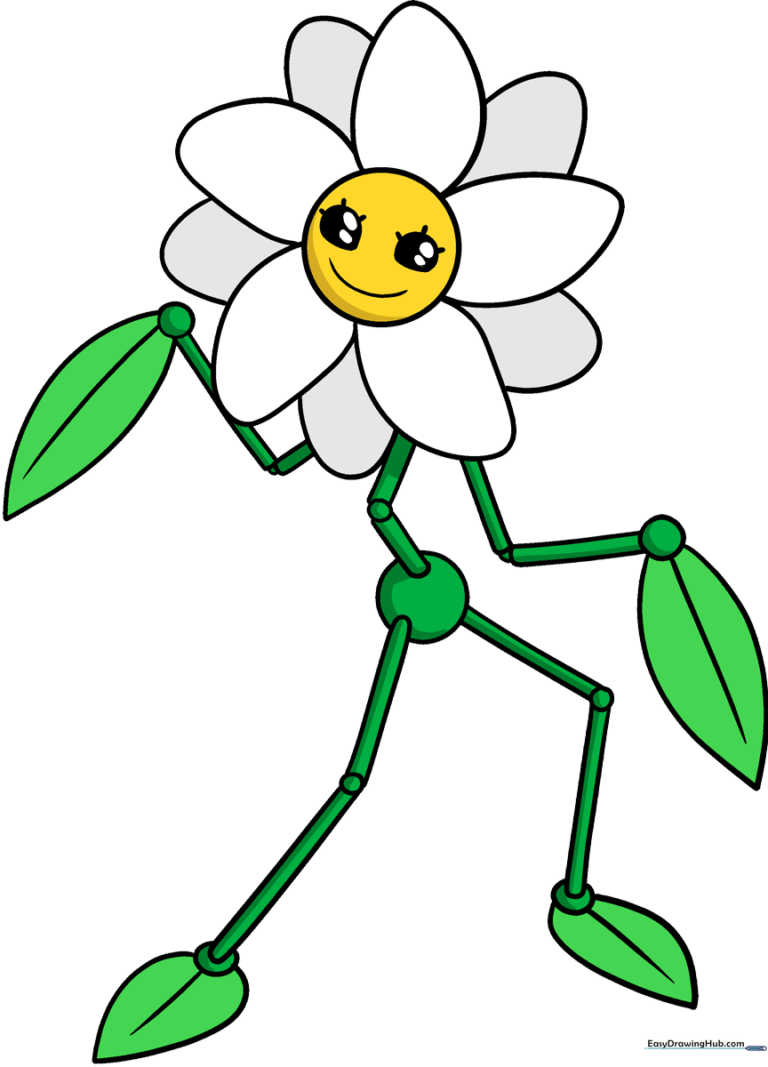
🎯 Final Result
Step-by-Step Instructions
Step 1: Sketching the Face

Draw a clean circle for the head. Inside, add two irregular shapes for the eyes, then place smaller ovals within them for pupils. Tip: Keep your pencil pressure light so you can easily erase the guidelines later when adding the eyelashes and smile.
Step 2: Adding the Inner Petals

Use long, sweeping curved lines to enclose five petals around the face. Tip: Try to space them evenly like a star to keep the flower shape balanced.
Step 3: Layering the Back Petals
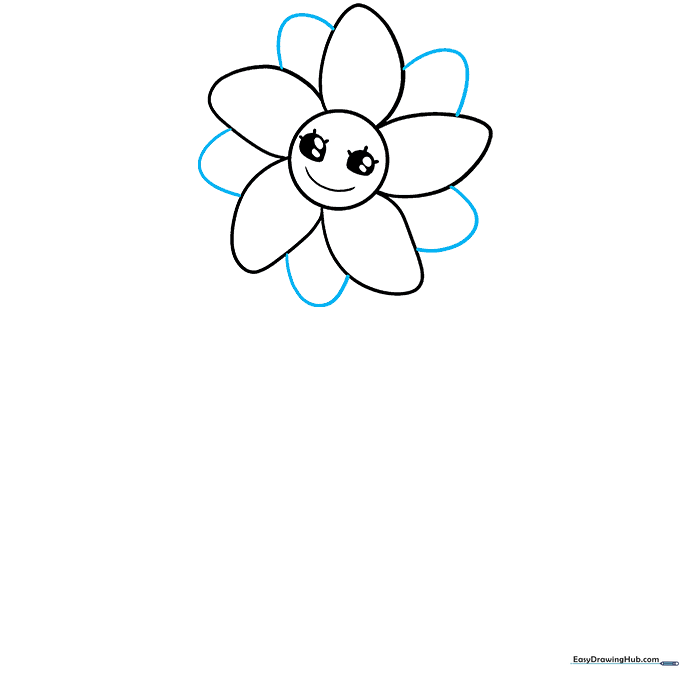
Add five more petals behind the first set using 'U' shaped lines. Tip: Drawing these slightly smaller or offset creates a 3D depth effect for your flower.
Step 4: Constructing the Body
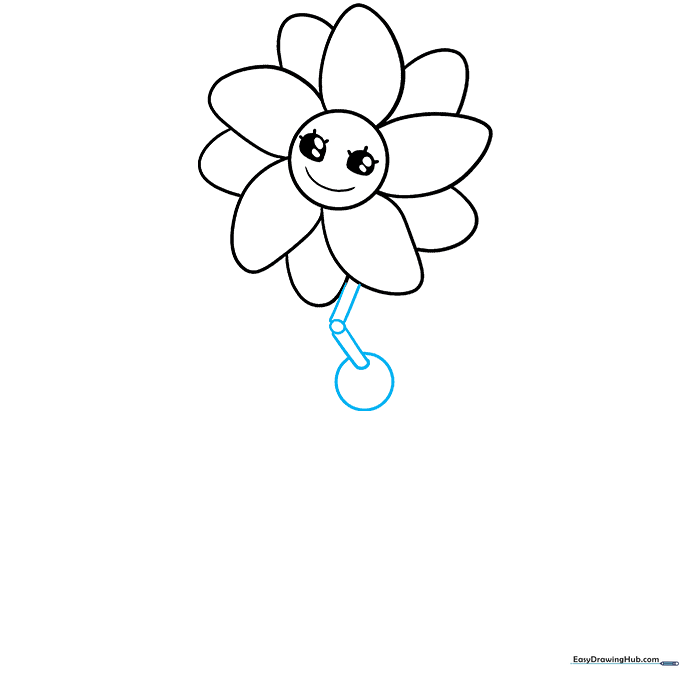
Draw two circles below the flower to represent the torso, connecting them with parallel lines to form the pipeline neck. Tip: Keep the lines straight to give it that 'toy-like' mechanical appearance.
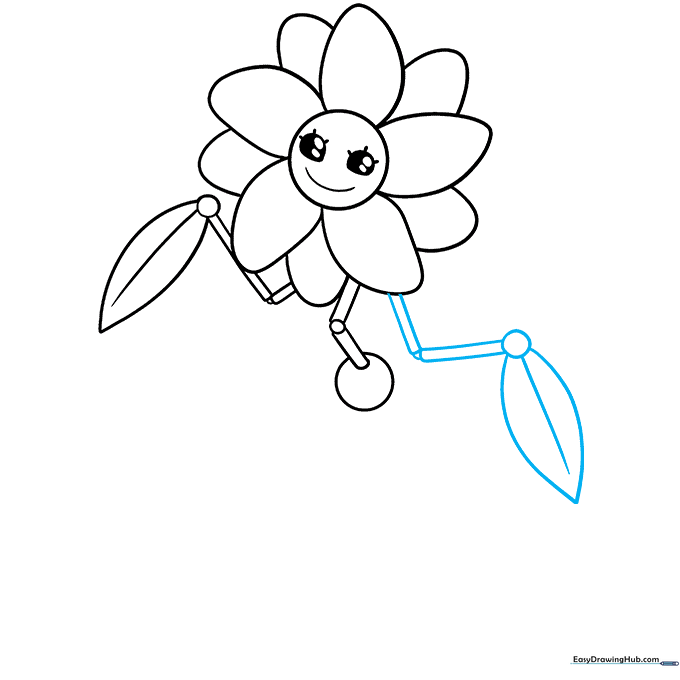
Step 5: Drawing the First Arm
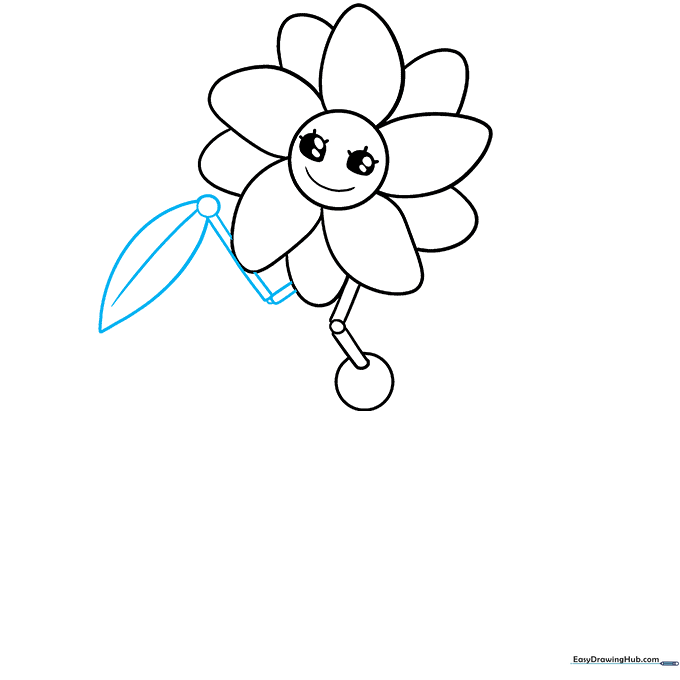
Create the arm using two circles connected by parallel lines, ending in a leaf-shaped hand. Add a curved vein down the center of the leaf. Tip: Make the leaf point slightly outward to give the character more personality.
Step 6: Adding the Second Arm
Repeat the process for the opposite arm, ensuring it mirrors the first. Tip: If you want a more dynamic pose, try angling this arm slightly higher or lower than the first.
Step 7: Sketching the First Leg

Draw the leg using the same circle-and-line technique. Tip: Erase any overlapping lines where the leg meets the body to make the drawing look clean and professional.
Step 8: Adding the Second Leg
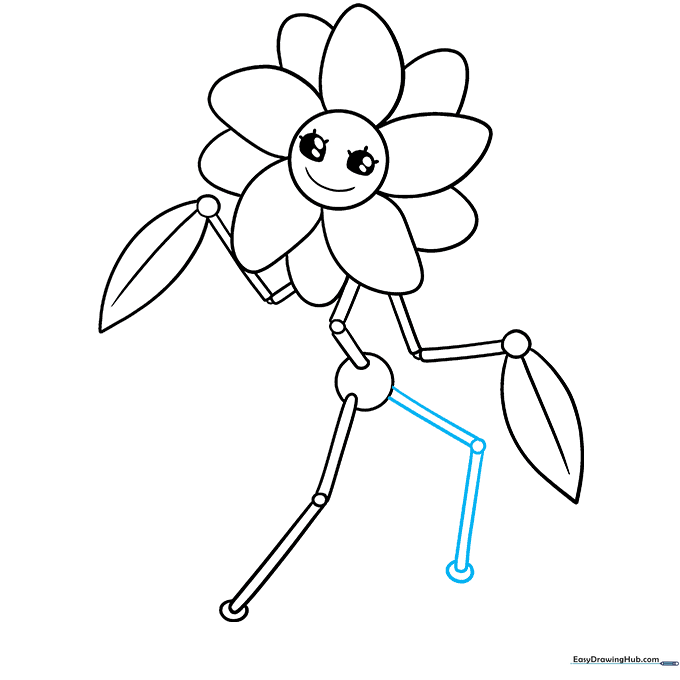
Draw the second leg at a different angle to give your character a sense of movement. Tip: Bending the knee slightly makes the character look like she is walking or dancing.
Step 9: Finalizing the Feet
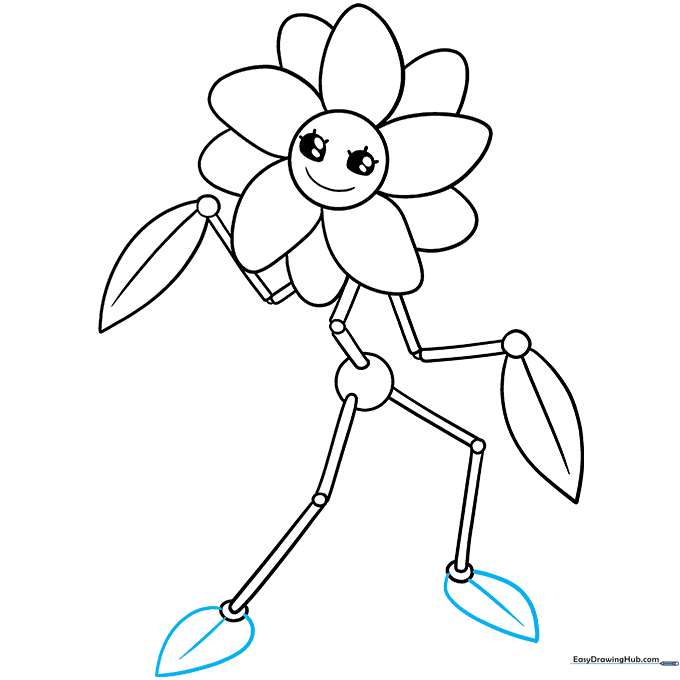
Extend three curved lines from each leg to form the leaf-shaped feet. Tip: Ensure the feet are wide enough to support the character's weight visually.
Step 10: Bringing Daisy to Life with Color
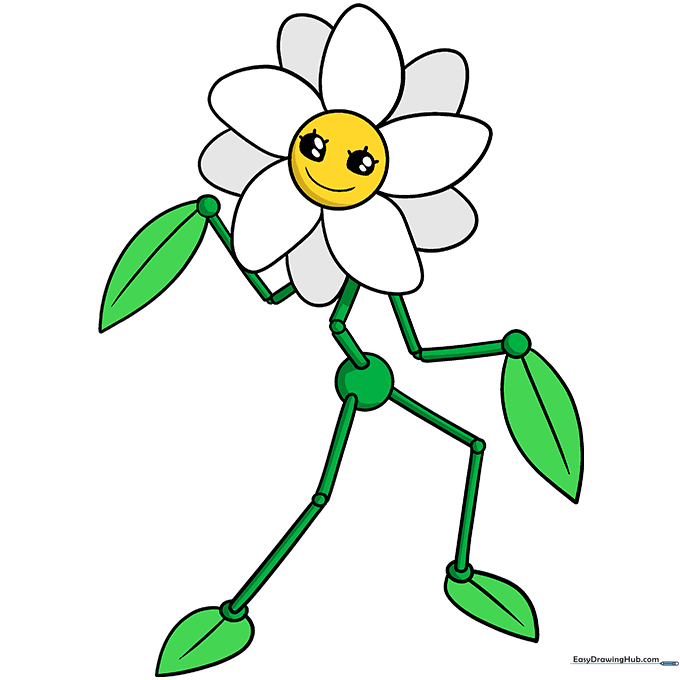
Your outline is ready! Use a vibrant green for the body, a bright yellow for the face, and crisp white for the petals. Tip: Use a darker shade of green on the edges of the body to add a subtle shadow effect.
More Tutorials


