How to Draw Daisy Duck: Easy 10-Step Guide for Kids
Ready to bring Daisy Duck to life? This tutorial is perfect for young artists ages 5 and up. You will only need a pencil, an eraser, and a piece of paper to master her iconic look. Follow along to build confidence in your character drawing skills!
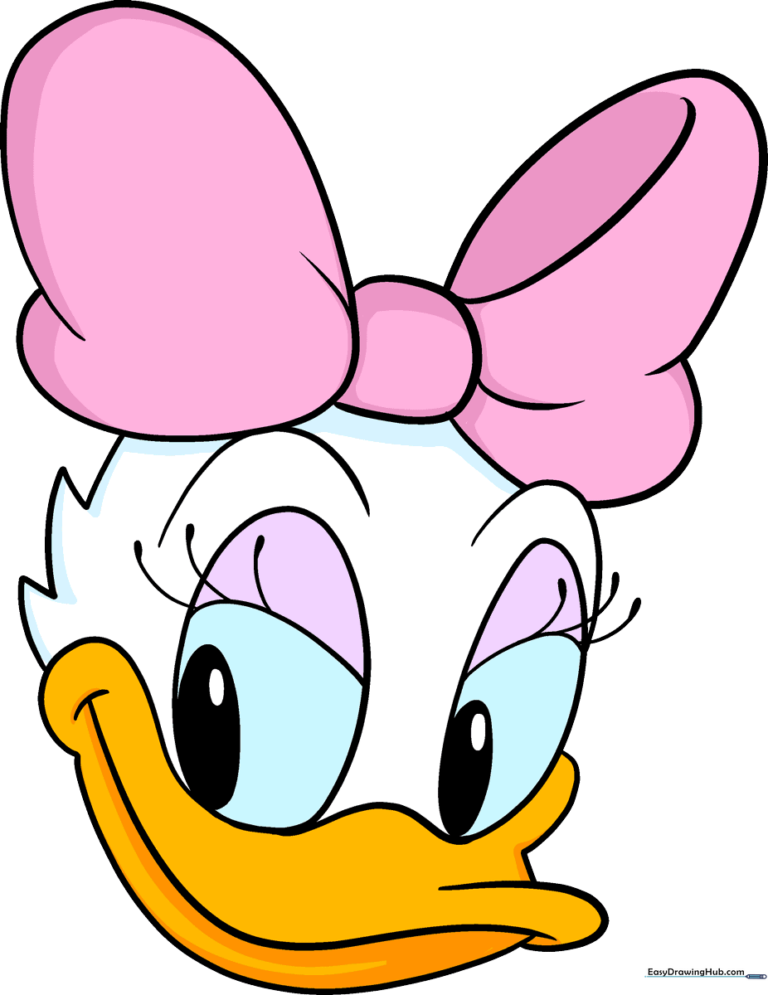
🎯 Final Result
Step-by-Step Instructions
Step 1: Sketching the Eyes

Start by drawing two large, slightly irregular ovals. Teacher's Tip: Keep these shapes light and airy; they serve as the foundation for Daisy's expressive face.
Step 2: Adding Detail to the Eyes

Draw a soft curve inside each eye for the eyelids, then add a smaller oval at the bottom for the pupils. Tip: Ensure both pupils are looking in the same direction to keep her gaze focused.
Step 3: Drawing Eyelashes
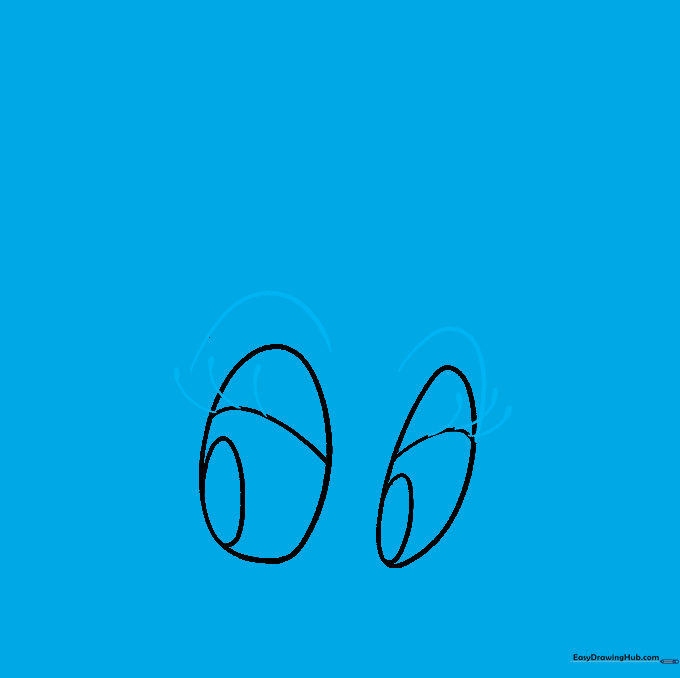
Add three curved lines to the top of each eye for lashes, finishing each with a tiny teardrop shape. Add a gentle arch above the eyes for her brow line. Tip: Press lightly; these details define her personality.
Step 4: Shaping the Beak

Connect the eyes with a long, sweeping line that spirals slightly at the side. This creates the top of her beak. Tip: Use one fluid motion for the spiral to keep the line looking smooth.
Step 5: Defining the Smile
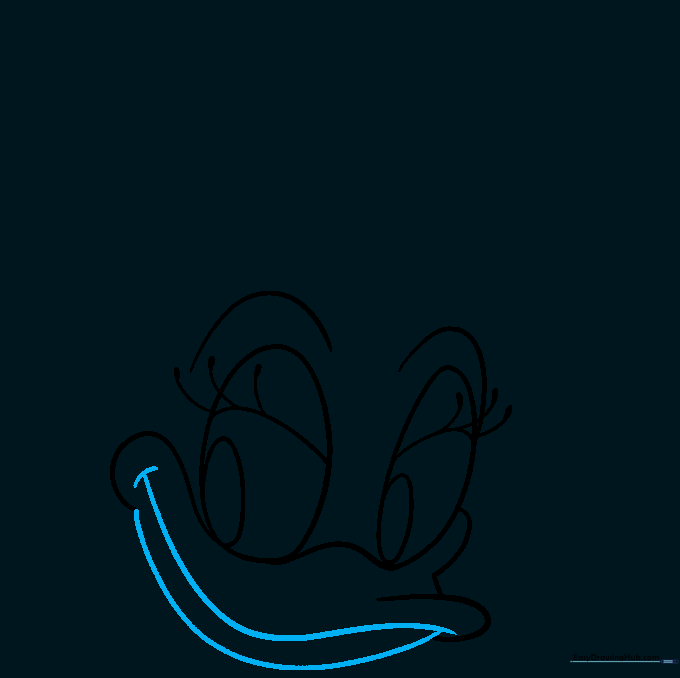
Complete the beak outline and add a curved line inside to show her smiling. A small dash at the corner adds a happy expression. Tip: A smile is all about the curve—make it look like a gentle 'U' shape.
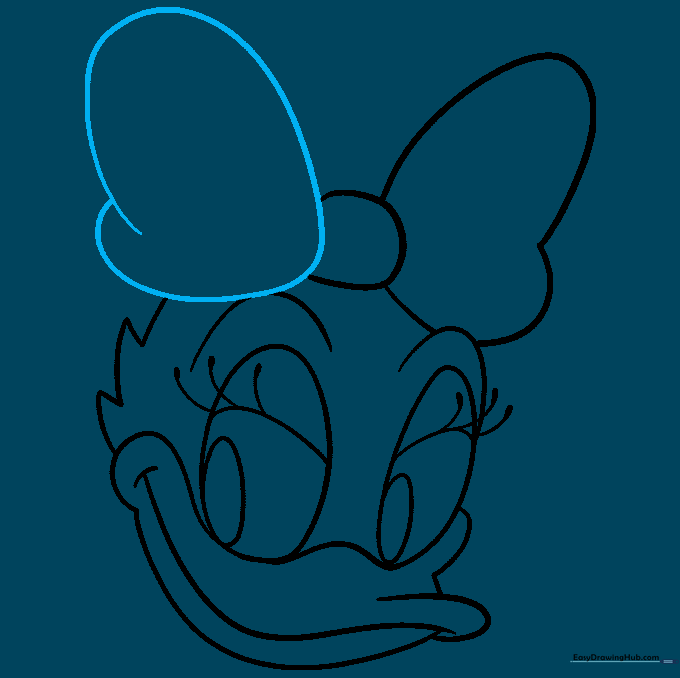
Step 6: Adding Feathers

Draw a series of zigzagging curved lines on the side of her head to represent her fluffy feathers. Tip: Vary the length of your lines to make the feathers look natural and soft.
Step 7: Starting the Bow
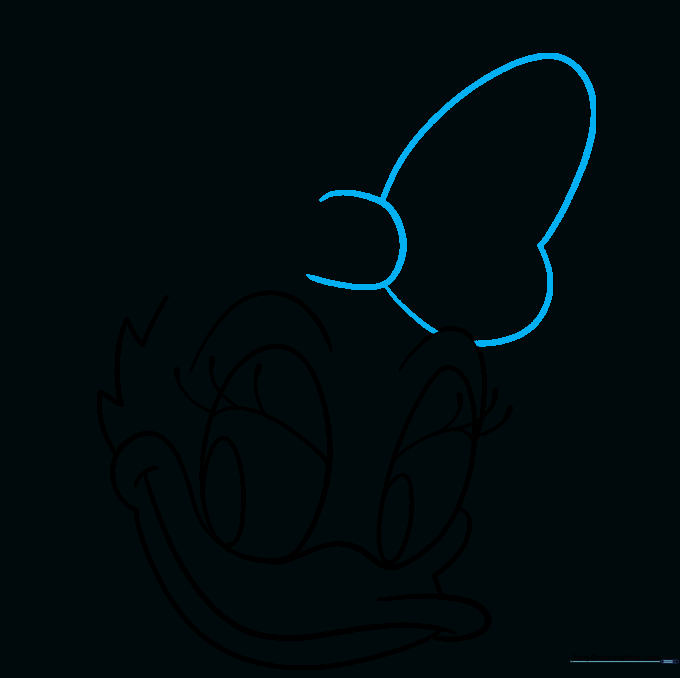
Draw a 'C' shape for the center knot of her bow, then add curved lines to form the sides. Tip: Think of this as drawing two rounded triangles meeting in the middle.
Step 8: Completing the Bow
Finish the bow by drawing a large heart shape on the side. Tip: If the heart looks tricky, draw it as two small circles connected by a 'V' at the bottom.
Step 9: Final Touches
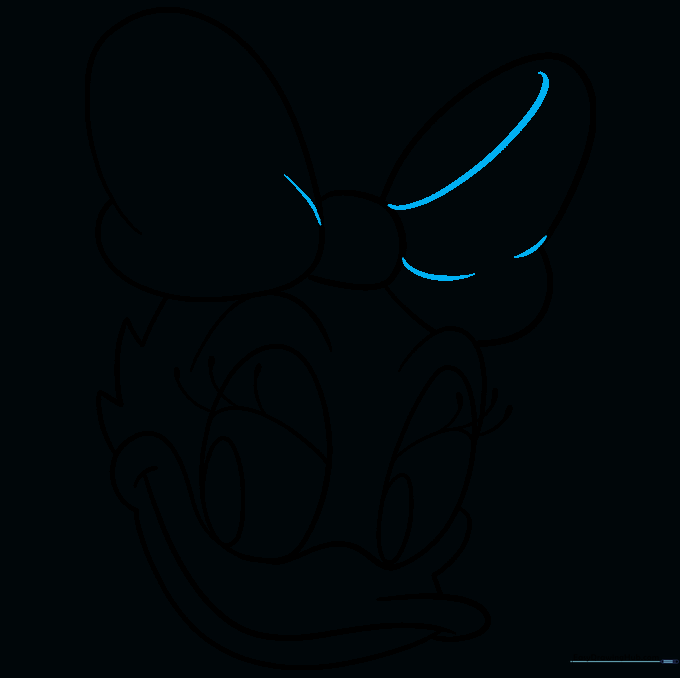
Add small curved lines to the bow to show fabric folds. This adds depth to your drawing. Tip: Keep these lines short and subtle so they don't overpower the main shape.
Step 10: Bringing Daisy to Life with Color
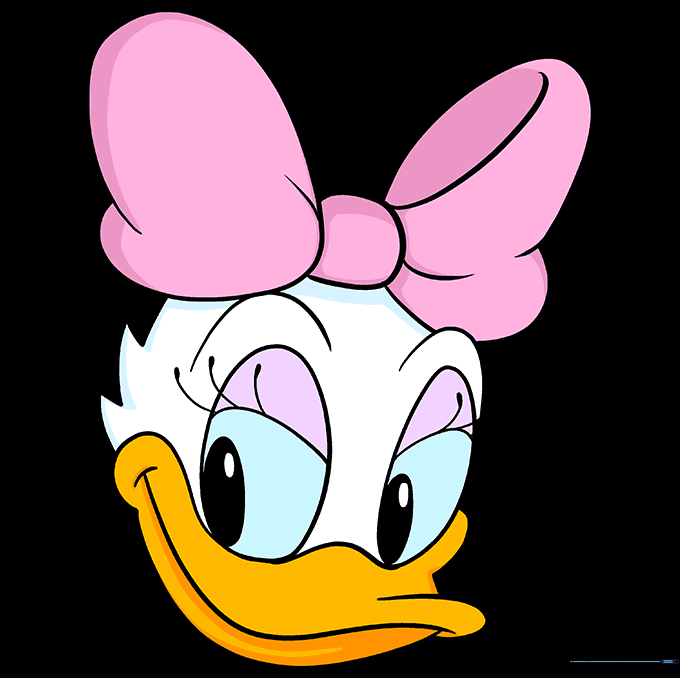
Time to color! Use pink or purple for her bow and soft tones for her feathers. Tip: Use light pressure with your colored pencils to blend colors smoothly.
More Tutorials


