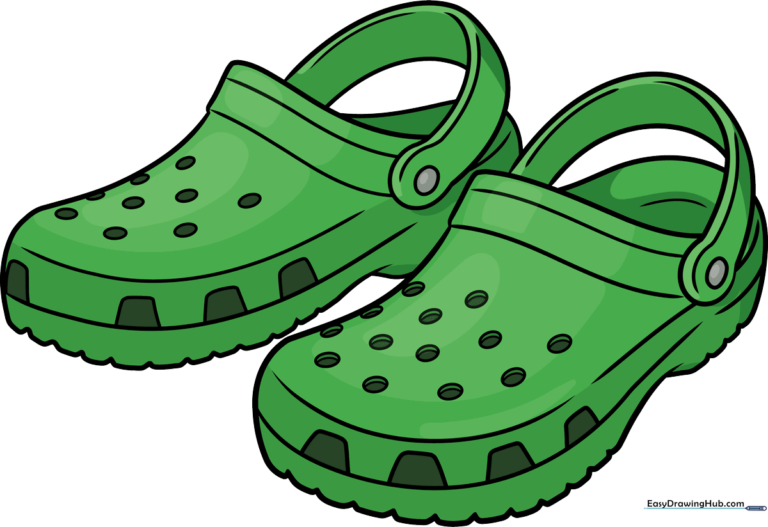
How to Draw Crocs: Easy 10-Step Guide for Kids
Ready to draw your favorite comfy footwear? This tutorial is perfect for young artists ages 5 and up. All you need is a pencil, an eraser, and your favorite markers to bring these iconic shoes to life on paper.
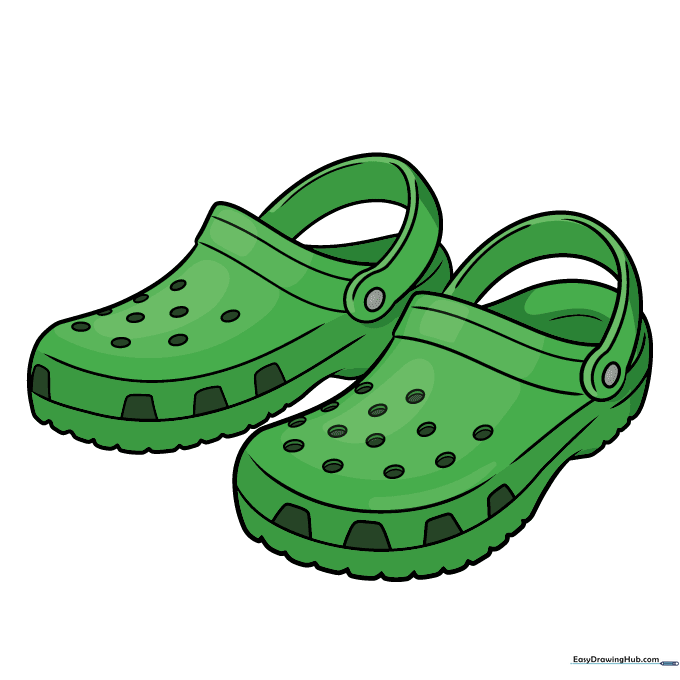
🎯 Final Result
Step-by-Step Instructions
Step 1: Sketching the Opening
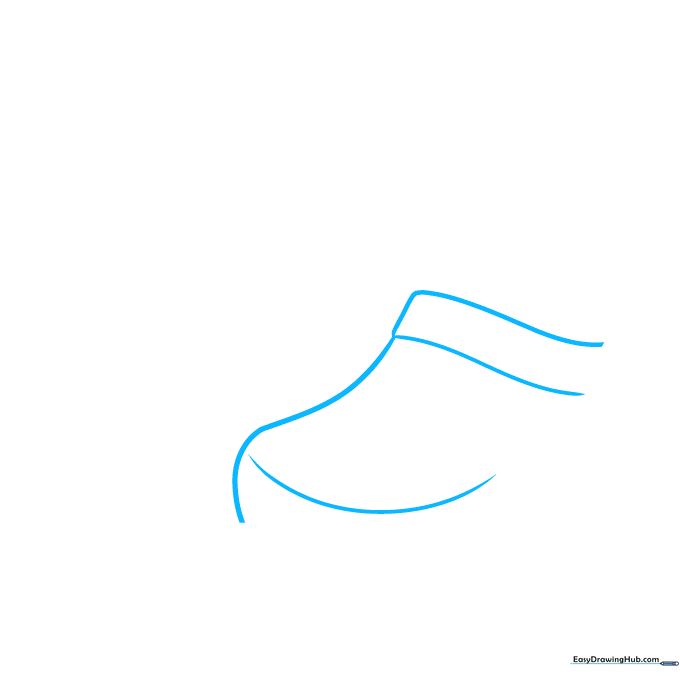
Start by drawing a partial rectangle with soft, wavy lines to represent the top opening of the shoe. Teacher's Tip: Keep your pencil pressure light here—it helps if you make a mistake!
Step 2: Defining the Toe and Sole
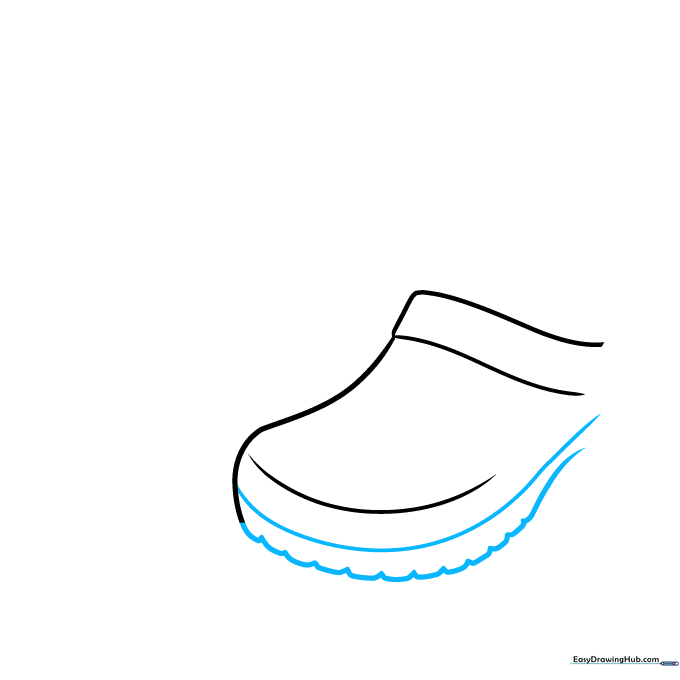
Draw a long, smooth curve for the top of the shoe, then add the sole underneath. Tip: Use a scalloped motion with your wrist to give the sole that classic, bumpy Crocs tread.
Step 3: Adding the Heel Strap
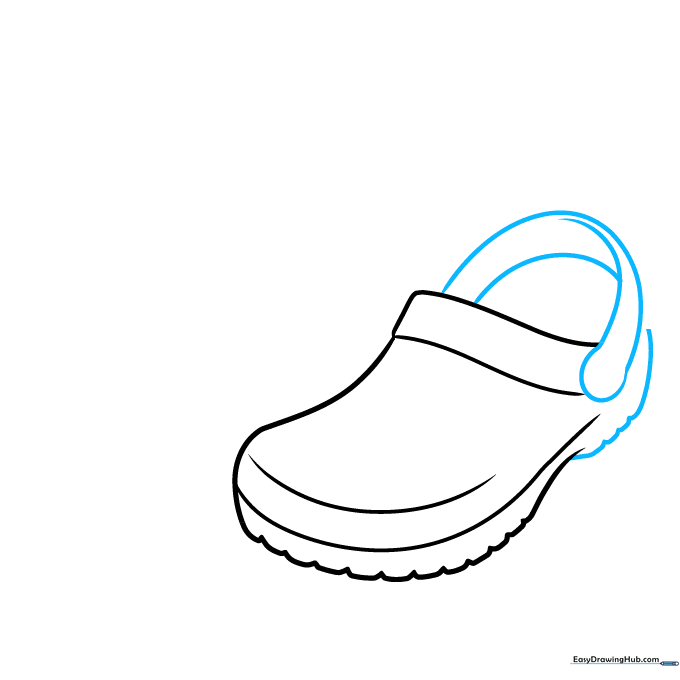
Add the heel strap using overlapping curved lines. This overlap is key to making the shoe look 3D. Tip: Imagine the strap is a 'C' shape hugging the back of the shoe.
Step 4: Detailing the Sides and Holes
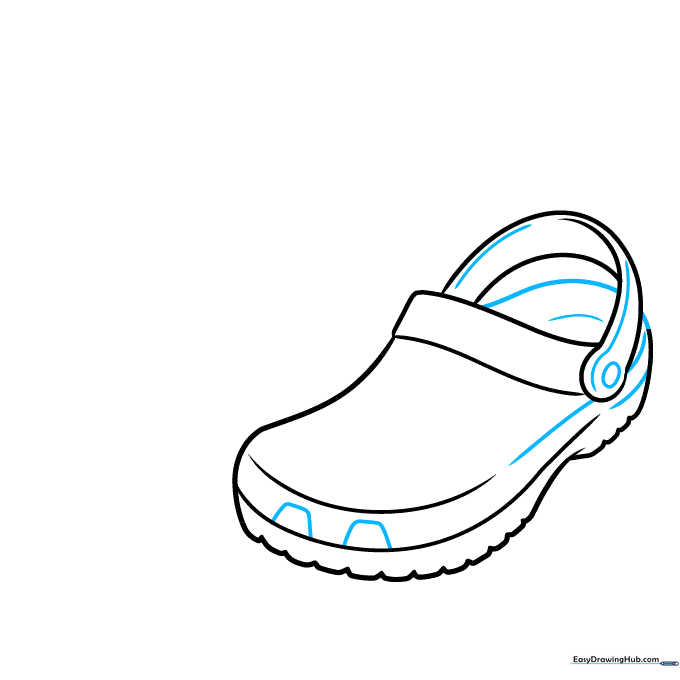
Draw an oval where the strap connects to the shoe. Then, sketch small rounded trapezoids on the toe area. These will become the signature ventilation holes.
Step 5: Adding More Ventilation
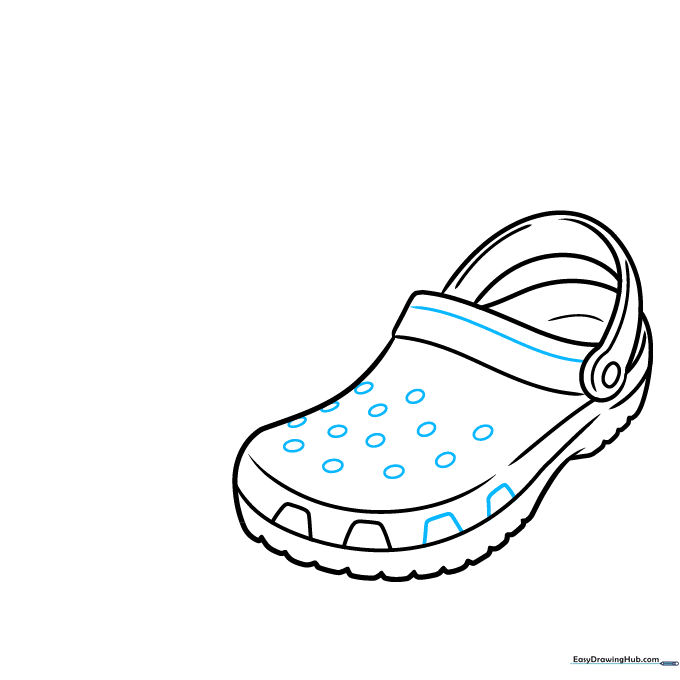
Add a few more rounded trapezoids and small ovals across the top surface. Tip: Don't worry about making them perfect; Crocs holes are naturally a bit organic and rounded.
Step 6: Starting the Second Shoe
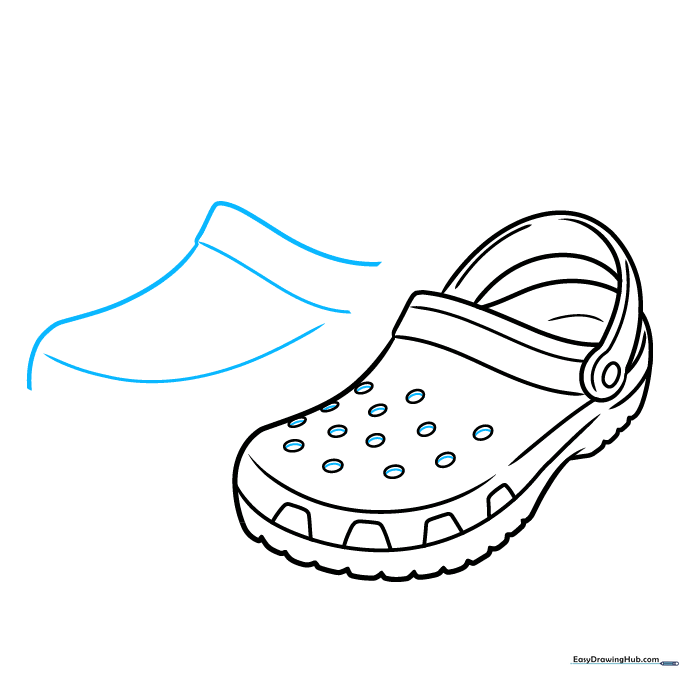
Give your drawing depth by starting the second shoe behind the first. Use a similar curved line for the top opening. Tip: Keep the second shoe slightly smaller to show perspective.
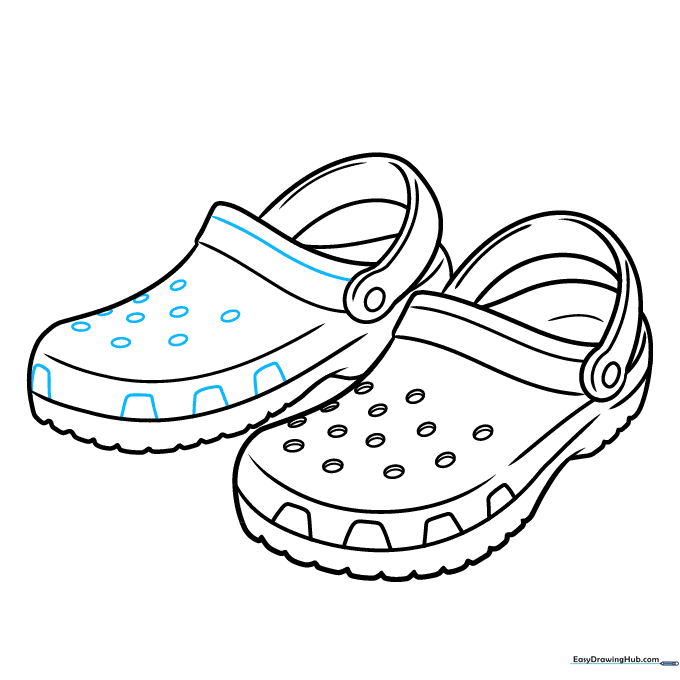
Step 7: Shaping the Second Shoe

Continue the second shoe by adding the sole and the strap area. Use the same scalloped line technique for the tread to keep the pair looking consistent.
Step 8: Refining the Second Shoe

Complete the strap and heel contour on the second shoe. Ensure the connection points match the first shoe for a realistic look.
Step 9: Final Touches
Add the final ventilation holes to the second shoe. Check your work—erase any stray pencil marks to make your drawing look clean and professional.
Step 10: Color Your Masterpiece
Time to color! Whether you want neon pink, classic blue, or a tie-dye pattern, use your markers to fill in the shoes. Tip: Use a slightly darker shade on the edges to give your shoes a rounded, 3D effect.
More Tutorials


