How to Draw Classic Mickey Mouse: Easy 10-Step Guide
Bring the magic of animation to your sketchbook with this classic Mickey Mouse drawing tutorial. Designed for artists ages 5 and up, this lesson uses basic shapes to build confidence and coordination. All you need is a pencil, an eraser, and a piece of paper to get started.
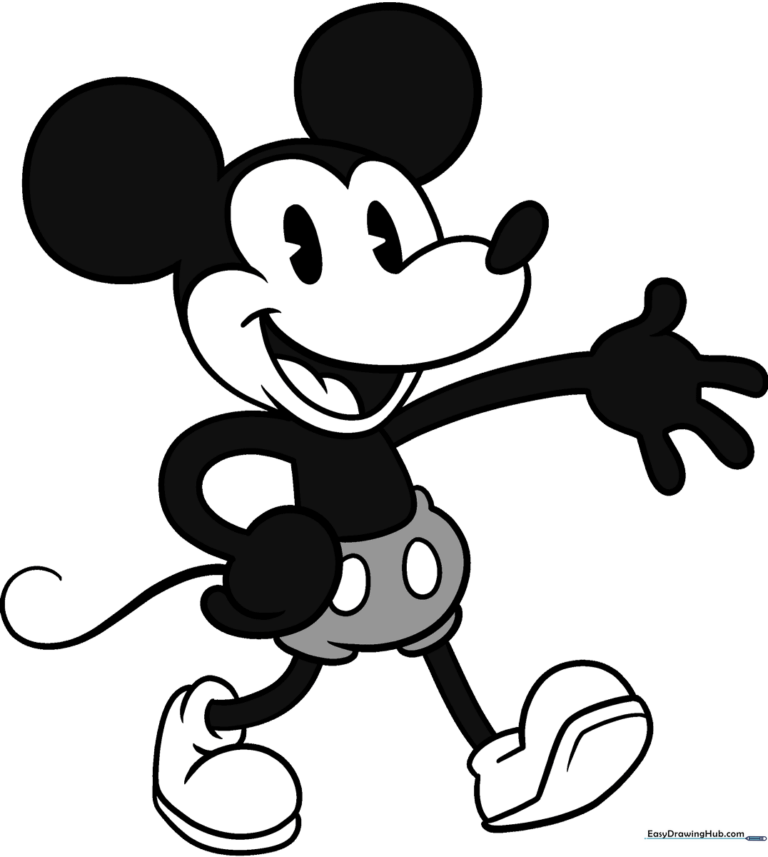
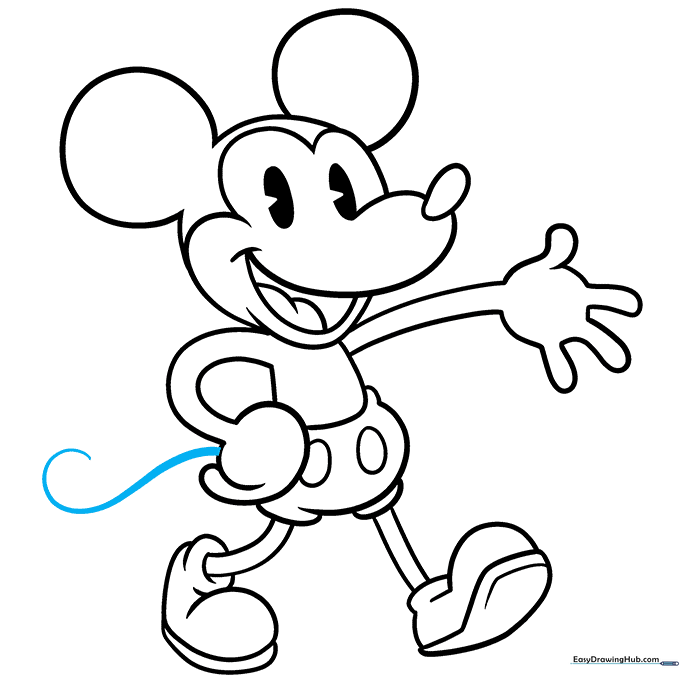
🎯 Final Result
Step-by-Step Instructions
Step 1: Sketching the Eyes and Snout
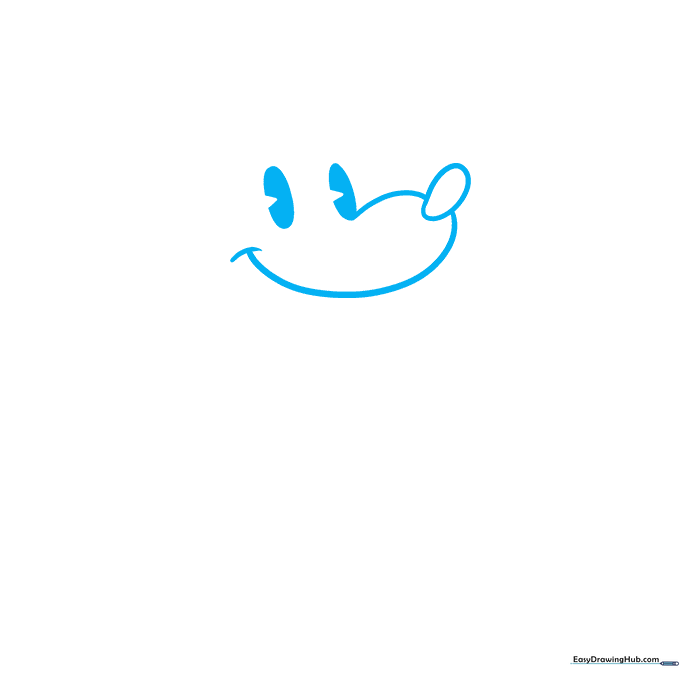
Start by drawing two ovals with a small triangle missing from the top to create the classic pie-cut eyes. Shade them in, then draw a small pointed oval for the nose. Teacher's Tip: Keep the nose centered between the eyes to ensure Mickey's face looks balanced.
Step 2: Defining the Face and Mouth
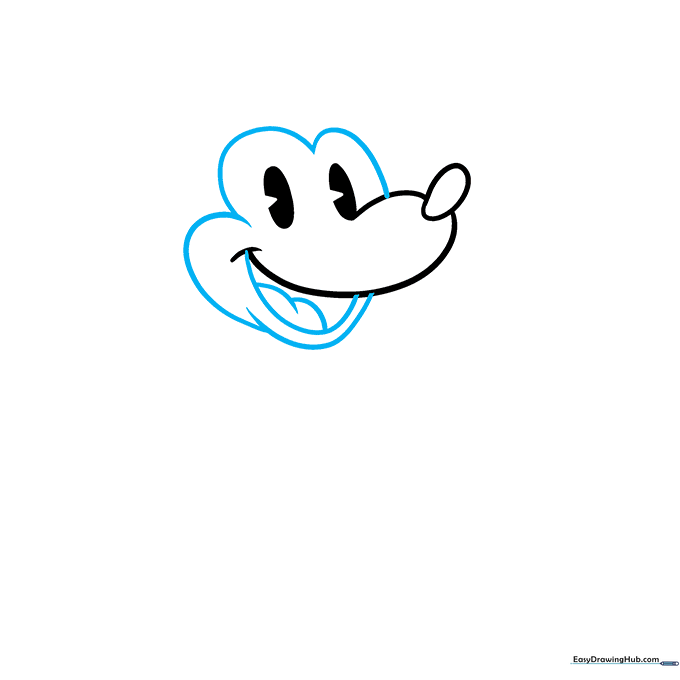
Use smooth, curved lines to outline the cheeks and the snout area. Add a wide, curved line for the open mouth and a small tongue inside. Teacher's Tip: Use a light touch here—Mickey's expression should look happy and friendly.
Step 3: Adding the Iconic Ears
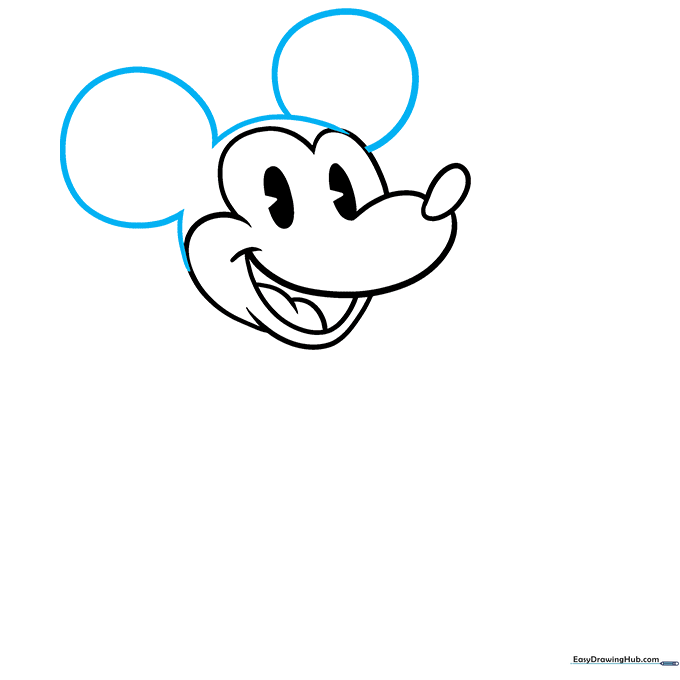
Draw two large, perfect circles on top of the head. Teacher's Tip: Make sure the ears are large enough to touch the top of the head curve; this is what makes Mickey instantly recognizable!
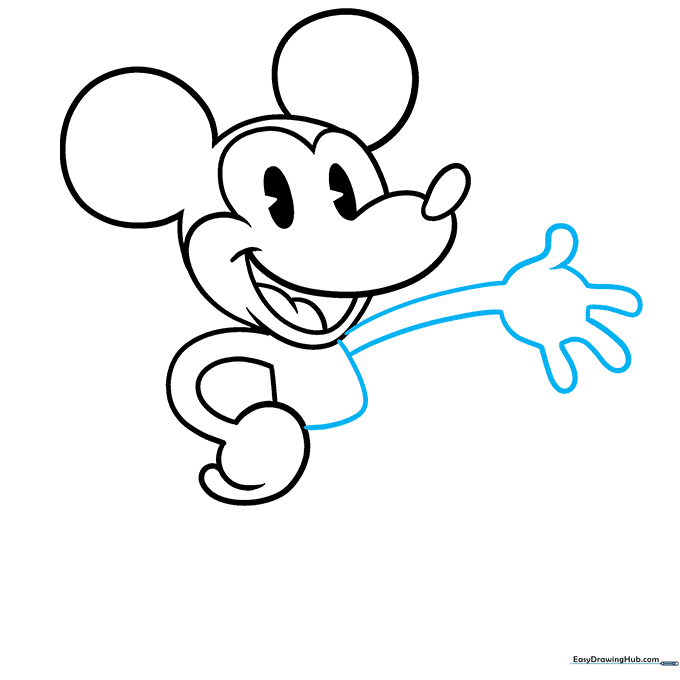
Step 4: Sketching the Arm
Draw two parallel curved lines extending from the side of the head to form the arm. Add a small curve at the end for the hand. Teacher's Tip: Keep the arm slightly bent to give the character a natural, relaxed pose.
Step 5: Forming the Torso
Draw a rectangular shape with rounded corners for the torso. Connect the arm to the body and add the fingers on the hand. Teacher's Tip: Mickey's fingers are rounded and simple—don't worry about making them too detailed.
Step 6: Adding Shorts and Buttons
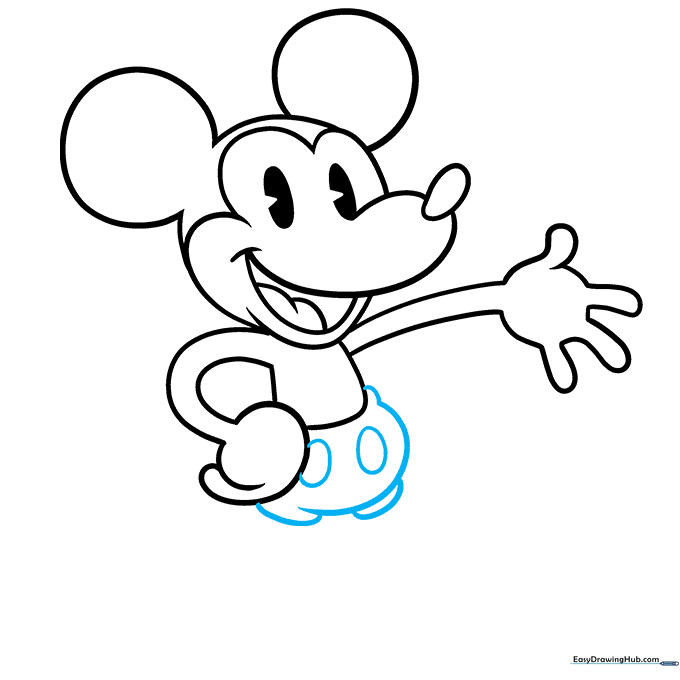
Draw the shorts using two overlapping curved lines. Add two large oval buttons on the front. Teacher's Tip: The buttons should be perfectly vertical to keep the classic look.
Step 7: Drawing the First Leg
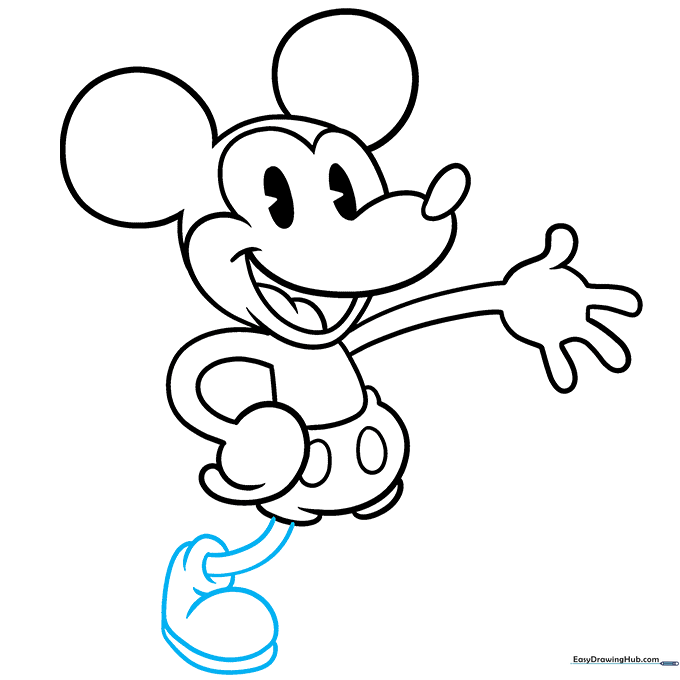
Extend two long curved lines for the leg and draw the large, rounded shape of the shoe. Teacher's Tip: Mickey's shoes are quite big compared to his legs, so don't be afraid to make them chunky!
Step 8: Drawing the Second Leg

Repeat the process for the second leg, positioning it slightly behind the first. Teacher's Tip: Ensure the feet are pointing in slightly different directions to give Mickey a dynamic, standing pose.
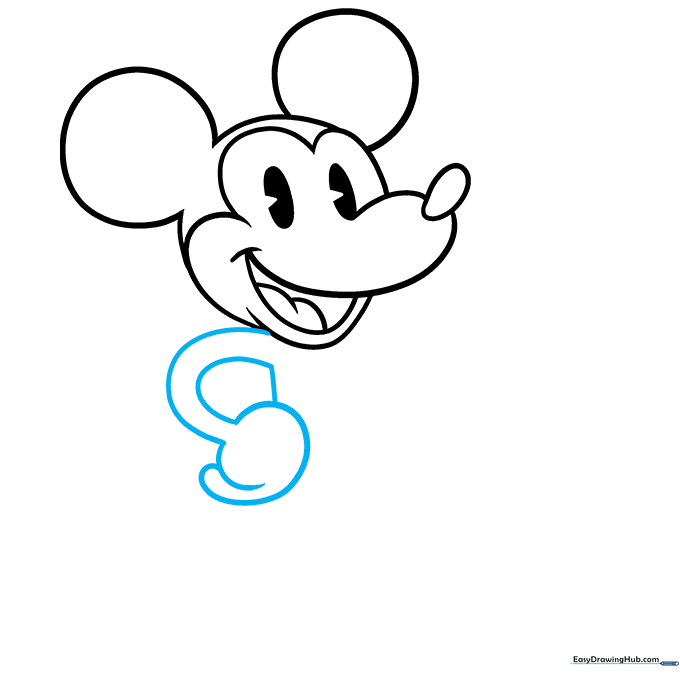
Step 9: Adding the Tail
Draw a long, thin 'S' shaped line extending from the back of the torso to create the tail. Teacher's Tip: Keep the line smooth and fluid to make it look like it's moving.
Step 10: Coloring Your Masterpiece
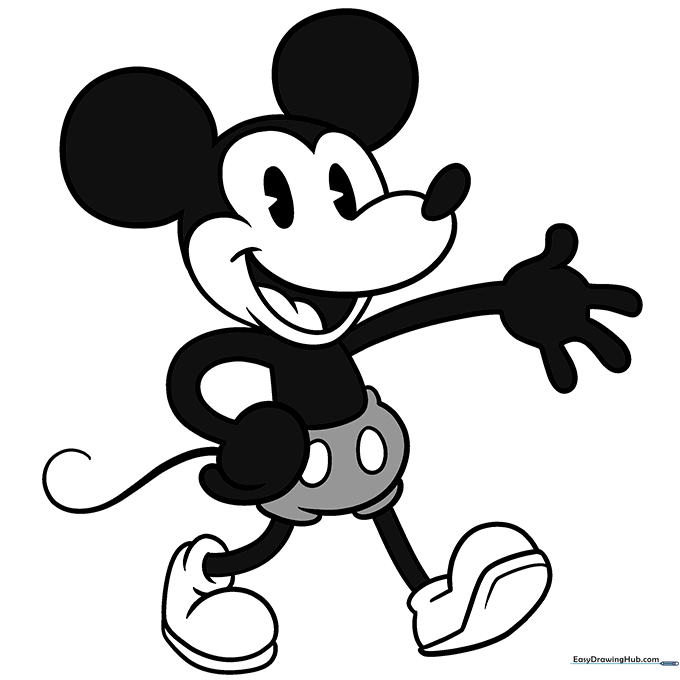
Time to color! Use black for the ears and body, white for the face and shoes, and grey for the shorts to honor the classic 1920s style. Teacher's Tip: Use light, even strokes to keep the colors looking clean.
More Tutorials


