How to Draw Christmas Snoopy: Easy 10-Step Guide
Bring the holiday spirit to your sketchbook with this fun, screen-free activity perfect for artists ages 5 and up. You will need a pencil, an eraser, and your favorite markers or crayons to bring this iconic Peanuts character to life. Follow these simple steps to master Snoopy’s classic look while practicing your line control and character proportions.
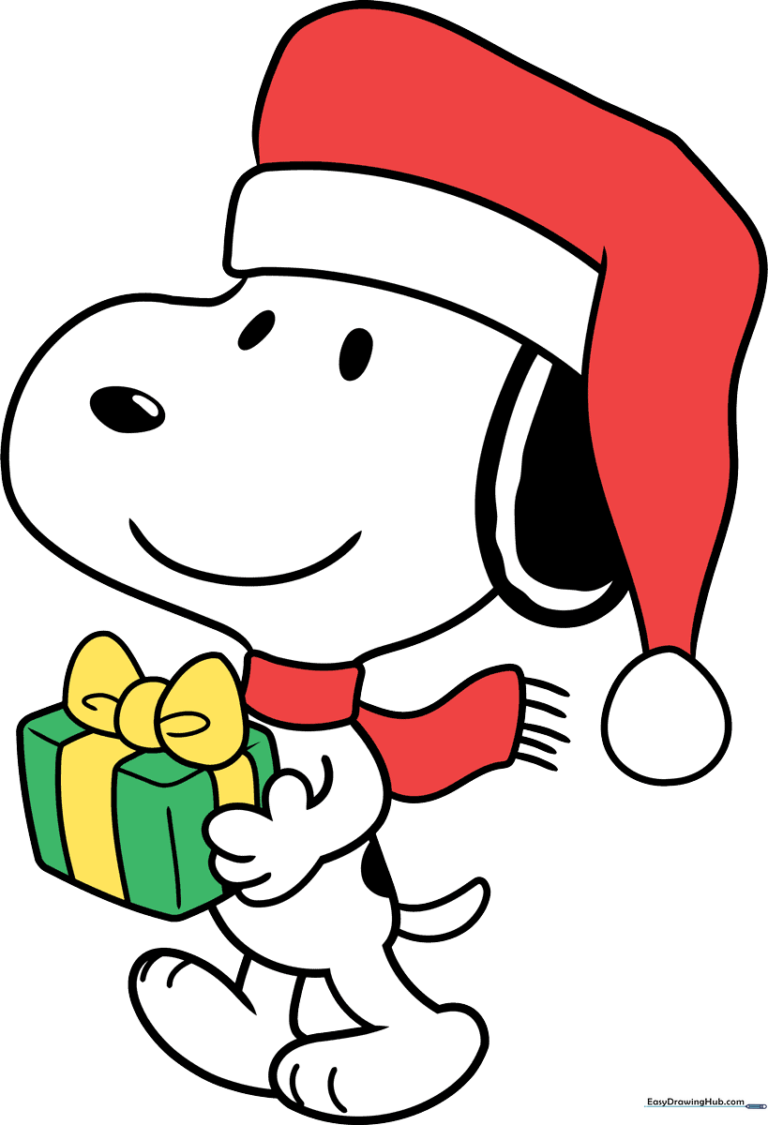
🎯 Final Result
Step-by-Step Instructions
Step 1: Sketching the Muzzle and Face

Start by sketching Snoopy's face. Use a gentle curved line to outline the muzzle, then add two small, dark ovals for the eyes and nose. Tip: Keep the nose slightly rounded to give him that friendly, classic Snoopy expression.
Step 2: Adding the Hat Brim and Ear
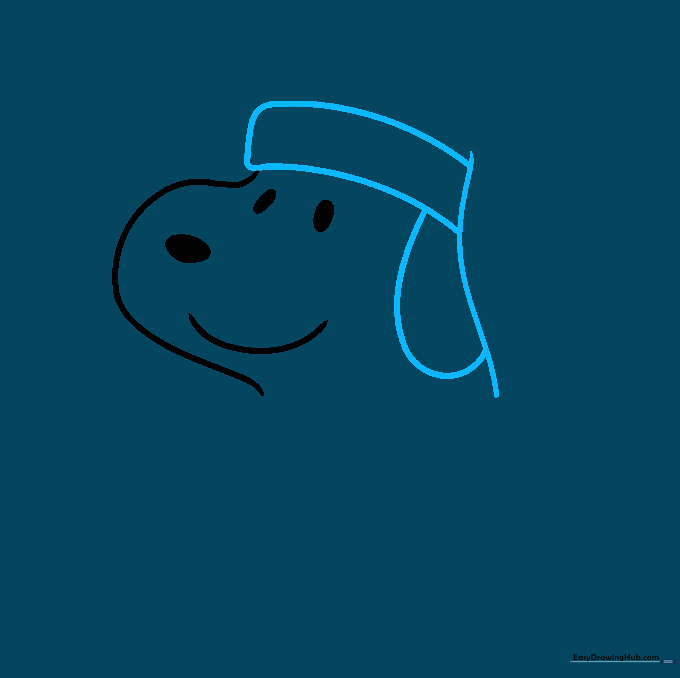
Draw two parallel curved lines across the forehead to create the brim of his hat. Extend a curved line downward to form the top of the hat and add his floppy ear on the side. Tip: Make the ear look soft and rounded to emphasize his playful personality.
Step 3: Completing the Hat and Head

Use a long, sweeping curved line to finish the hat's shape, adding a small circle at the tip for the pom-pom. Complete the outline of his head and neck. Tip: Don't worry if the hat isn't perfectly symmetrical; a slightly organic shape looks more natural.
Step 4: Drawing the Scarf and Arm

Sketch a pair of curved lines around the neck to form the scarf, then draw his arm extending outward. Use small 'U' shapes to indicate his fingers. Tip: Keep the fingers small and rounded to match the cartoon style.
Step 5: Adding Scarf Detail
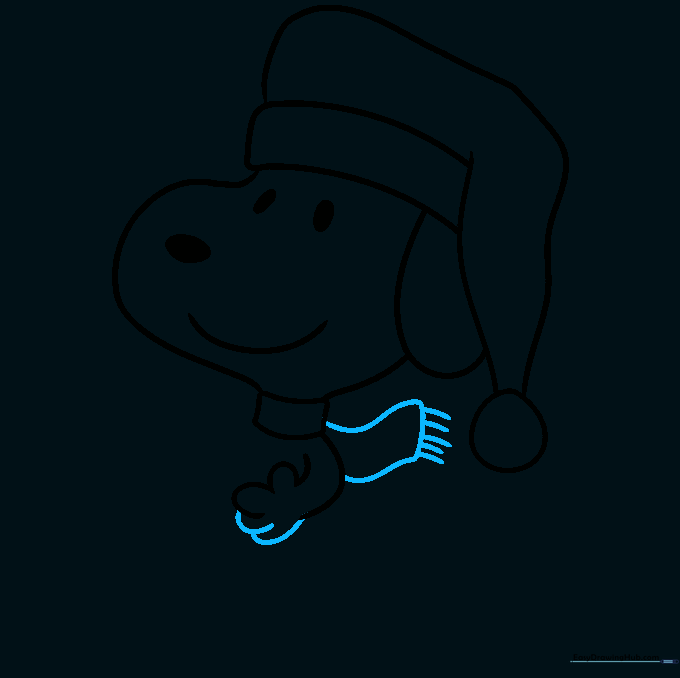
Finish the hand and draw the end of the scarf blowing in the wind. Add short, vertical lines at the end to create the fringe. Tip: Use quick, light strokes for the fringe to make it look like fabric texture.
Step 6: Sketching the Gift Box

Draw the gift Snoopy is holding. Start with a bow, then use straight lines to form the 3D box shape. Tip: Use a ruler if you struggle with straight lines, but freehand adds a nice, authentic charm.
Step 7: Adding Gift Details and Torso
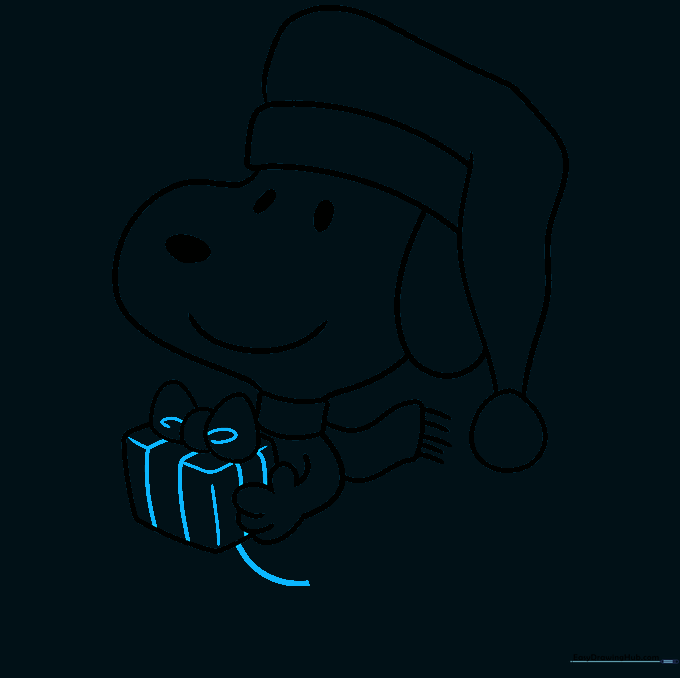
Add ribbons to the box and sketch the corners to give it depth. Below the gift, draw a curved line to start Snoopy's stomach. Tip: Ensure the stomach line flows naturally from the arm to keep the character balanced.
Step 8: Completing the Body and Tail
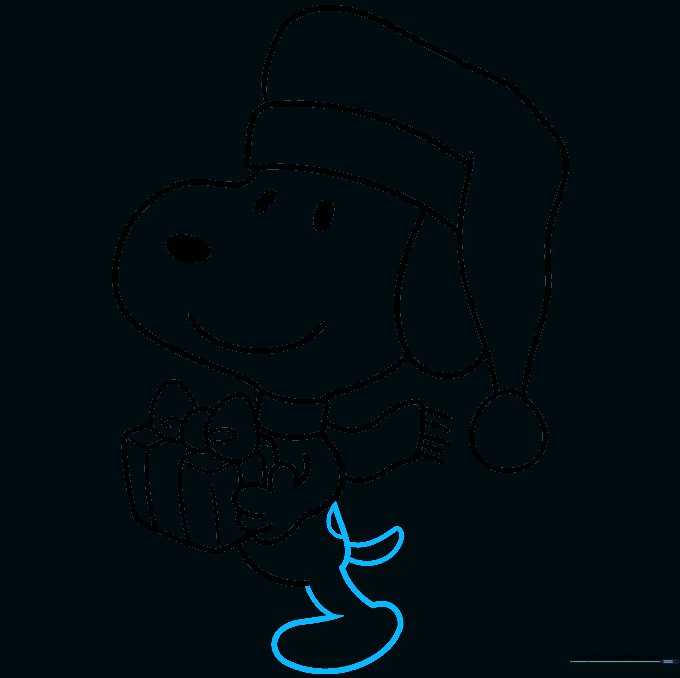
Use smooth, curved lines to finish the torso, leg, and tail. Don't forget to add the signature spot on his back! Tip: The spot should be an irregular oval shape to look authentic.
Step 9: Finalizing the Legs and Feet

Draw the remaining leg and foot, adding small curved lines for the toes. Tip: Make sure the feet are planted firmly to give your character a sense of weight.
Step 10: Adding Color

Time to bring him to life! Use red for the hat and scarf, and keep Snoopy mostly white with black for his ears, nose, and back spot. Tip: Use a light grey marker to add subtle shading under the scarf for a 3D effect.
More Tutorials


