How to Draw Charles Darwin: Easy 9-Step History Lesson
Bring history to life by drawing the father of evolution, Charles Darwin! This tutorial is designed for students and budding artists ages 8+ who want to practice portraiture. You will need a pencil, an eraser, and a black fine-liner to complete this iconic look.
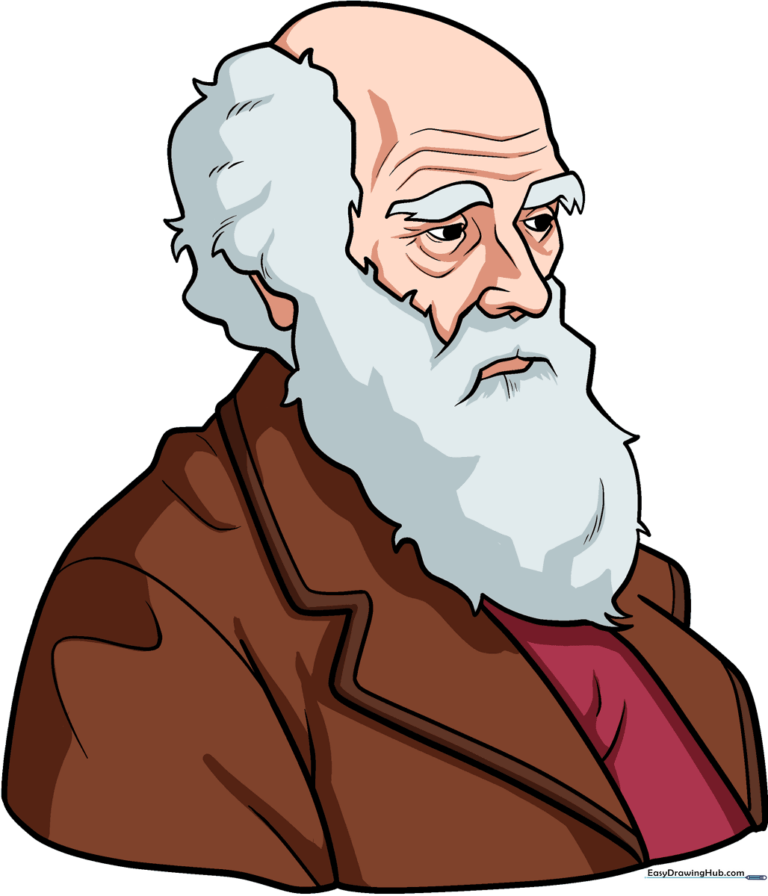
🎯 Final Result
Step-by-Step Instructions
Step 1: Sketching the Eyes and Brows
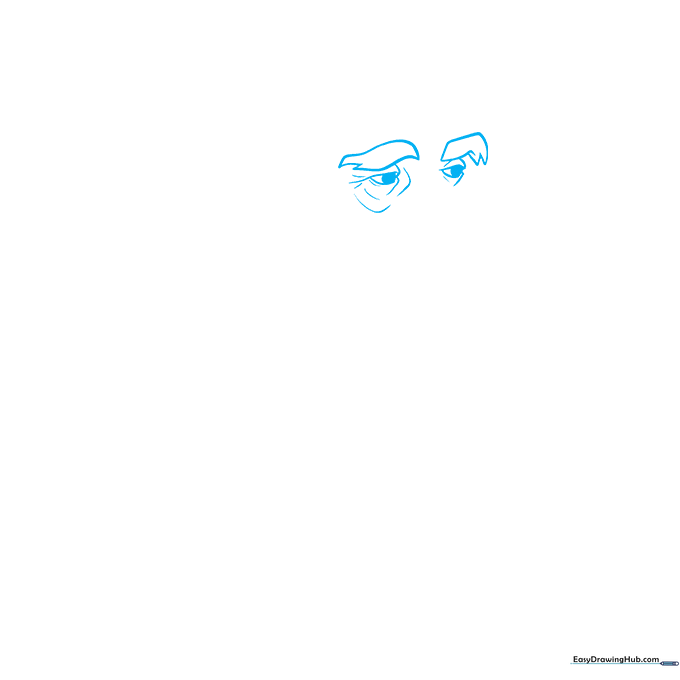
Lightly sketch two lemon-shaped outlines for the eye sockets, then place circles inside for the pupils. Add curved lines above to suggest wrinkles. Tip: Keep your pencil pressure light so you can easily adjust the symmetry of the brows later.
Step 2: Defining the Nose
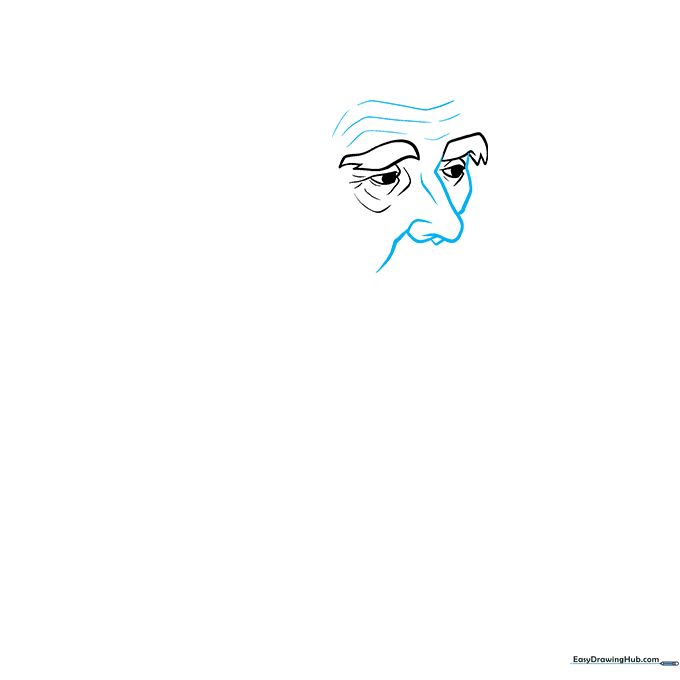
Draw thin lines above the brows. For the nose, sketch two diagonal lines near the right eye, adding a hook at the end and a C-shape on the left. Tip: The nose is the anchor of the face; ensure the bridge aligns with the center of the eyes.
Step 3: Starting the Mustache

Add a wavy line beneath the nose, followed by a soft curve. On the right, sketch a loose, wavy line with small triangles to suggest hair texture. Tip: Use short, flicking motions with your pencil to mimic the appearance of coarse facial hair.
Step 4: Outlining the Left Cheek
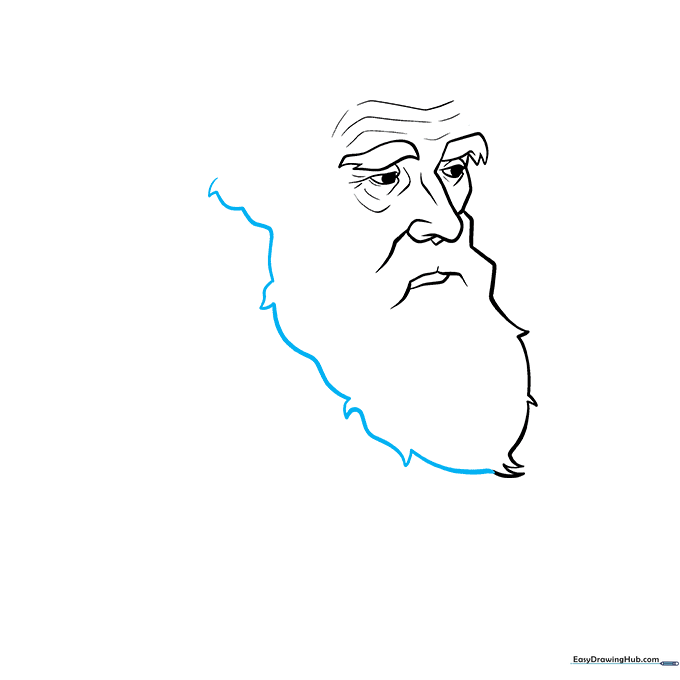
Sketch a long, loose, wavy line that defines the left side of the face. Tip: Don't worry about making this line perfectly smooth; a slightly jagged line looks more natural for a beard.
Step 5: Developing the Beard
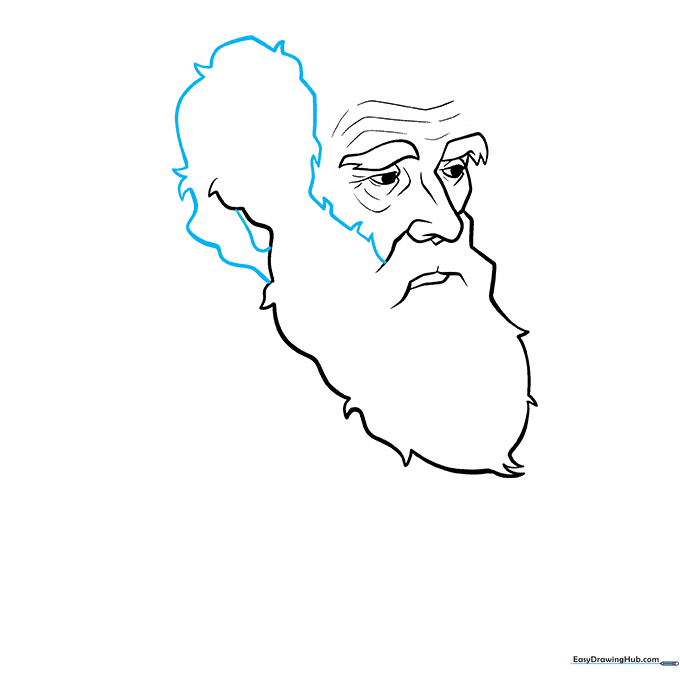
Complete the beard with a sketchy line crossing the left cheek. Add small triangles and curves to create depth. Tip: Vary the size of your triangles to make the beard look fuller and more realistic.
Step 6: Adding Head Shape
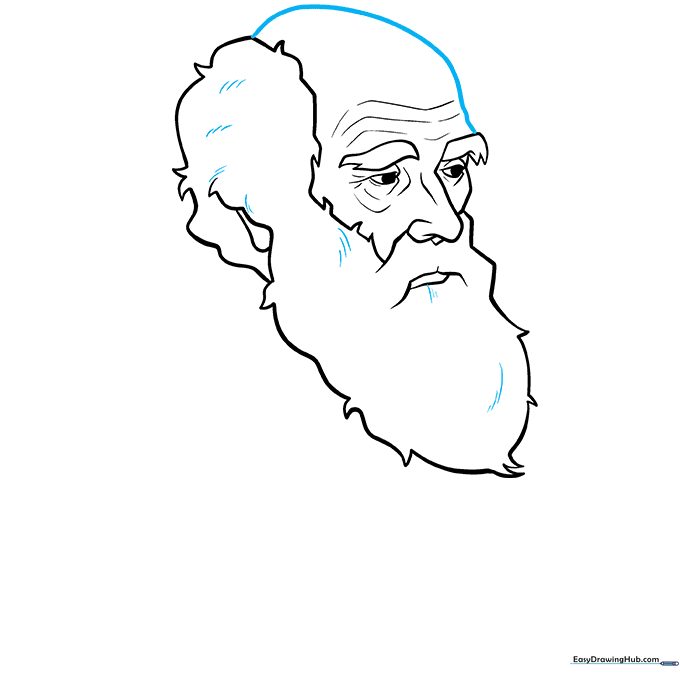
Add small dashes inside the beard for texture, then draw a dome shape to outline the top of the head. Tip: Keep the dome rounded to balance out the busy, jagged lines of the beard below.
Step 7: Drawing the Collar
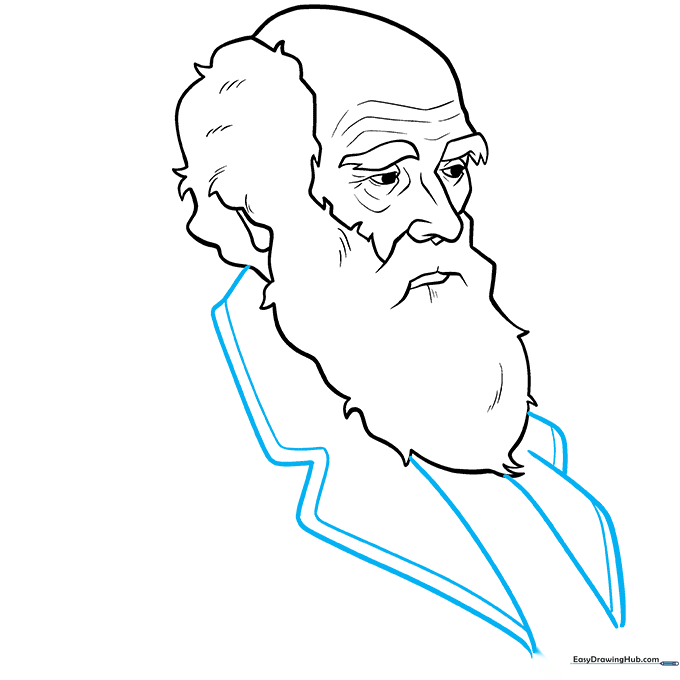
Sketch two diagonal lines under the beard. On the right, draw two triangles with vertical lines inside for the shirt collar. On the left, sketch a rectangle and a triangle with a parallel line inside. Tip: Use a ruler if you struggle with straight lines for the collar.
Step 8: Adding Shoulders and Chest
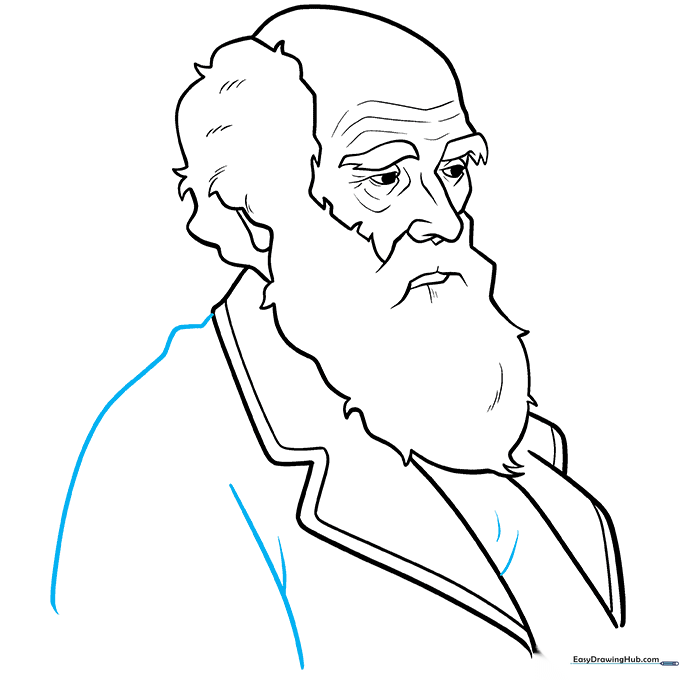
Draw a curve with a small triangle near the top for the shoulder. Complete the arm with a loose Y-shape and add two dashes on the chest for clothing folds. Tip: These small lines add a sense of weight to the fabric of his coat.
Step 9: Final Inking
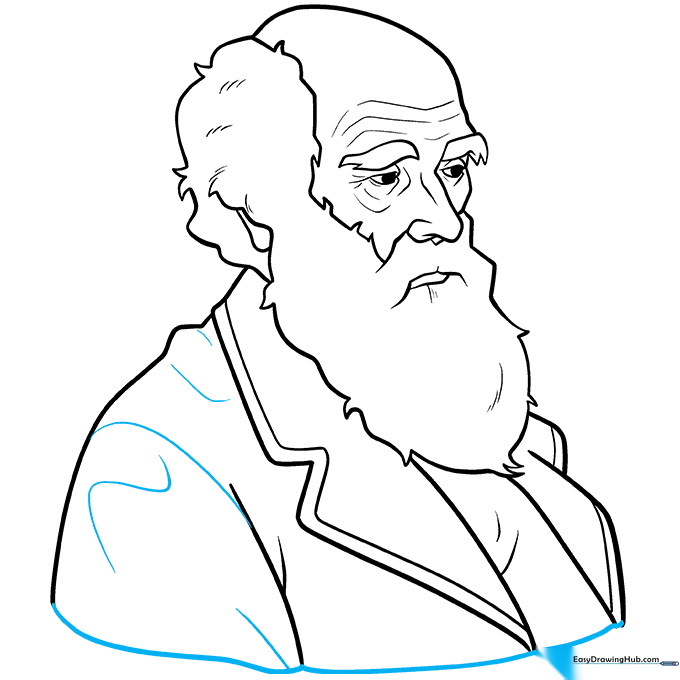
Outline the bottom of the body with a wavy line and add final curves to the shoulders. Once satisfied, trace your pencil lines with a black ink pen. Tip: Wait for the ink to dry completely before erasing your pencil marks to avoid smudging.
Step 10: Adding Color
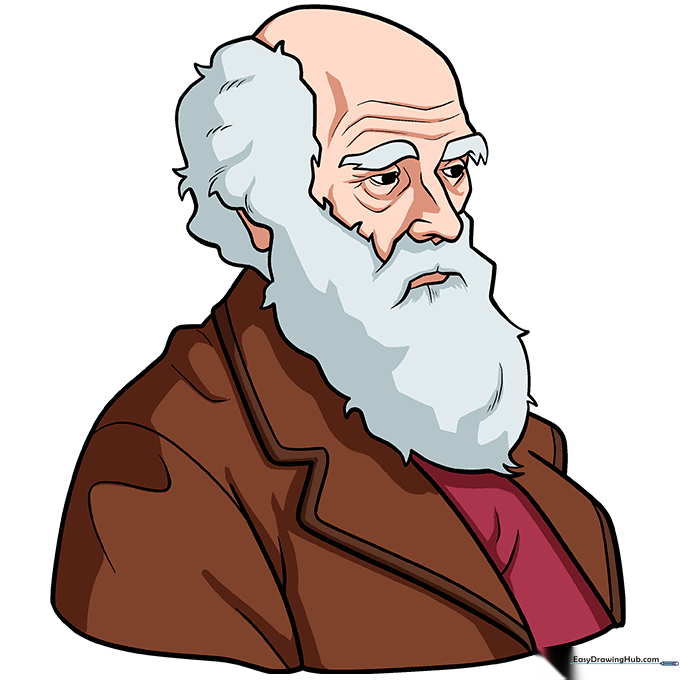
Bring your drawing to life! Use a grey pencil for the beard, tan for the skin, reddish-brown for the coat, and maroon for the shirt. Keep the eyes white with dark pupils for a sharp, intelligent gaze.
More Tutorials


