How to Draw a Cartoon Money Bag: Easy 10-Step Guide
Ready to add some loot to your character drawings? This tutorial is perfect for artists ages 6 and up who want to master drawing classic cartoon props. All you need is a pencil, an eraser, and a piece of paper to bring this iconic money bag to life.
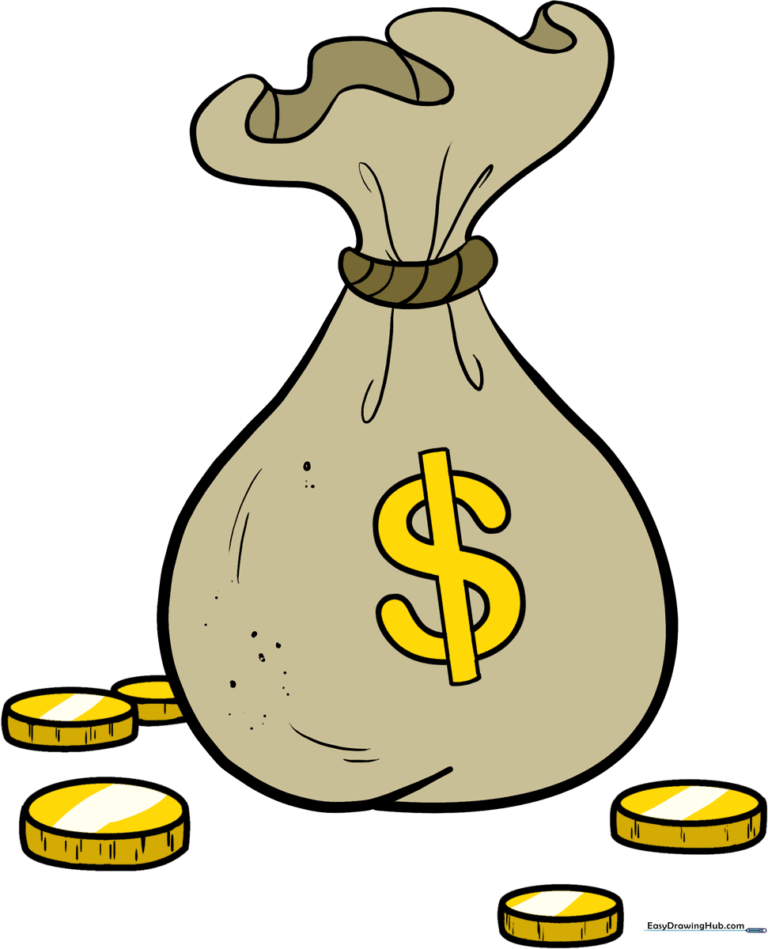
🎯 Final Result
Step-by-Step Instructions
Step 1: Sketching the Base

Start by drawing a curved line that looks like the top half of a heart. Teacher's Tip: Keep your pencil pressure light so you can easily adjust the shape if it looks a bit lopsided.
Step 2: Forming the Bag
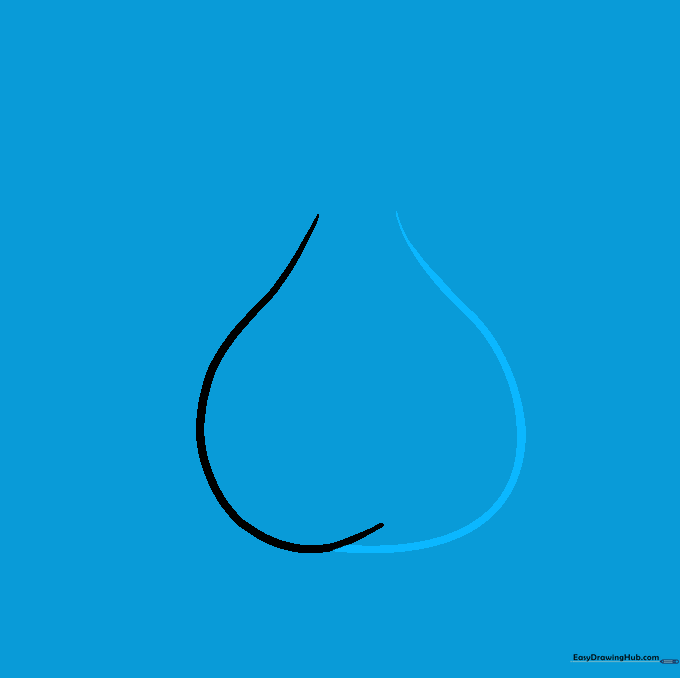
Draw a mirroring curved line to close the bottom of the bag. Make sure the lines overlap slightly to create a sense of volume. Tip: Imagine the bag is filled with heavy gold coins to give it a rounded, bottom-heavy look.
Step 3: Adding the Tie
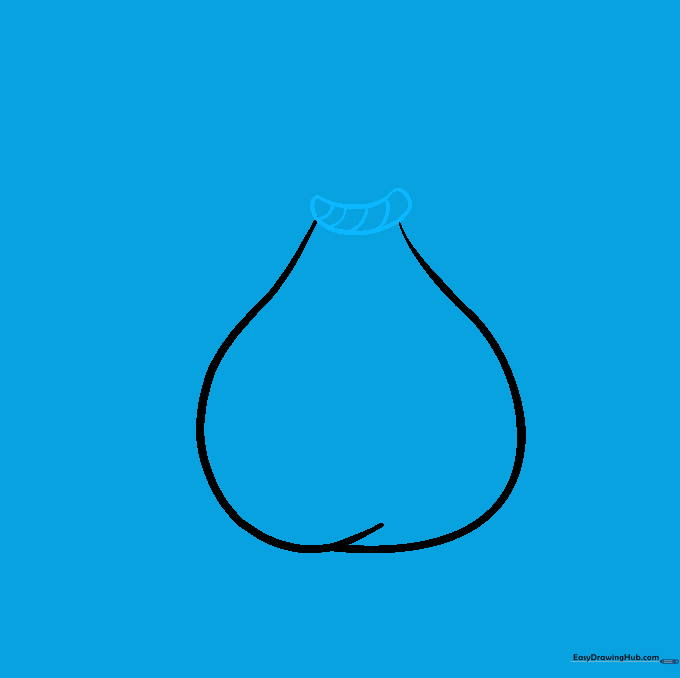
Draw two curved lines at the top to create the cinched rope. Add small, short lines inside the rope area to give it a twisted, textured look. Tip: This is where the bag is tied shut, so keep it tight against the top of the bag.
Step 4: Creating the Opening
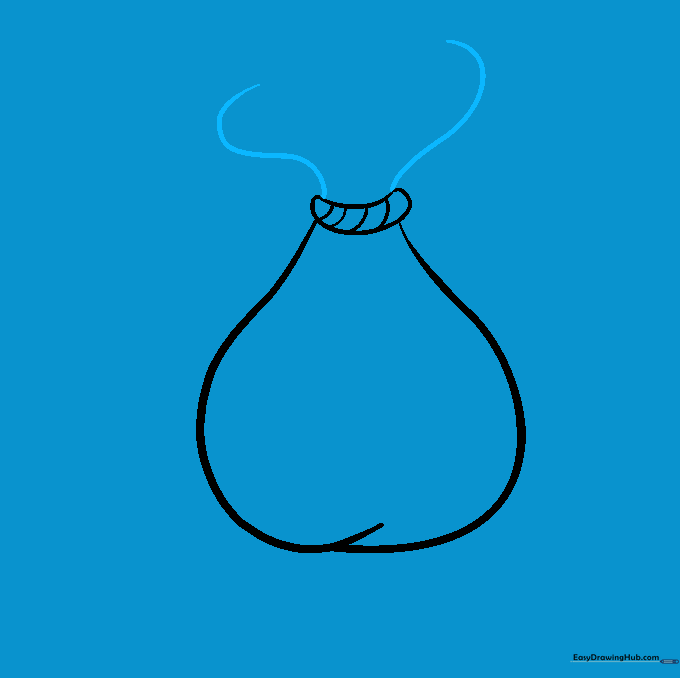
Draw two curved lines extending upward from the rope. These represent the fabric gathered at the top. Tip: Keep these lines slightly asymmetrical to make the bag look more natural and less like a stiff robot.
Step 5: Defining the Top
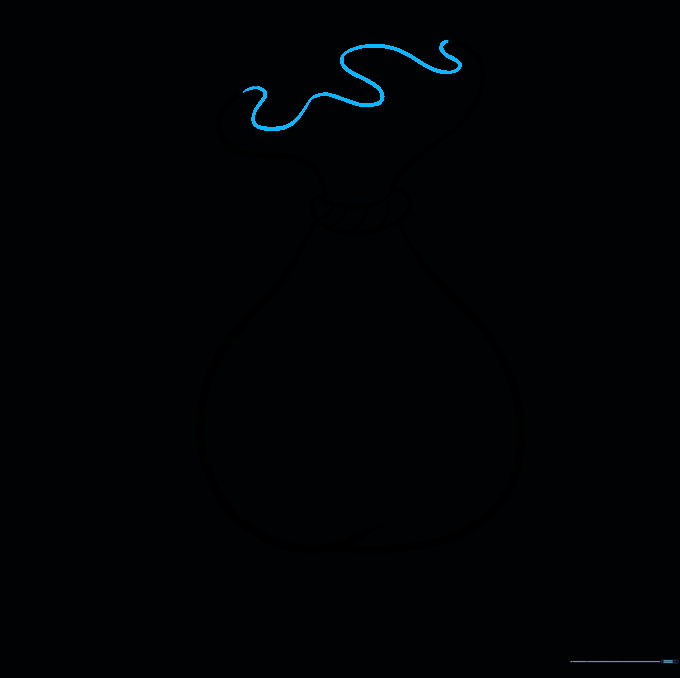
Connect the top lines with a long, wavy line. This creates the 'ruffle' effect of the fabric opening. Tip: Use a fluid motion with your wrist to get that nice, wavy, organic curve.
Step 6: Adding Depth

Add extra wavy lines to show the far side of the bag's opening and small vertical lines near the rope to suggest fabric folds. Tip: Folds are just shadows, so keep these lines short and close together.
Step 7: Sketching the Symbol
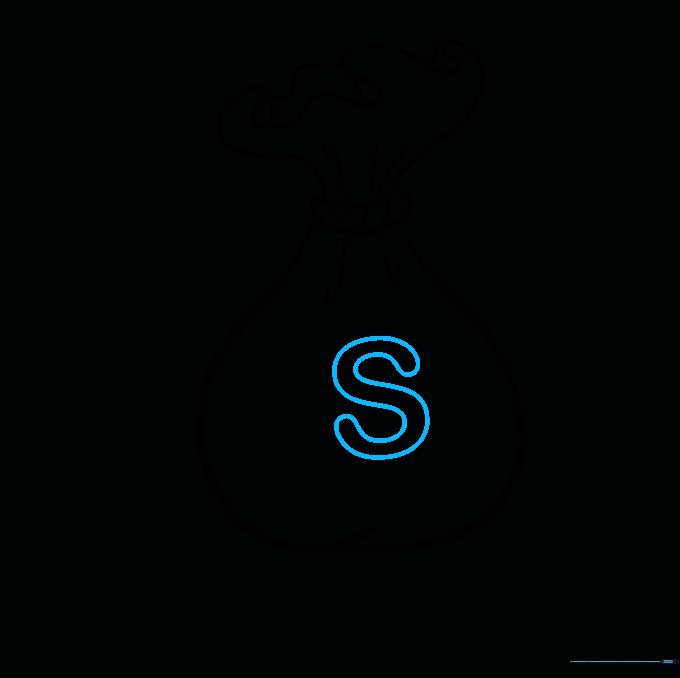
Lightly sketch a large 'S' in the center of the bag. This is the foundation for our dollar sign. Tip: Don't press too hard; you'll be adding a line through it in the next step.
Step 8: Finalizing the Dollar Sign

Draw a vertical rectangle through the 'S' to complete the dollar sign. Add a few small dots and curved lines around the bag to give it a worn, textured fabric look. Tip: Use your eraser to clean up any overlapping lines inside the dollar sign.
Step 9: Adding Loose Coins
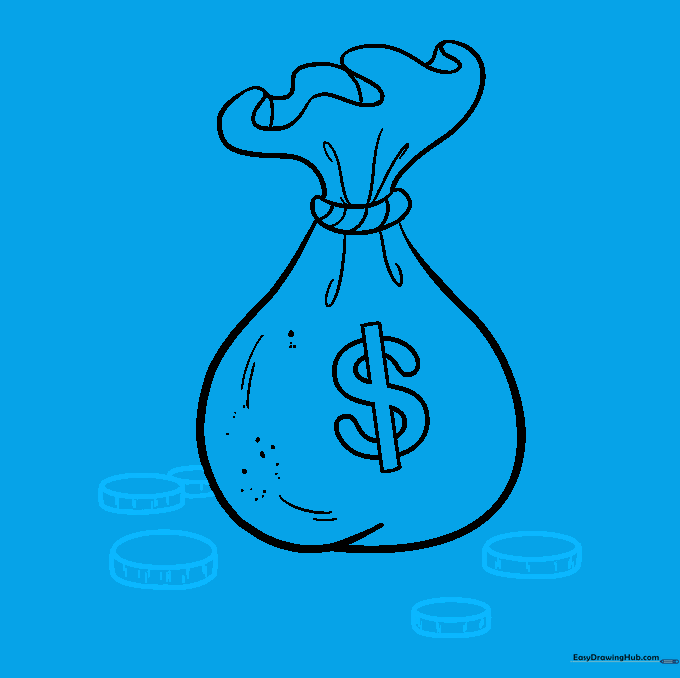
Draw a few narrow ovals at the bottom to represent spilled coins. Add a small line descending from the side of each oval to give them thickness. Tip: Vary the sizes of the coins to make the drawing look more dynamic.
Step 10: Bring It to Life
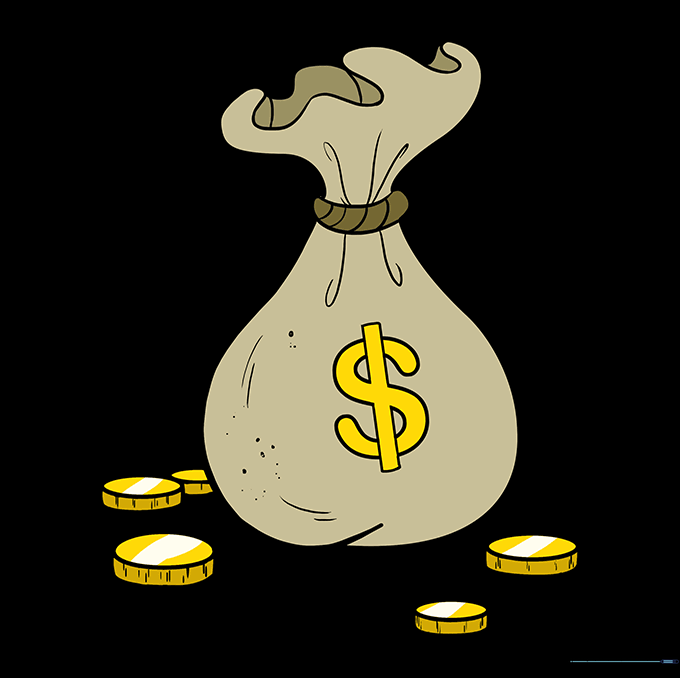
Time to color! Use shades of yellow or gold for the coins and a tan or brown for the bag. Now that you have your loot, why not draw a character to hold it? Check out our people drawing guides to find a perfect owner for your money bag.
More Tutorials


