How to Draw Cartoon Flowers: Easy 20-Step Guide
Bring a touch of spring to your sketchbook with this fun, expressive flower drawing activity. Designed for ages 5 and up, this project uses basic shapes to build confidence in young artists. All you need is a pencil, an eraser, and your favorite markers to bring these happy blossoms to life.
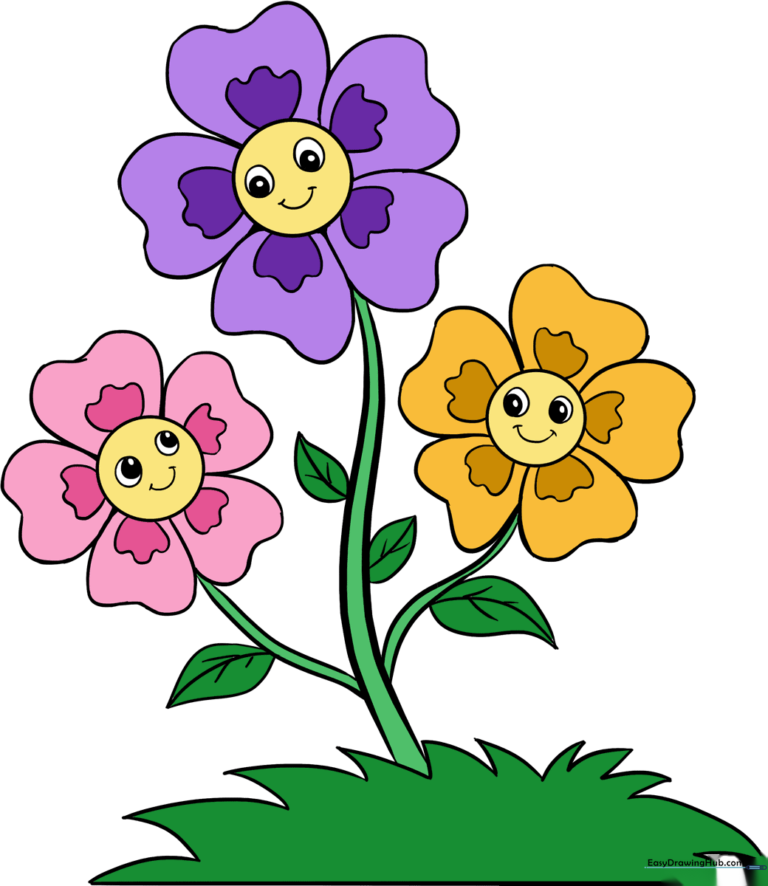
🎯 Final Result
Step-by-Step Instructions
Step 1: Establishing the Main Stem

Draw a long, gentle wavy line for the primary stem. Teacher's Tip: Keep your hand loose and relaxed to get a natural, organic curve.
Step 2: Thickening the Stem

Draw a parallel wavy line to create the stem's thickness. Tip: Make the gap narrower at the top and wider at the bottom to give it a sturdy look.
Step 3: Adding Side Stems

Extend a curved line from each side of the main stem. These will support your smaller flowers. Tip: Think of these like branches reaching out for sunlight.
Step 4: Defining Secondary Stems
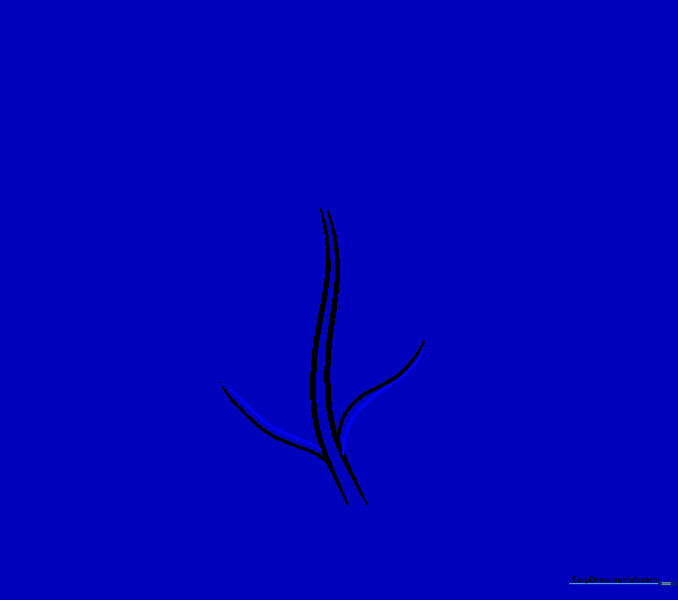
Draw a second curved line parallel to each side branch. Tip: Ensure the lines meet at the tips to create a clean, finished look.
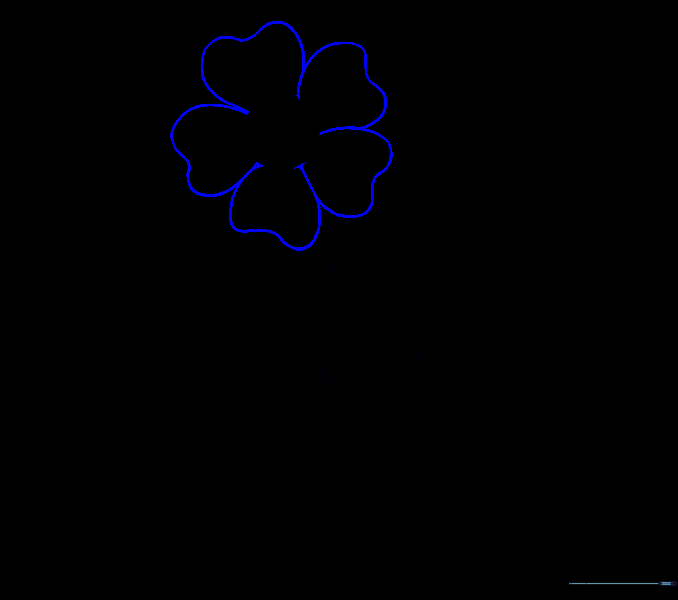
Step 5: Positioning the First Flower

Draw a circle at the tip of the left stem. Tip: Use a circular object like a coin if you need help keeping it perfectly round!
Step 6: Drawing Petals

Add five rounded 'M' shaped petals around the circle. Tip: Make sure the bottom two petals touch the stem so the flower looks attached.
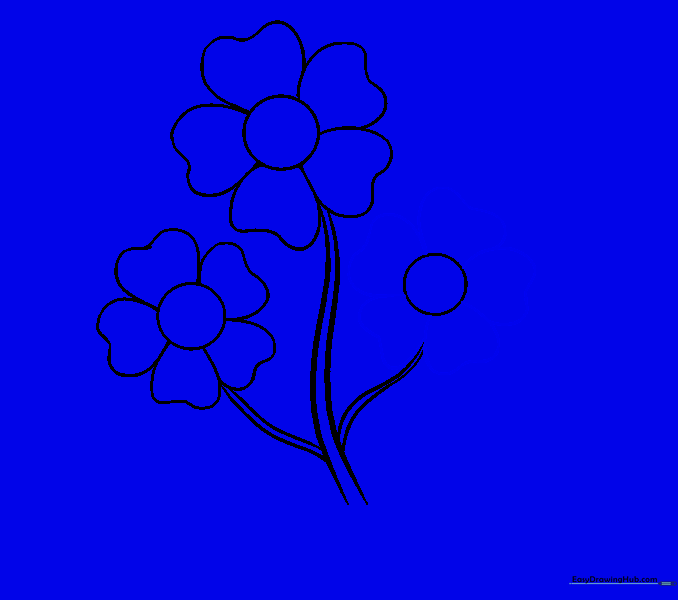
Step 7: The Center Flower

Draw a circle at the top of the main stem. Tip: Try to make this one slightly larger than the first to create variety.
Step 8: Petals for the Center
Add five 'M' shaped petals around the center circle. Tip: Keep your spacing even for a balanced look.
Step 9: The Right Flower

Draw a circle at the tip of the right stem. Tip: Consistency is key—try to match the size of your first flower.
Step 10: Final Petals
Add five 'M' shaped petals to the right flower. Tip: Don't worry if they aren't perfect; nature is full of unique shapes!
Step 11: Petal Detail

Add a wavy line inside each petal of the left flower. Tip: Start from the center circle and curve outward to give the petals depth.
Step 12: Center Flower Details

Repeat the wavy line detail for the center flower. Tip: Keep your lines smooth and flowing.
Step 13: Right Flower Details

Add the same wavy lines to the right flower. Tip: This repetition helps build muscle memory for drawing curves.
Step 14: Leaf Veins

Draw short curved lines from the stems to act as leaf veins. Tip: These act as a guide for the leaf shape in the next step.
Step 15: Drawing Leaves
Outline the leaves using two curved lines that meet at the vein point. Tip: Make the leaves look slightly different sizes for a more natural look.
Step 16: Adding Grass

Draw short, pointed curved lines at the base to create grass. Tip: Imagine you are drawing little triangles that don't quite close at the bottom.
Step 17: Final Details

Connect the grass with a straight line and add small details to the leaf veins. Tip: A few extra lines on the leaves make them look much more realistic.
Step 18: Adding Faces

Draw two small circles for eyes and a 'U' shaped mouth on each flower. Tip: Change the mouth shape to make some flowers happy, surprised, or shy!
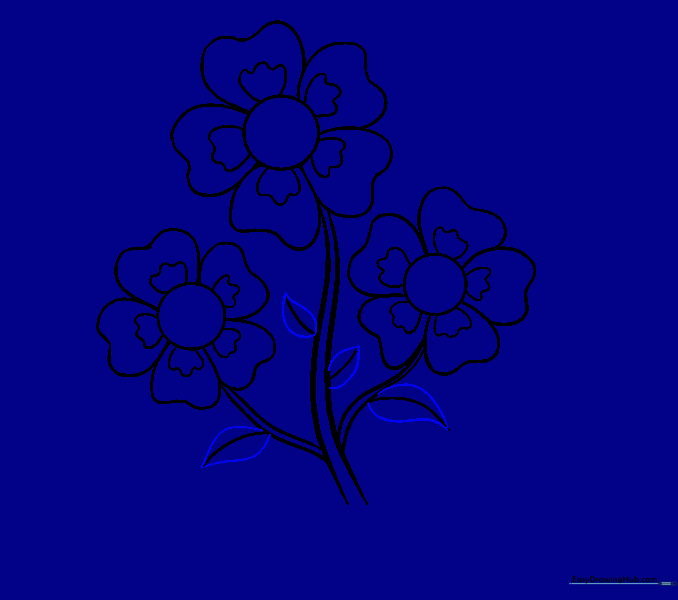
Step 19: Eye Detail

Add pupils to the eyes and shade them in. Tip: Placing the pupil in different spots makes the flowers look like they are looking in different directions.
Step 20: Add Color
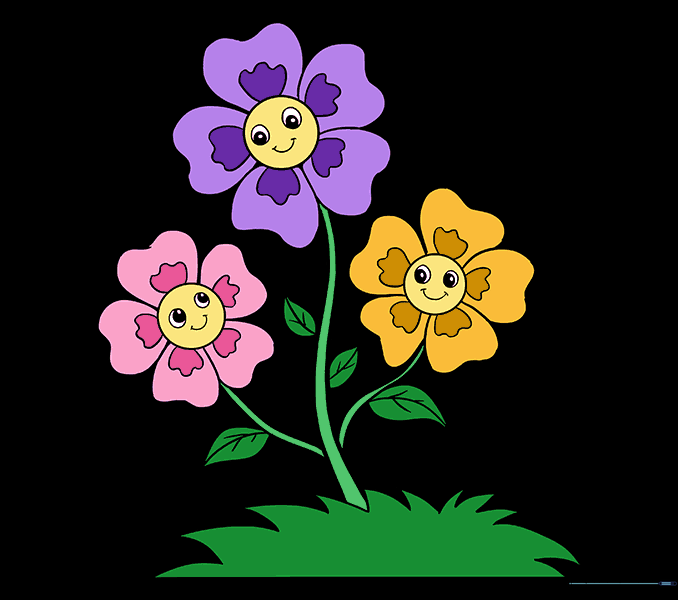
Color your flowers using bright, cheerful colors. Tip: Use yellow for the centers and mix up your petal colors for a vibrant garden effect!
More Tutorials


