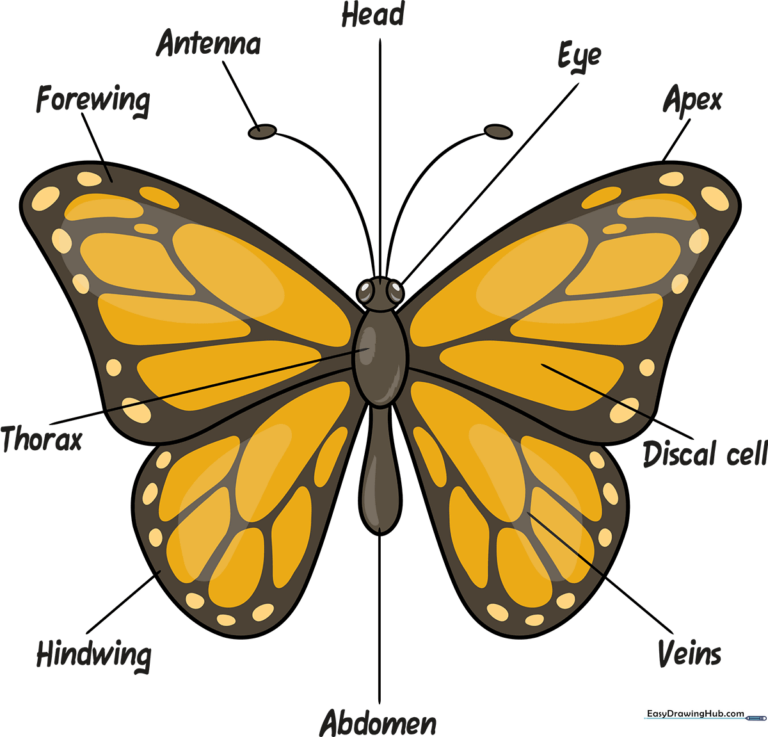
How to Draw Butterfly Body Parts: Easy Science Diagram
Combine art and biology with this simple, screen-free activity perfect for students ages 7+. You will need a pencil, an eraser, and a ruler to create a clear, accurate scientific diagram of a butterfly. By the end of this lesson, you will have a labeled illustration that helps you master insect anatomy while practicing precision drawing.
🎯 Final Result
Step-by-Step Instructions
Step 1: Sketching the Head and Antennae
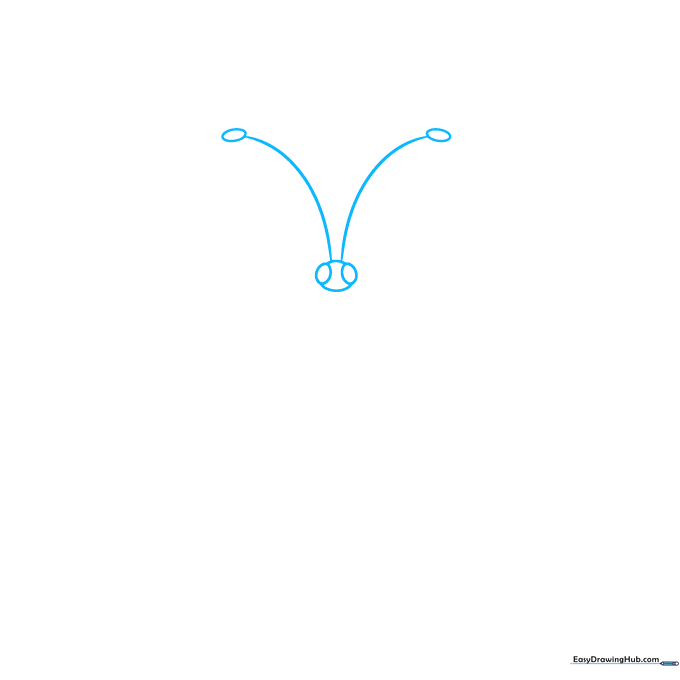
Start by sketching two small ovals for the eyes, then connect them with a soft curve to form the head. Add two long, sweeping lines for the antennae with small circles at the tips. Teacher's Tip: Keep your pencil pressure light here so you can easily clean up the lines later.
Step 2: Defining the Thorax and Abdomen
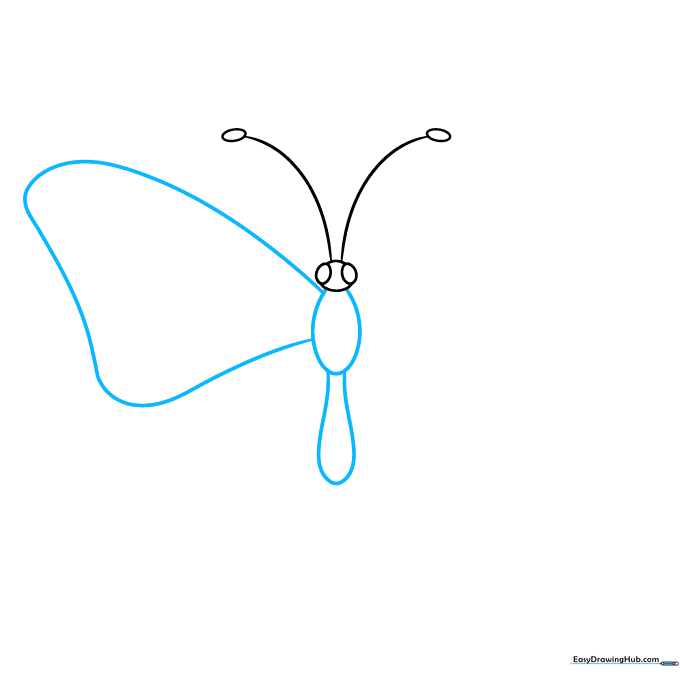
Draw a central oval for the thorax (the middle body section). For the abdomen, extend a long, curved line that loops back on itself. Add a triangular shape on the side to begin the wing structure. Teacher's Tip: Think of the abdomen as a long, thin teardrop shape.
Step 3: Completing the Wing Outline
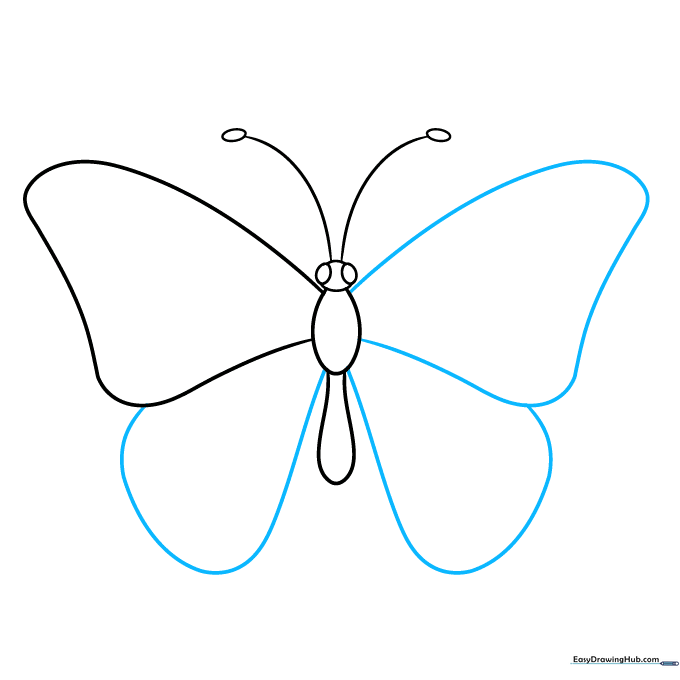
Draw the remaining forewing as a mirror image of the first. Use long, sweeping curves to add the rear wings. Teacher's Tip: Symmetry is key here—try to make the left and right sides match as closely as possible.
Step 4: Adding Wing Patterns
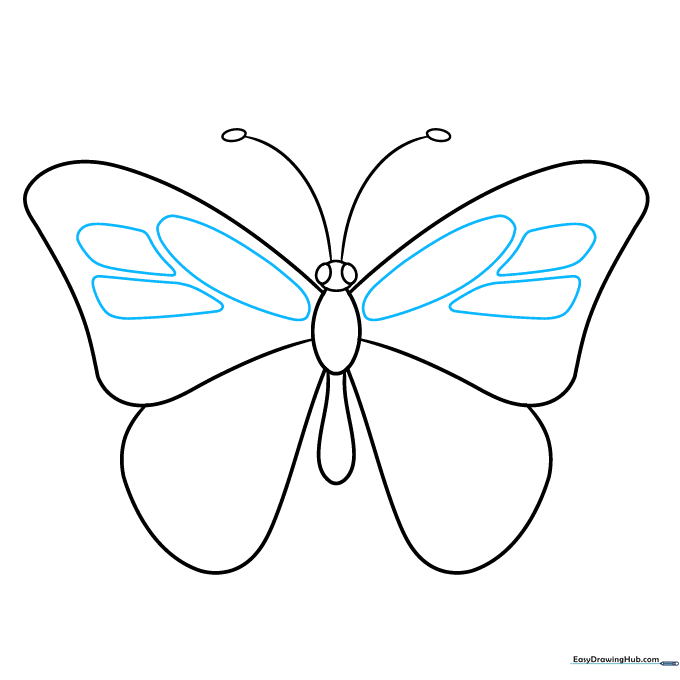
Sketch a large oval in each wing to represent the main color patches. Add smaller rectangular and rounded shapes inside the wings for detail. Teacher's Tip: Don't worry about perfection; butterfly wing patterns are naturally irregular.
Step 5: Refining Wing Details
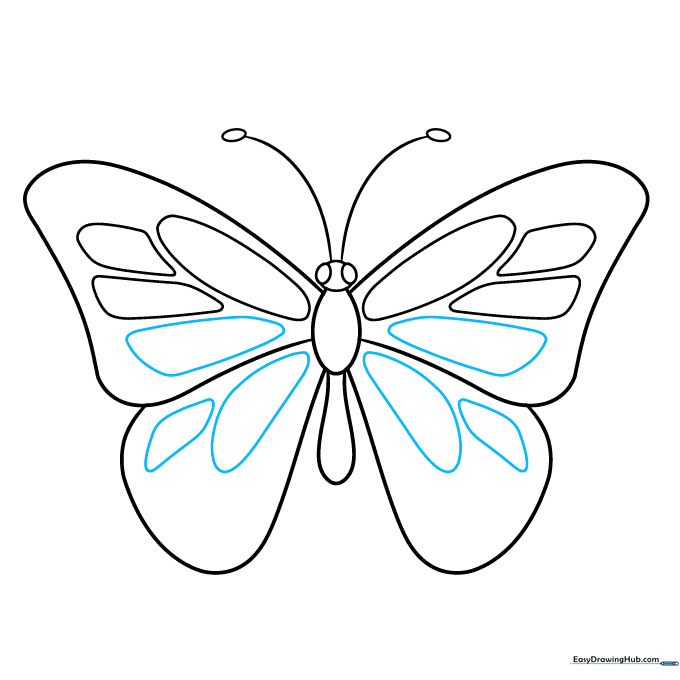
Add an extra shape inside each forewing and two shapes in each rear wing. This builds the complexity of your scientific illustration.
Step 6: Adding Rear Wing Texture
Draw four additional small shapes in each of the rear wings. These represent the intricate markings found on real butterflies.
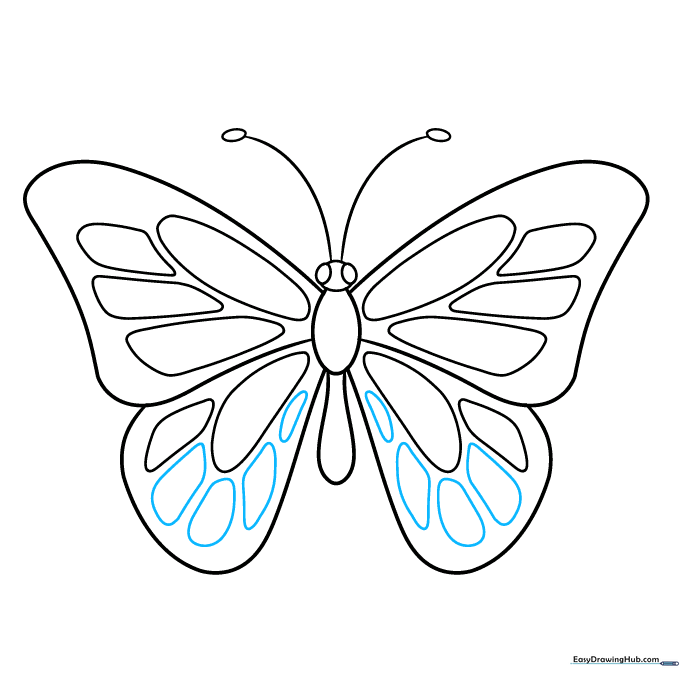
Step 7: Detailing the Wing Edges
Add small ovals and irregular shapes along the outer edges of the front wings to create a natural, scalloped look.
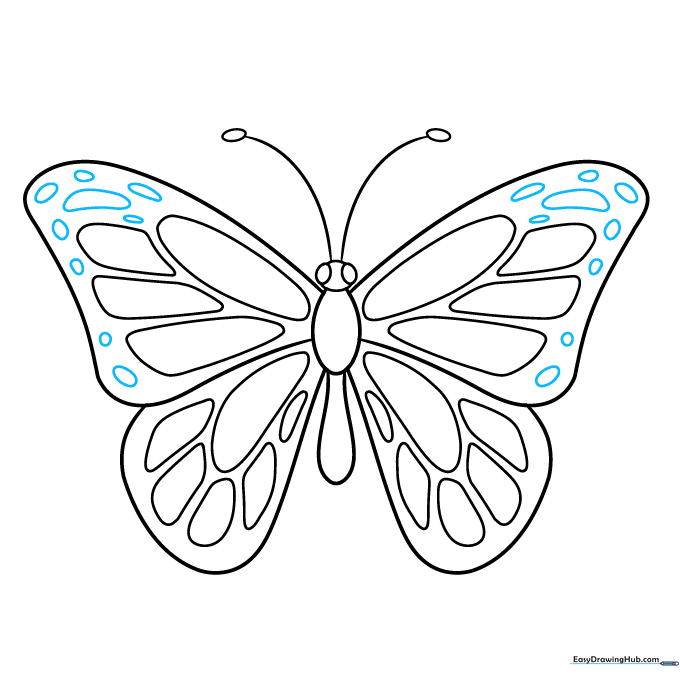
Step 8: Starting the Anatomy Labels
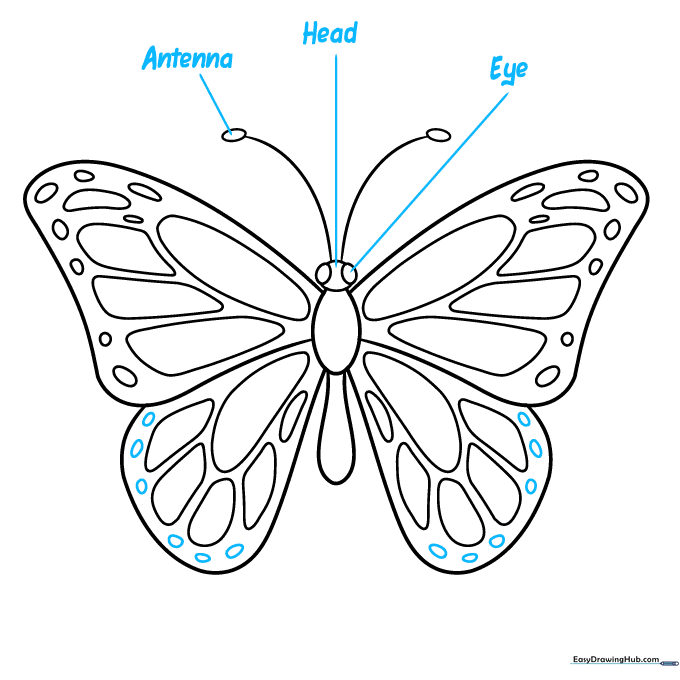
Add small ovals to the rear wing edges. Now, use a ruler to draw straight lines pointing to the 'Antenna,' 'Head,' and 'Eye.' Write the labels clearly at the end of each line. Teacher's Tip: Use a ruler to keep your lines clean and professional.
Step 9: Completing the Scientific Labels
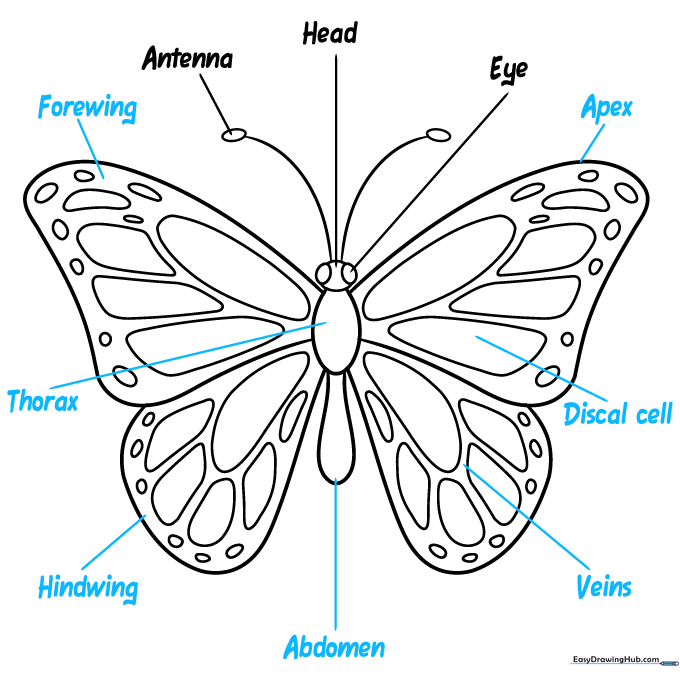
Finish labeling the diagram. Working clockwise, add: 'Apex,' 'Discal cell,' 'Veins,' 'Abdomen,' 'Hindwing,' 'Thorax,' and 'Forewing.' This turns your drawing into a helpful study guide.
Step 10: Adding Color

Bring your diagram to life with color! For a classic Monarch look, use black for the body and wing edges, bright orange for the main wing spots, and white for the small accent spots. Teacher's Tip: Use colored pencils for better control over small areas.
More Tutorials


