How to Draw Bulbasaur: Easy 10-Step Pokémon Guide
Bring your favorite Grass-type Pokémon to life with this beginner-friendly drawing tutorial. Designed for ages 5 and up, this guide requires only a pencil, paper, and an eraser. Follow these simple steps to build confidence in your character sketching skills while creating a perfect Bulbasaur.
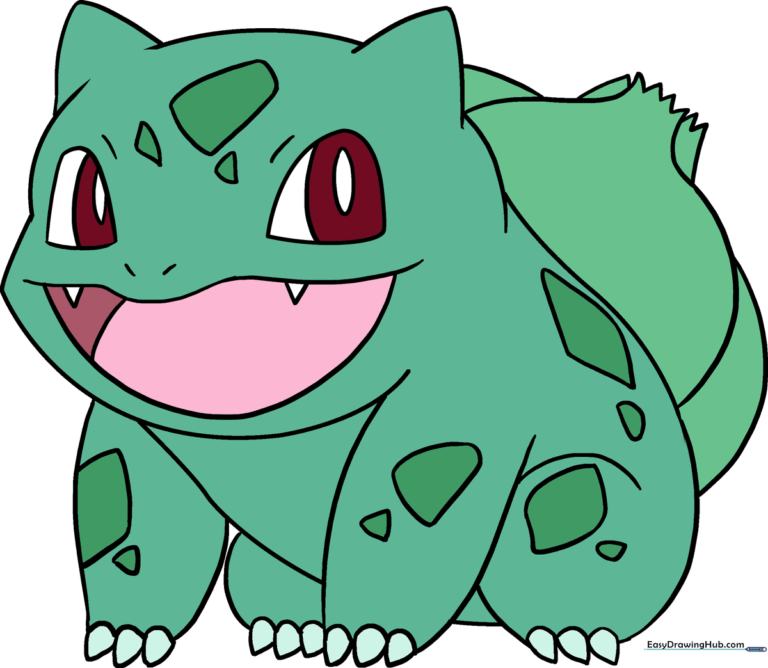
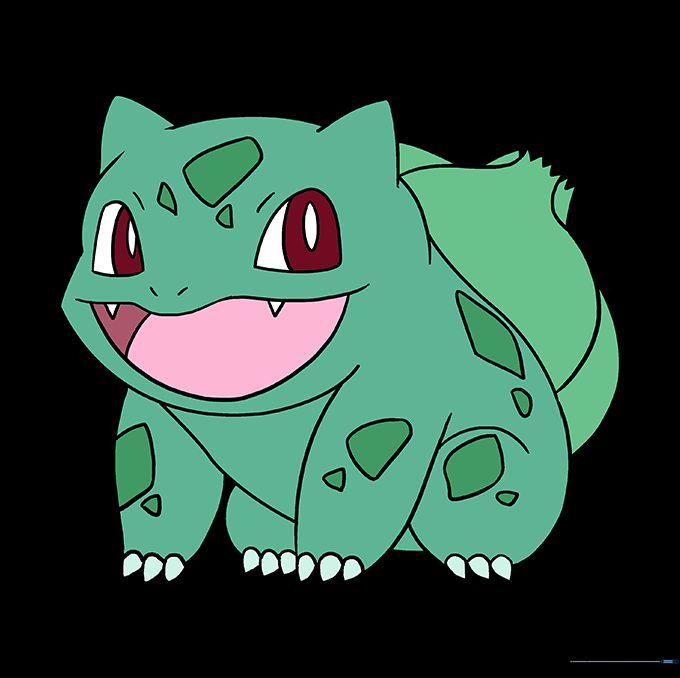
🎯 Final Result
Step-by-Step Instructions
Step 1: Sketching the Head Base

Draw a light, horizontal oval to serve as the foundation for Bulbasaur’s head. Teacher's Tip: Keep your pencil strokes very faint so you can easily erase them later once the final outline is complete.
Step 2: Defining the Ears and Jaw

Add two small, rounded triangles on top of the head for the ears, and use a curved line to define the jawline. Teacher's Tip: Ensure the ear tips are soft and rounded rather than sharp to maintain Bulbasaur's friendly look.
Step 3: Forming the Body

Draw a short, curved line at the back of the head, then enclose a large, rounded shape beneath it to form the main body. Teacher's Tip: Think of the body as a soft, squashed bean shape to get the proportions just right.
Step 4: Drawing the Front Legs
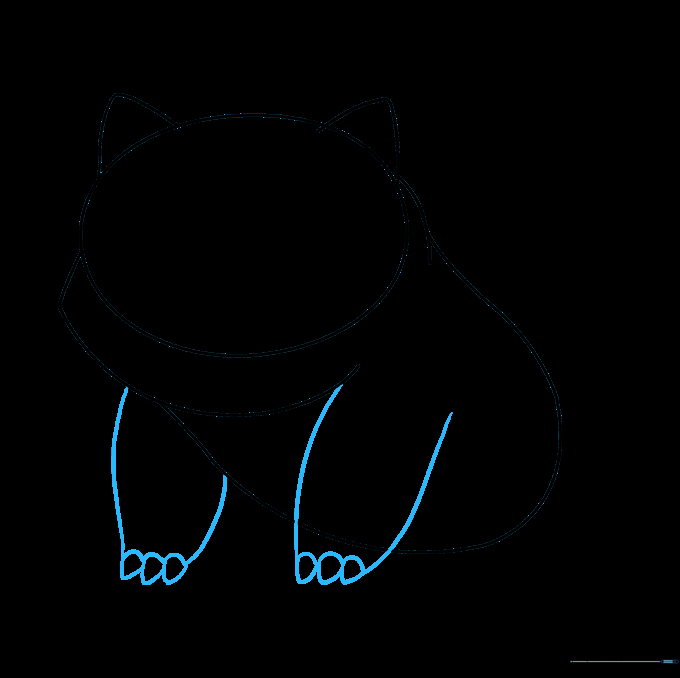
Extend two pairs of curved lines from the upper body for the front legs, finishing them with small, rounded triangles for claws. Teacher's Tip: Keep the legs short and stout to capture Bulbasaur's sturdy, squat appearance.
Step 5: Adding the Rear Legs

Sketch the rear legs using curved lines, ensuring they look tucked in. Add the same rounded triangle claws as you did for the front. Teacher's Tip: Since Bulbasaur is sitting, make these legs look slightly wider and more compact.
Step 6: Cleaning the Outline

Carefully erase the overlapping guide lines where the head meets the body. Teacher's Tip: Use a soft eraser and gentle pressure to avoid smudging your drawing or tearing the paper.
Step 7: Drawing the Back Plant

Extend two curved lines from the back to create a semicircle, then connect them with 'V' shaped lines to form the plant bulb. Teacher's Tip: Use light, rhythmic strokes to create the 'V' shapes to make the plant look organic and textured.
Step 8: Adding Body Spots
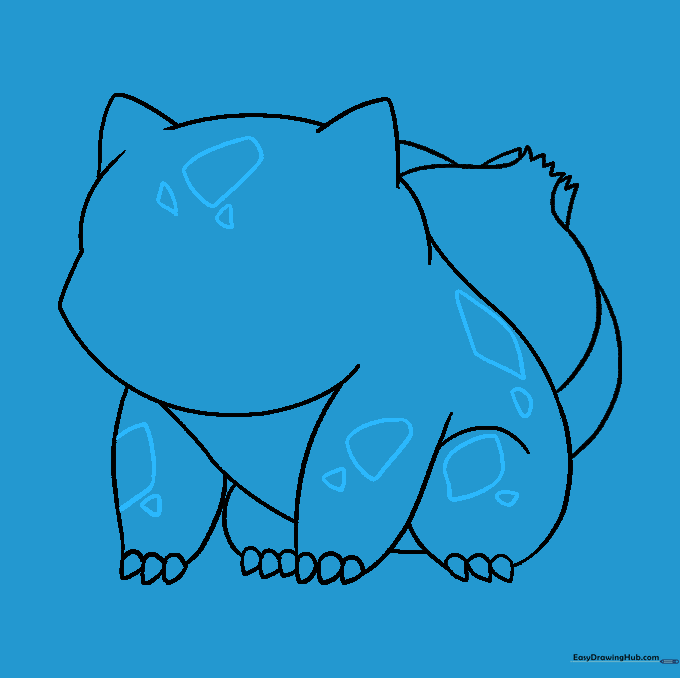
Add spots to the forehead, legs, and back. Use a mix of large, rounded diamond shapes and smaller triangles. Teacher's Tip: Don't worry about making them perfectly symmetrical; nature is irregular, and it adds character!
Step 9: Final Facial Details
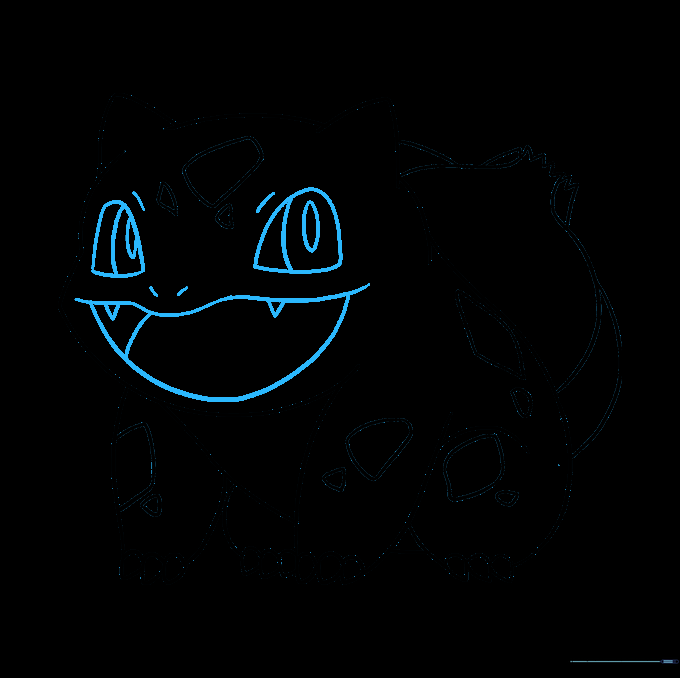
Draw the smiling mouth with a tongue, teardrop-shaped eyes, and small lines for eyebrows and nostrils. Teacher's Tip: Focus on the eyes—adding a small oval for the pupil gives your Bulbasaur a lively, expressive look.
Step 10: Bringing It to Life with Color
Color your Bulbasaur using turquoise or bluish-green for the body, and vibrant green for the spots and plant bulb. Use pink for the tongue. Teacher's Tip: Try using light pressure with your colored pencils to create smooth, even shading.
More Tutorials


