How to Draw Bruno from Encanto: Easy 10-Step Guide
Bring the mysterious Bruno from Encanto to life on your page! This tutorial is designed for young artists and fans who want to practice character proportions and expressive facial features. You will need a pencil, an eraser, and a piece of paper to complete this magical portrait.
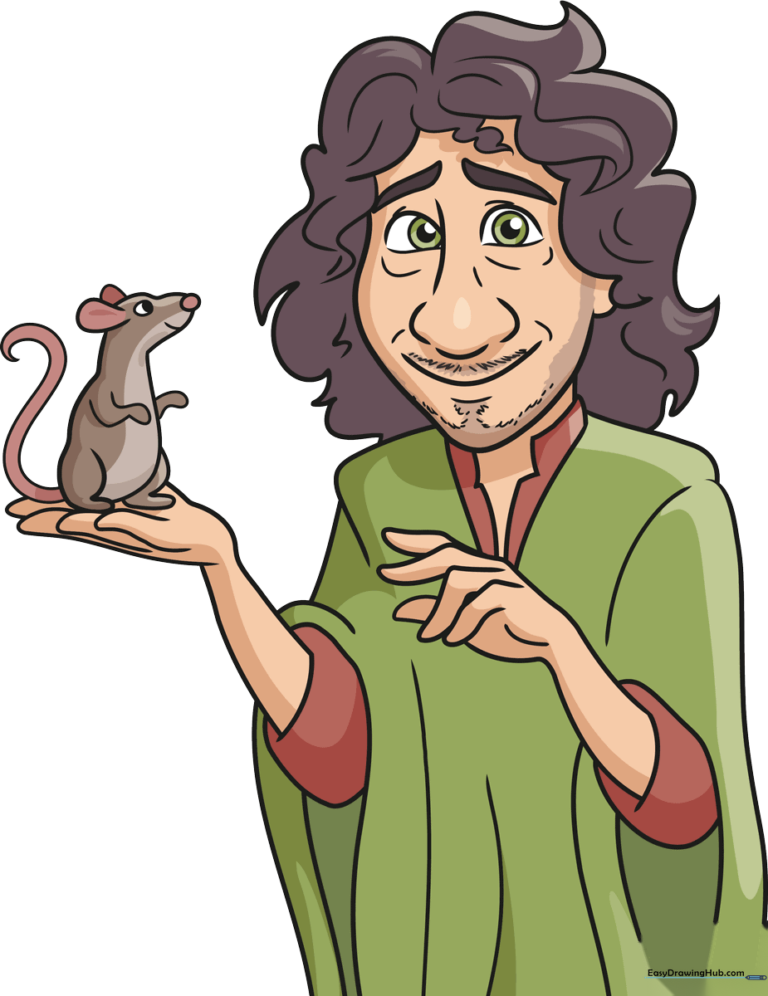
🎯 Final Result
Step-by-Step Instructions
Step 1: Sketching the Eyes and Nose
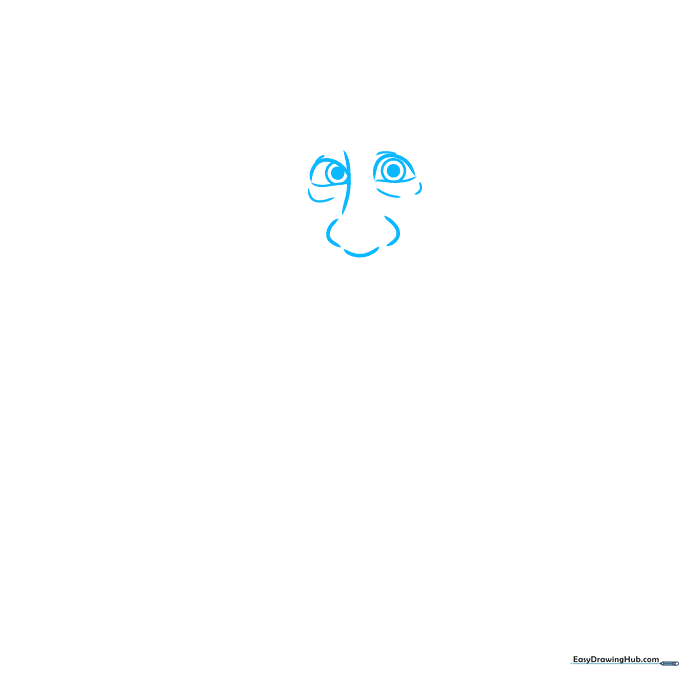
Start by drawing Bruno's almond-shaped eyes. Add the dark circles beneath them to capture his weary expression. Draw the bridge of his nose and the nostrils. Teacher's Tip: Keep your pencil pressure light here so you can refine the shapes later.
Step 2: Defining the Face and Smile
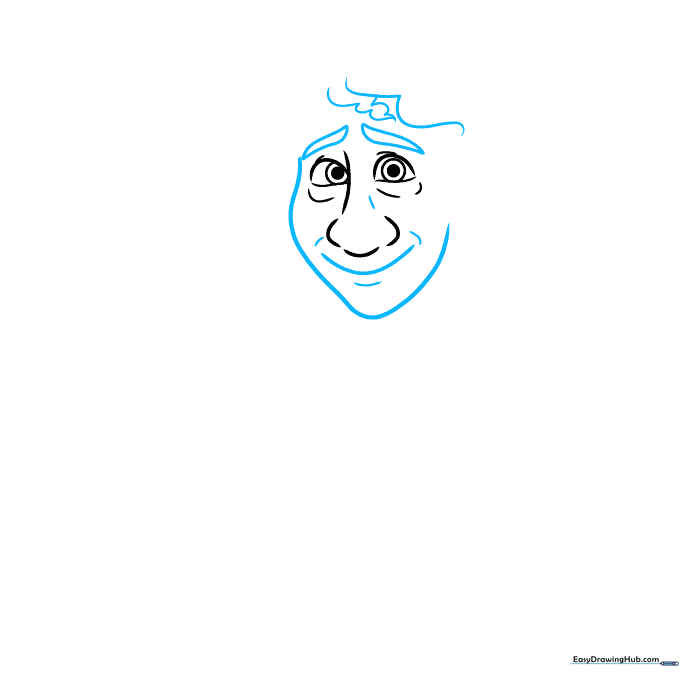
Outline his face using a long, curved line for the chin. Add a gentle smile and small contour lines near the nose. Draw pointed eyebrows to give him character. Teacher's Tip: Use short, quick strokes for the hair to make it look curly and natural.
Step 3: Adding Hair Texture
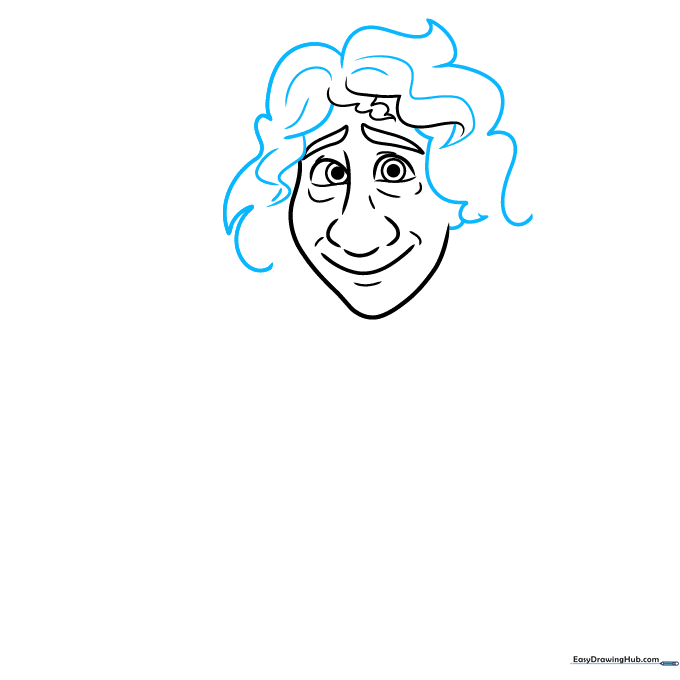
Use long, sweeping curved lines to build out his hair. Let some lines meet at sharp points to create depth. Teacher's Tip: Don't worry about making every hair strand perfect; focus on the overall volume.
Step 4: Shoulders and Facial Hair
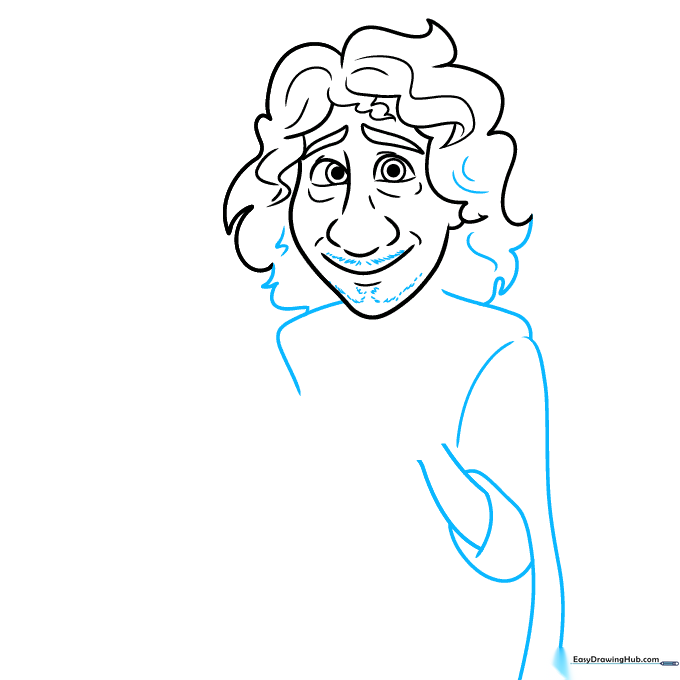
Draw his shoulders and sleeve using overlapping curves. Add small, fine lines to suggest his mustache and beard. Teacher's Tip: Use very light pressure for the beard to keep it looking soft rather than heavy.
Step 5: Drawing the Hand
Sketch his extended hand using overlapping curved lines. Add a small line for the palm detail. Teacher's Tip: Hands can be tricky! Draw a simple mitten shape first, then refine the fingers.
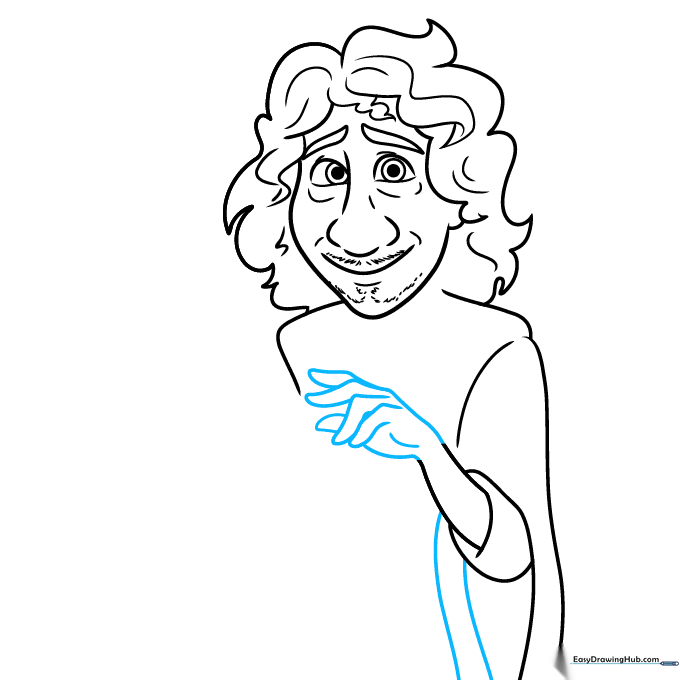
Step 6: Torso and Collar
Draw the remaining arm and the side of his torso. Add the high collar of his garment using lines that meet at sharp points. Teacher's Tip: Make the collar look stiff to contrast with his messy hair.
Step 7: Refining Fingers and Sleeves
Add detail to the fingers and finish the sleeve lines. Texture the front of his garment with a few simple vertical lines. Teacher's Tip: Use a sharp pencil to keep these details clean.
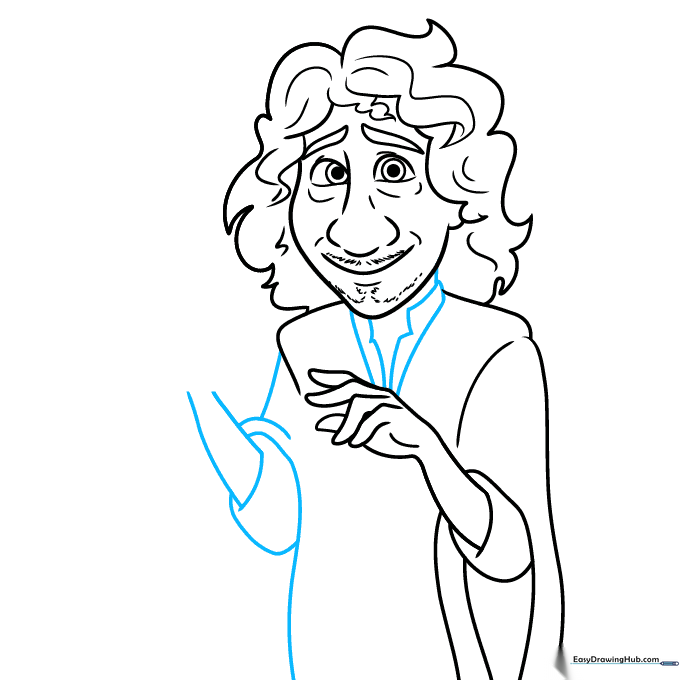
Step 8: Drawing the Rat
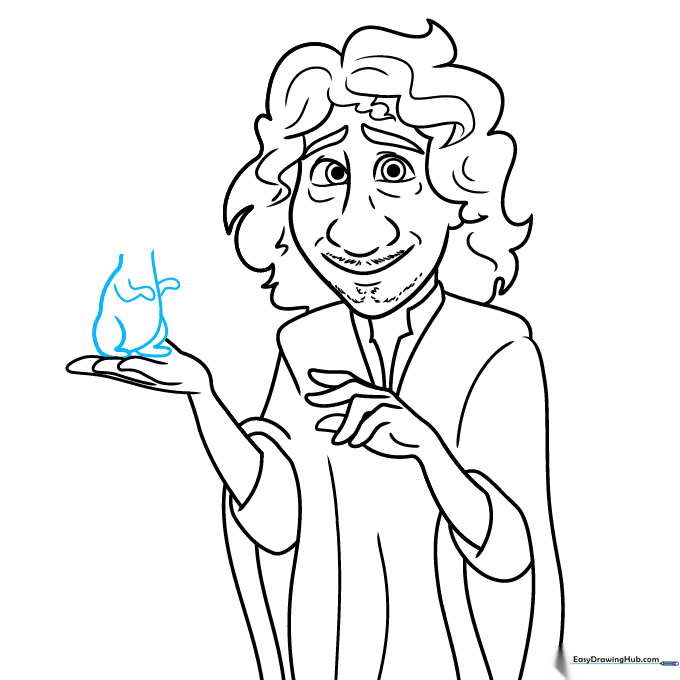
Start sketching the rat on Bruno's hand. Use a long curved line for the back and smaller lines for the legs. Teacher's Tip: Keep the rat small so it doesn't distract from Bruno's face.
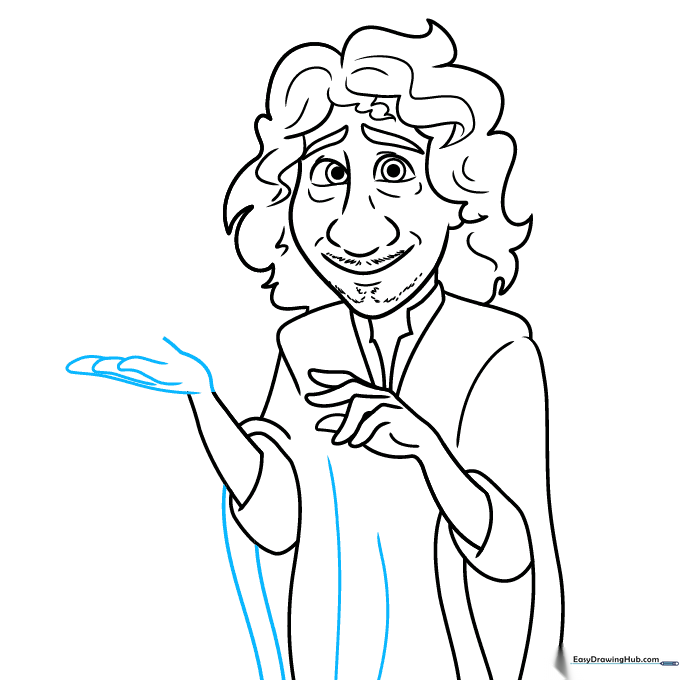
Step 9: Finalizing the Rat
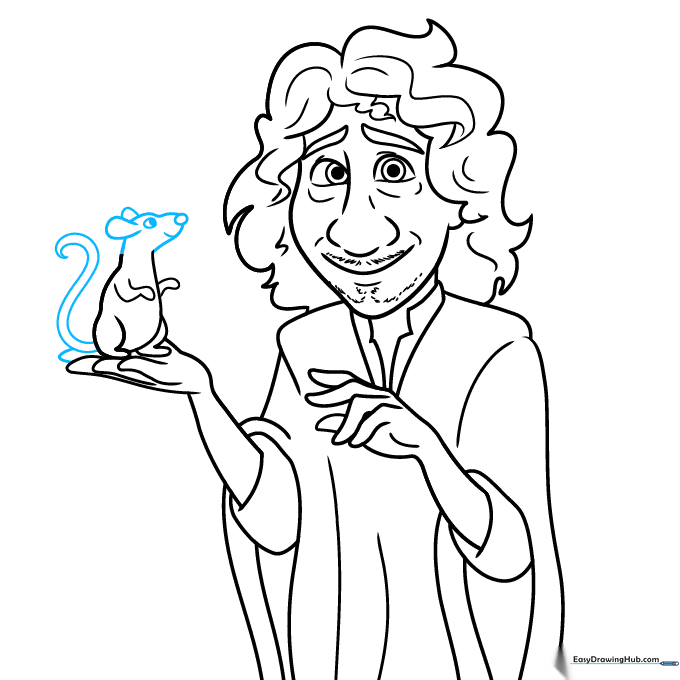
Complete the rat by adding the face, ears, and tail. Use small ovals for the eyes and shade them in. Teacher's Tip: A simple tail curve adds a lot of personality to the little rat!
Step 10: Adding Color
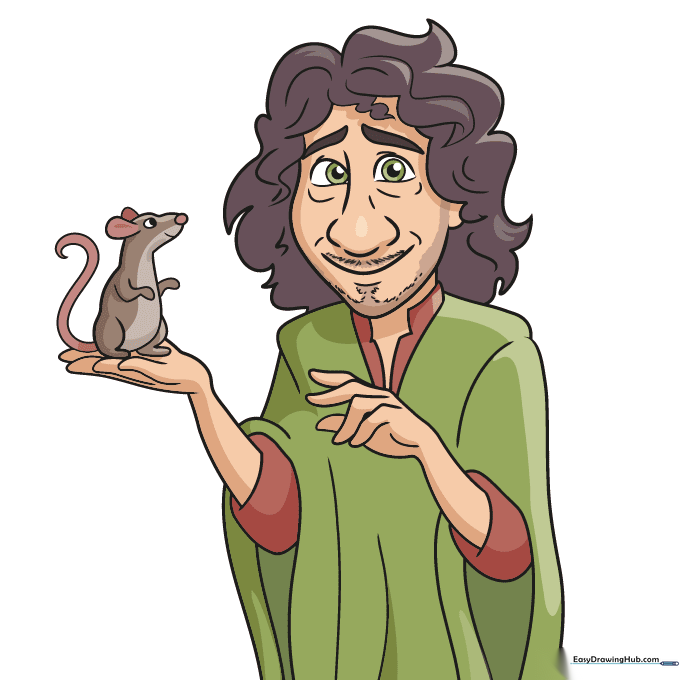
Bring your drawing to life with color! Use dark tones for his hair and his signature green cloak. Teacher's Tip: Use light pressure with your colored pencils to create smooth, even layers.
More Tutorials


