How to Draw Birch Trees: Easy 10-Step Forest Guide
Bring the beauty of a birch forest to your sketchbook with this beginner-friendly tutorial. Designed for ages 5 and up, this activity uses simple shapes to build a professional-looking landscape. Grab your pencil, eraser, and markers, and let’s create a peaceful woodland scene together.
🎯 Final Result

Step-by-Step Instructions
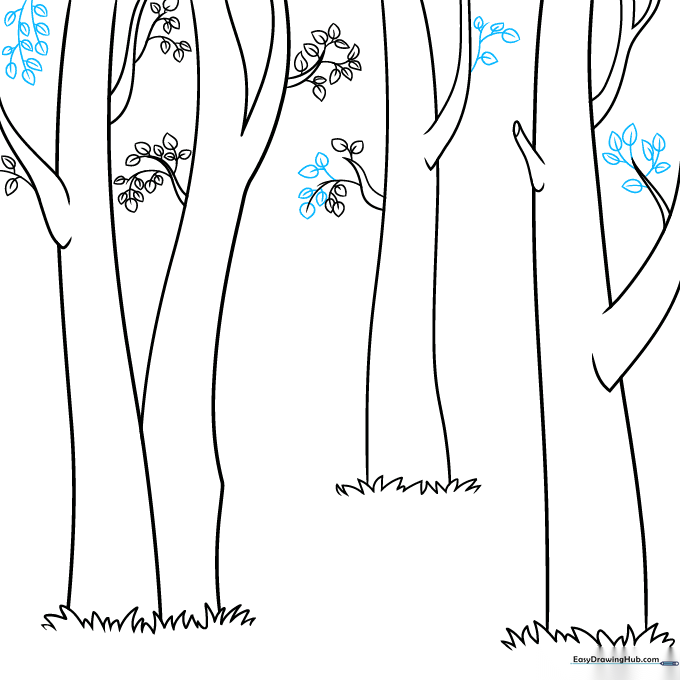
Step 1: Establishing the Ground and Trunks
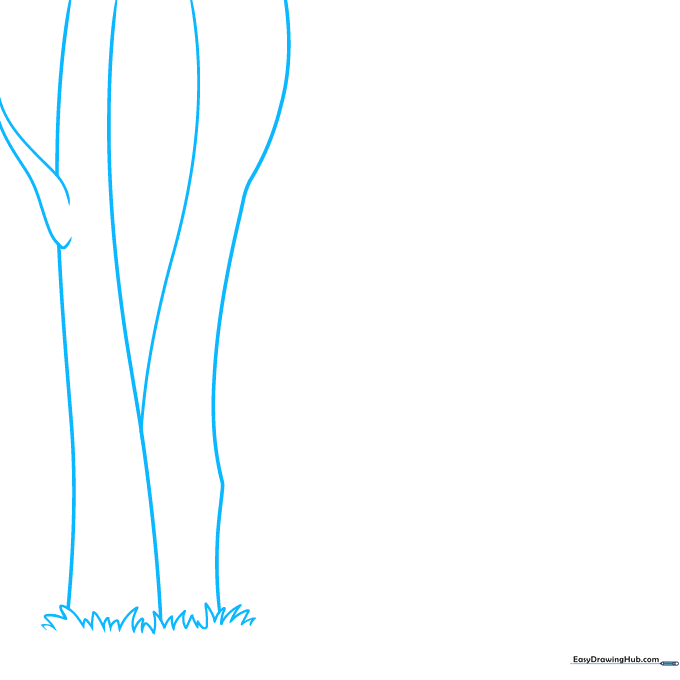
Draw a horizontal line for the ground using loose, uneven triangles to represent grass. Sketch two tall, overlapping curved lines for the first tree. Teacher's Tip: Keep your lines fluid; birch trees are rarely perfectly straight, so a slight wobble adds character!
Step 2: Adding Branches and Depth
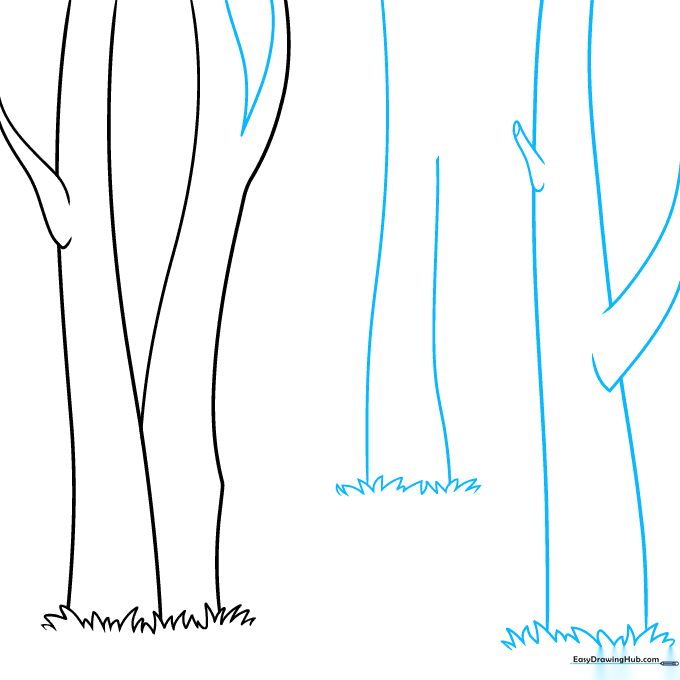
Add a V-shape inside the right trunk to suggest a branch fork. Draw two more grass patches and sketch a small, finger-like branch extending from the side. Teacher's Tip: Vary the height of your branches to make the trees look more natural and less like clones.
Step 3: Developing the Canopy
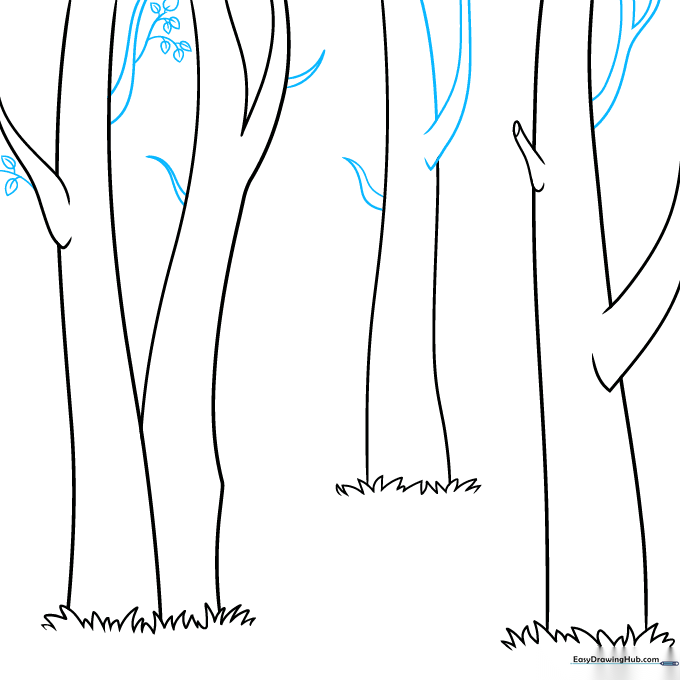
Draw long, narrow triangles for branches and complete the third trunk. Add curved lines and teardrop shapes to the first tree to represent leaf clusters. Teacher's Tip: Teardrop shapes are the secret to drawing foliage quickly without needing to draw every individual leaf.
Step 4: Expanding the Foliage
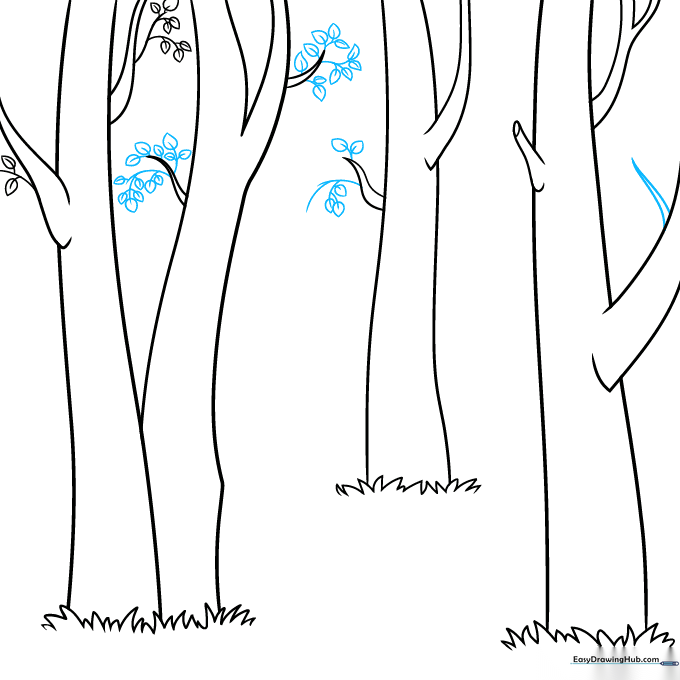
Sketch another branch on the fourth tree. Add more leaf clusters to fill out the canopy. Teacher's Tip: Keep your leaf clusters grouped in small bunches rather than spreading them out evenly; this creates a more realistic, organic look.
Step 5: Adding Leaf Variety
Continue adding leaves at different angles to create volume. Teacher's Tip: Rotate your paper as you draw to make it easier to sketch leaves pointing in different directions.
Step 6: Texturing the Bark
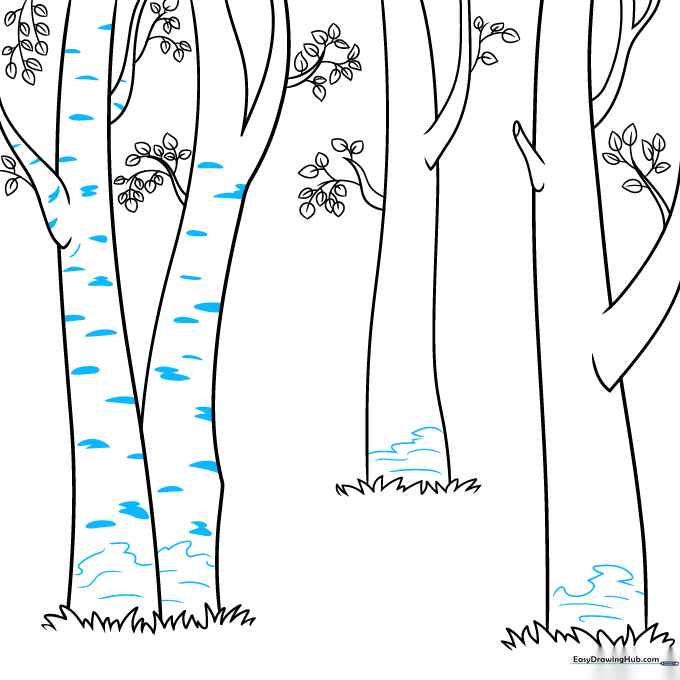
Draw thick, horizontal dashes inside the trunks to represent the iconic birch bark texture. Add squiggly lines near the grass to suggest small ground plants. Teacher's Tip: Don't make the dashes perfectly uniform; birch bark is naturally irregular.
Step 7: Refining the Texture
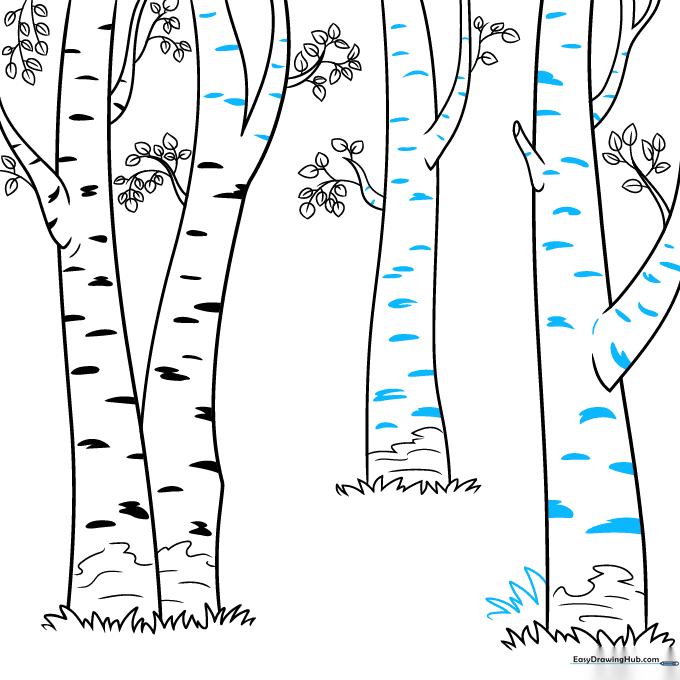
Add more 'tiger stripe' dashes to the trunks and draw another tuft of grass near the fourth tree. Teacher's Tip: Use a slightly darker pencil pressure for the bark markings to make them stand out.
Step 8: Adding Shrubs
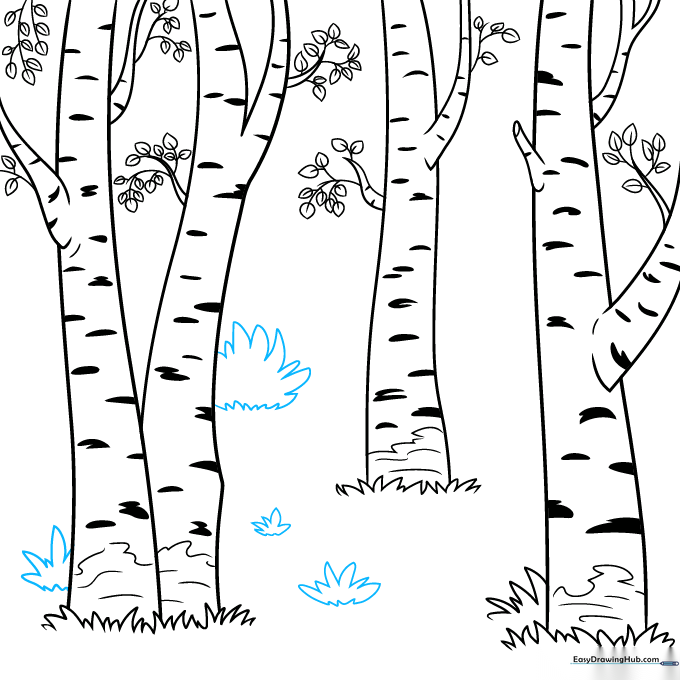
Repeat the grass-drawing technique to create small shrubs around the base of the trees. Teacher's Tip: Shrubs help 'ground' your trees so they don't look like they are floating on the page.
Step 9: Finalizing the Landscape
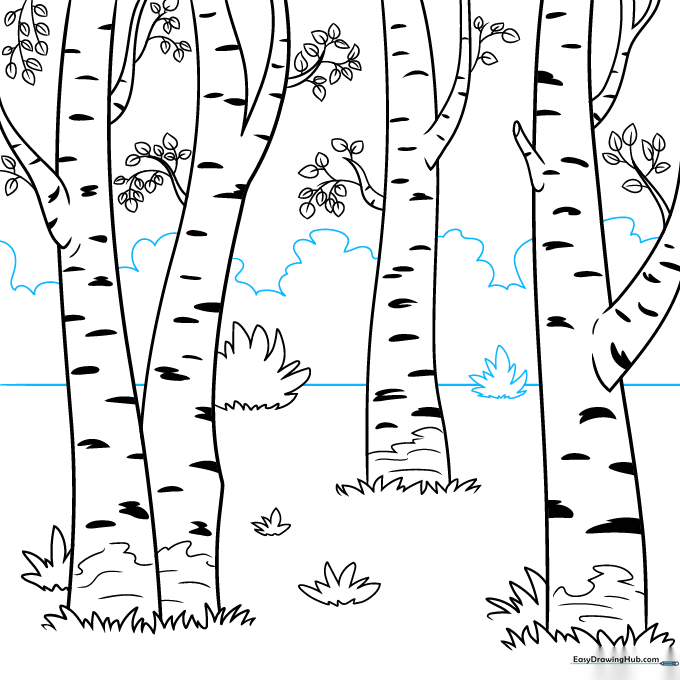
Draw a horizon line and add a squiggly line in the distance to suggest a forest background. Outline your drawing with a black pen. Teacher's Tip: Use a steady hand for the outline, but keep the bark dashes thin and delicate.
Step 10: Adding Color
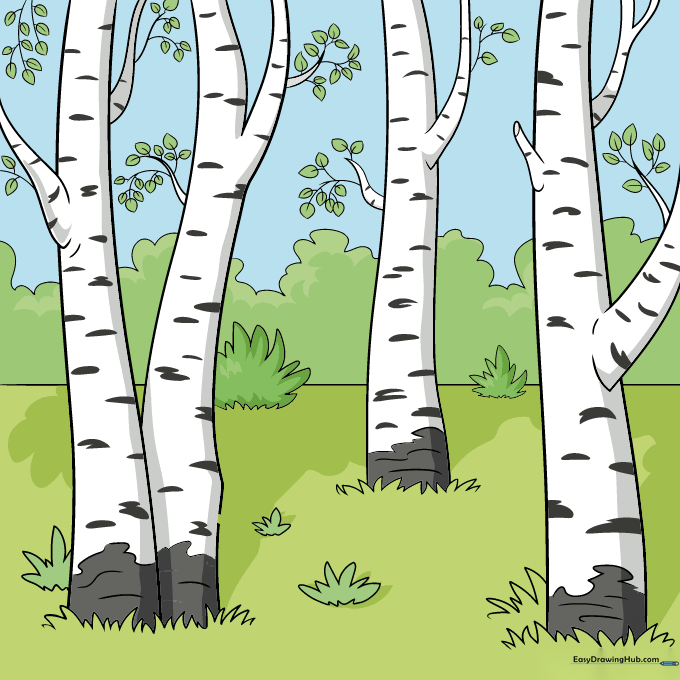
Color the bark markings and trunk bases in dark grey, leaving the rest white. Use light grey for shadows. Color the sky blue and the foliage in vibrant greens. Teacher's Tip: Use a light touch with the grey to keep the trees looking bright and clean.
More Tutorials


