How to Draw Big Bird: Easy 10-Step Guide for Kids
Bring Sesame Street's favorite yellow bird to life with this easy, guided drawing lesson. Designed for young artists ages 5 and up, this activity requires only a pencil, paper, and an eraser. Follow along to develop your sketching confidence and create a vibrant character portrait.
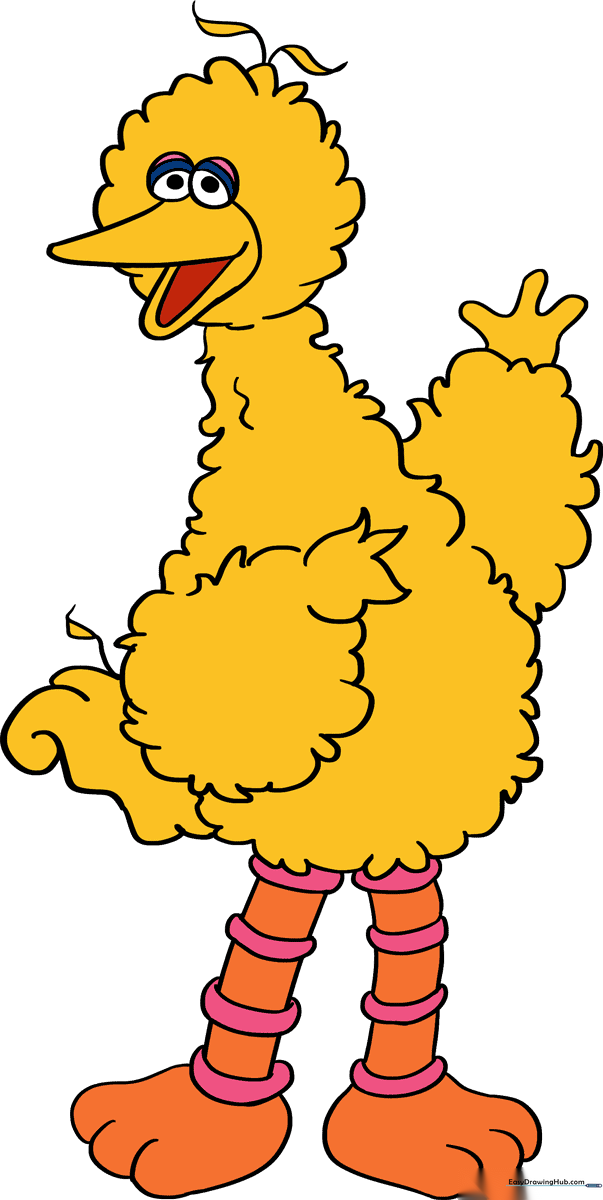
🎯 Final Result
Step-by-Step Instructions
Sketching the Head

Start by drawing Big Bird's head using a series of small, connected 'U' shapes. Teacher's Tip: Think of these as fluffy feathers; keep them consistent in size to give him that iconic, soft look.
Forming the Neck and Arm

Use short, curved 'U' strokes to define the neck and the outer edge of his arm. Add a three-fingered hand at the end. Teacher's Tip: Make the fingers slightly pointed to match his Muppet-style hands.
Defining the Body

Continue the feathery 'U' pattern down to outline the neck, chest, and belly. Teacher's Tip: Keep your pencil pressure light here so the body flows naturally into the neck.
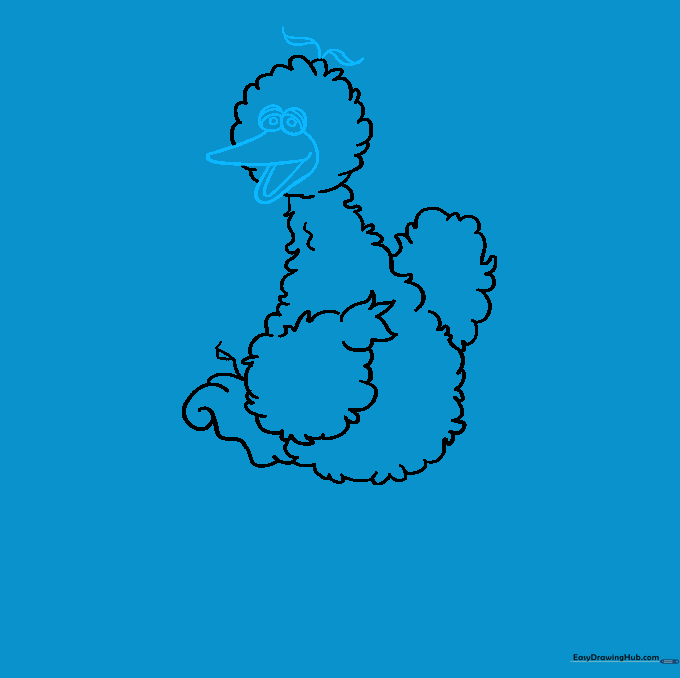
Adding the Second Wing

Use short, overlapping curved lines to enclose the second wing on the opposite side of the body. Teacher's Tip: Ensure the wing looks tucked in to keep the character balanced.
Sketching the Tail

Draw the tail using long, wavy lines. Don't forget the famous stray feather at the end! Teacher's Tip: That little stray feather is what makes him look authentic, so don't skip it.
Facial Features
Add two head feathers, eyes with pupils, drooping eyelids, and a 'V' shaped beak. Teacher's Tip: The drooping eyelids give him his friendly, gentle expression, so take your time with those curves.
Refining the Hand
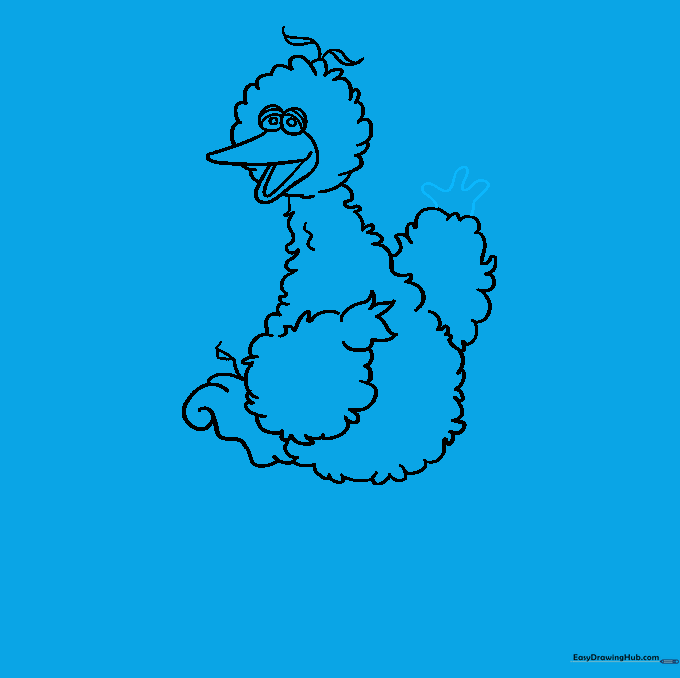
Use a smooth, curved line to finish the rounded 'W' shape of the hand. Teacher's Tip: Check that the hand size matches the proportions of the arm you drew earlier.
Drawing the Legs
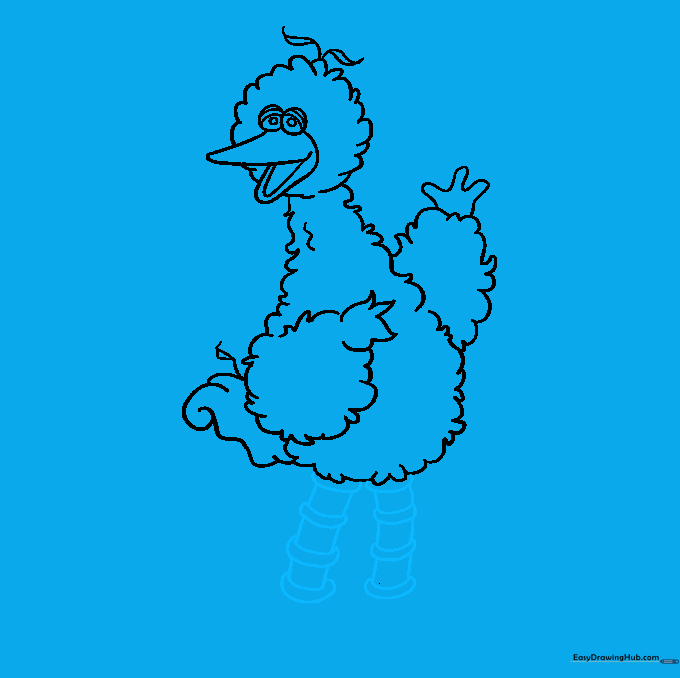
Draw the long legs using a series of curved shapes and short connecting lines. Teacher's Tip: Big Bird has long legs, so make sure they are proportional to his large body.
Adding the Feet

Finish the drawing by adding the feet with overlapping curved lines. Teacher's Tip: Ensure the feet look sturdy to support his tall frame.
Adding Color

Bring your drawing to life! Use bright yellow for his feathers and a warm orange for his legs and beak. Teacher's Tip: Use light, circular strokes when coloring to keep the texture looking soft.
More Tutorials


