How to Draw Bamboo: Easy 9-Step Guide for Beginners
Bring a touch of nature to your sketchbook with this simple bamboo drawing tutorial, perfect for artists ages 5 and up. You only need a pencil, an eraser, and a piece of paper to get started. Follow these steps to master the organic curves and segmented structure of bamboo stalks.
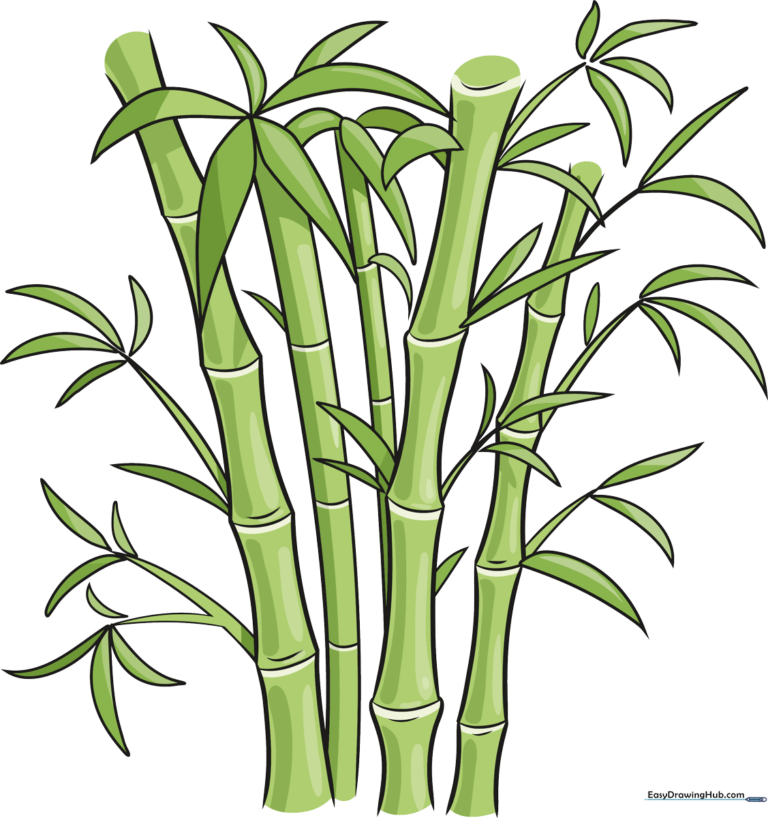
🎯 Final Result
Step-by-Step Instructions
Step 1: Sketching the First Stalk
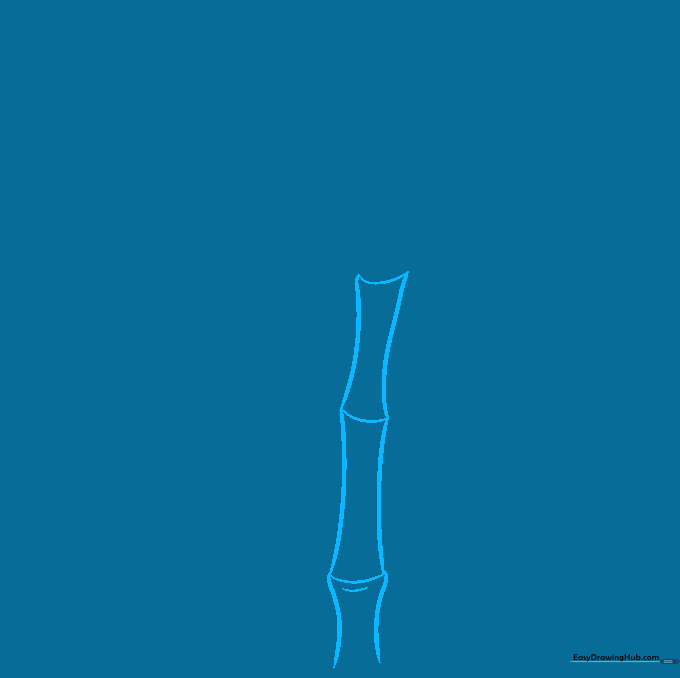
Start by drawing two long, slightly curved parallel lines to form the first bamboo cane. Add short, horizontal curved lines across the stalk to create the segments. Teacher's Tip: Keep your pencil pressure light so you can easily adjust the curves if they look too straight.
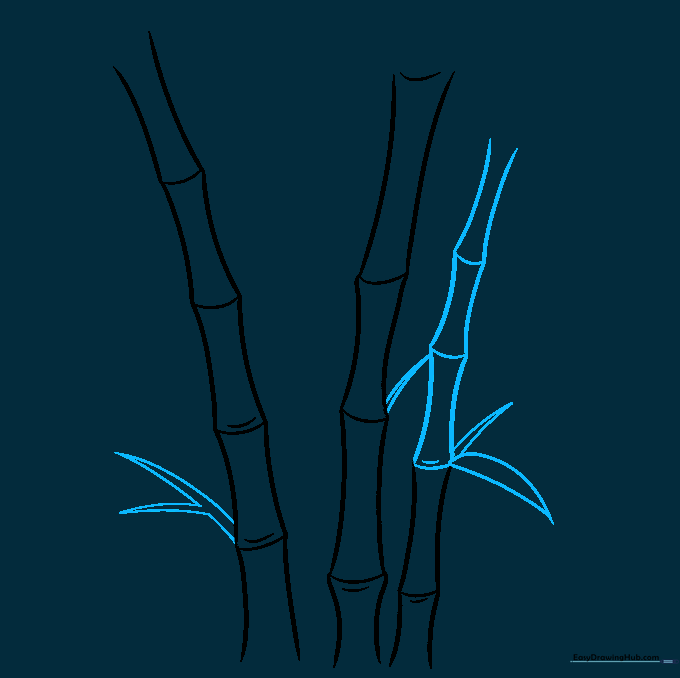
Step 2: Adding Height and New Stalks
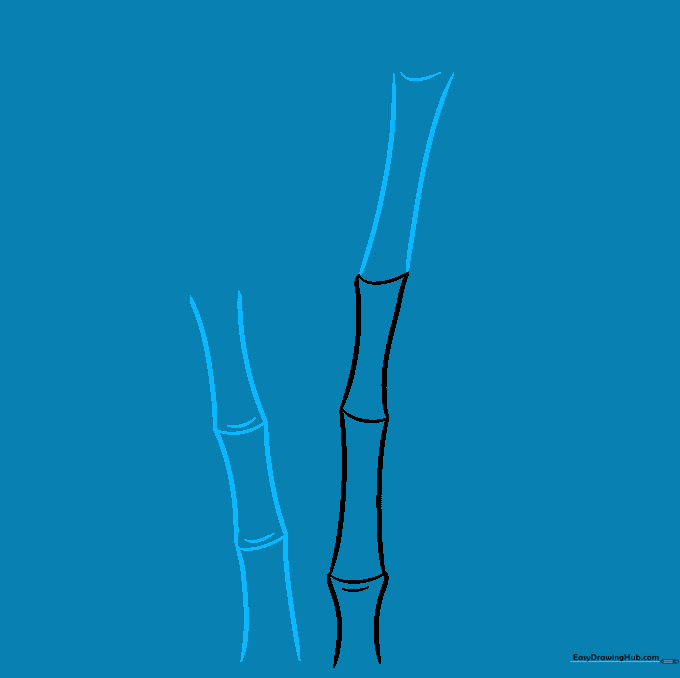
Extend your first stalk upward with another segment, then start a second stalk next to it using the same curved line technique. Teacher's Tip: Bamboo isn't perfectly straight, so don't worry if your lines wobble—it actually makes the plant look more realistic!
Step 3: Building the Bamboo Cluster
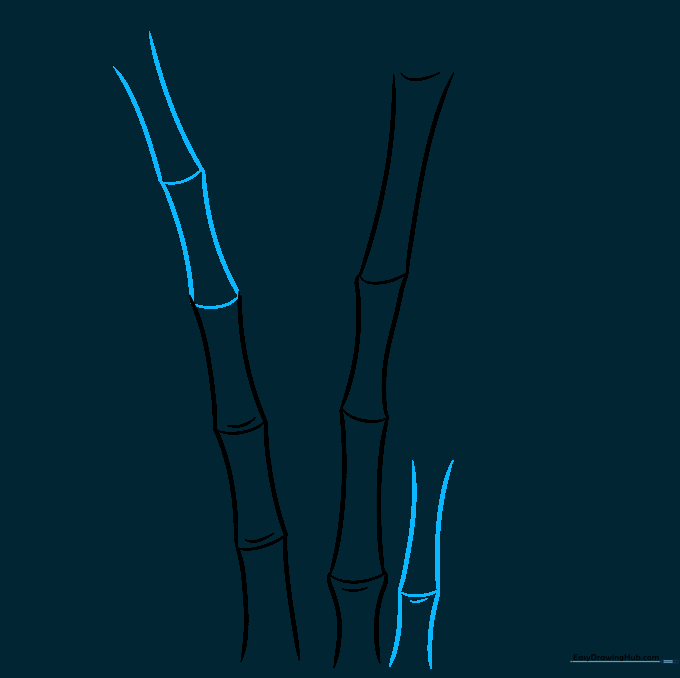
Add more segments to your second stalk and begin a third one to create a cluster. Teacher's Tip: Vary the heights of your stalks so they don't all look like they stop at the same point; this creates a more natural, organic composition.
Step 4: Introducing Leaves
Extend your third stalk and begin adding leaves by drawing two curved lines that meet at a sharp point. Teacher's Tip: Think of the leaves as long, thin teardrops. Start them from the joints where the segments meet.
Step 5: Filling in the Foliage
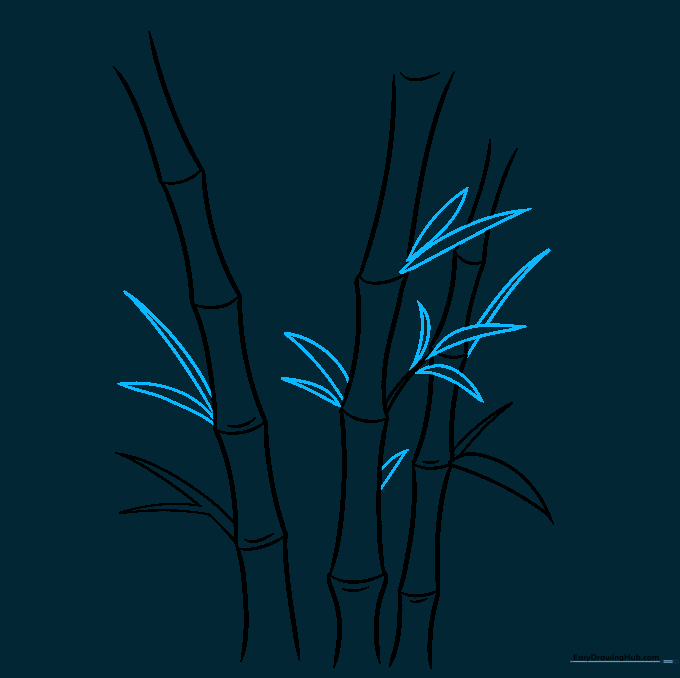
Add more leaves to the stalks. If you make a mistake, use your eraser to clean up the lines where the leaves overlap the stalks. Teacher's Tip: Don't crowd the leaves; leaving some white space makes the drawing look cleaner and more professional.
Step 6: Layering the Leaves
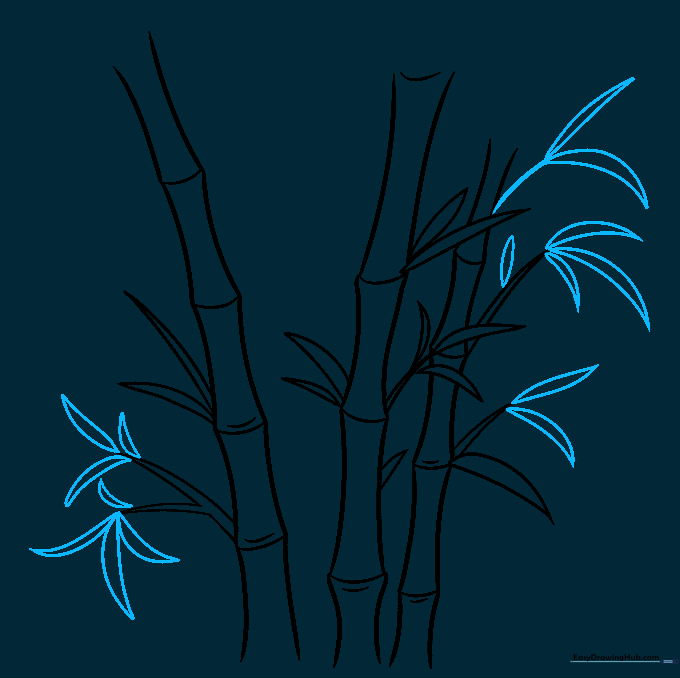
Continue adding leaves to create a fuller look. Vary the direction of the leaves—some pointing up, some drooping down. Teacher's Tip: Try drawing some leaves behind the stalks to create a sense of depth in your drawing.
Step 7: Adding a New Stalk
Draw one more bamboo cane to add balance to your composition. Use the same parallel curved lines and horizontal segment bands. Teacher's Tip: Make this stalk slightly shorter than the others to keep the eye moving across the page.
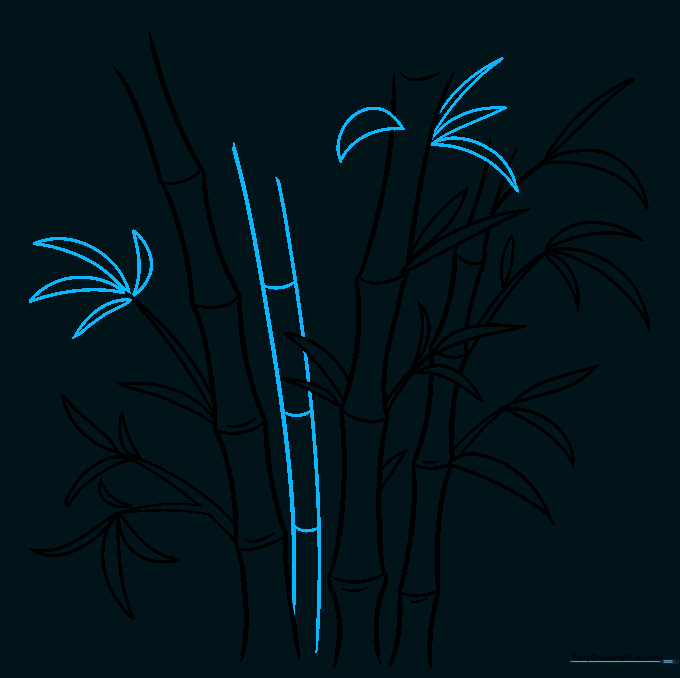
Step 8: Final Leaf Details
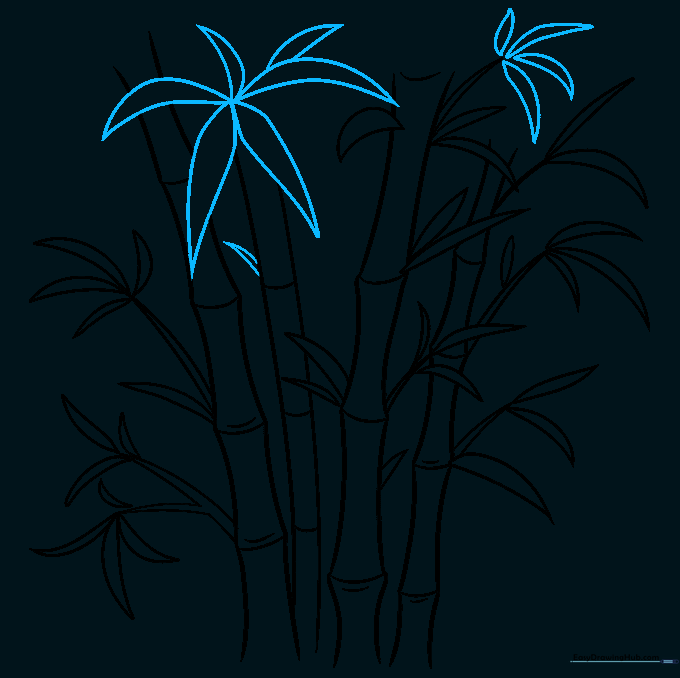
Add final leaves at the tops of your canes. Group some leaves together in a starburst pattern to make the plant look lush. Teacher's Tip: Use short, quick strokes to make the leaves look sharp and pointed.
Step 9: Final Touches
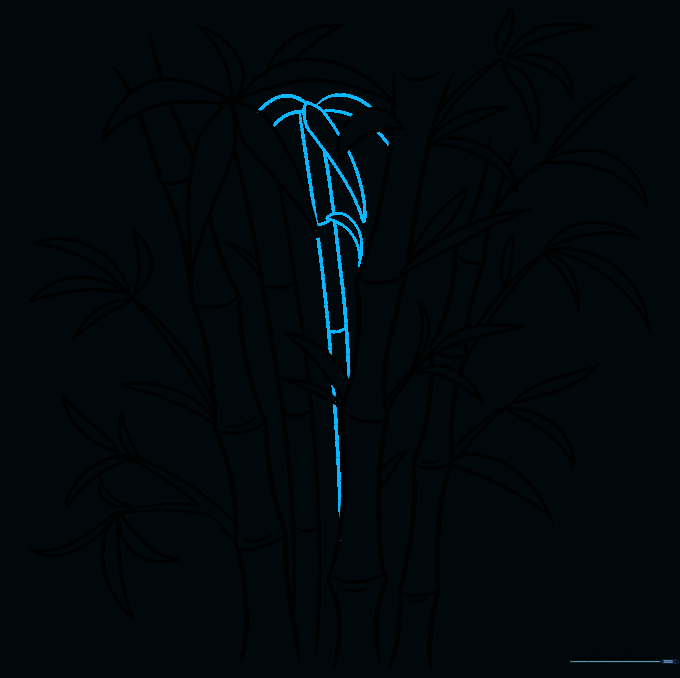
Add a final stalk in the background to give your drawing depth. Check your lines and darken the ones you want to keep. Teacher's Tip: Before you color, use a kneaded eraser to gently lift any stray pencil marks for a clean finish.
Step 10: Bring Your Bamboo to Life with Color
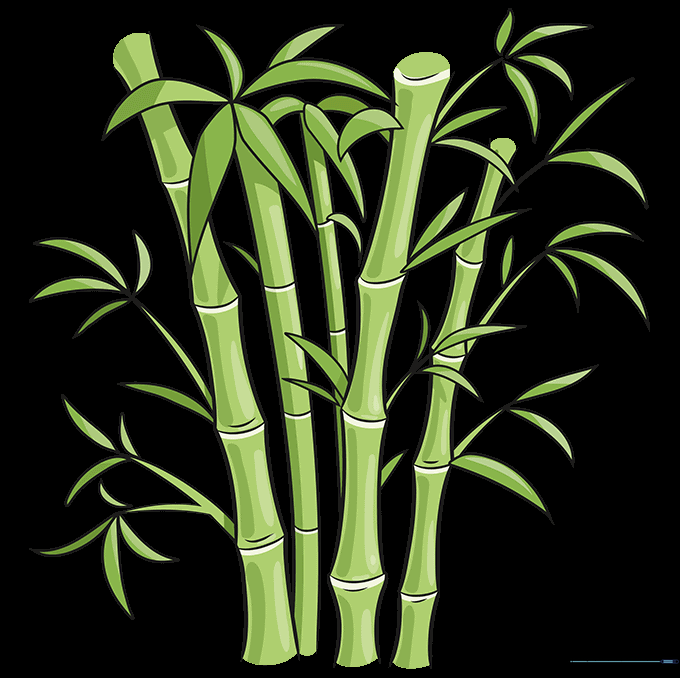
Time to color! Use various shades of green for the leaves and a light tan or pale green for the stalks. Teacher's Tip: Add a tiny bit of yellow to the sunny side of the stalks to make them look like they are catching the light.
More Tutorials


