How to Draw Baby Dory: Easy 10-Step Guide for Kids
Bring the ocean's most forgetful friend to life with this simple, guided drawing lesson. Designed for young artists ages 5 and up, this activity requires only a pencil, paper, and an eraser. Follow along to build confidence in your sketching skills while creating an adorable version of Baby Dory.
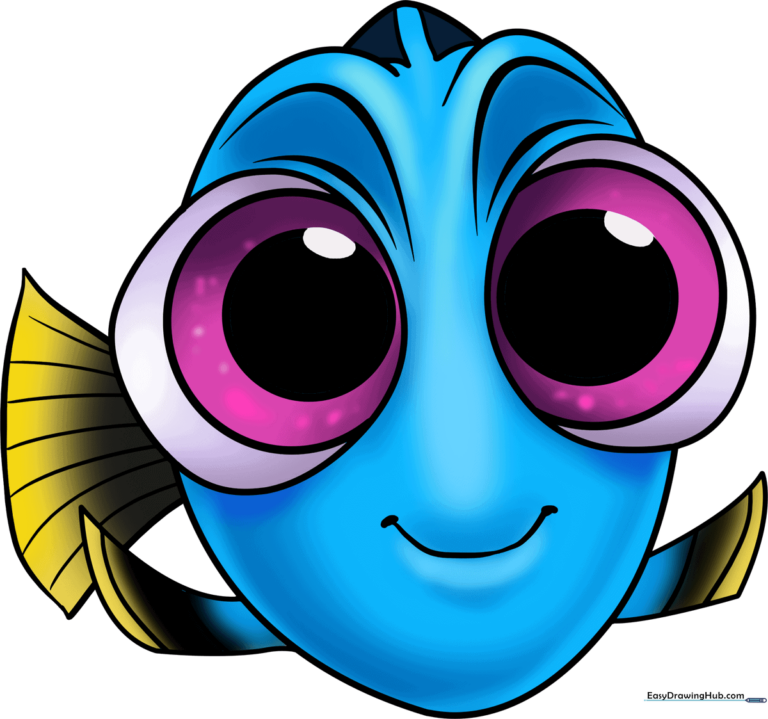
🎯 Final Result
Step-by-Step Instructions
Step 1: Sketching the Face Shape

Draw a long, curved line that looks like a rounded heart shape, leaving the top open. Teacher's Tip: Keep your pencil pressure light here; this is just the foundation for Dory's head.
Step 2: Adding the Dorsal Fin

Connect the two top lobes of your heart shape with a smooth, curved line. This creates the top dorsal fin. Tip: Imagine a gentle wave to get that natural, rounded look.
Step 3: First Pectoral Fin
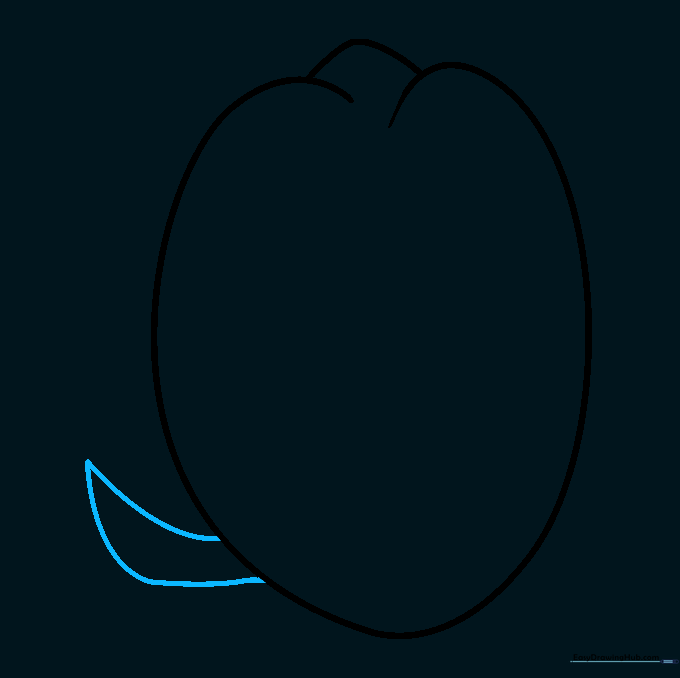
Extend two curved lines from the side of the body, meeting at a point to form a fin. Tip: Think of this as a small, rounded triangle pointing away from the body.
Step 4: Second Pectoral Fin

Draw a similar fin shape on the opposite side of the body. Tip: Since this fin is further away, try drawing it slightly smaller to create a sense of depth.
Step 5: Drawing the First Eye

Draw a large circle that overlaps the side of the face. Tip: Make sure it's nice and round—don't rush this part, as the eyes give Dory her cute expression!
Step 6: Drawing the Second Eye
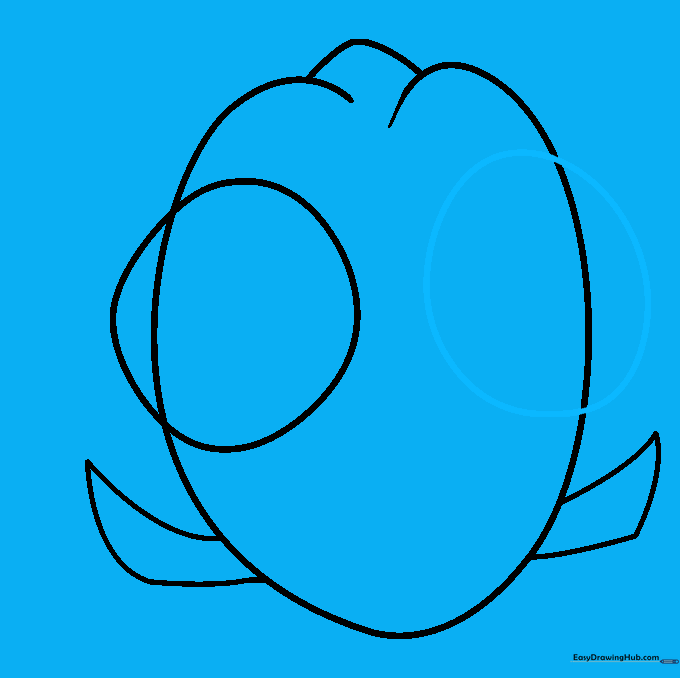
Repeat the process on the opposite side to draw the second eye. Tip: Try to align the tops of the circles so they look level.
Step 7: Cleaning Up

Gently erase the lines inside the eyes to make them look clear. Tip: Use a clean eraser and brush away the crumbs so your paper stays tidy.
Step 8: Adding Facial Details

Add pupils with a C-shaped notch, a smiling mouth, and bands on the fins. Tip: Shading the pupils makes Dory look much more lively and friendly.
Step 9: Adding the Tail and Final Details
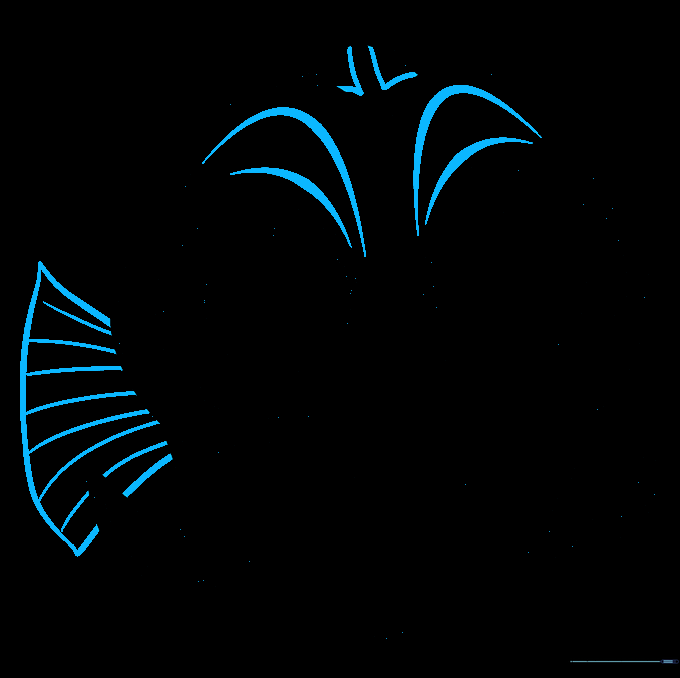
Draw the tail with curved lines and add small triangular details to the dorsal fin. Tip: Use short, quick strokes for the tail to give it a feathery texture.
Step 10: Bringing Dory to Life with Color

Color your Dory using deep blue for the body, bright yellow for the fins, and a touch of pink or purple for the eyes. Tip: Use a black marker to outline your work for a professional cartoon look!
More Tutorials


