How to Draw Anime Ripped Jeans: Easy 7-Step Guide
Ready to give your anime characters some street-style flair? This tutorial is perfect for artists ages 8+ looking to master fabric texture and distressed denim details. All you need is a pencil, an eraser, and a piece of paper to bring these trendy ripped jeans to life.
🎯 Final Result
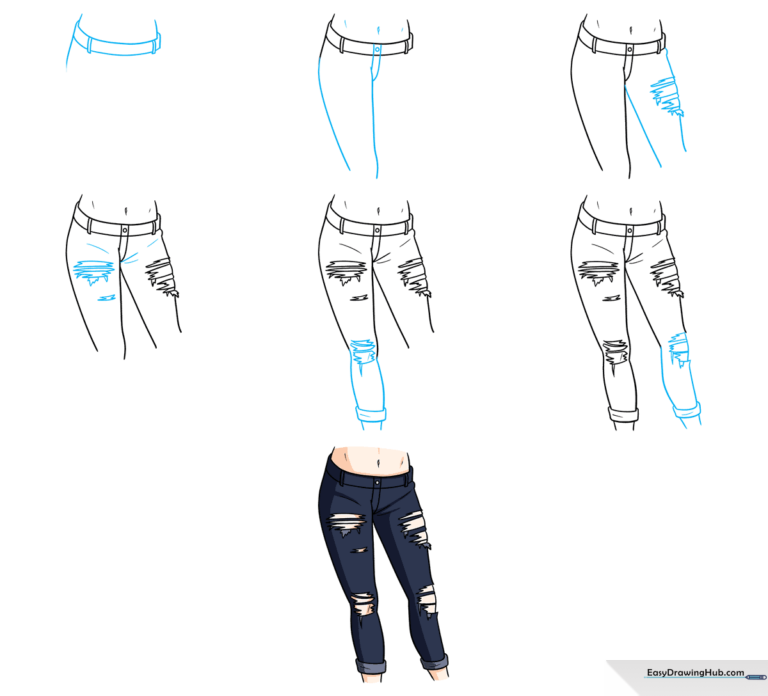
Step-by-Step Instructions
Step 1: Sketching the Waistline
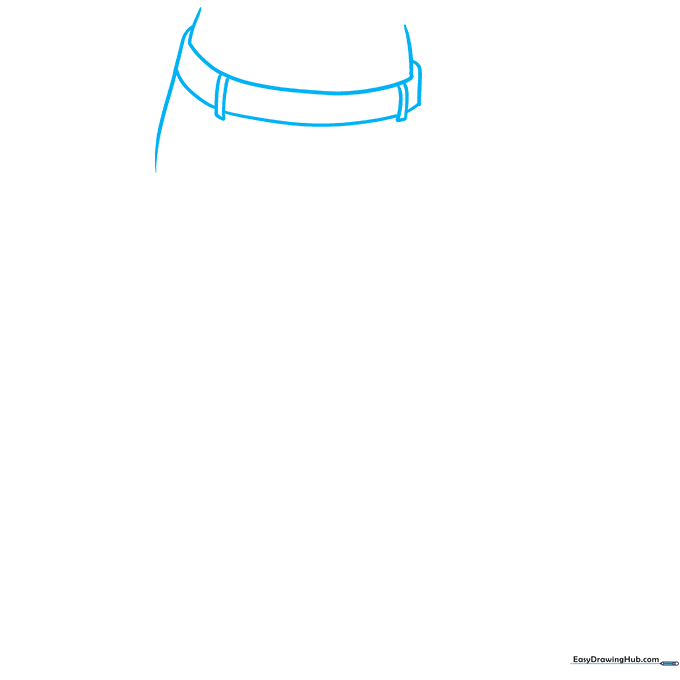
Start by drawing two vertical lines to frame the torso. Add a series of small rectangles for the belt and loops. Teacher's Tip: Keep your pencil pressure light here; you'll want to erase the internal lines later to make the jeans look like they are sitting on the body.
Step 2: Defining the Hips and Fly
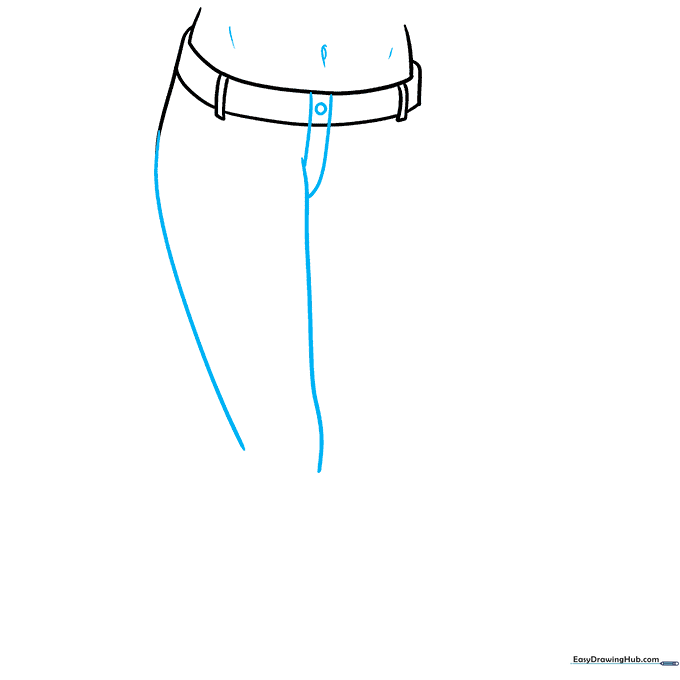
Extend two curved lines downward to outline the upper legs. Add the zipper fly in the center and a small circle for the button. Teacher's Tip: Anime anatomy often features wider hips; make sure your curves are soft and rounded to show the fabric wrapping around the form.
Step 3: Creating the First Rips
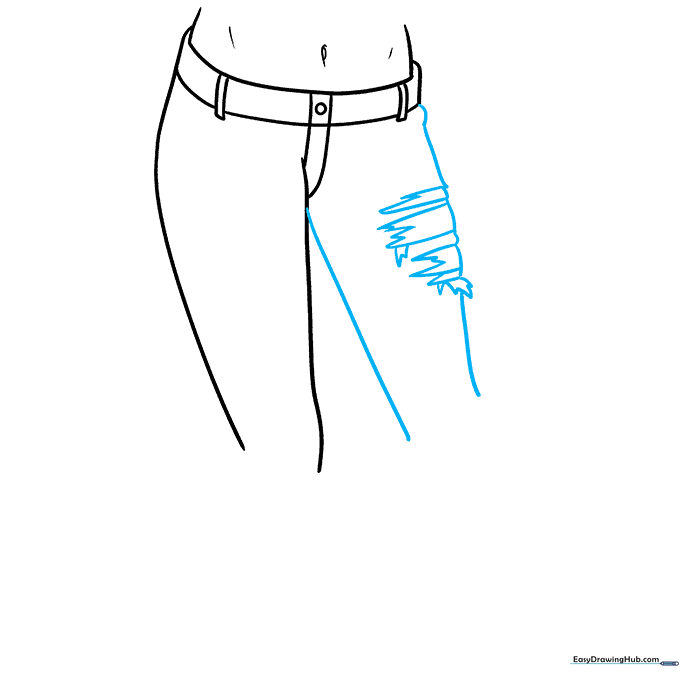
Outline the second leg with curved lines, then add jagged, zigzag shapes on the thigh. Teacher's Tip: Don't make the rips perfectly symmetrical. Add a few vertical 'thread' lines inside the holes to give the denim a realistic, frayed texture.
Step 4: Adding Tears to the Opposite Leg
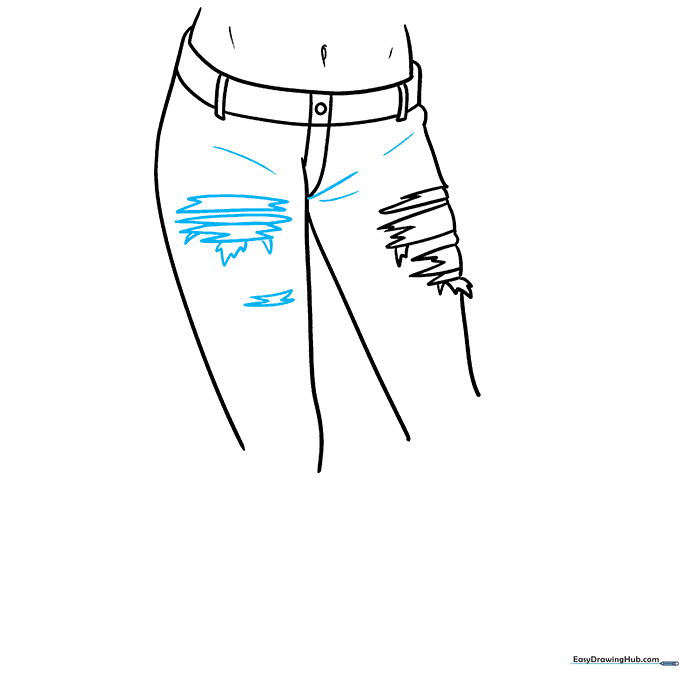
Mirror the process on the other leg by drawing ragged shapes for tears. Use curved lines to connect the legs to the torso. Teacher's Tip: Focus on the 'junction' where the legs meet; adding a slight curve here helps the pants look like they are being worn rather than just floating.
Step 5: Drawing the Cuffs and Knees
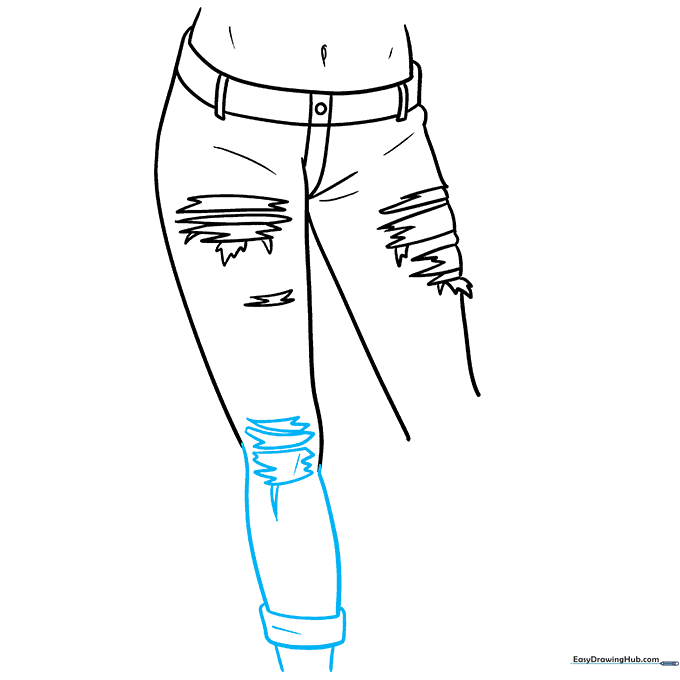
Outline the lower legs and add rectangular shapes at the bottom for rolled cuffs. Add more jagged tears near the knee area. Teacher's Tip: The calf muscle bulges, so make sure your outline curves outward slightly to show the shape of the leg underneath the fabric.
Step 6: Finalizing Details
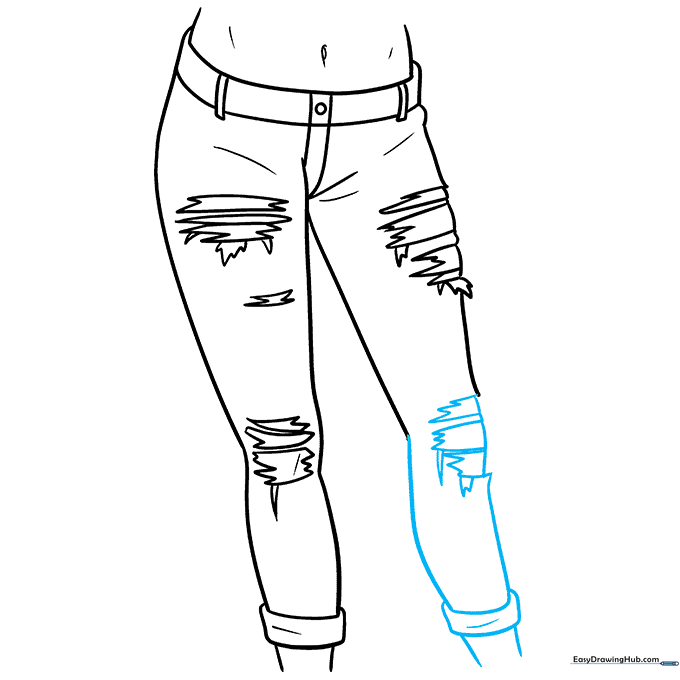
Complete the remaining calf, ankle, and cuff details. Ensure all your lines are clean and connected. Teacher's Tip: If you made any mistakes, use your eraser to clean up the edges before you start inking.
Step 7: Adding Color
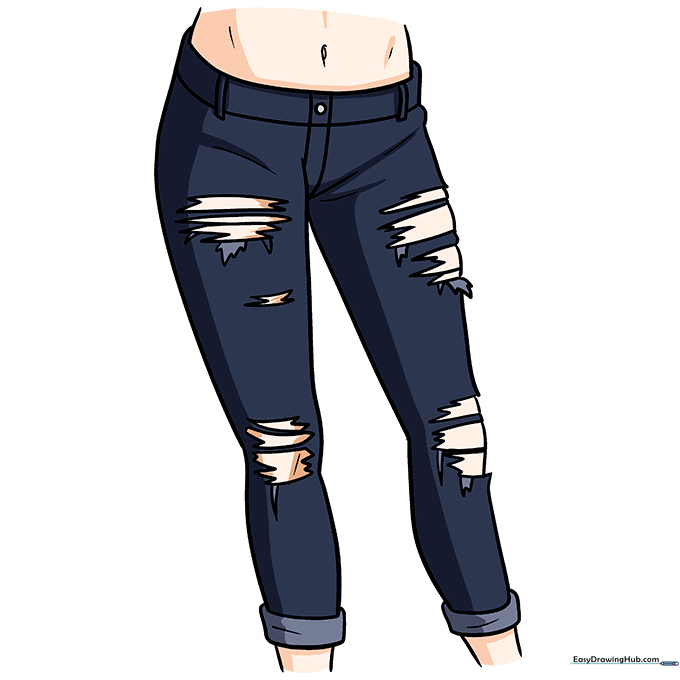
Time to bring your jeans to life! Use shades of blue for a classic denim look, or get creative with black or neon colors. Teacher's Tip: Use a darker shade of blue near the seams and the edges of the rips to create a sense of depth and shadow.
More Tutorials


