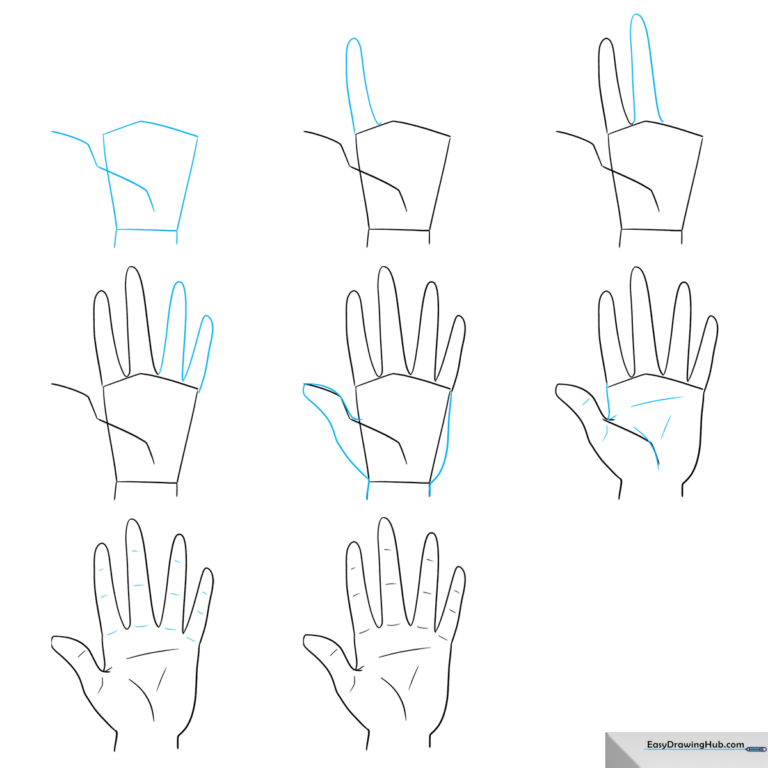
How to Draw Anime Hands: Easy 8-Step Guide
Drawing hands is often the biggest hurdle for budding anime artists, but breaking them down into simple geometry makes it achievable. This guide is perfect for artists ages 8+ looking to add dynamic movement to their characters. You only need a pencil, an eraser, and a piece of paper to start building professional-looking hand gestures.
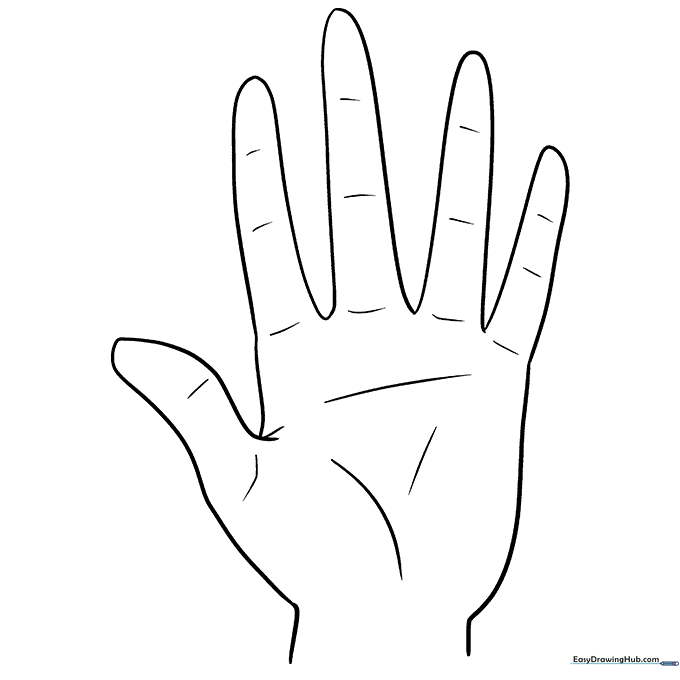
🎯 Final Result
Step-by-Step Instructions
Step 1: Establishing the Palm and Thumb Base
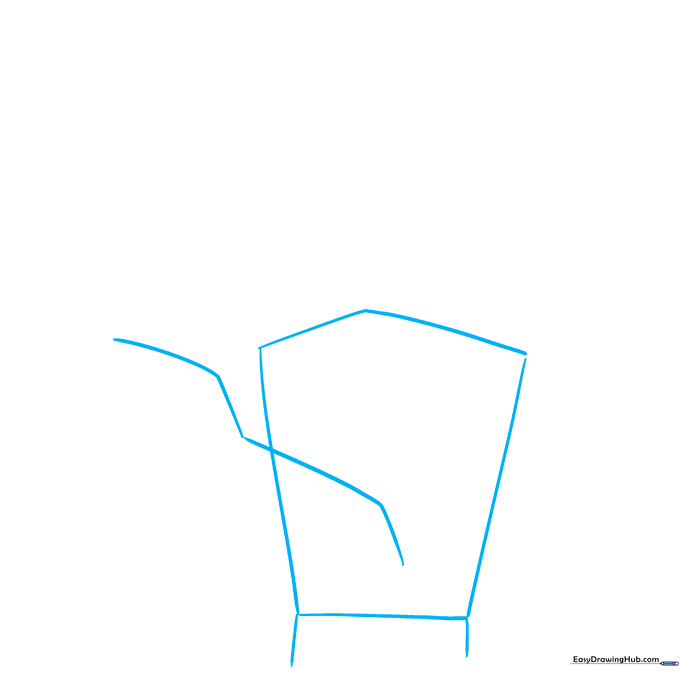
Lightly sketch an irregular pentagon to represent the palm. Add two short lines at the bottom for the wrist and a wide zigzag shape on the side for the thumb. Teacher's Tip: Keep these lines faint; they are your 'map' and will be erased later.
Step 2: Sketching the Index Finger
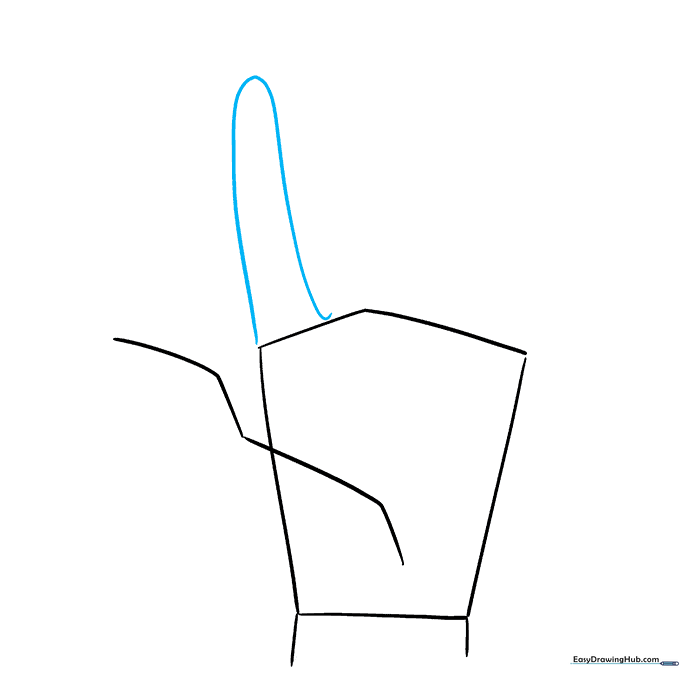
Extend a long, slightly curved line from the top corner of your pentagon and loop it back to create the index finger. Teacher's Tip: Think of the finger as a soft tube—keep the curve gentle to make it look natural, not robotic.
Step 3: Adding the Middle Finger
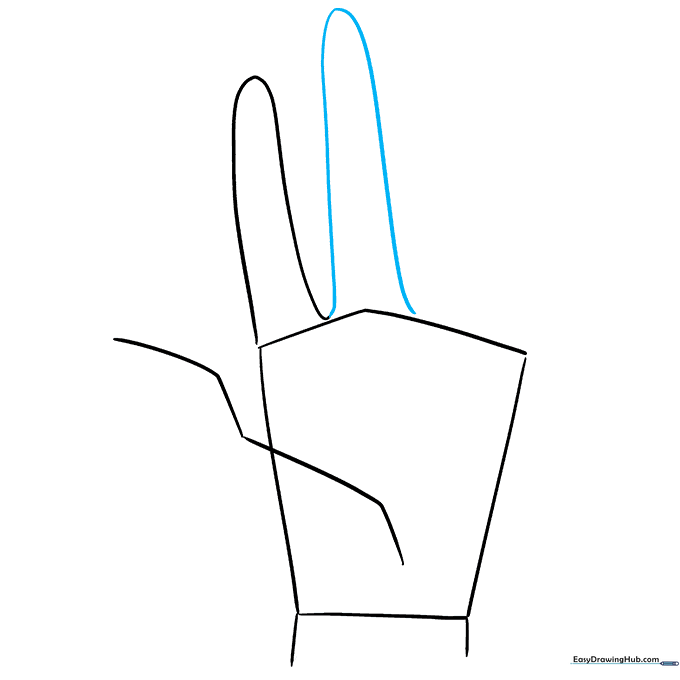
Draw a second curved loop starting from the base of the index finger. This middle finger should be the longest and sit centered over the top point of your pentagon. Teacher's Tip: Ensure the middle finger is slightly taller than the index finger for correct anatomy.
Step 4: Completing the Fingers
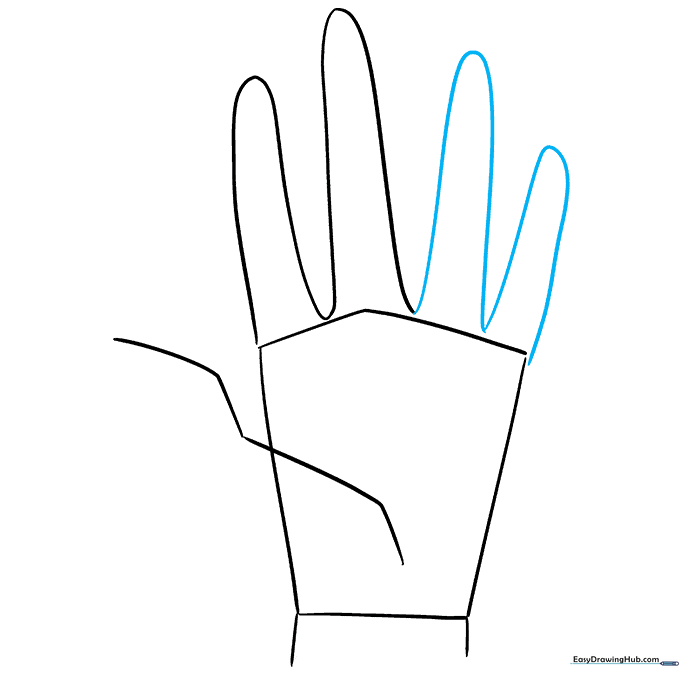
Add two more curved loops for the ring and pinky fingers, making each one slightly shorter than the last. Teacher's Tip: The pinky should be the shortest finger; don't make it too long or the hand will look distorted.
Step 5: Refining the Hand Contour
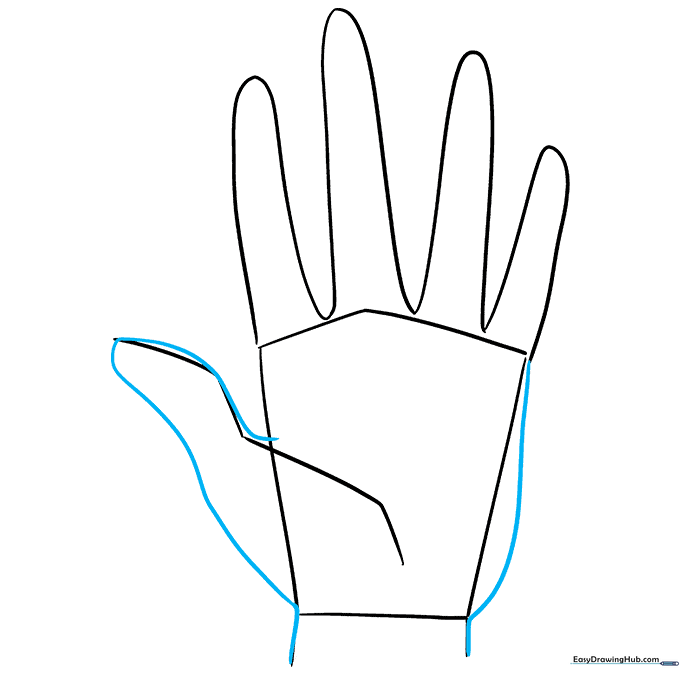
Use smooth, flowing lines to connect the fingers to the palm and define the wrist. Teacher's Tip: Use a 'C' shape for the thumb area to give it that fleshy, realistic look.
Step 6: Cleaning and Detailing
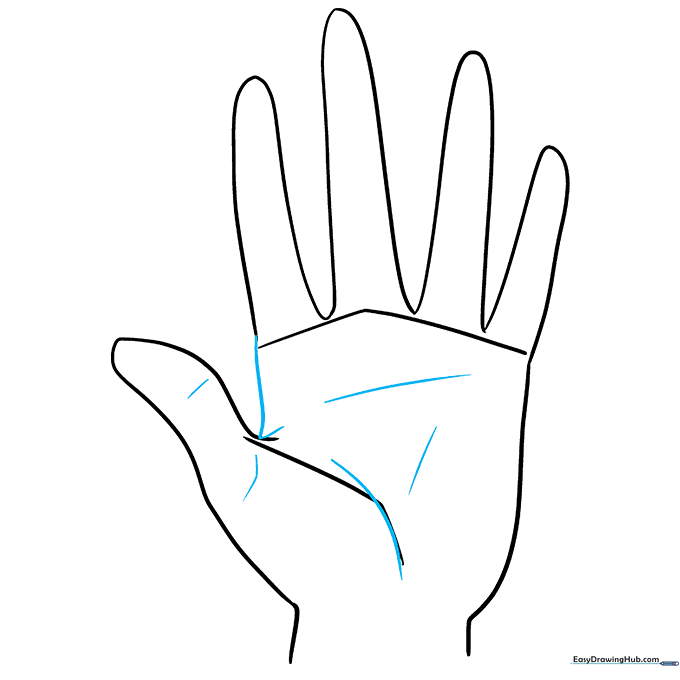
Carefully erase your internal pentagon guidelines. Add small, curved lines to define the palm pad and the thumb base. Teacher's Tip: Use a kneaded eraser if you have one—it’s perfect for lifting graphite without damaging the paper.
Step 7: Final Touches
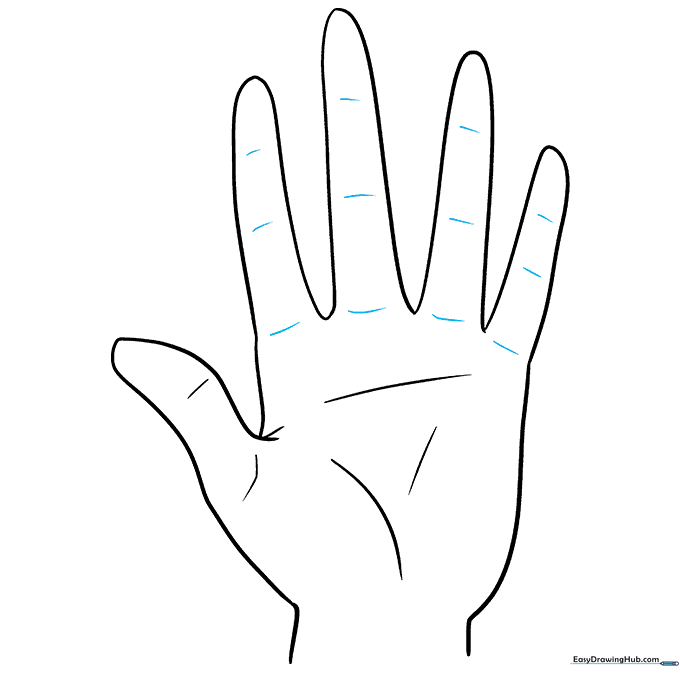
Remove any remaining stray guidelines. Add short, horizontal lines at the finger joints to show where the fingers bend. Teacher's Tip: Keep these joint lines very light; they are just subtle hints of anatomy.
Step 8: Bring Your Hand to Life
Add color or shading to your hand. Use a skin-tone marker or pencil, and add a slightly darker shade on the palm side to create depth. Teacher's Tip: Imagine where the light is coming from and shade the opposite side for a 3D effect!
More Tutorials


