How to Draw Angel Wings: Simple 20-Step Guide
Ready to add a touch of magic to your sketchbook? This tutorial is perfect for artists ages 8+ looking to master feather textures and symmetry. All you need is a pencil, an eraser, and a steady hand to bring these ethereal wings to life.
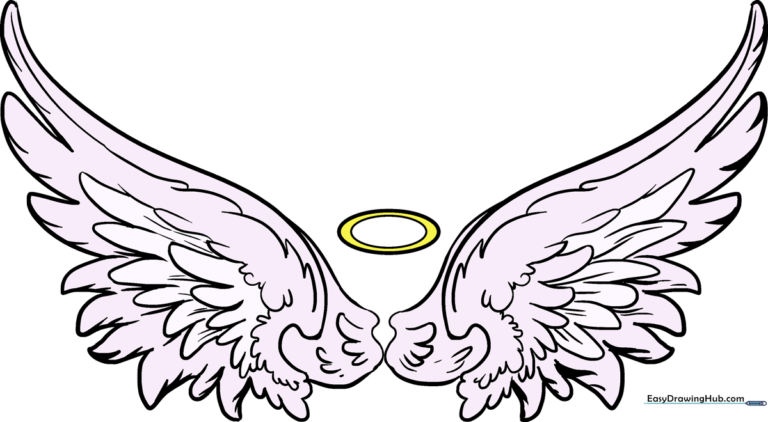
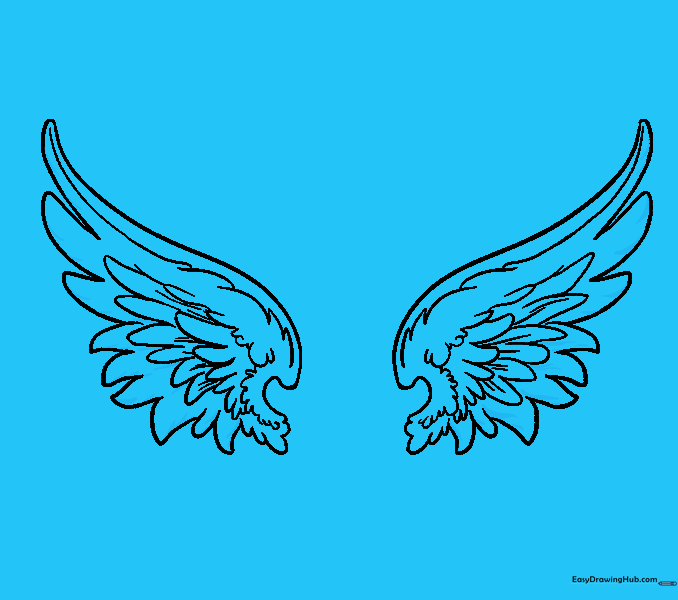
🎯 Final Result
Step-by-Step Instructions
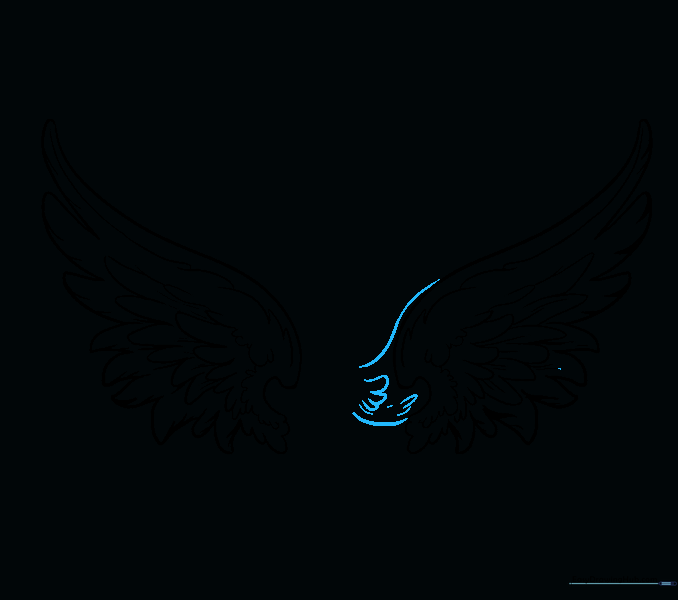
Step 1: Establishing the Arch
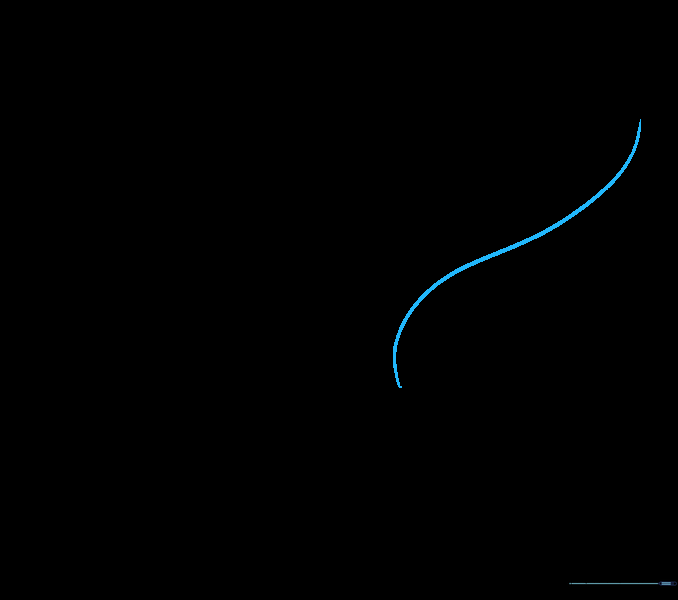
Draw a long, sweeping 'S' shaped diagonal line. Tip: Keep this line light; it serves as the spine of your wing.
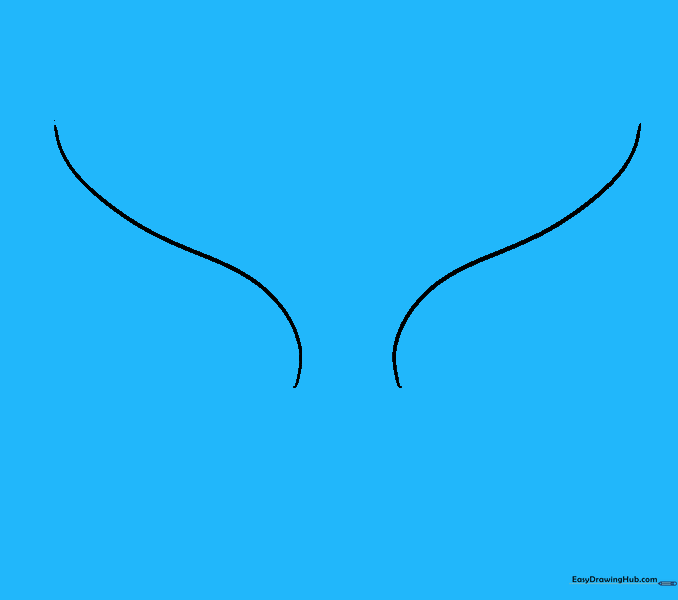
Step 2: Creating Symmetry
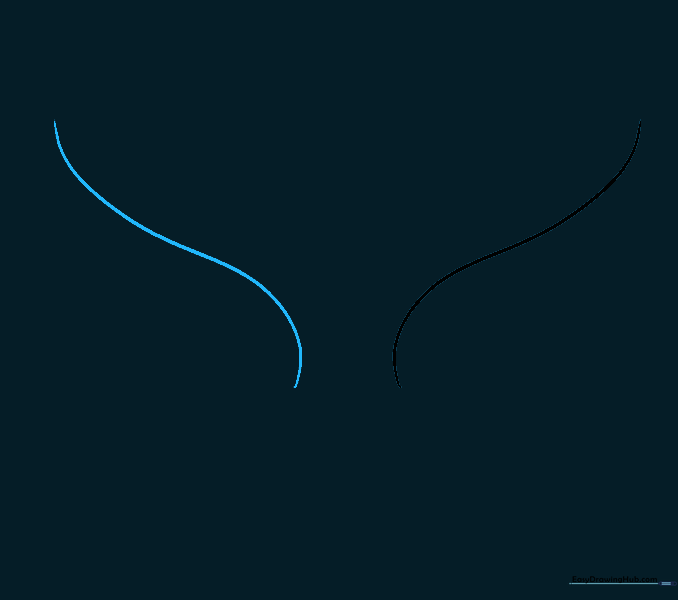
Mirror the first line on the opposite side to create the second wing. Tip: Use your fingers to measure the distance from the center to ensure both sides are balanced.
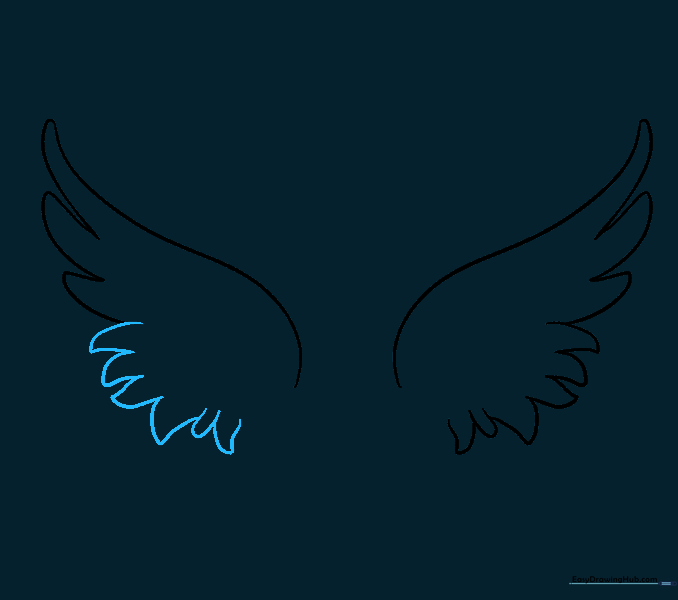
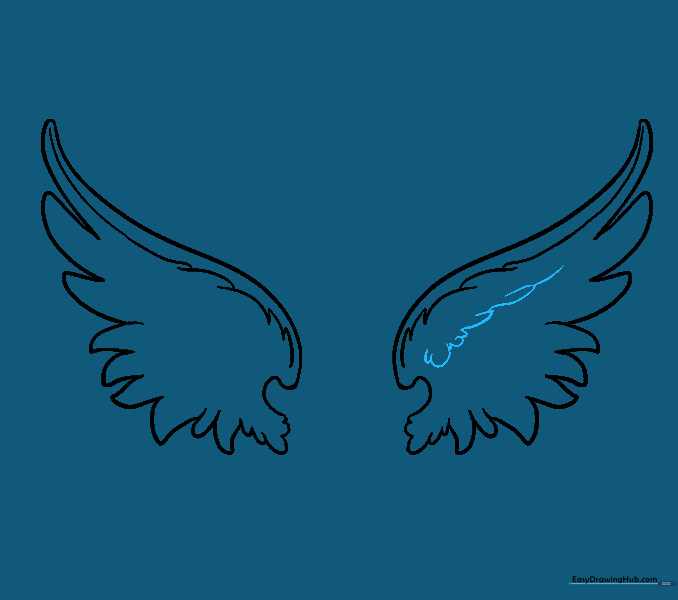
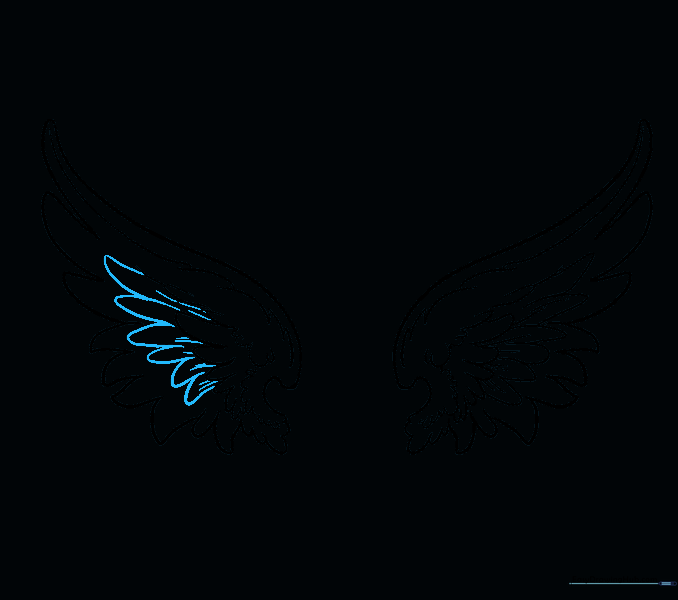
Step 3: Sketching Primary Feathers
Add downward curved lines at the tips, forming sideways 'U' shapes. Tip: These are your flight feathers—make them long and elegant.
Step 4: Layering Feathers

Continue adding 'U' shaped feathers beneath the first set. Tip: Overlap them slightly to create a natural, layered look.
Step 5: Balancing the Wings
Repeat the feathering process on the opposite wing. Tip: Keep your pencil pressure consistent so the wings look uniform.
Step 6: Adding Inner Feathers
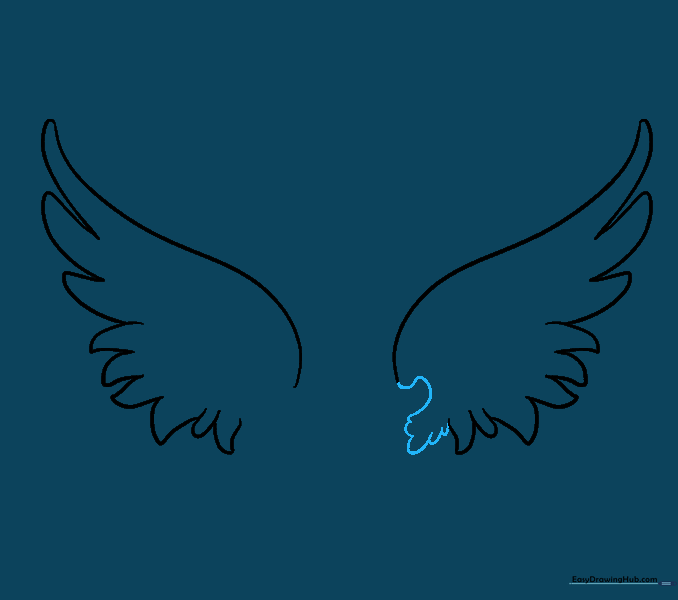
Draw smaller 'U' shapes near the base of the wing. Tip: Smaller feathers should look tighter and more compact than the flight feathers.
Step 7: Mirroring Inner Details
Repeat step 6 on the other wing. Tip: Take your time; the inner feathers define the wing's volume.
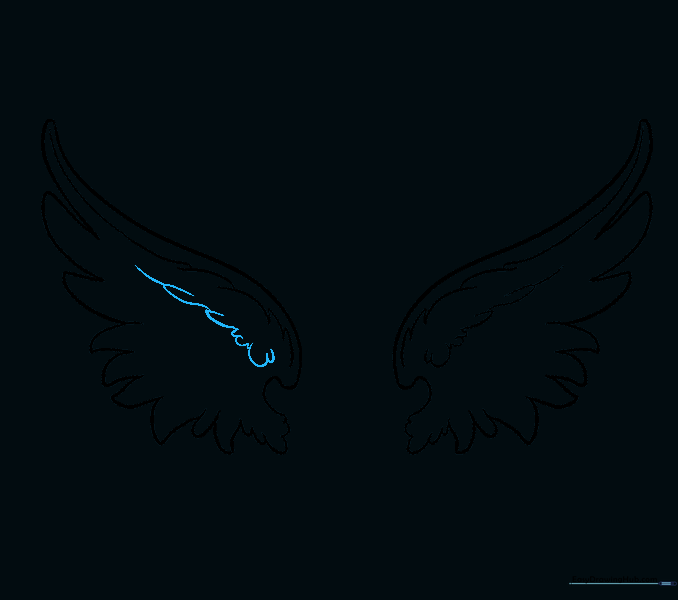
Step 8: Adding Texture
Add curved lines across the top of the wing to suggest texture. Tip: Use short, quick strokes to mimic the look of soft downy feathers.
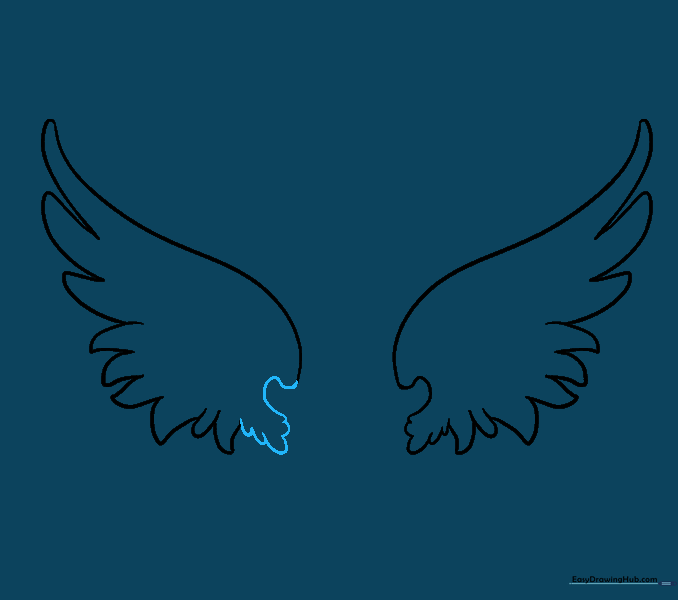
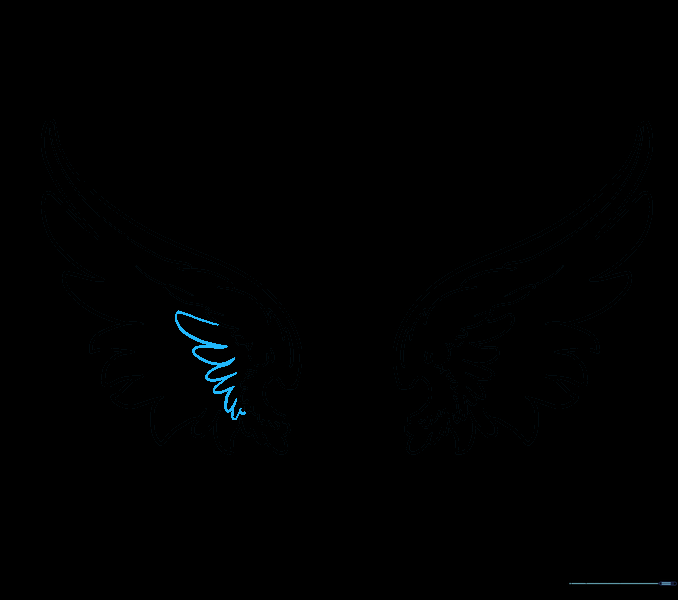
Step 9: Refining the Center
Add more 'U' shapes in the center to build density. Tip: Vary the size of your 'U's to make the feathers look realistic.
Step 10: Finalizing Symmetry
Apply the same center details to the opposite wing. Tip: Check your work against the first wing to ensure they match.
Step 11: Base Feathering
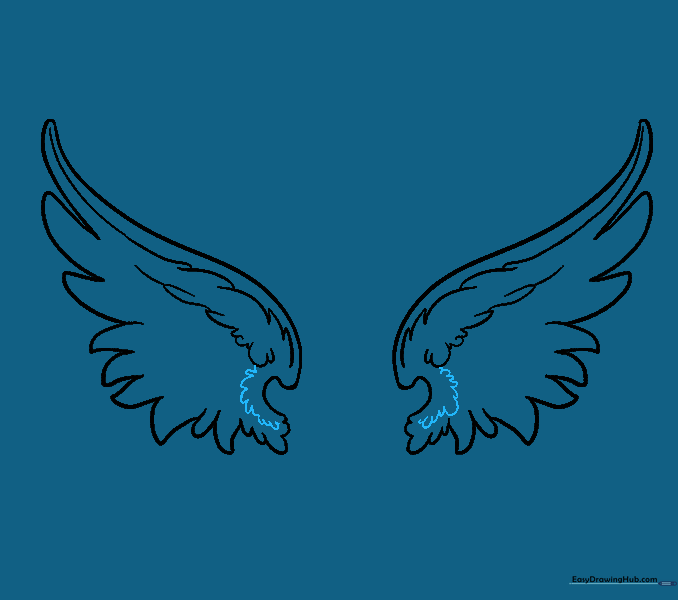
Add small curved lines at the very base of the wings. Tip: These represent the smallest, fluffiest feathers.
Step 12: Expanding the Midsection
Draw larger 'U' shapes extending from the base to the middle. Tip: Let these feathers overlap for a natural, flowing look.
Step 13: Mirroring Midsection
Repeat the midsection feathering on the other wing. Tip: Keep your strokes fluid and confident.
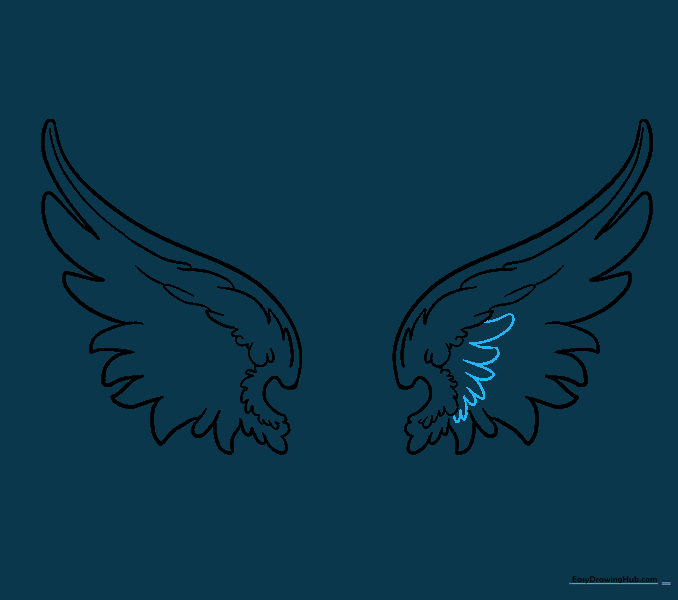
Step 14: Adding Detail
Add pointed 'U' shapes and small lines to the feathers. Tip: These small details add depth and make the wings look realistic.
Step 15: Mirroring Detail
Repeat these details on the opposite wing. Tip: Don't worry about being 100% identical; nature is rarely perfect!
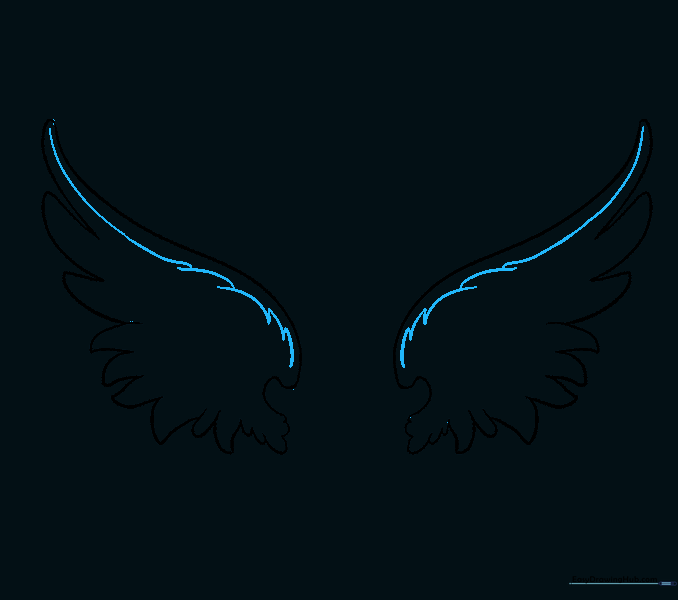
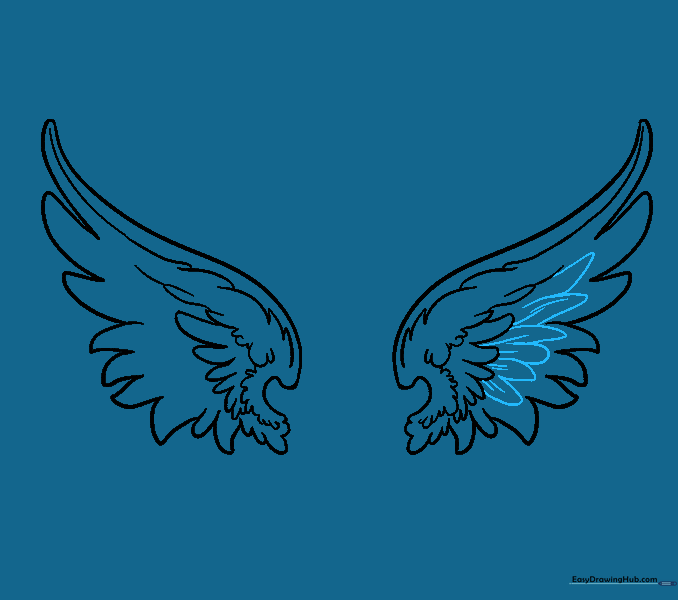
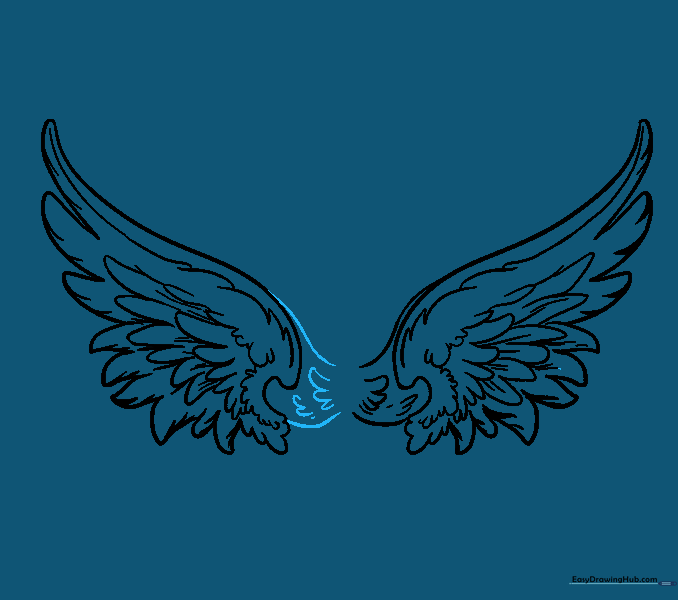
Step 16: Refining Flight Feathers
Add short, curved lines to the base of the flight feathers. Tip: This creates a shadow effect that adds dimension.
Step 17: Final Texture
Add final curved lines to the upper wing space. Tip: Keep these light to maintain the airy feel of the wings.
Step 18: Mirroring Texture
Repeat the final texture on the opposite wing. Tip: You're almost done—check for any gaps that need more feathers.
Step 19: The Halo
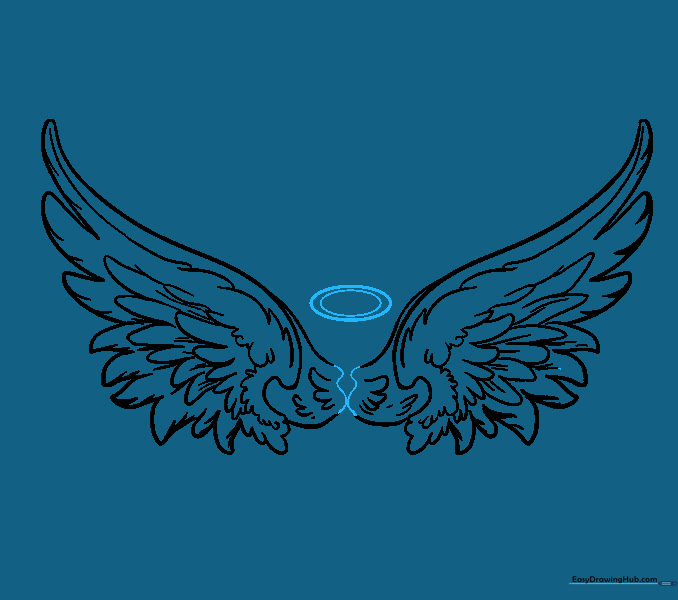
Enclose the inner wings with a wavy line and draw an oval-within-an-oval above them. Tip: A halo adds a classic, angelic touch.
Step 20: Shading and Finishing
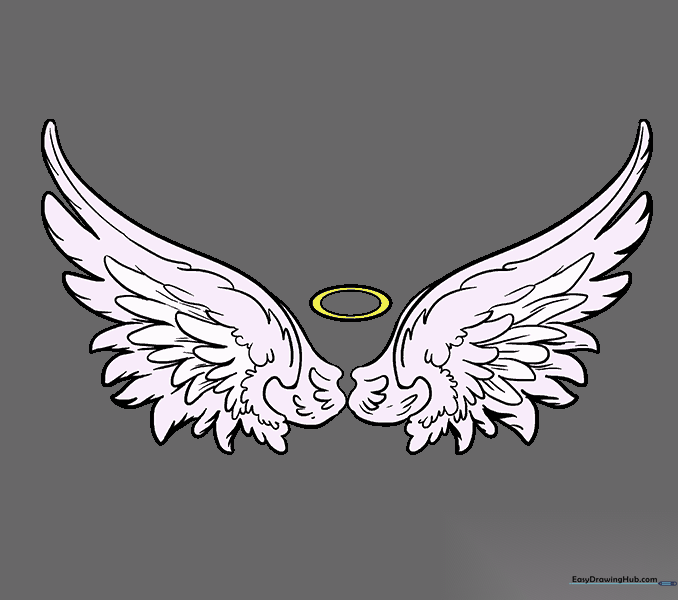
Add soft shading to give the wings depth. Tip: Use the side of your pencil for smooth, light shading.
More Tutorials


