How to Draw an X-Ray: Simple 9-Step Anatomy Lesson
Perfect for young scientists and budding artists, this tutorial breaks down the complex structure of a hand X-ray into simple, manageable shapes. You will need a pencil, an eraser, and a black marker to define your final lines. Follow along to explore how bones fit together while practicing your precision sketching.
🎯 Final Result

Step-by-Step Instructions
Step 1: Sketching the Wrist Bones
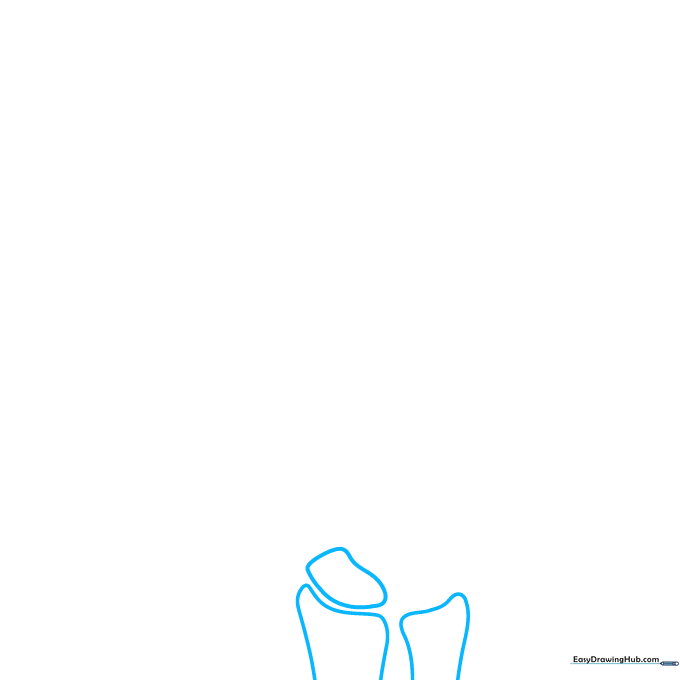
Start by drawing the carpal bones of the wrist at the bottom of your page. Create two irregular, blocky shapes that extend off the bottom edge. Teacher's Tip: Keep your pencil pressure light here so you can easily adjust the spacing if the bones look too crowded.
Step 2: Adding the Palm Bones
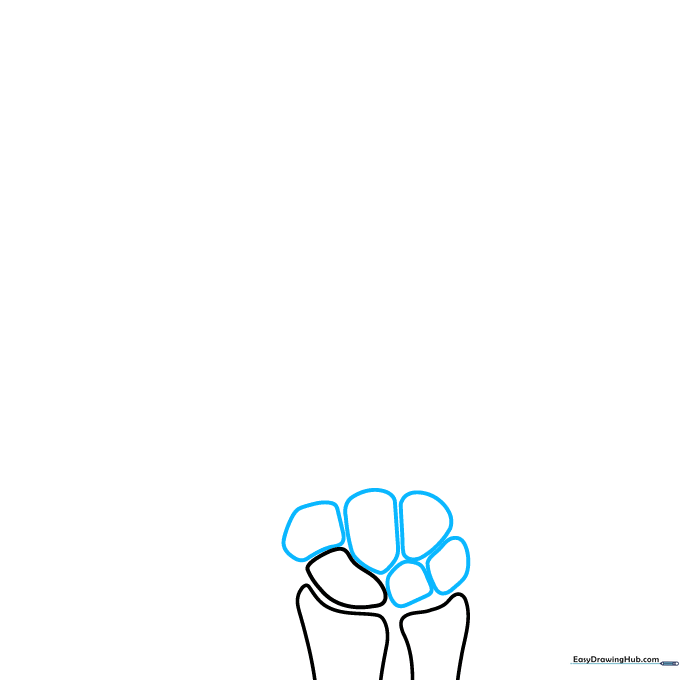
Add five small, rounded, irregular shapes in an oval pattern just above the wrist. These represent the base of the metacarpals. Tip: Think of these as smooth river stones; they shouldn't be perfectly round, so add a few bumps to make them look natural.
Step 3: Drawing the Long Metacarpals
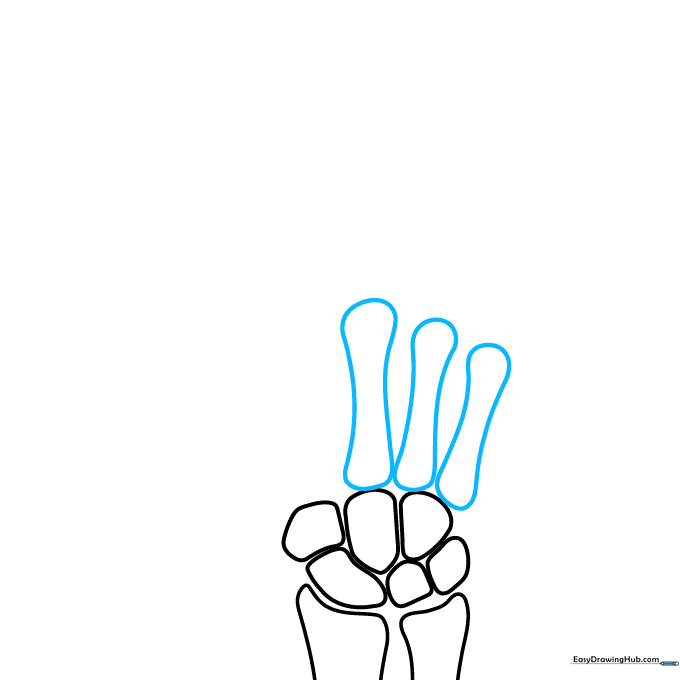
Draw the long bones of the palm. Use curved lines to create rectangular shapes that are narrow in the middle and bulbous at the ends. Tip: These bones are the longest in the hand, so ensure they have enough room to extend upward.
Step 4: Starting the Finger Bones
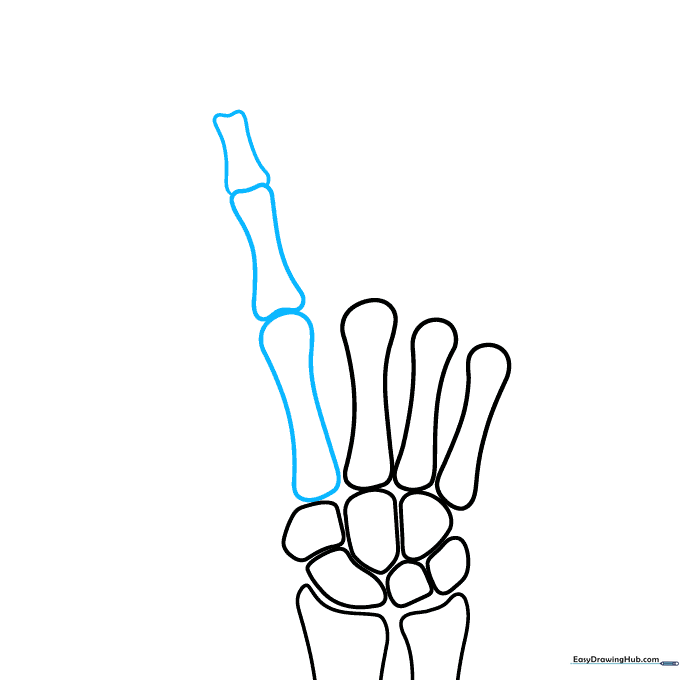
Draw one more long bone for the thumb area, then begin the first segments of the fingers. Use curved lines to create a 'dog bone' shape. Tip: Remember that the thumb bone should be angled slightly away from the other fingers.
Step 5: Detailing the Pointer and Middle Fingers
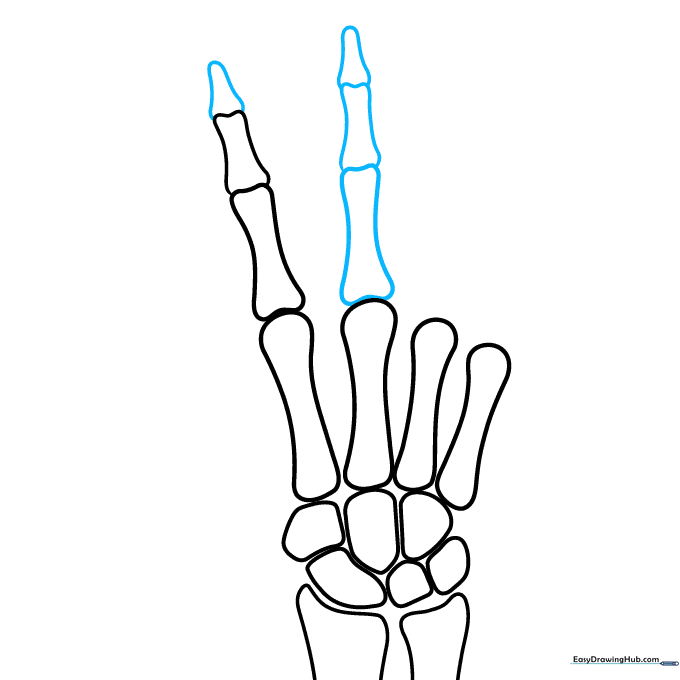
Draw a rounded triangular bone at the tip of the pointer finger. For the middle finger, draw two bone segments followed by a rounded triangle. Tip: The triangle represents the fingertip bone; keep it small to show the tapering of the finger.
Step 6: The Ring Finger
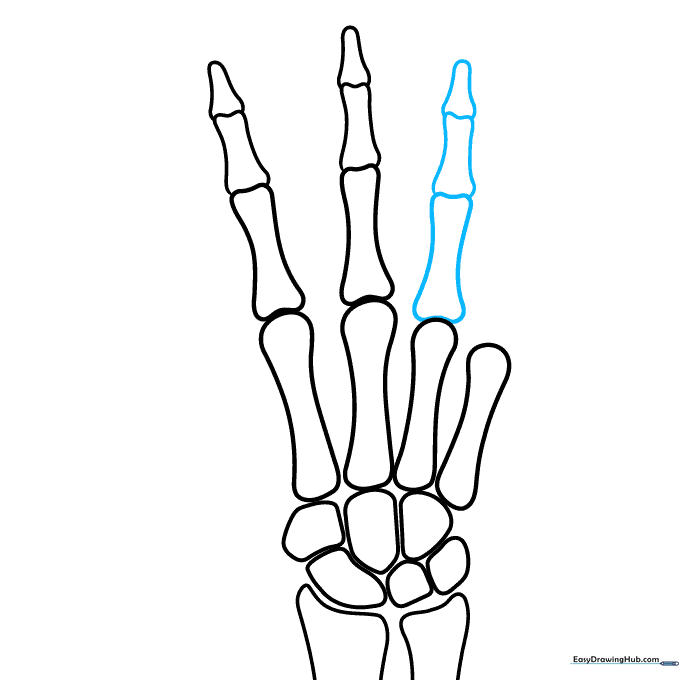
Repeat the process for the ring finger: two classic bone shapes followed by a rounded triangle at the tip. Tip: Ensure the ring finger is slightly shorter than the middle finger to keep the hand looking realistic.
Step 7: Pinky and Thumb Base
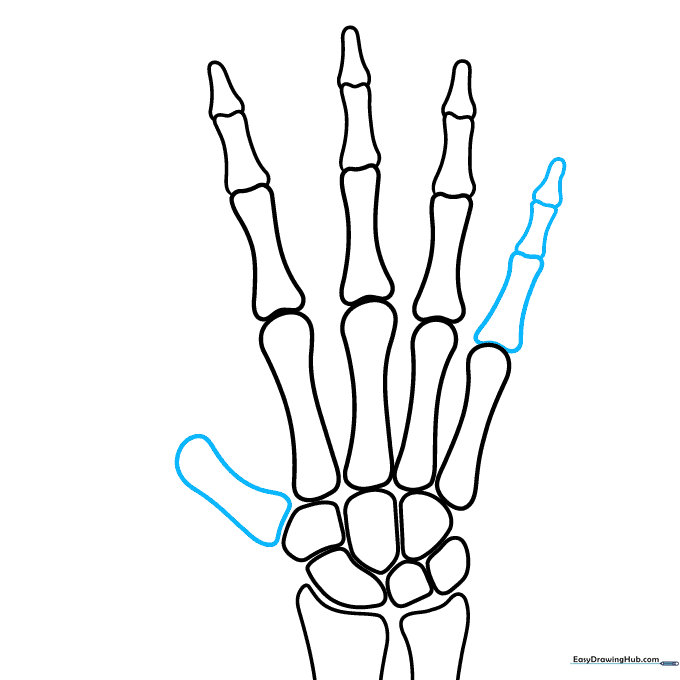
Draw the pinky finger with two bone segments and a triangle. On the opposite side, draw the base of the thumb as a rectangular shape with bulbous ends. Tip: The thumb is shorter than the other fingers, so make sure this bone segment is compact.
Step 8: Completing the Thumb and Tissue Outline
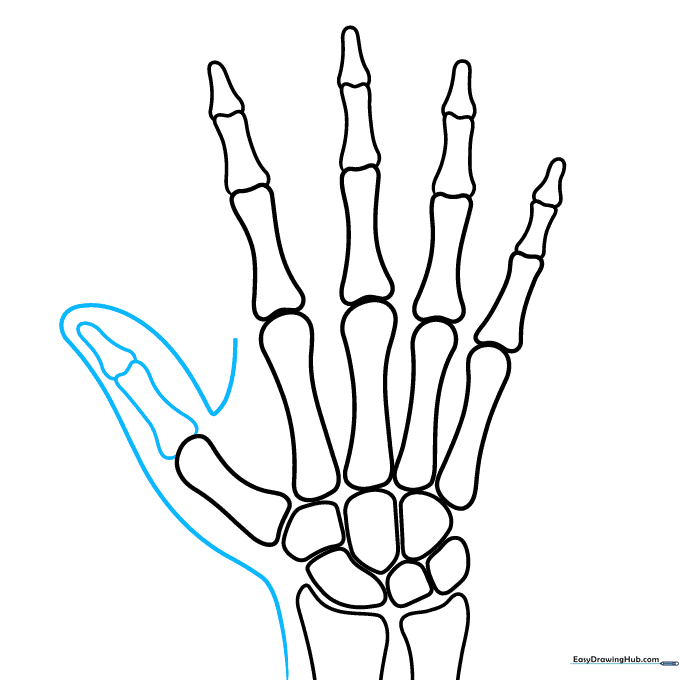
Finish the thumb with its final bone segment and triangular tip. Then, draw a long, soft curved line parallel to the wrist and thumb to represent the outer skin tissue. Tip: Use a lighter touch for the skin outline to distinguish it from the dense bones.
Step 9: Finalizing the Hand Outline
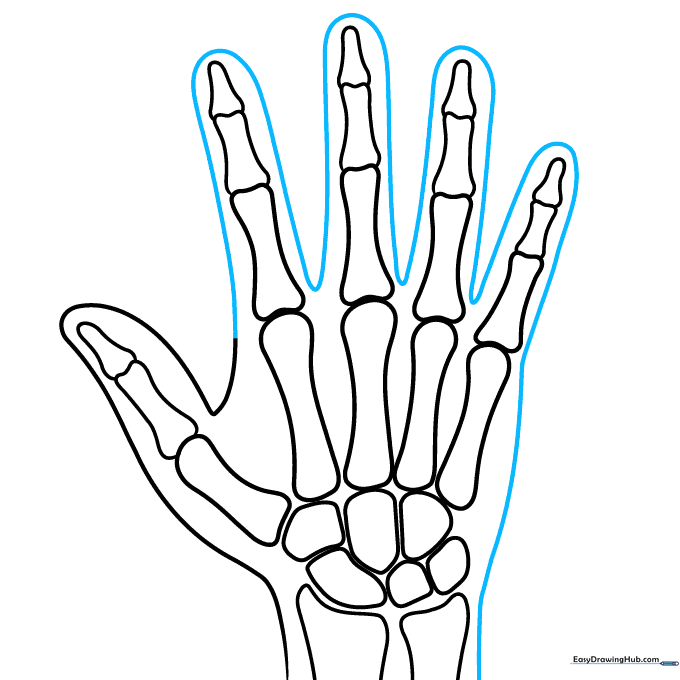
Continue the skin outline around the fingers and down to the wrist. Ensure the line flows smoothly around the tips of the fingers. Tip: This line defines the 'flesh' of the hand, so keep it fluid and continuous.
Step 10: Coloring Your X-Ray
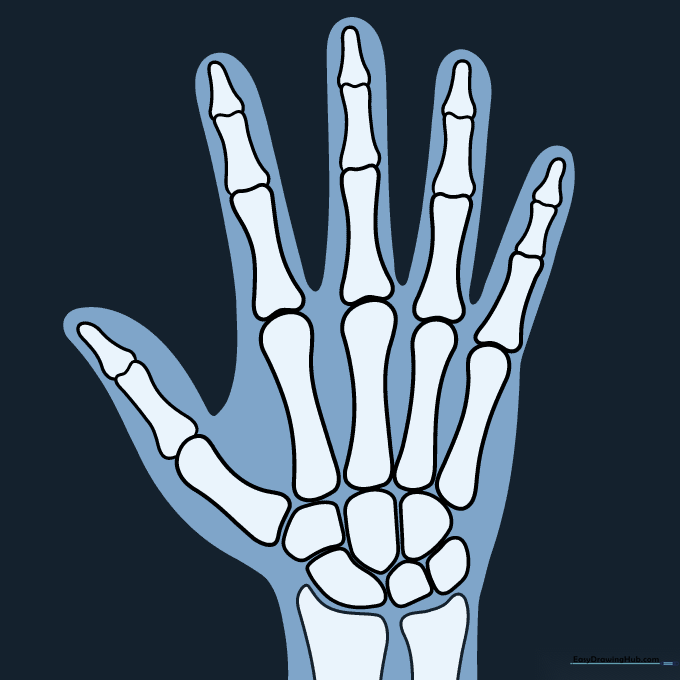
Color your X-ray to make it look authentic. Keep the bones white or a very pale grey, and use a darker, semi-transparent shade for the surrounding tissue. Tip: Use a dark background or a dark blue/grey wash for the tissue to make the white bones 'pop' like a real medical image.
More Tutorials


