How to Draw a Cartoon Owl: Easy 10-Step Guide for Kids
Looking for a fun, screen-free activity? This cartoon owl tutorial is perfect for young artists ages 5 and up. Grab a pencil, an eraser, and some paper to build confidence while practicing basic shapes and line control.
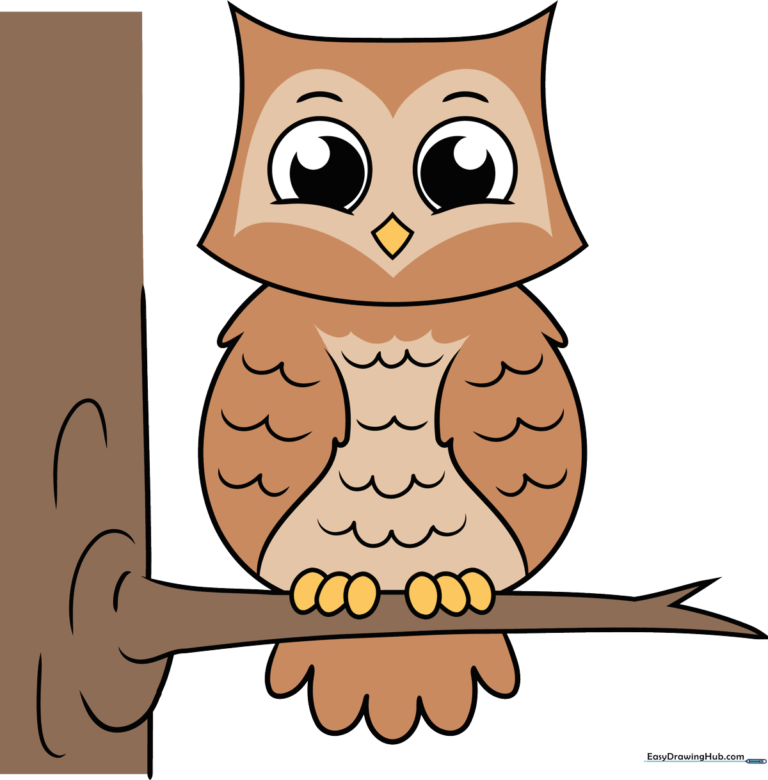
🎯 Final Result
Step-by-Step Instructions
Step 1: Sketching the Branch

Start by drawing a horizontal branch for your owl to perch on. Use two parallel lines and connect them with a 'V' shape at the end to create a twig. Teacher's Tip: Keep your lines loose and relaxed to make the branch look natural rather than perfectly straight.
Step 2: Adding Texture to the Branch
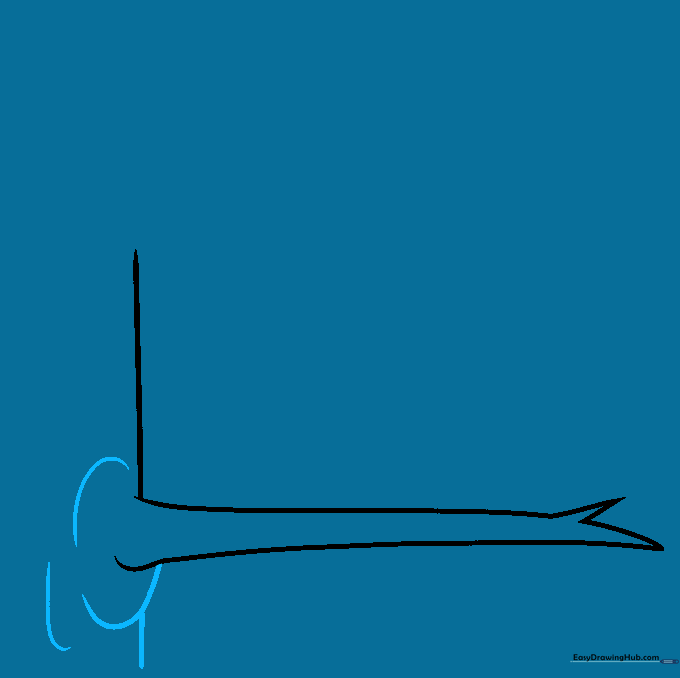
Add small, curved 'wrinkle' lines around the base of the branch to give it a woody texture. Extend the vertical trunk line downward. Teacher's Tip: Vary the length of your curves to make the bark look realistic.
Step 3: Drawing the Owl's Body
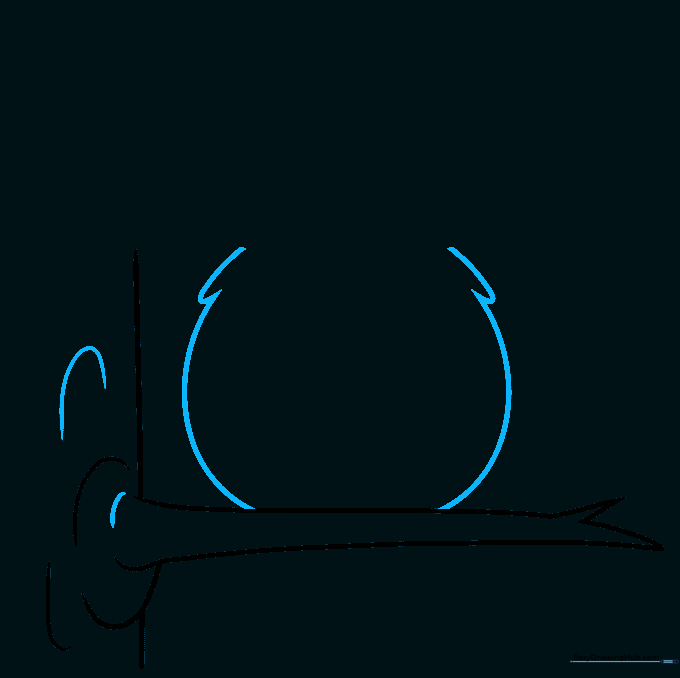
Sketch a large, rounded shape sitting on the branch for the owl's body. Add a few overlapping curved lines at the top to suggest fluffy chest feathers. Teacher's Tip: Don't press too hard; you want this shape to be soft and round.
Step 4: Sketching the Wings
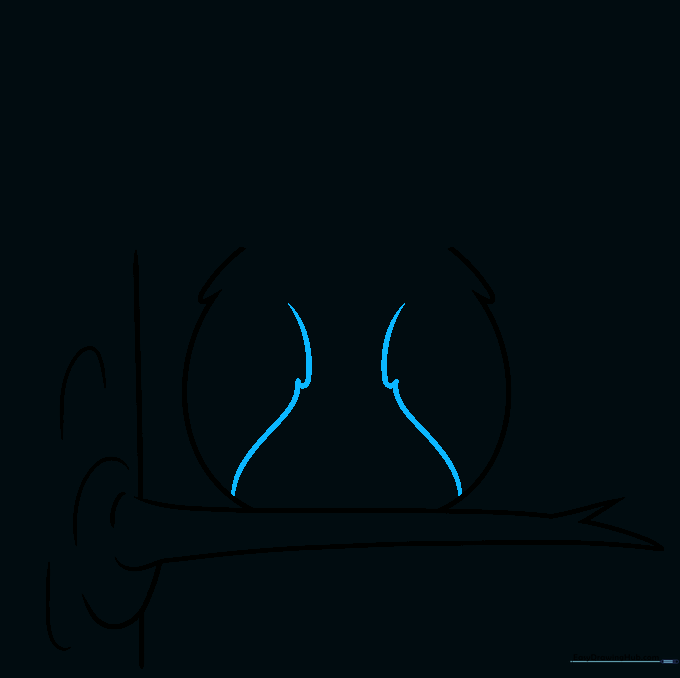
Draw two wing shapes tucked against the sides of the body. Use overlapping curved lines to create the look of layered feathers. Teacher's Tip: Think of these as 'U' shapes stacked on top of each other.
Step 5: Adding the Tail
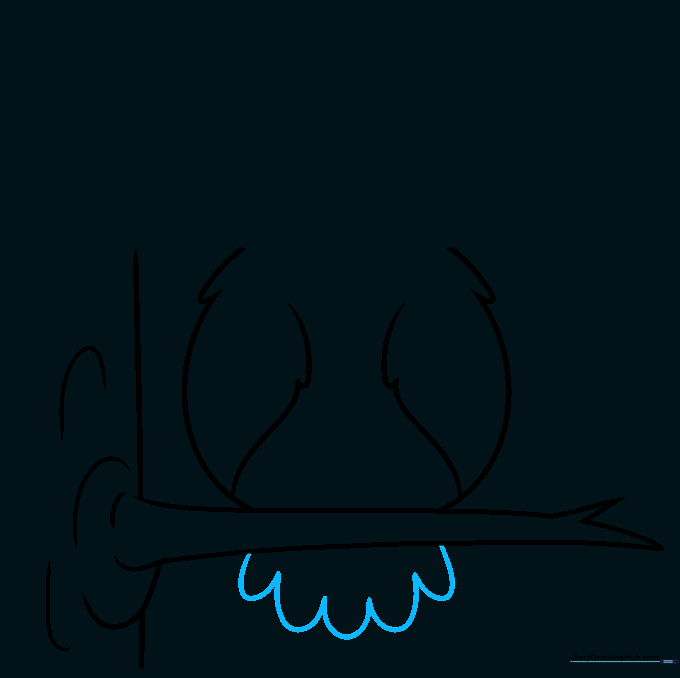
Draw the tail feathers peeking out from underneath the branch using a series of 'U' shaped lines. Teacher's Tip: Keep these feathers uniform in size to make the tail look neat and tidy.
Step 6: Forming the Head
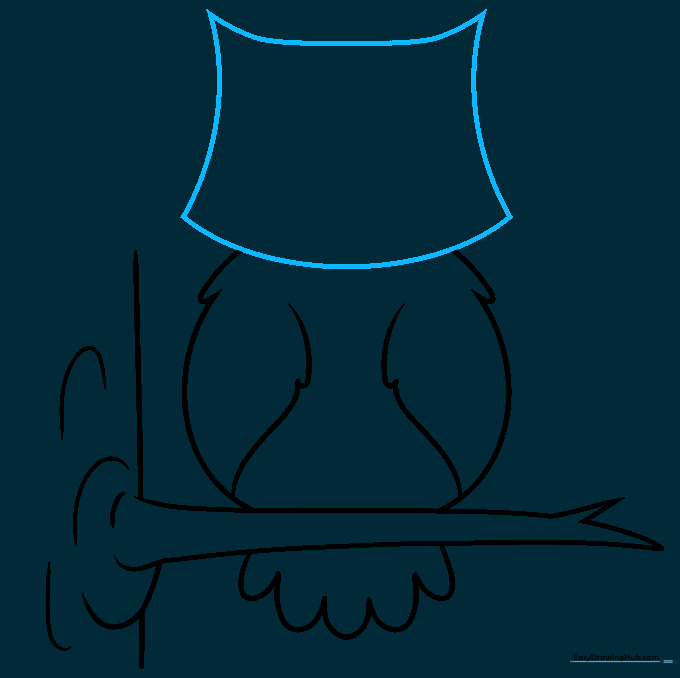
Draw a curved, quadrilateral shape on top of the body to form the head. Teacher's Tip: Make the top slightly wider than the bottom to give your owl a friendly, wide-eyed look.
Step 7: Drawing the Face

Add two large circles for eyes, a diamond-shaped beak, and curved eyebrows. Shade the pupils to give the owl personality. Teacher's Tip: Leave a tiny white dot inside each pupil to make the eyes look bright and 'alive'.
Step 8: Adding Feet
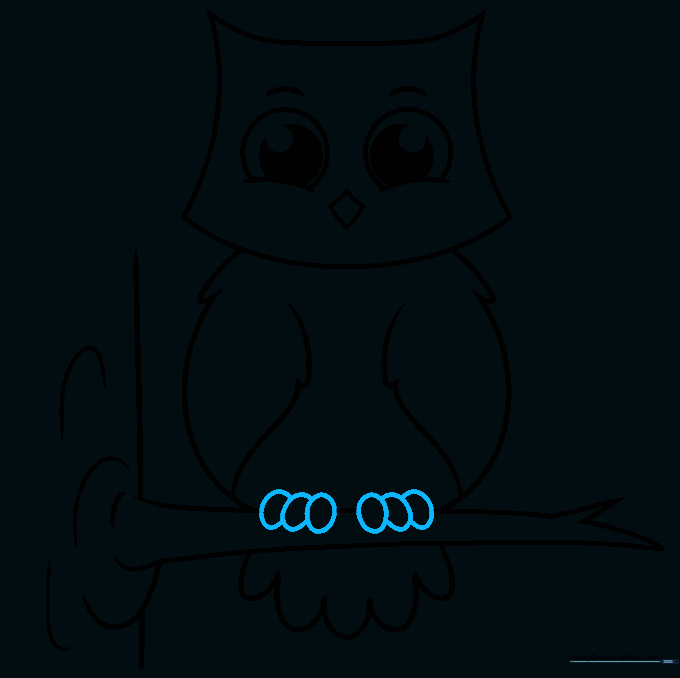
Draw the owl's feet gripping the branch using overlapping rounded shapes. Erase any lines that overlap the branch to make it look like the owl is truly sitting on it. Teacher's Tip: Think of these as small, soft ovals.
Step 9: Adding Feather Texture

Add more 'U' shaped lines across the wings and body to create a feathery texture. Teacher's Tip: Don't overdo it—a few well-placed lines look better than a crowded drawing.
Step 10: Bringing Your Owl to Life with Color
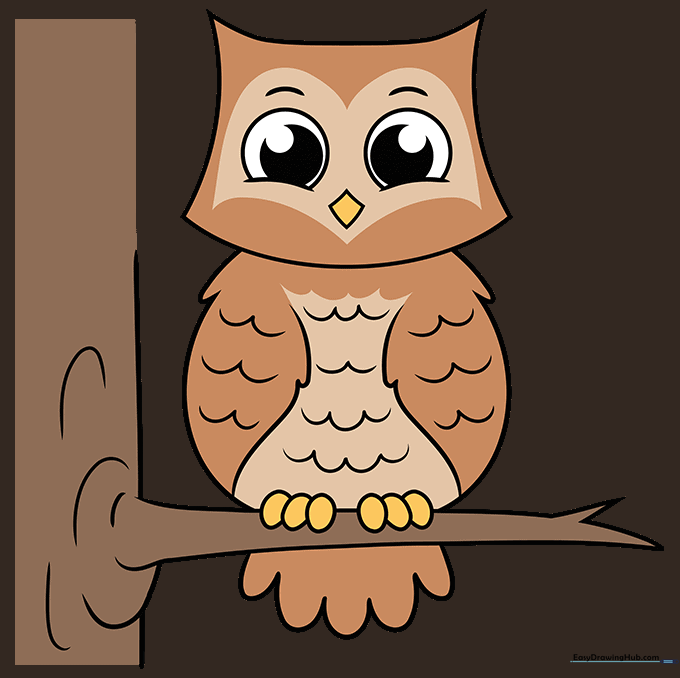
Time to color! Use browns and grays for a classic look, or try white for a snowy owl. Teacher's Tip: Use light pressure with your colored pencils to create soft gradients on the feathers.
More Tutorials


