How to Draw an Okapi: Easy 10-Step Guide for Kids
Bring the 'forest giraffe' to life with this simple, guided drawing lesson. Designed for ages 5 and up, this tutorial uses basic shapes to help young artists build confidence and fine motor control. All you need is a pencil, an eraser, and a piece of paper to get started.
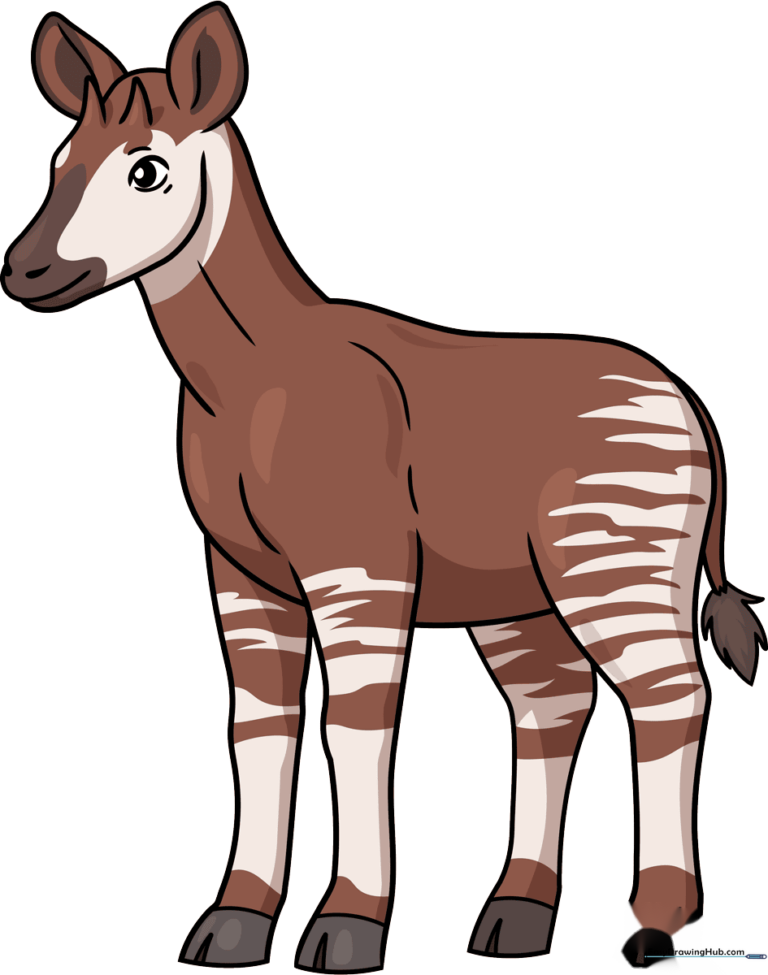
🎯 Final Result
Step-by-Step Instructions
Step 1: Sketching the Face and Eye
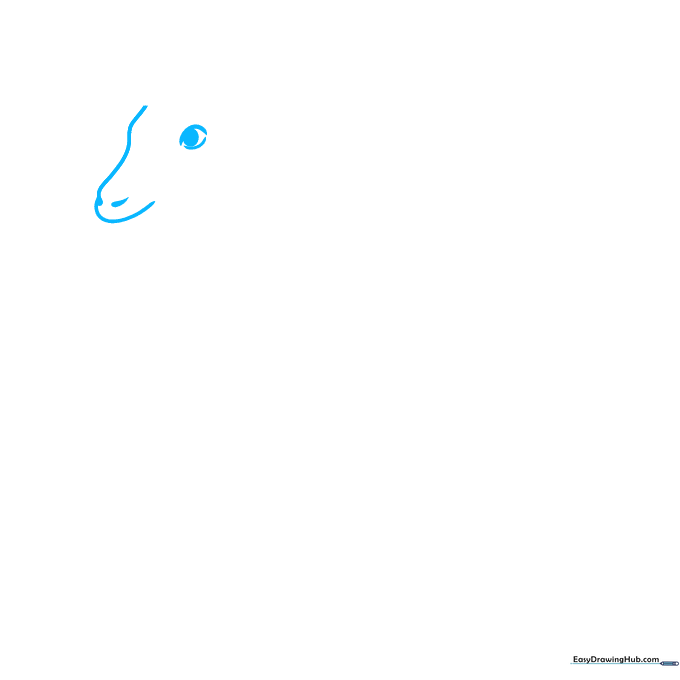
Start by drawing a soft, curved line to outline the face. Add two small teardrop shapes for the nostrils. For the eye, draw two curved lines that don't quite touch at the corners, and shade a small oval for the pupil. Teacher's Tip: Keep the eye near the center of the face shape to give your okapi a friendly expression.
Step 2: Adding the Jaw and Horns
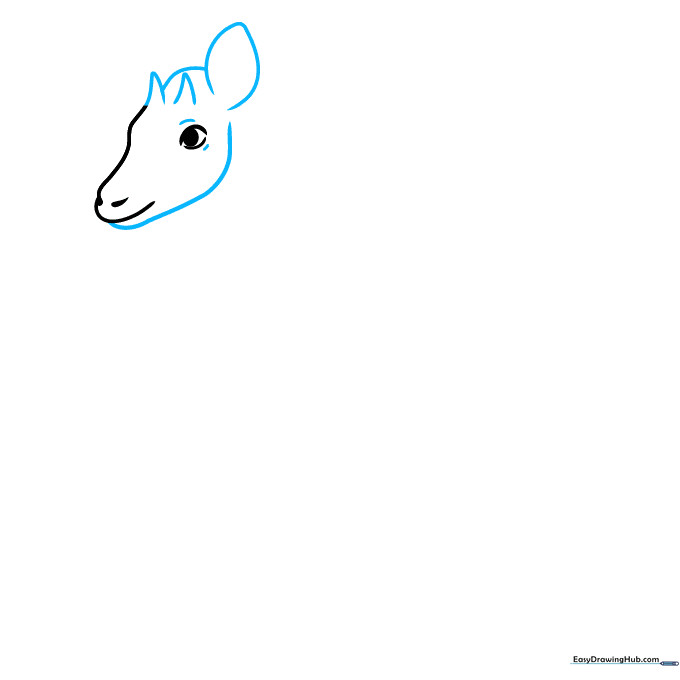
Draw a long, smooth curve for the lower jaw. On top of the head, add two inverted 'V' shapes for the ossicones (horns). Enclose the ear with two curved lines meeting at a point. Teacher's Tip: Make the ossicones small and rounded at the tips to keep them looking cute and cartoonish.
Step 3: Defining the Neck and Ears
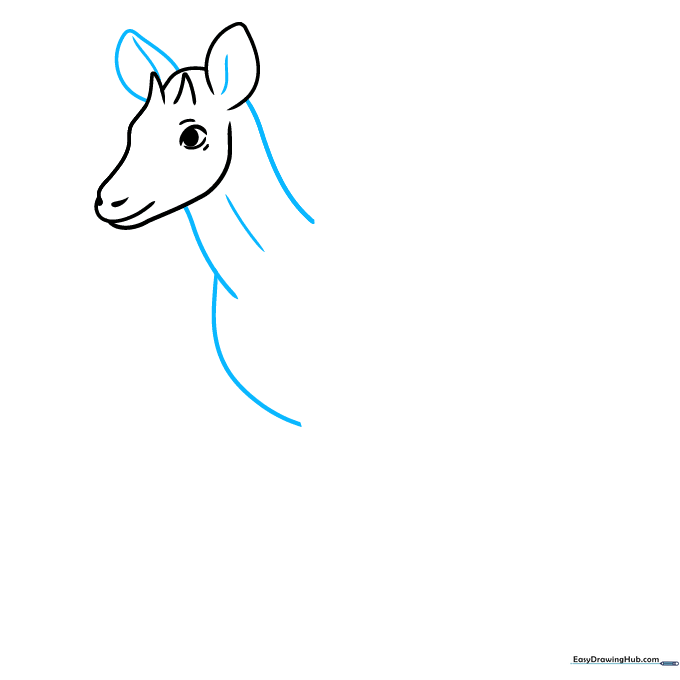
Draw the second ear by extending a curved line from the head and doubling it back. Then, draw long, graceful lines from the head and jaw to form the neck and chest. Teacher's Tip: Use long, sweeping motions for the neck to make it look smooth and elegant.
Step 4: Sketching the First Leg
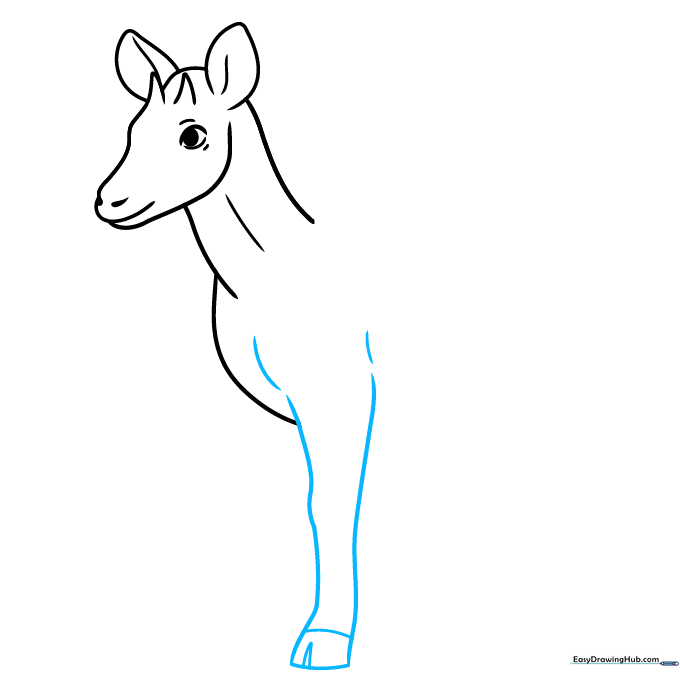
Use curved lines to outline the front leg. Add a curved band at the bottom for the hoof and a small 'V' shape to show the split. Teacher's Tip: Keep the leg slightly wider at the top and narrower toward the hoof for a more realistic shape.
Step 5: Outlining the Body
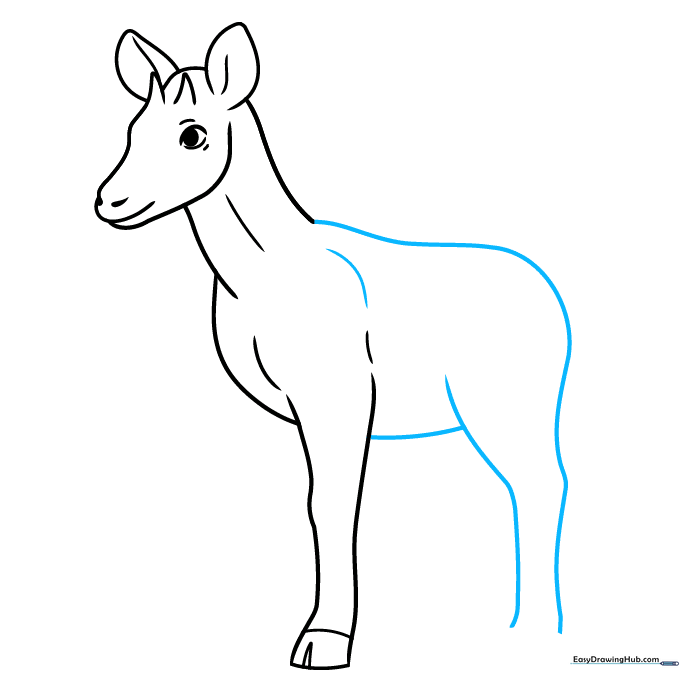
Extend the neck line to trace the back and the rear leg. Add lines for the belly and the front of the rear leg to give the body volume. Teacher's Tip: Imagine the body as a large oval shape to help you place these lines correctly.
Step 6: Adding Remaining Legs
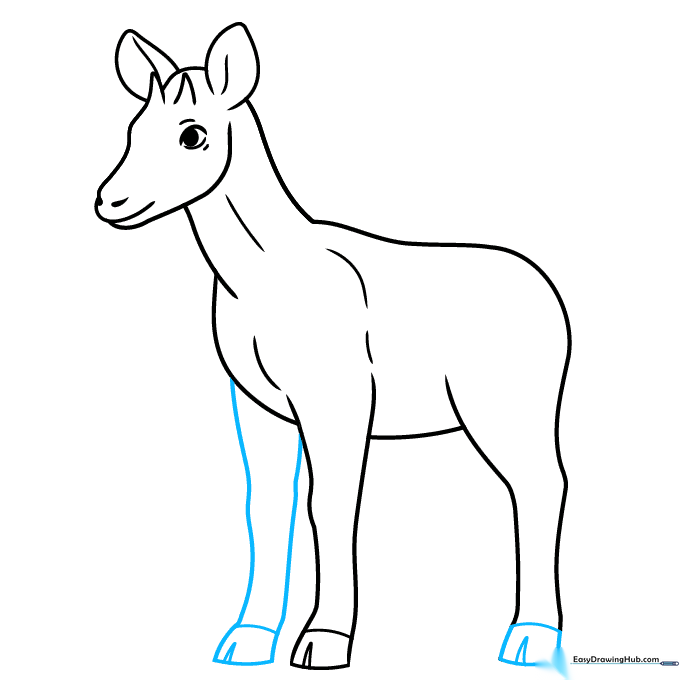
Draw the rear hoof and the second front leg using long, parallel curved lines. Don't forget to add the 'V' shape to each hoof. Teacher's Tip: Ensure the legs are roughly the same length so your okapi stands firmly on the page.
Step 7: Finishing the Legs and Tail
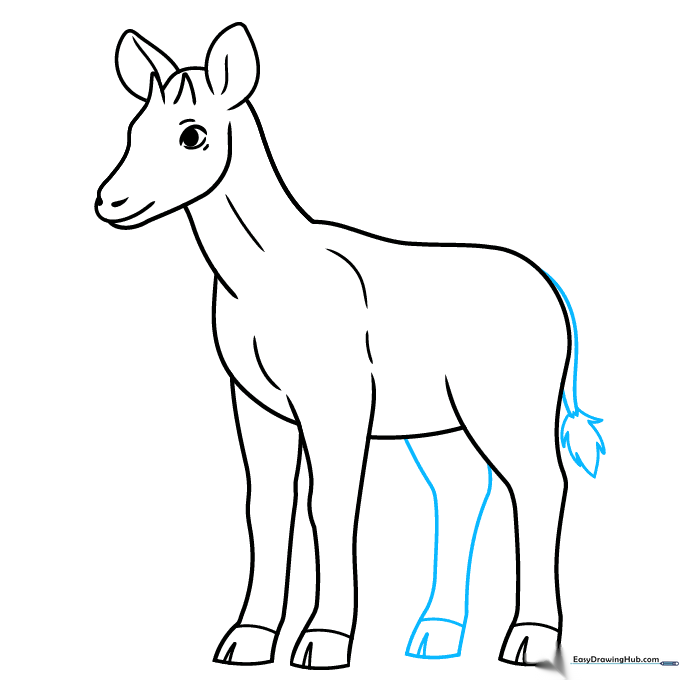
Draw the final rear leg and add a tail with a jagged tuft of hair at the end. Teacher's Tip: Use quick, short strokes for the tail tuft to make it look like real fur.
Step 8: Adding Body Details
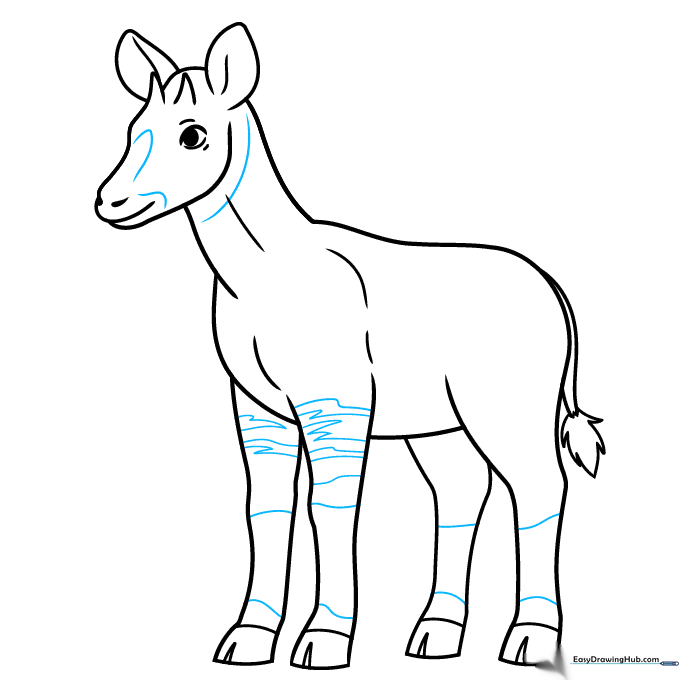
Add curved lines across the face, neck, and legs to define the okapi's unique markings. Teacher's Tip: These lines don't need to be perfectly straight; slight curves follow the natural shape of the animal.
Step 9: Completing the Stripes
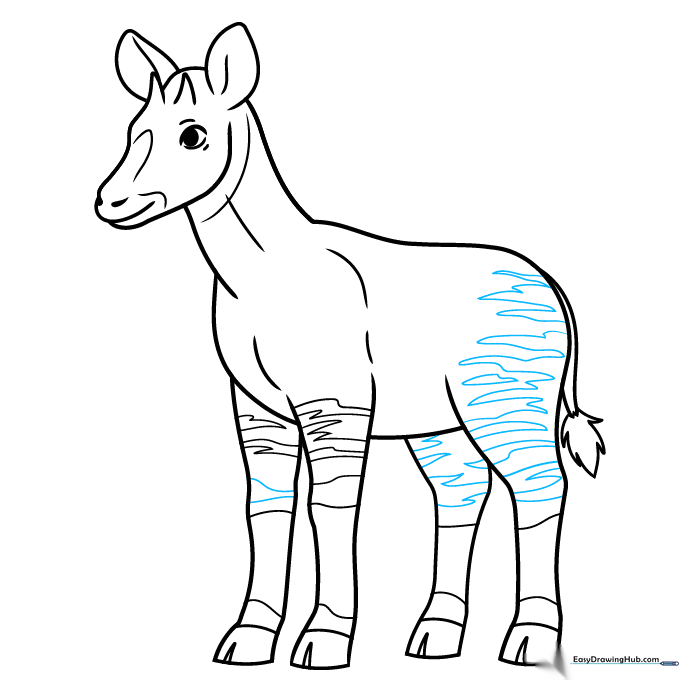
Draw the signature striped pattern at the top of the legs and hips. Teacher's Tip: Keep the stripes spaced out so they look distinct when you color them in.
Step 10: Adding Color
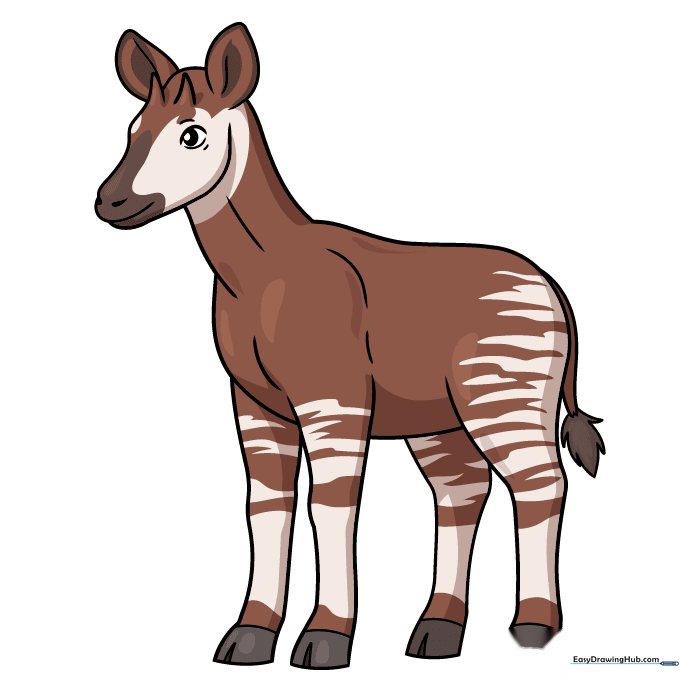
Time to color! Use dark brown for the body and black and white for the leg stripes. Teacher's Tip: Use a light touch with your pencil to create a smooth, even coat of color.
More Tutorials


