How to Draw an Iris Flower: Easy 10-Step Guide
Bring the beauty of spring to your sketchbook with this simple iris drawing tutorial. Designed for ages 5 and up, this activity requires only a pencil, eraser, and paper to create a stunning floral masterpiece. Follow along to master the elegant, wavy petals of the iris while building your confidence in botanical drawing.
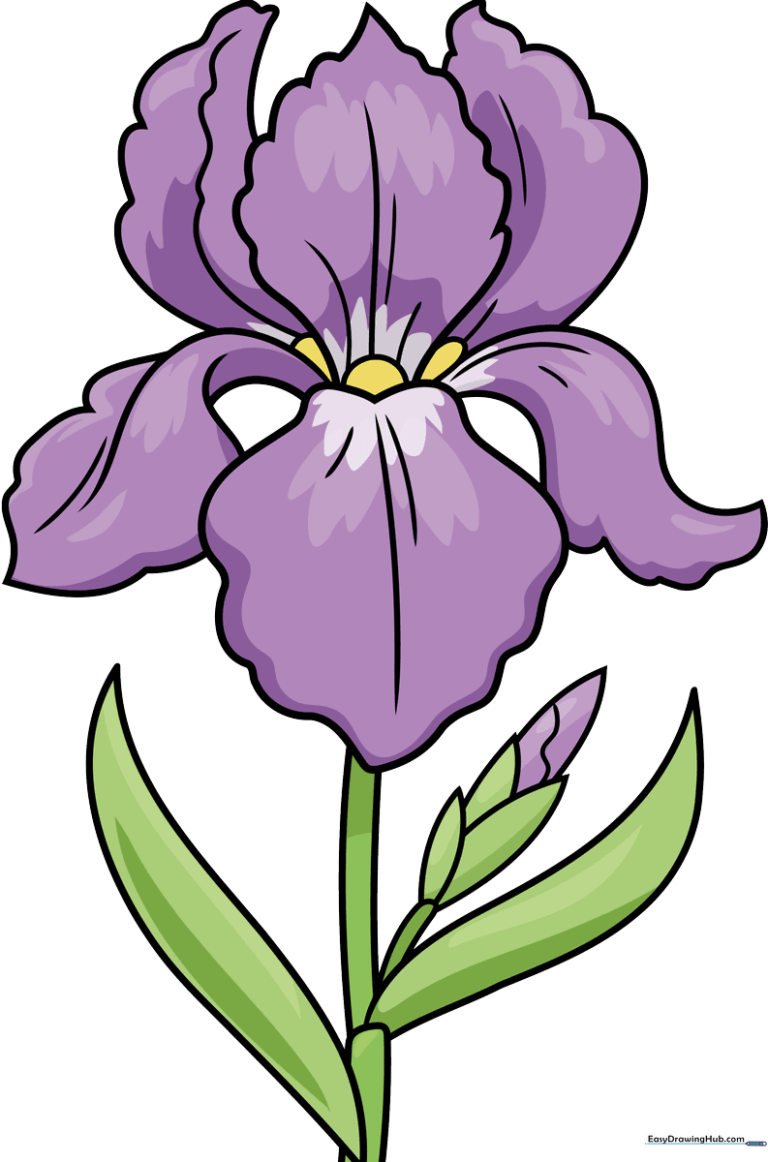
🎯 Final Result
Step-by-Step Instructions
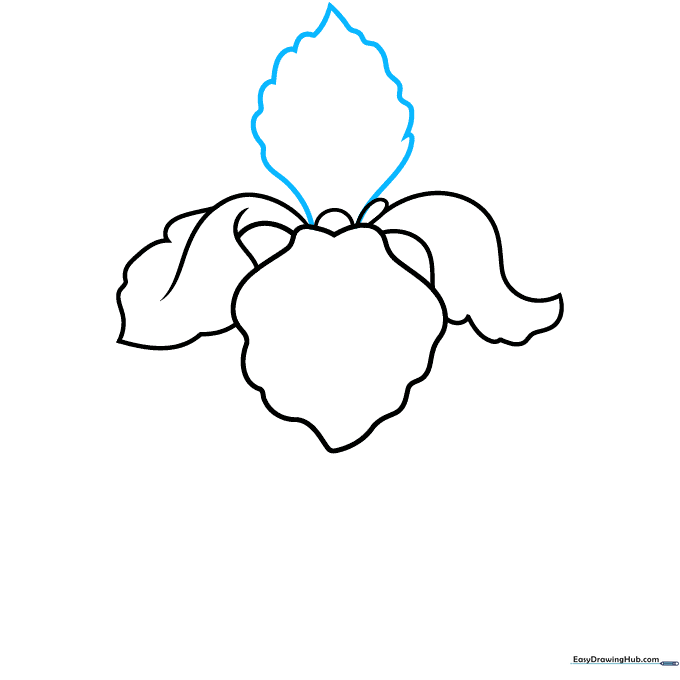
Step 1: Sketching the First Petal

Begin by drawing the central petal using a soft, wavy line. Add a small semi-circle on top. Teacher's Tip: Keep your pencil strokes light so you can easily adjust the shape if needed later.
Step 2: Adding Side Petals

Draw a rounded shape on the side of your first petal, then add a teardrop shape above it. Tip: Use smooth, flowing motions to capture the organic, natural curve of the flower.
Step 3: Balancing the Flower

Mirror the process on the opposite side using overlapping curved lines. Tip: Don't worry about making it perfectly symmetrical; nature is beautifully irregular!
Step 4: Drawing Upright Petals
Extend two wavy lines upward to meet at a point, creating the central upright petal. Tip: Imagine the petal is reaching toward the sun.
Step 5: Adding Detail to Upright Petals
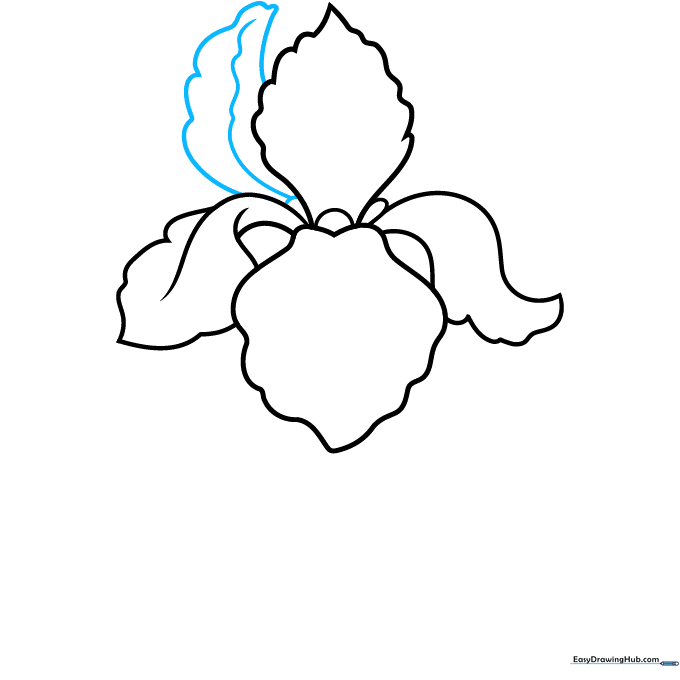
Draw a second upright petal next to the first, adding a wavy line down the center for texture. Tip: This center line creates a sense of depth and dimension.
Step 6: Completing the Bloom and Stem
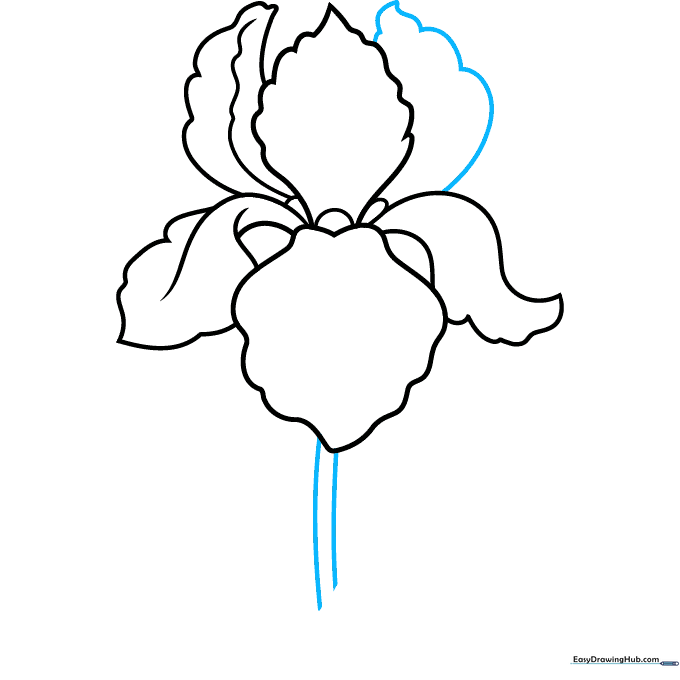
Add the final upright petal and draw two parallel curved lines downward to form the stem. Tip: Keep the stem lines smooth to show the strength of the flower.
Step 7: Adding Leaves
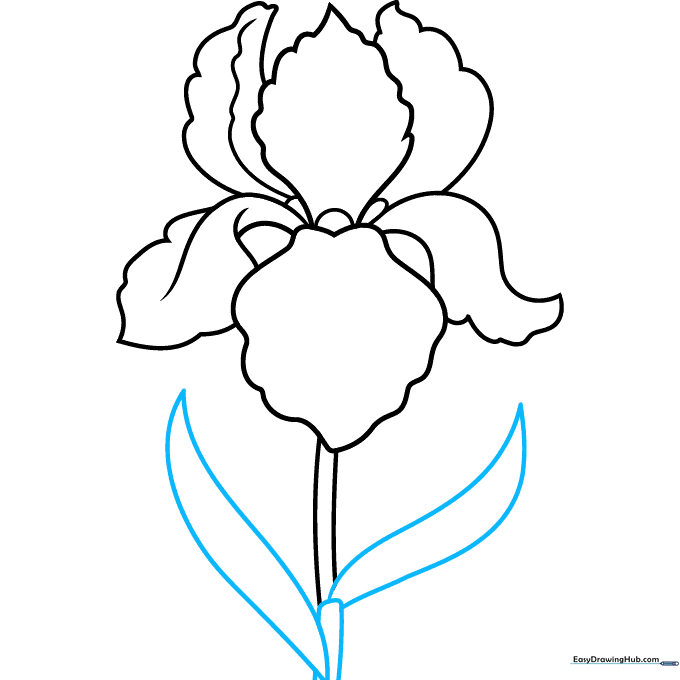
Draw a rounded rectangle at the base of the stem, then extend long, pointed leaves from it. Tip: Iris leaves are sharp and sword-like, so make your points nice and crisp.
Step 8: Drawing a Flower Bud
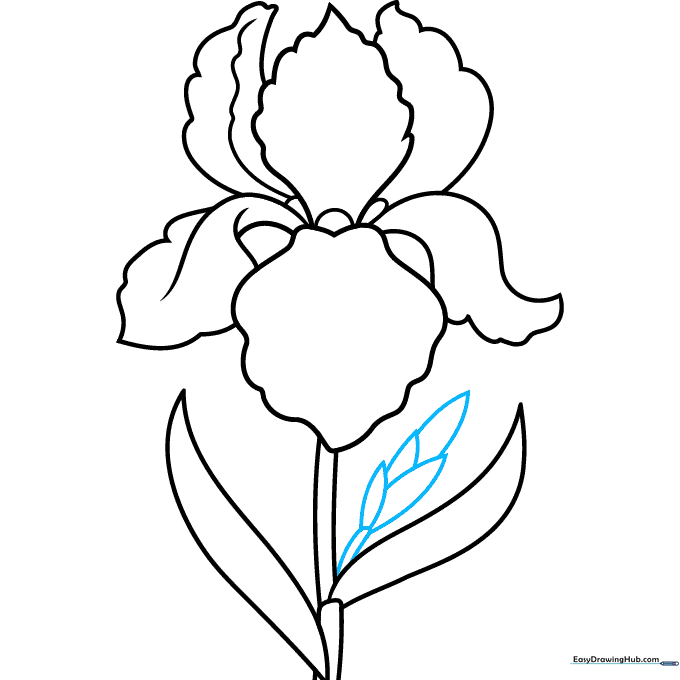
Add an unopened bud on the side by stacking pointed, U-shaped lines. Tip: This adds a realistic touch, showing the flower is still growing.
Step 9: Adding Texture
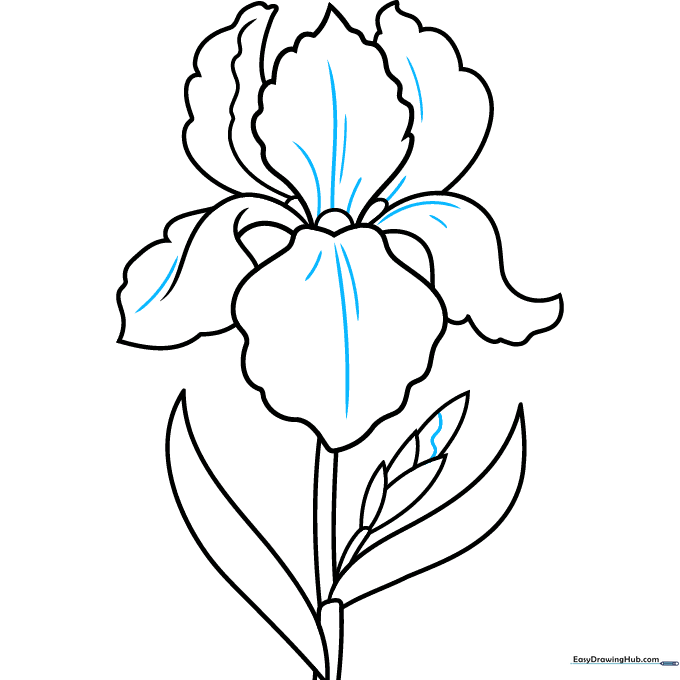
Use small, delicate curved lines to add texture to the petals. Tip: Think of these as the natural veins of the flower petal.
Step 10: Bring Your Iris to Life with Color
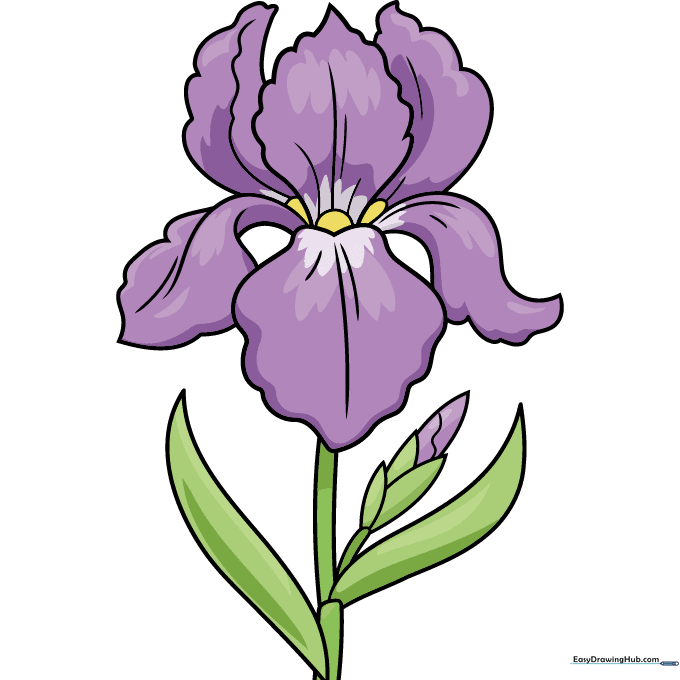
Time to color! Use deep purples for the petals and bright yellow for the centers. Tip: Try experimenting with different colors like white, pink, or even stripes to make your iris unique.
More Tutorials


